Live Chat Icon For mobile
Live Chat Icon

Blazor FAQ - Forms and validation

Find answers for the most frequently asked questions
Expand All Collapse All

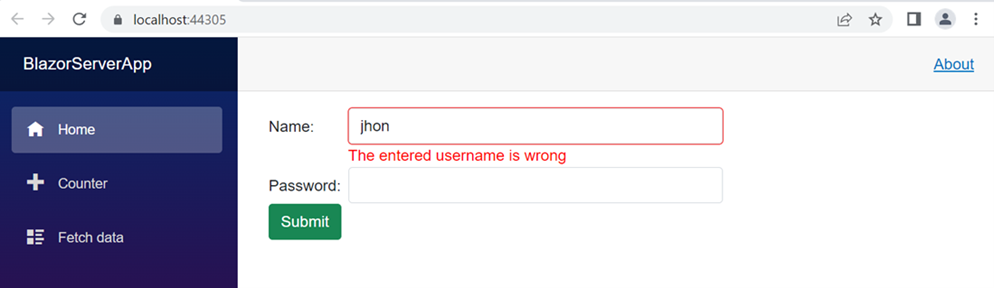
Instead of using the DataAnnotationValidator in Blazor, you can use FluentValidation to implement form validation. FluentValidation is a common validation library for.NET Core that offers a few advantages over the built-in DataAnnotations validation library, such as a larger set of rules, simpler setup, and extensibility.

To use fluent validation in a Blazor application:

  1. Create a Blazor application using the link.

  2. Install the “FluentValidation” package using the NuGet package manager.

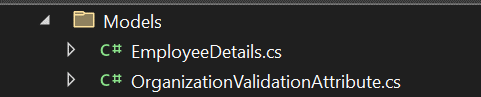
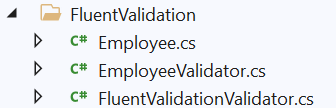
  3. Create a new folder named FluentValidation in the main application and add the following *.cs files – Employee, EmployeeValidator, FluentValidationValidator to it as shown below.
    Fluent Validation

  4. Add a model Employee class name in the Employee.cs file.

      namespace {AppName}.FluentValidation
    {
        public class Employee
        {
            public string Name { get; set; }
            public string Organization { get; set; }
        }
    }


  5. To write a model validator, you must create a EmployeeValidator class that is inherited from the AbstractValidator<Employee> and then add all the validation rules for the respective model to the constructor.

  6.    using FluentValidation;
     
    namespace {AppName}.FluentValidation
    {
        public class EmployeeValidator : AbstractValidator<Employee>
        {
            public EmployeeValidator()
            {
                RuleFor(p => p.Name).NotEmpty().WithMessage("You must enter a valid name.");
                RuleFor(p => p.Name).MaximumLength(20).WithMessage("The name cannot be more than 20 characters long.");
                RuleFor(p => p.Organization).NotEmpty().WithMessage("You must enter a valid organization name.");
            }
        }
    }


  7. In FluentValidationValidator.cs, create a new validator component named FluentValidationValidator to replace DataAnnonationsValidator, and add the code below to it.
     
    The FluentValidationValidator receives an EditContext as a cascading parameter and hooks into the EditContext’s OnFieldChanged and OnValidationRequested events to know when something is happening in the UI. It can add or remove validation messages from a ValidationMessageStore at any time.

    using System;
    using FluentValidation;
    using Microsoft.AspNetCore.Components;
    using Microsoft.AspNetCore.Components.Forms;
     
    namespace {AppName}.FluentValidation
    {
        public class FluentValidationValidator<TValidator> : ComponentBase where TValidator : IValidator, new()
        {
            private readonly static char[] separators = new[] { '.', '[' };
            private TValidator validator;
     
            [CascadingParameter]
            private EditContext EditContext { get; set; }
     
            protected override void OnInitialized()
            {
                validator = new TValidator();
                var messages = new ValidationMessageStore(EditContext);
     
                /* Re-validate when any field changes or when the entire form requests validation.*/
                EditContext.OnFieldChanged += (sender, eventArgs)
                    => ValidateModel((EditContext)sender, messages);
     
                EditContext.OnValidationRequested += (sender, eventArgs)
                    => ValidateModel((EditContext)sender, messages);
            }
     
            private void ValidateModel(EditContext editContext, ValidationMessageStore messages)
            {
                var context = new ValidationContext<object>(editContext.Model);
                var validationResult = validator.Validate(context);
                messages.Clear();
                foreach (var error in validationResult.Errors)
                {
                    var fieldIdentifier = ToFieldIdentifier(editContext, error.PropertyName);
                    messages.Add(fieldIdentifier, error.ErrorMessage);
                }
                editContext.NotifyValidationStateChanged();
            }
     
            private static FieldIdentifier ToFieldIdentifier(EditContext editContext, string propertyPath)
            {
                var obj = editContext.Model;
     
                while (true)
                {
                    var nextTokenEnd = propertyPath.IndexOfAny(separators);
                    if (nextTokenEnd < 0)
                    {
                        return new FieldIdentifier(obj, propertyPath);
                    }
     
                    var nextToken = propertyPath.Substring(0, nextTokenEnd);
                    propertyPath = propertyPath.Substring(nextTokenEnd + 1);
     
                    object newObj;
                    if (nextToken.EndsWith("]"))
                    {
                        nextToken = nextToken.Substring(0, nextToken.Length - 1);
                        var prop = obj.GetType().GetProperty("Item");
                        var indexerType = prop.GetIndexParameters()[0].ParameterType;
                        var indexerValue = Convert.ChangeType(nextToken, indexerType);
                        newObj = prop.GetValue(obj, new object[] { indexerValue });
                    }
                    else
                    {
                        var prop = obj.GetType().GetProperty(nextToken);
                        if (prop == null)
                        {
                            throw new InvalidOperationException($"Could not find property named {nextToken} in object of type {obj.GetType().FullName}.");
                        }
                        newObj = prop.GetValue(obj);
                    }
     
                    if (newObj == null)
                    {
                        return new FieldIdentifier(obj, nextToken);
                    }
     
                    obj = newObj;
                }
            }
        }
    }

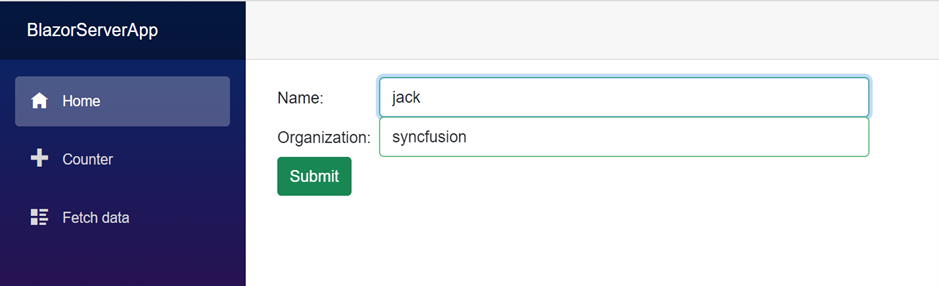
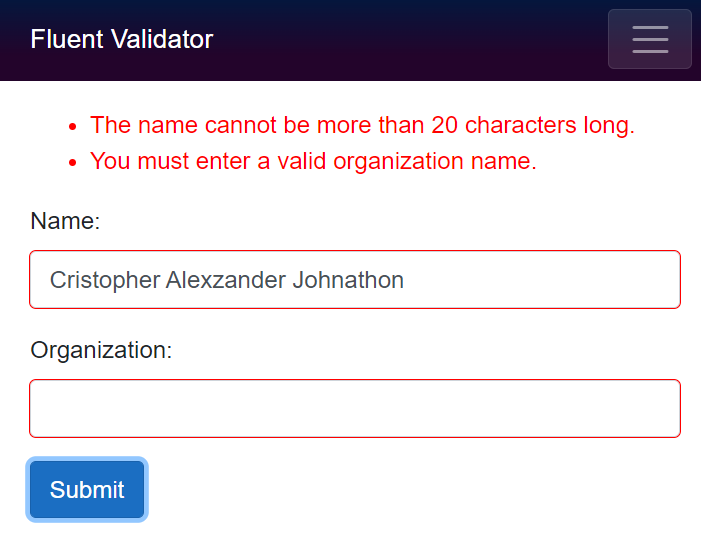
  8. Add the following code to the Index.razor page to perform fluent validation using the FluentValidationValidator component and its model validator (EmployeeValidator) in the EditForm component.

      @page "/"
     
    @using {AppName}.FluentValidation;
     
    <EditForm Model="employee" OnValidSubmit="SubmitForm">
        <FluentValidationValidator TValidator="EmployeeValidator" />
        <ValidationSummary />
     
        <div class="form-group">
            <label for="name">Name:</label>
            <InputText @bind-Value="employee.Name" class="form-control" id="name" />
        </div>
     
        <div class="form-group">
            <label for="age">Organization:</label>
            <InputText @bind-Value="employee.Organization" class="form-control" />
        </div>
     
        <button type="submit" class="btn btn-primary">Submit</button>
     
    </EditForm>
     
    @code {
        Employee employee { get; set; } = new Employee();
     
        public void SubmitForm()
        {
     
        }
    }

    Fluent Validator Output


    View Sample in GitHub

Permalink

The DisplayName property, which is set for built-in form components, help maintain an alternate name. When the component’s input value is incorrect due to form validation, this alternate name is displayed in the error message.

The DisplayName property is supported by the following built-in components.

  • InputCheckbox
  • InputDate
  • InputNumber
  • InputRadioGroup
  • InputSelect
  • InputText
  • InputTextArea

Please refer to the code example below.

[Index.razor]

@page "/"

@using System.ComponentModel.DataAnnotations;

<EditForm Model="@details">
    <DataAnnotationsValidator />

    <div>
        <strong>Name:</strong>
        <InputText @bind-Value="details.Name" />
        <ValidationMessage For="@(() => details.Name)" />
    </div>
    <br />

    <div>
        <strong>Age:</strong>
        <InputNumber @bind-Value="details.Age" DisplayName="Details: Age"></InputNumber>
        <ValidationMessage For="@(() => details.Age)" />
    </div>
    <br />

    <div>
        <strong>Birth Date:</strong>
        <InputDate @bind-Value="details.BirthDate" DisplayName="Details: Birthday" />
        <ValidationMessage For="@(() => details.BirthDate)" />
    </div>
    <br />

    <div>
        <strong>Address:</strong>
        <InputTextArea @bind-Value="details.Address" />
        <ValidationMessage For="@(() => details.Address)" />
    </div>
    <br />

    <div>
        <strong>Classification:</strong>
        <InputSelect @bind-Value="details.Classification">
            <option value="">Select classification...</option>
            <option value="Sedan">Sedan</option>
            <option value="SUV">SUV</option>
            <option value="MUV">MUV</option>
        </InputSelect>
        <ValidationMessage For="@(() => details.Classification)" />
    </div>
    <br />

    <div>
        <strong>Vehicle Name: @details.VehicleName</strong>
        <InputRadioGroup @bind-Value="details.VehicleName">
            @foreach (var option in VehicleNames)
            {
                <br /><InputRadio Value="option" /> @option
            }
        </InputRadioGroup>
        <ValidationMessage For="@(() => details.VehicleName)" />
    </div>
    <br />

    <div>
        <strong>Loan Required:</strong>
        <InputCheckbox @bind-Value="details.IsLoanRequired" />
        <ValidationMessage For="@(() => details.IsLoanRequired)" />
    </div>
    <br />

    <button type="submit">Submit</button>

</EditForm>

@code{

    public Details details = new Details();
    public List<string> VehicleNames = new List<string> { "Ciaz", "Vitara Brezza", "Ertiga" };

    public class Details
    {
        [Required, Display(Name = "Details: Name")]
        public string Name { get; set; }

        [Required]
        public int Age { get; set; }

        [Required]
        public DateTime BirthDate { get; set; }

        [Required, Display(Name = "Details: Address")]
        public string Address { get; set; }

        [Required, Display(Name = "Details: Classification")]
        public string Classification { get; set; }

        [Required, Display(Name = "Details: Vehicle Name")]
        public string VehicleName { get; set; }

        [Required, Display(Name = "Details: Loan Required")]
        public bool IsLoanRequired { get; set; }
    }
}

View Sample in GitHub

Permalink

By default, the System.ComponentModel.Annotations library provides different validation attributes. However, to add a new or custom validation, users can create a custom validation attribute and apply it to their model class. To create an attribute:

  1. Create a Blazor Server Application with latest .NET support.

  2. Install the System.ComponentModel.Annotations NuGet package to perform custom validation in Created project.

  3. Create a new folder named Models in the main application and add the following *.cs files –EmployeeDetails, OrganizationValidationAttribute to it as shown below.

  4. Models

  5. Add a model EmployeeDetails class name in the EmployeeDetails.csfile.
  6.  using System.ComponentModel.DataAnnotations;
    namespace BlazorServerApp.Models
    {
    public class EmployeeDetails
    {
    [Required]
    public string? Name { get; set; }
    [Required]
    public string? Organization { get; set; }
    }
    }
  7. Create a new OrganizationValidationAttribute.cs file and then the OrganizationValidationAttribute class, which is derived from ValidationAttribute. The ValidationAttribute from System.ComponentModel.Annotations acts as the base class for validation.
  8. [OrganizationValidationAttribute.cs]
     using System.ComponentModel.DataAnnotations; 
    namespace BlazorServerApp.Models
    {
    public class OrganizationValidationAttribute : ValidationAttribute
    {
    public string? ValidOrganizationName { get; set; }
    protected override ValidationResult? IsValid ( object? value, ValidationContext? validationContext )
    {
    string fieldValue = value!.ToString()!.ToLower();
    if (fieldValue.Equals(ValidOrganizationName?.ToLower()))
    return null;
    return new ValidationResult(ErrorMessage, new[] { validationContext?.MemberName }.Cast());
    }
    }
    }
    The ValidOrganizationName property can be set from the model EmployeeDetails class. Following that, override the IsValid method, which takes two parameters, value and validationContext. The value parameter contains the value that the user entered in the Organization field. The validationContext parameter is used to explain the context in which validation is performed. If the value is equal to the ValidOrganizationName, no errors will be thrown; otherwise, an error message returns.
  9. Add the following custom validation attribute to the Organization property.
  10.  using System.ComponentModel.DataAnnotations;
    namespace BlazorServerApp.Models
    {
    public class EmployeeDetails
    {
    [Required]
    public string? Name { get; set; }
    //Here OrganizationValidation is a Customvalidation Attribute
    [Required]
    [OrganizationValidation(ErrorMessage = "Invalid customer log-in.", ValidOrganizationName = "Syncfusion")]
    public string? Organization { get; set; }
    }
    }
  11. Moving back to the Blazor Server application, add the following code to the Index.razor page to render a form with validation settings.
  12. [Index.razor]
     @page "/" 
    @using BlazorServerApp.Models
    <EditForm Model="_product" OnValidSubmit="Submit" style="width:600px;">
    <DataAnnotationsValidator />
    <ValidationSummary/>
    <div class="form-group row">
    <label for="name" class="col-md-2 col-form-label">Name:
    <label for="name" class="col-md-2 col-form-label">Name:
    <div class="col-md-10">
    <InputText id="name" class="form-control" @bind-Value="_product.Name" />
    <ValidationMessage For="@(() => _product.Name)" />
    </div>
    </div>
    <div class="form-group row">
    <label for="organization" class="col-md-2 col-form-label">Organization:
    <div class="col-md-10">
    <InputText id="supplier" class="form-control" @bind-Value="_product.Organization" />
    <ValidationMessage For="@(() => _product.Organization)" />
    </div>
    </div>
    <div class="row">
    <div class="col-md-12 text-right">
    <button type="submit" class="btn btn-success">Submit</button>
    </div>
    </div>
    </EditForm>
    @code{
    private EmployeeDetails _product = new EmployeeDetails();
    public void Submit () =>
    Console.WriteLine($"{_product.Name}, {_product.Organization}");
    }
    The following outputs will be seen after submitting the form.
    Form Validation
    Custom Form Validation

 View Sample in GitHub

Permalink

The built-in DataAnnotationsValidator allows you to validate form input using data annotations,  but it only validates top-level properties bound to the form and not child or complex type properties. To validate the nested complex  model, replace the DataAnnotationsValidator with the ObjectGraphDataAnnotationsValidator, which validates the entire object, including child and complex type properties in the form.

  1. Install the following package via Package Manager Console in order to use the ObjectGraphDataAnnotationsValidator.

    PM> Install-Package Microsoft.AspNetCore.Components.DataAnnotations.Validation -Version 3.2.0-rc1.20223.4

  2. Create a new Folder named StudentDetails in the main application and add the class named Student.cs to the StudentDetails folder. In Student.cs file, create two model classes -Student and PersonalDetails. Here, add ValidateComplexType belonging to the ObjectGraphDataAnnotationsValidator above the complex type declaration.

    using System.ComponentModel.DataAnnotations;
    namespace Validating_Complex_Model_in_Blazor.StudentDetails
    {
    public class Student
    {
    public Student ()
    {
    Details = new PersonalDetails();
    }

    [Required]
    public string Name { get; set; }
    [Required]
    public string Department { get; set; }
    [ValidateComplexType]
    public PersonalDetails Details { get; set; }
    }

    public class PersonalDetails
    {
    [Required]
    public int Age { get; set; }

    [Required]
    public string? Address { get; set; }
    }
    }

  3. Create an Index.razor page with the EditForm and Input components shown in the code sample below. Set the Model property of the EditForm component to the Student class instance. Additionally, the ObjectGraphDataAnnotationsValidator and ValidationSummary tags are used for validation and the display of validation summary, respectively.

     @page "/"
    @using Validating_Complex_Model_in_Blazor.StudentDetails
    <EditForm Model="@_student" OnValidSubmit="@HandleValidSubmit" OnInvalidSubmit="@HandleInvalidSubmit">
        <ObjectGraphDataAnnotationsValidator />
        <ValidationSummary />
        <div class="form-group">
            <label for="name">Name: </label>
            <InputText Id="name" Class="form-control" @bind-Value="@_student.Name"></InputText>
            <ValidationMessage For="@(() => _student.Name)" />
        </div>
        <div class="form-group">
            <label for="department">Department: </label>
            <InputText Id="department" Class="form-control" @bind-Value="@_student.Department"></InputText>
            <ValidationMessage For="@(() => _student.Department)" />
        </div>
        <div class="form-group">
            <label for="address">Address: </label>
            <InputTextArea Id="address" Class="form-control" @bind-Value="@_student.Details.Address"></InputTextArea>
            <ValidationMessage For="@(() => _student.Details.Address)" />
        </div>
        <button type="submit">Submit</button>
    </EditForm>
     
    @code
    {
        public string StatusMessage;
        public Student _student = new Student();
     
        public void HandleValidSubmit()
        {
            StatusMessage = "It's a valid submission.";
        }
     
        public void HandleInvalidSubmit()
        {
            StatusMessage = "It's an invalid submission. Please see the error message(s) listed below.";
        }
    }

      Nested Form Output

View Sample in GitHub

Permalink

The EditContext of the form stores information about the editing process, such as which fields have been changed and which validation messages are currently displayed. To manually pass the EditContext to the EditForm, follow the steps below.

  1. Create a new Customer.cs file and model Customer class.

    public class Customer
    {
        [Required]
        public string Name { get; set; }
     
        [Required]
        [StringLength(4, ErrorMessage = "The organization code must be less than 5 characters in length.")]
        public string OrganizationCode { get; set; }
    }

  2. Insert an EditForm component into the Index.razor page. Then, make instances of the Customer class and the EditContext, and assign the Customer class instance to the EditContext instance. Finally, bind the EditContext instance to the EditContext property in the EditForm component.

      @page "/"
     
    <EditForm EditContext="@editContext">
        <DataAnnotationsValidator />
        <ValidationSummary />
     
    </EditForm>
     
    @code {
        private Customer _customer = new Customer();
        private EditContext editContext;
     
        protected override void OnInitialized()
        {
            editContext = new(_customer);
        }
    }

  3. As the EditContext stores all the form information, it can be used to validate the form components. Add the Razor code as given below with input  texts and a button. When a form is submitted, the Validate() method is invoked to perform validation.

      @page "/"
     
    <EditForm EditContext="@editContext">
        <DataAnnotationsValidator />
        <ValidationSummary />
        <div class="form-group">
            <label for="name">Name:</>
            <InputText id="name" @bind-Value="_customer.Name" />
            <ValidationMessage For="="@(() => _customer.Name)" />
        </div>
            <div class="form-group">
            <label for="organizationCode">Organization Code:</>
            <InputText id="organizationCode" class="form-control" @bind-Value="_customer.OrganizationCode"/>
            <ValidationMessage For="="@(() => _customer.OrganizationCode)" />
            </div>
        <div style="margin-top: 10px;">
            <button type="submit" class="btn btn-primary" @onclick="Submit">Submit</button>
            </div>
    </EditForm>
    EditContext Output


View Sample in GitHub

Permalink

Use the disabled=”@(!context.Validate()) attribute for the submit button component to validate the form to display and enable or disable the button. If an Error message occurs in form validation, the button is disabled.
Follow the code below to enable or disable the submit button based on the form validation state.
[Index.razor]

@page "/"
@using System.ComponentModel.DataAnnotations

<EditForm style="width:470px;" Model="_login" OnValidSubmit="Submit">
    <DataAnnotationsValidator />
    <div class="form-group row">
        <label for="name" class="col-md-2 col-form-label">Name:</label>
        <div class="col-md-10">
            <InputText id="name" class="form-control" @bind-Value="_login.UserName" />
            <ValidationMessage For="@(() => _login.UserName)" />
        </div>
    </div>

    <div class="form-group row">
        <label for="supplier" class="col-md-2 col-form-label">Password:</label>
        <div class="col-md-10">
            <InputText id="supplier" class="form-control" @bind-Value="_login.Password" />
            <ValidationMessage For="@(() => _login.Password)" />
        </div>
    </div>

    <div class="row">
        <div class="col-md-12 text-right">
            <button type="submit" class="btn btn-success" disabled="@(!context.Validate())">Submit</button>
        </div>
    </div>
</EditForm>

@code {
    private Login _login = new Login();

    public void Submit()
    {
        Console.WriteLine($"User name is {_login.UserName} and password is {_login.Password}");
    }

    public class Login
    {
        [Required]
        public string UserName { get; set; }
        [Required]
        public string Password { get; set; }
    }
}

Refer to this link for more details.

Permalink

To create a custom validation component in Blazor, follow these code steps:

  1. Create a Blazor Server or WebAssembly application and install the System.ComponentModel.Annotations NuGet package using NuGet Package Manager.

  2. Now, create a new custom validation class in the Pages folder and restrict the user to enter only “admin” in the password field.
    [CustomValidatorAttribute.cs]

    using System.ComponentModel.DataAnnotations;
     
    namespace {{Your_App_Name}}.Pages
    {
    public class CustomValidationAttribute : ValidationAttribute
    {
    public string? ValidUserName { get; set; }
    protected override ValidationResult? IsValid ( object? username, ValidationContext validationContext )
    {
    var content = username?.ToString()?.ToLower();
    if (content!.Equals(ValidUserName?.ToLower()))
    {
    return null;
    }
    return new ValidationResult(ErrorMessage, new[] { validationContext.MemberName });
    }
    }
    }
  3. Use the created custom validator attribute in the Razor component. Provide the error message and valid username properties for validation.
    [Index.razor]

    @page "/"
    @using System.ComponentModel.DataAnnotations
     
    <EditForm style="width:470px;" Model="_login" OnValidSubmit="Submit">
        <DataAnnotationsValidator />
        <div class="form-group row">
            <label for="name" class="col-md-2 col-form-label">Name:</label>
            <div class="col-md-10">
                <InputText id="name" class="form-control" @bind-Value="_login.UserName" />
                <ValidationMessage For="@(() => _login.UserName)" />
            </div>
        </div>
     
        <div class="form-group row">
            <label for="supplier" class="col-md-2 col-form-label">Password:</label>
            <div class="col-md-10">
                <InputText id="supplier" class="form-control" @bind-Value="_login.Password" />
                <ValidationMessage For="@(() => _login.Password)" />
            </div>
        </div>
     
        <div class="row">
            <div class="col-md-12 text-right">
                <button type="submit" class="btn btn-success">Submit</button>
            </div>
        </div>
    </EditForm>
     
    @code {
        private Login _login = new Login();
     
        public void Submit()
        {
            Console.WriteLine($"User name is {_login.UserName} and password is {_login.Password}");
        }
     
        public class Login
        {
            [Required]
            [CustomValidation(ErrorMessage = "The entered username is wrong ", ValidUserName = "admin")]
            public string? UserName { get; set; }
            [Required]
            public string? Password { get; set; }
        }
    }


  4. Refer to the following output image for the custom validator.

    Refer to this link for more details.


    View Sample in GitHub
Permalink

You can submit a Blazor form programmatically by using EditContent validation. In the following example, a keypress event function triggers when you press the Enter key. It validates the form editContent.Validate() and submits the form programmatically.

<EditForm Model="modelClass" Context=MyCurrentEditContext>
    <input @onkeypress="@(async e => await KeyPress(MyCurrentEditContext, e))" @bind-value="modelClass.TextValue" />
  <button type="submit">Store it</button>
</EditForm>

<p>@formValue</p>

@code {
    private string formValue { get; set; }
    ModelClass modelClass = new ModelClass();

    private async Task KeyPress(EditContext editContext, KeyboardEventArgs key)
    {
        if (key.Code == @"Enter")
        {
            if (editContext.Validate())
            {
                formValue = "Form Submitted";
            }
        }
    }

    public class ModelClass
    {
        public string TextValue = "BlazorApp";
    }
}
Permalink

Data annotation localization in Blazor server-side and WebAssembly (client-side) apps is achieved by referencing the Resource class localized string. Follow these steps to achieve this:

  1. Add the required localized error messages to the Resource file in the Resource folder.
  2. In the validation attribute, set the ErrorMessageResourceType as typeof(Resource).
  3. Assign the required validation message to the ErrorMessageResourceName property.

[Index.razor]

@page "/"
@using {{ApplicationName}}.Resource
@using System.ComponentModel.DataAnnotations;

<EditForm Model="@_employee" OnValidSubmit="HandleValidSubmit">
    <DataAnnotationsValidator />
    <ValidationSummary />
    <InputText id="name" @bind-Value="_employee.Name" />
    <button type="submit">Submit</button>
</EditForm>

@code {
    public class Employee
    {
        [Required(ErrorMessageResourceName = "RequiredError", ErrorMessageResourceType = typeof(Resource))]
        [StringLength(5, ErrorMessageResourceName = "LengthError", ErrorMessageResourceType = typeof(Resource))]
        public string Name { get; set; }
    }

    private Employee _employee = new Employee();

    private void HandleValidSubmit()
    {
        Console.WriteLine("OnValidSubmit");
    }
}
Permalink

Blazor has a built-in InputFile component from .NET 5.0 that can be used to upload files to the server. You can check the file size in the OnChange event and upload or prevent uploading the files to the server.

[Index.razor]

@page “/”

<h3>File Upload</h3>

<InputFile OnChange=”OnInputFileChange” />

@if (file?.Size < 1000000)
{
    <p>Name: @file.Name</p>
    <p>Size in bytes: @file.Size</p>
    <p>Last modified date: @file.LastModified.DateTime.ToShortDateString()</p>
    <p>Content type (not always supplied by the browser): @file.ContentType</p>
}
else
{
    <p>File size exceeds more than 1MB</p>
}

@code {
    IBrowserFile file;

    void OnInputFileChange(InputFileChangeEventArgs e)
    {
        file = e.File;
        if (e.File.Size < 1000000)
        {
            // Upload files to the server from here
        }
    }
}

Note: Syncfusion offers a feature-rich, easy-to-use File Upload component for Blazor. You can check it out here.

Permalink

In the cascading DropDown menu, the value of first DropDown list depends on the value of the second DropDownList. In the following example, a country is selected from the countries dropdown menu, and respective states will be loaded in the state dropdown menu.

<EditForm Model="@model">
        <label>Country: </label>
        <InputSelect @bind-Value="@model.Country">
            <option value="1">Australia</option>
            <option value="2">United States</option>
        </InputSelect>
        <label> State: </label>
        <InputSelect @bind-Value="@model.State">
            @if (model.Country == "1" || model.Country == null)
            {
                <option value="101">New York</option>
                <option value="102">Virginia</option>
                <option value="103">Washington</option>
            }
            else if (model.Country == "2")
            {
                <option value="104">Queensland</option>
                <option value="105">Tasmania</option>
                <option value="106">Victoria</option>
            }
        </InputSelect>
    </EditForm>

@code {

    public Models model = new Models();
    public class Models
    {
        public string Country { get; set; }
        public string State { get; set; }
    }
}
Permalink

Autocomplete enables the user to predict the value. The browser will show options to fill the field when a user starts typing in a field, based on earlier typed values. The code example shows how to enable autocomplete using an input element.

<input id="name" type="text" autocomplete="on" />

If you want to enable the autocomplete from your own database or own set of options, you can go with third party components such as Syncfusion Autocomplete.

Permalink

To check the checkbox, use the textbox input event to get the entered text, and based on the text enable or disable it. In the following example, if the entered text is “check”, using the @bind attribute you can enable the checkbox.

<input @oninput="@((args) => { this.isCheck = ((string)args.Value == "check") ? true : false; })" />

<br />

<input type="checkbox" @bind="@this.isCheck" />

@code {

    private bool isCheck { get; set; }

}
Permalink

Use the “Disabled” attribute to disable the input component. In the following example, input and checkbox are disabled on button click.

<button @onclick="@onDisable">Disable</button>

<input type="text" disabled="@isDisable" />

<input type="checkbox" disabled="@isDisable" />

<button disabled="@isDisable">button</button>


@code {

    private bool isDisable { get; set; }

    private void onDisable()
    {
        this.isDisable = true;
    }
}
Permalink

You can use the “preventDefault” attribute to prevent certain actions(events). In the following example, input keypress event checks whether the key value is “a” to prevent the keypress event. 

<input value="@name" type="text" @onkeydown="@onKeydown" @onkeydown:preventDefault="@isPreventKey" />

@code {

    private string name { get; set; }

    private bool isPreventKey { get; set; }

    private void onKeydown(KeyboardEventArgs args)
    {
        if(args.Key == "a")
        {
            this.isPreventKey = true;
        }
    }
}
Permalink

Use input change event to get the changed value in onchange event argument. If you bind using the two-way bind to value property, it will automatically change the value into the value property.

<input placeholder="Enter your text" @onchange="@onChange" />

@code {

    private string value { get; set; }
    private void onChange(Microsoft.AspNetCore.Components.ChangeEventArgs args)
    {
        value = (string)args.Value;
    }
}

Or

<input placeholder="Enter your text" @bind-value="@value" />

@code {

    private string value { get; set; }
}
Permalink

To upload files in Blazor applications, install the NuGet package, BlazorInputFile. This package has the component, Blazor input file that is used to upload files.
You also need to include the input file scripts in HTML and add BlazorInputs to the _Imports.razor file.

[_Host.cshtml]

  <script src="_content/BlazorInputFile/inputfile.js"></script>
[index.razor]

@page "/upload"

<h3>Upload</h3>

<InputFile OnChange="HandleFileSelected"  class="btn-primary"/>

@if (file != null)
{
    <p>Name: @file.Name</p>
    <p>Size in bytes: @file.Size</p>
    <p>Last modified date: @file.LastModified.ToShortDateString()</p>
    <p>Content type (not always supplied by the browser): @file.Type</p>
}

@code {
    IFileListEntry file;

    void HandleFileSelected(IFileListEntry[] files)
    {
        file = files.FirstOrDefault();
    }
}

You can handle multiple file uploads by adding multiple attribute to the InputFile component.

@page "/multiupload"

<h3>Multiple File Upload</h3>

<InputFile multiple OnChange="HandleFileSelected"  class="btn-primary"/>

@if (file != null)
{
   <p>Name: @file.Name</p>
   <p>Size in bytes: @file.Size</p>
    <p>Last modified date: @file.LastModified.ToShortDateString()</p>
    <p>Content type (not always supplied by the browser): @file.Type</p>
}

@code {
    IFileListEntry file;

    void HandleFileSelected(IFileListEntry[] files)
    {
        file = files.FirstOrDefault();
    }
}

Please refer to this link here for more information on file uploading in Blazor.

Note: Syncfusion offers feature rich as well as easy to use file upload component. For more information, please check the link.

Permalink

You can check/uncheck the checkbox in the Blazor programmatically by using the @bind parameter in the checkbox. Assign a Boolean property to @bind in the checkbox and toggle the Boolean property programmatically.

@page 
<input type="checkbox" @bind="@boolvalue" />
<br />
Checkbox: @val
<br />
<button class="btn btn-primary" @onclick="@ToggleCheckbox ">toggle</button>

@code {

public bool boolvalue { get; set; }
public string val;
 void ToggleCheckbox()
 {
        if (boolvalue)
        {
            val = "unchecked";
        }
        else
        {
            val = "checked";
        }
        boolvalue = !boolvalue;
}
}

Permalink

To set the active value on a select dropdown control, you must bind a property to the value in the select component and change that bind property in the event call

@page "/dropdown"


<select class="form-control" value="@listdefault" @onchange="@OnSelect" style="width:150px">
    @foreach (var template in templates)
    {
<option value=@template>@template</option>
     }
</select>

<h5>@selectedString</h5>
<select class="form-control" value="@citydefault" @onchange="@OnSelectCity" style="width:150px">
       @foreach (var template in citytemplates)
        {
   <option value=@template>@template</option>
}
</select>
<h5>@selectedCity</h5>
<button class="btn btn-primary" @onclick="@Change">Change</button>

@code {
    List<string> templates = new List<string>() { "America", "China", "India", "Russia", "England" };
    List<string> citytemplates = new List<string>();
    List<string> usa = new List<string>() { "Los-Angeles", "Florida", "Newyork", "Washington", "California" };
    List<string> china = new List<string>() { "Wuhan", "Beijing", "Shanghai", "Macau", "Taipei " };
    List<string> india = new List<string>() { "New-Delhi", "Mumbai", "Chennai", "Bangalore", "Hyderabad" };
    List<string> russia = new List<string>() { "Moscow", "Saint Petersburg", "Novosibirsk", "Yekaterinburg", "Kazan" };
    List<string> england = new List<string>() { "Birmingham", "Cambridge", "Manchester", "Leicester", "London" };
    string selectedString = "";
    string selectedCity = "";
    string listdefault = "India";
    string citydefault = "Mumbai";
    void OnSelect(ChangeEventArgs e)
    {
        if (e.Value.ToString() == "America")
        {
            citytemplates = usa;
        }
        else if (e.Value.ToString() == "China")
        {
            citytemplates = china;
        }
        else if (e.Value.ToString() == "India")
        {
            citytemplates = india;
        }
        else if (e.Value.ToString() == "Russia")
        {
            citytemplates = russia;
        }
        else
        {
            citytemplates = england;
        }
        selectedString = "Selected Country is: " + e.Value.ToString();

        StateHasChanged();
        Console.WriteLine("It is definitely: " + selectedString);
    }
    void OnSelectCity(ChangeEventArgs e)
    {
        selectedCity = "Selected CIty is: " + e.Value.ToString();
        Console.WriteLine("It is definitely: " + selectedString);
    }
    void Change(MouseEventArgs args)
    {
        listdefault = "Russia";
    }
    protected override void OnInitialized()
    {
        citytemplates = india;
        citydefault = "Chennai";
        base.OnInitialized();
    }
}

In the above sample, the city dropdown is changed based on the country selected in the country dropdown.

Permalink

The value property in the HTML <select> control can be utilized to set the default value. 

@page "/dropdown" 

<select class="form-control" value="@defaultValue.." @onchange="@OnSelect" style="width:150px"> 

@foreach (var template in templates)
{ 
<option value=@template>@template</option> 
} 

</select> 

<h5>@selectedString</h5> 

@code  
{ 
List<string> templates = new List<string>() { "America", "China", "India", "Russia", "England" }; 
string defaultValue = "India"; 
string selectedString = ""; 
void OnSelect(ChangeEventArgs e) 
{ 
         selectedString = "Selected Country is: " + e.Value.ToString(); 
} 
} 
Permalink

To retrieve a selected value from the select control, you can use either the @bind or @onchange event.

//using @bind

@page "/dropdown"
<select class="form-control" @bind="@selectedString" style="width:150px">
         @foreach (var template in templates)
         {
                 <option value=@template>@template</option>
         }
</select>

<h5>Selected Country is: @selectedString</h5>

@code {
List<string> templates = new List<string>() { "America", "China", "India", "Russia", "England" };
string selectedString = "America";
    }
//using @onchange event

@page "/dropdown"

<select class="form-control"  @onchange="@OnSelect" style="width:150px">
         @foreach (var template in templates)
         {
                 <option value=@template>@template</option>
         }
</select>

<h5>Selected Country is: @selectedString</h5>

@code {
List<string> templates = new List<string>() { "America", "China", "India", "Russia", "England" };
string selectedString = "America";

void OnSelect (ChangeEventArgs e)
{
        selectedString = e.Value.ToString();
        Console.WriteLine("The selected country is : " + selectedString);
}
    }

Permalink

We can focus an InputText Blazor element not directly but by using JavaScript in Blazor. We can set an ID for the InputText and then pass it to JavaScript using interop by method InvokeVoidAsync. In the JavaScript function, use the focus DOM input method for focusing the input element with the received ID from Blazor.

Refer to the following code snippet.

[script.js]
function focusInput(id) {
    document.getElementById(id).focus();
}

Refer the script file in the HTML page

[index.html/_Host.cshtml]
<head>
 .....
 <script src="~/script.js"></script>
 ....
</head>
[Index.razor]

@page "/"

@inject IJSRuntime jsRuntime

<EditForm Model="@inputText">
    <InputText id="@InputID" @bind-Value="inputText.TextValue">You can enter some text...</InputText>
</EditForm>

<br />
<br />

<button @onclick="Focus">FOCUS!!!</button>

@code {

    public string InputID = "input-id";
    public string Output = "";

    public class InputTextClass
    {
        public string TextValue = "Some Random Text";
    }

    public InputTextClass inputText = new InputTextClass();

    public async Task Focus()
    {
        await jsRuntime.InvokeVoidAsync("focusInput", InputID);
    }
}
Permalink

To carry out form validation in a Blazor server-side application, use data annotations to enable validation for the forms. Also, include <DataAnnotationsValidator  /> and <ValidationSummary /> in the forms.

Refer to the following code sample.

@page "/employeedetails"
@using System.ComponentModel.DataAnnotations;

<EditForm Model="@_employee" OnValidSubmit="HandleValidSubmit">
<DataAnnotationsValidator />
 <ValidationSummary />
    <InputText id="name" @bind-Value="_employee.Name" />
    <button type="submit">Submit</button>
</EditForm>

@code {
    public class Employee
    {
        [Required]
        [StringLength(10, ErrorMessage = "Name is too long.")]
        public string Name { get; set; }
    }

    private Employee _employee = new Employee();

    private void HandleValidSubmit()
    {
         Console.WriteLine("OnValidSubmit");
    }
}
Permalink

Two-way binding is having a bidirectional data flow, i.e., passing the value from the property to the UI and then from the view (UI) to the property. Blazor provides support for two-way binding using the bind attribute.

Syntax for creating two-way binding property:

@bind-{Parameter_name}={Variable_name}

For e.g.., in InputDate, a form component can be used to achieve two-way data binding with input date values in a Blazor application.

Refer to the following code for more details.

<EditForm Model="@_test">
    <InputDate @bind-Value="_test.DateValue" />
</EditForm>

<br />

<p>Selected Date: @_test.DateValue.ToLongDateString()</p>

@code {
    
    public class TestClass
    {
        public DateTime DateValue { get; set; }
    }

    private TestClass _test = new TestClass();
}

In this example code, when the value of _test.DateValue is changed in the code or user changes the date in the InputDate component, the same will be reflected in the paragraph, “Selected Date”.

Permalink

One-way (unidirectional) binding is all about moving data in one direction from the “Parameter/Property” to the UI (components). You just need to add the @ symbol to the variable name (for example, @yourVariable).

For example, one-way binding with an input date value can be achieved using the InputDate component (form component in Blazor) as follows in an application.

<EditForm Model="@_test">
    <Input type="Date" Value="@_test.DateValue" />
</EditForm>

@code {
    
    public class TestClass
    {
        public DateTime DateValue { get; set; }
    }

    private TestClass _test = new TestClass();
}

In this example, the property DateValue in _test class is bound to the InputDate component’s value property using the value attribute. A form is defined by the EditForm component.

Permalink

Blazor provides support for validating form input using data annotations with the built-in DataAnnotationsValidator.

The ValidationSummary can be used to display error messages for all the fields. It can also be used to display custom error messages.

The <DataAnnotationsValidator/> and <ValidationSummary /> components only validate top-level properties. It does not validate the collection or complex-type properties of the model class. The Model class needs to be bound to the EditForm component.

Blazor provides ObjectGraphDataAnnotationsValidator to validate the entire model object including collection and complex-type properties. This component is defined in Microsoft.AspNetCore.Blazor.DataAnnotations.Validation package and currently it is in an experimental stage.

@page "/employeedetails"
@using System.ComponentModel.DataAnnotations;

<EditForm Model="@_employee" OnValidSubmit="HandleValidSubmit">
<DataAnnotationsValidator />
 <ValidationSummary />
    <InputText id="name" @bind-Value="_employee.Name" />
    <button type="submit">Submit</button>
</EditForm>

@code {
    public class Employee
    {
        [Required]
        [StringLength(10, ErrorMessage = "Name is too long.")]
        public string Name { get; set; }
    }

    private Employee _employee = new Employee();

    private void HandleValidSubmit()
    {
        Console.WriteLine("OnValidSubmit");
    }
}
Permalink

You can use the following CSS classes to apply your own styles to validation messages.

CSS class name Added DOM element 
valid/invalid Added to the <input> element of DOM 
validation-errors  Added to the dynamically created <ul>
element while using the
<ValidationSummary> tag 
validation-message Added to the dynamically created <div> / <li>
element which holds to error message. 

<div> – created while using
<ValidationMessage> tag 
<li> – created while using
<ValidationSummary> tag 
modified Added to the <input> element after modifying the default value. 
Permalink

You have to use the <ValidationMessage> tag with the “For” attribute lambda expression pointing to the form field.

[Person.cs]

using System.ComponentModel.DataAnnotations;
public class Person
    {
        [Required]
        [StringLength(15, ErrorMessage = "{0} length must be between {2} and {1}.", MinimumLength = 6)]
        public string FirstName { get; set; }

        [Required]
        [DataType(DataType.Password)]
        [StringLength(15, ErrorMessage = "{0} length must be between {2} and {1}.", MinimumLength = 6)]
        public string LastName { get; set; }

        [Required]
        [Range(1, 100, ErrorMessage = "Age should a number between (1-100).")]
        public int Age { get; set; }
    }

[FormValidation.Razor]

<EditForm Model="@person" OnValidSubmit="@HandleValidSubmit">
  <DataAnnotationsValidator />

  <label for="firstname">First Name: </label>
  <InputText Id="firstname" @bind-Value="@person.FirstName"></InputText>
  <ValidationMessage For="@(() => person.FirstName)" />

  <label for="lastname">Last Name: </label>
  <InputText Id="lastname" @bind-Value="@person.LastName"></InputText>
  <ValidationMessage For="@(() => person.LastName)" />

  <label for="age">Age: </label>
  <InputNumber Id="age" @bind-Value="@person.Age"></InputNumber>
  <ValidationMessage For="@(() => person.Age)" />

  <button type="submit">Submit</button>
</EditForm>
@code {
    private Person person = new Person();
    private void HandleValidSubmit()
    {
        Console.WriteLine("OnValidSubmit");
    }
}
Permalink

The form validation in Blazor is achieved using data annotations. The following two tags are used for validations and display the validation error message:

  • <DataAnnotationsValidator />
  • <ValidationSummary />

Refer to the following code example for simple form validation in Blazor.

[Person.cs]

using System.ComponentModel.DataAnnotations;
public class Person
    {
        [Required]
        [StringLength(15, ErrorMessage = "{0} length must be between {2} and {1}.", MinimumLength = 6)]
        public string FirstName { get; set; }

        [Required]
        [DataType(DataType.Password)]
        [StringLength(15, ErrorMessage = "{0} length must be between {2} and {1}.", MinimumLength = 6)]
        public string LastName { get; set; }

        [Required]
        [Range(1, 100, ErrorMessage = "Age should a number between (1-100).")]
        public int Age { get; set; }
    }

[FormValidation.razor]

<EditForm Model="@person" OnValidSubmit="@HandleValidSubmit">
   <DataAnnotationsValidator />
   <ValidationSummary />
    <label for="firstname">First Name: </label>
    <InputText Id="firstname" @bind-Value="@person.FirstName"></InputText>

    <label for="lastname">Last Name: </label>
    <InputText Id="lastname" @bind-Value="@person.LastName"></InputText>

    <label for="age">Age: </label><br />
    <InputNumber Id="age" @bind-Value="@person.Age"></InputNumber>

    <button type="submit">Submit</button>
</EditForm>
@code {
    private Person person = new Person();
    private void HandleValidSubmit()
    {
        Console.WriteLine("OnValidSubmit");
    }
}
Permalink

You have to use the EditContext with EditForm to validate the forms inside a bootstrap modal.

@using System.ComponentModel.DataAnnotations;

<div id="modalDialog" class="modal" tabindex="-1" role="dialog">
    <div class="modal-dialog" role="document">
        <div class="modal-content">
            <div class="modal-body">
                <EditForm EditContext="@EC">
                    <DataAnnotationsValidator />
                    <ValidationSummary />

                    <div class="form-group d-flex justify-content-between">
                        <label class="col-form-label col-3" for="name">Name</label>
                        <InputText bind-Value="@model.Name" id="name" Class="form-control" />
                    </div>
                    @if (EC.Validate())
                    {
                        <button type="button" onclick="@SubmitHandler" class="btn btn-primary" data-dismiss="modal">Submit</button>
                    }
                    else
                    {
                        <button type="button" onclick="@SubmitHandler" class="btn btn-primary">Submit</button>
                    }
                </EditForm>
            </div>
        </div>
    </div>
</div>
<button data-toggle="modal" data-target="#modalDialog" class="btn btn-primary">Open</button>

@code {
    public class ModelClass
    {
        [Required]
        public string Name { get; set; }
    }
    private ModelClass model { get; set; } = new ModelClass();
    private EditContext EC { get; set; }
    private void SubmitHandler()
    {
        Console.WriteLine("Submit");
    }
    protected override void OnInitialized()
    {
        EC = new EditContext(model);
        base.OnInitialized();
    }
    }
Permalink

You have to define and bind the EditContext with EditForm and then call the method editContext.Validate() on button click to manually trigger the validation.

@using System.ComponentModel.DataAnnotations;

<EditForm EditContext="@EC">
    <DataAnnotationsValidator />
    <ValidationSummary />
    <div class="form-group d-flex justify-content-between">
        <label class="col-form-label col-3" for="name">Time</label>
        <InputText bind-Value="@model.Name" id="name" Class="form-control" />
    </div>
    <button type="button" onclick="@SubmitHandler" class="btn btn-primary">Submit</button>
</EditForm>
@code {
    public class ModelClass
    {
        [Required]
        public string Name { get; set; }
    }
    private ModelClass model { get; set; } = new ModelClass { Name = "" };
    private EditContext EC { get; set; }
    protected override void OnInitialized()
    {
        EC = new EditContext(model);
        base.OnInitialized();
    }
    private void SubmitHandler()
    {        
        EC.Validate(); // manually trigger the validation here
    }
}
Permalink

You can define the form attribute validation in a Razor component inside the function to achieve this. Please do not forget to include the DataAnnotations in the Razor component file.

@using System.ComponentModel.DataAnnotations;

<EditForm Model="@model" OnValidSubmit="@SubmitHandler">
    <DataAnnotationsValidator />
    <ValidationSummary />

    <div class="form-group d-flex justify-content-between">
        <label class="col-form-label col-3" for="name">Name</label>
        <InputText @bind-Value="@model.Name" id="name" Class="form-control" />
    </div>
    
    <button type="submit" @onclick="@SubmitHandler" class="btn btn-primary">Submit</button>
</EditForm>
@code {
    public class ModelClass
    {
        [Required]
        public string Name { get; set; }
    }
    private ModelClass model = new ModelClass();
    private void SubmitHandler()
    {
        Console.WriteLine("Submit");
    }   
}

Please refer to this documentation for more form validations.

Permalink

You have to use the format-value string “yyyy-MM-ddTHH:mm” to work with AM/PM conversion properly.

<input type="datetime-local" id="Test" name="Test" class="form-control" @bind="@testDateTime" format-value="yyyy-MM-ddTHH:mm" />

@code {
    DateTime testDateTime { get; set; } = new DateTime(2019, 12, 15, 16, 45, 15);
}

Refer to this thread for more information.

Permalink

Yes, this is a known issue in Blazor. You can track the issue link in the ValueChanged event not fired thread.

The following code snippet will work. You have to update the model manually because handling the ValueChanged event does not let you use the @bind-Value we need to use ValueExpression instead of @bind-Value.

<EditForm Model="person">
    <DataAnnotationsValidator />
    <div class="form-group">
        <label for="name">Name</label>
        <InputText ValueChanged="@ValueChange" Value="@person.FirstName" ValueExpressions= "@( () => @person.FirstName )" Class="form-control" Id="name" />
    </div>
</EditForm>

@code { 
    Person person = new Person();
    public void ValueChange()
    {
        Console.WriteLine(person.FirstName);
    }
}

Instead, you can also use the OnValidSubmit form event to get and process the value.

<EditForm Model="person" OnValidSubmit="@ValueChange">
  <DataAnnotationsValidator />
   <div class="form-group">
     <label for="name">Name</label>
     <InputText @bind-Value="@person.FirstName" Class="form-control" Id="name" />
   </div>
</EditForm>

@code { 
    Person person = new Person();
    public void ValueChange()
    {
        Console.WriteLine(person.FirstName);
    }
}
Permalink

Share with

Couldn't find the FAQs you're looking for?

Please submit your question and answer.