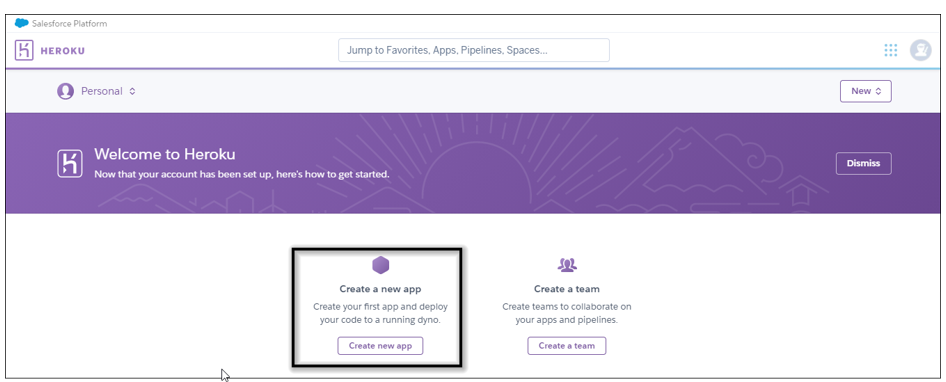
Heroku is a cloud platform as a service that enables you to deploy, build, and run applications in the cloud. Following are the steps to deploy a Blazor WebAssembly application to Heroku.
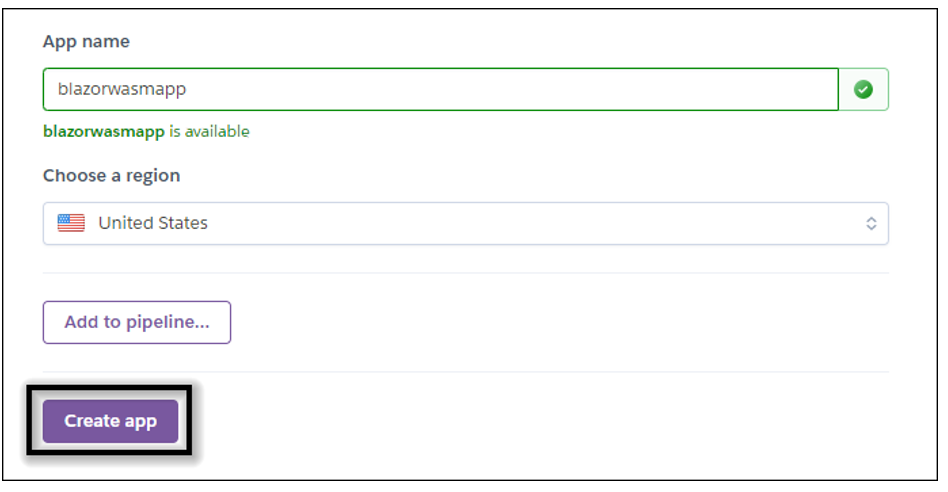
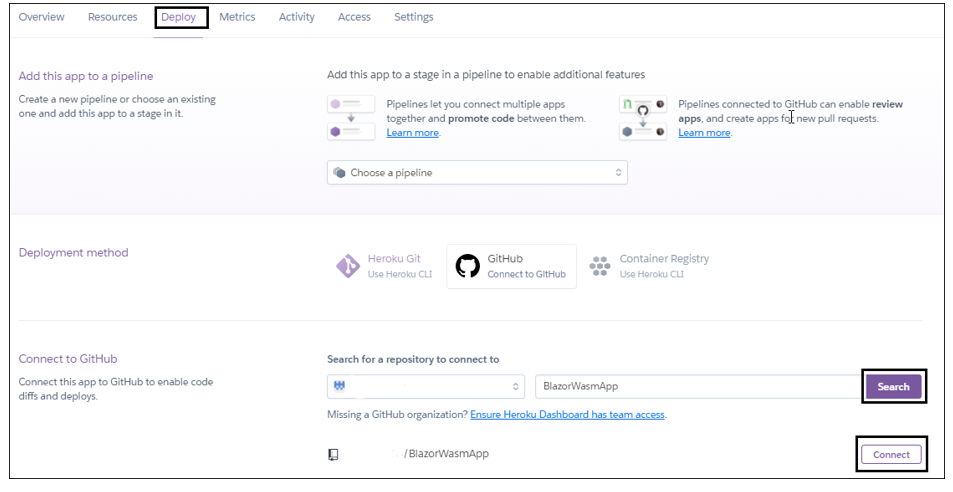
Now the new app is created. Next connect your GitHub Blazor WebAssembly app repository to Heroku for deployment.
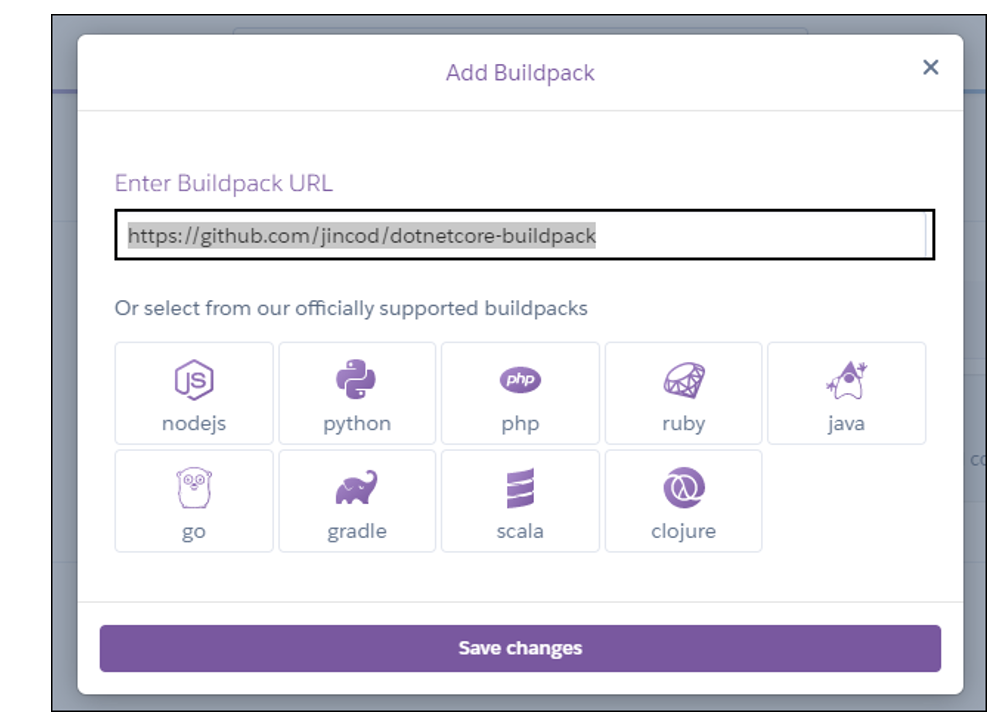
By default, Heroku does not support .NET apps for deployment. So, we add third-party build packs to enable the .NET app deployment support. Go to the settings tab and click Add buildpack.
Now the dialog box will open. Copy the link below, paste it into the Buildpack URL section, and save your changes.
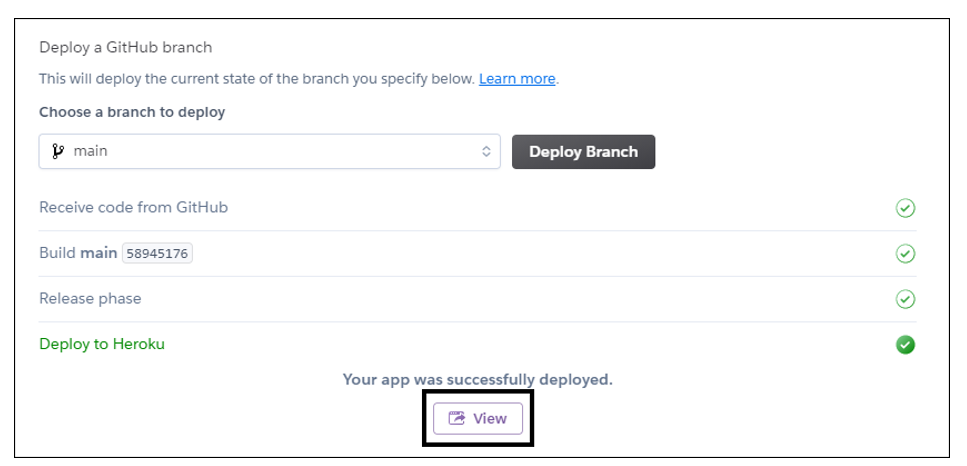
The build pack has been added. Go to the Deploy tab and deploy the repository manually. The Blazor app starts building now.
Now the Blazor app is deployed. Click View to run the deployed application.
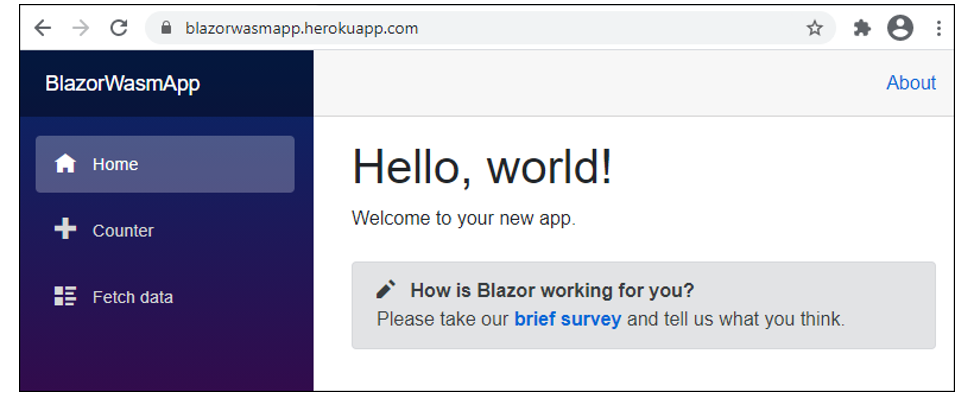
The deployed application opens in the default browser. See the following image for reference.
Follow the steps below to deploy a Blazor WebAssembly application to GitHub Pages.
Prerequisites:
.NET Core 3.1/.NET 5.0 GIT GitHub Account
Create a Blazor WebAssembly project using the below command in the CLI.
mkdir BlazorGitHubPagesDemo cd BlazorGitHubPagesDemo dotnet new blazorwasm
Add the .gitignore file to ignore the bin/obj files.
dotnet new gitignore
Now, create a new GitHub repository according to GitHub’s instructions and run the following commands in the CLI to push an existing repository to the created GitHub repository page.
// Create the Git repository git init
// Track all files that are not ignore by .gitignore git add –all
// Commit all changes to the repository git commit -m “Initial commit”
// Push the changes to the existing repo master branch git remote add origin https://github.com/{{GitHub_User_Name}}/BlazorGitHubPagesDemo.git
git push -u origin master
Now the changes have been committed in the newly created GitHub repository.
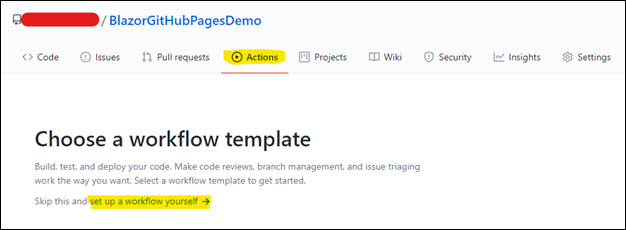
After the source code has been pushed to the created GitHub repository, create a new GitHub action workflow to build the project, commit the output, and push the published code to a separate branch. To deploy in GitHub, GitHub Pages will use a separate branch (named gh-pages) as the static files for your site.
To achieve this, navigate to the Action tab in the GitHub repository and click the set up a workflow yourself option to create a new GitHub workflow action.
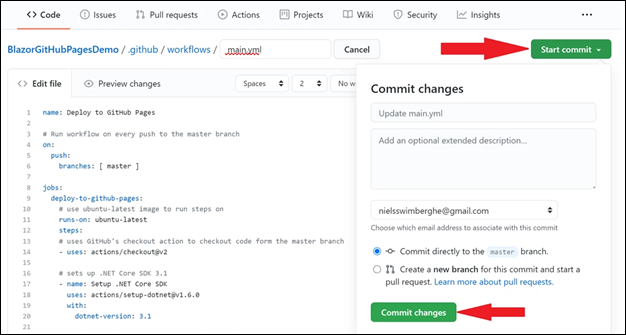
Clicking set up a workflow yourself will navigate to the Edit new file page. This file will instruct GitHub actions to build and deploy your project using YAML. Refer to “GitHub Actions” for the workflow of YAML files.
Copy this code and paste it in your YML file.
[main.yml]
name: Deploy to GitHub pages

# Run workflow on every push to the master branch
on:
push:
branches: [ master ]

jobs:
deploy-to-github-pages:
# Use Ubuntu-latest image to run steps on
runs-on: ubuntu-latest
steps:
# Uses GitHub’s checkout action to check out code from the master branch
– uses: actions/checkout@v2

# Sets up .NET Core SDK 3.1
– name: Setup .NET Core SDK
uses: actions/setup-dotnet@v1
with:
dotnet-version: 3.1

# Publishes the Blazor project to the release folder
– name: Publish .NET Core Project
run: dotnet publish BlazorGitHubPagesDemo.csproj -c Release -o release –nologo

# Changes the base tag in index.html from ‘/’ to ‘BlazorGitHubPagesDemo’ to match the GitHub Pages repository subdirectory
– name: Change base-tag in index.html from / to BlazorGitHubPagesDemo
run: sed -i ‘s/<base href=”\/” \/>/<base href=”\/BlazorGitHubPagesDemo\/” \/>/g’ release/wwwroot/index.html

# Copy index.html to 404.html to serve the same file when a file is not found
– name: copy index.html to 404.html
run: cp release/wwwroot/index.html release/wwwroot/404.html

# Add the .nojekyll file to tell GitHub pages to not treat this as a Jekyll project. (Allow files and folders starting with an underscore)
– name: Add .nojekyll file
run: touch release/wwwroot/.nojekyll

– name: Commit wwwroot to GitHub pages
uses: JamesIves/[email protected]
with:
GITHUB_TOKEN: ${{ secrets.GITHUB_TOKEN }}
BRANCH: gh-pages
FOLDER: release/wwwroot
Now that all steps are in place, commit the file.
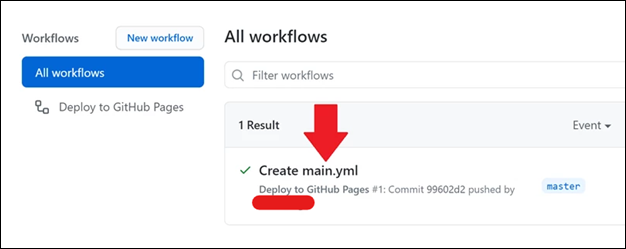
Navigate back to the GitHub Actions overview page by clicking the Actions tab.
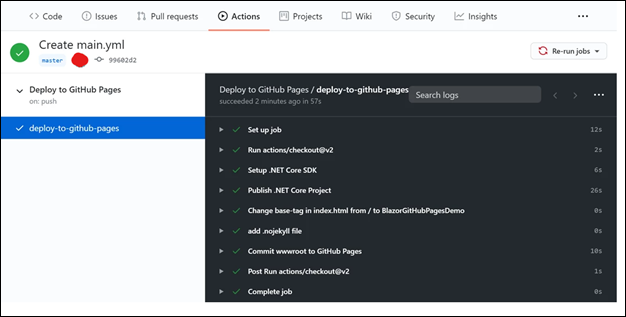
You can now find your GitHub Action Workflow and the workflow runs on this page. Click on the first run that was automatically created when you committed the workflow, and watch it publish your project to the gh-pages branch.
Once completed, you can see the result by navigating to the gh-pages branch in your repository.
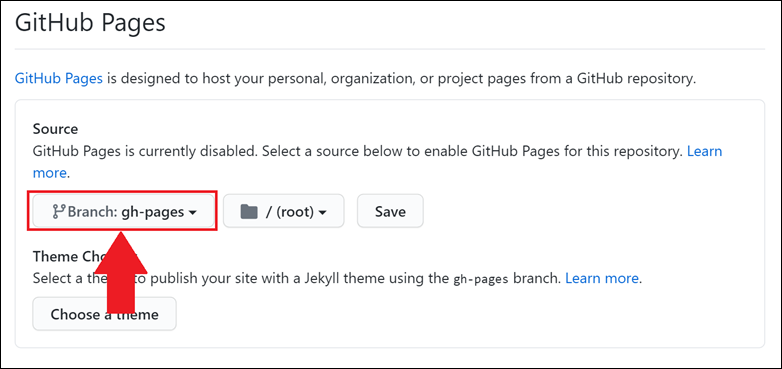
To enable GitHub pages in the repository settings, navigate to the settings by clicking on the Settings tab. Scroll down to the “GitHub Pages” section and select the gh-pages branch in the Source dropdown.
Now, the GitHub Pages site should be available at in the below link. ‘[YOUR_USERNAME].github.io/[YOUR_REPOSITORY_NAME]’.
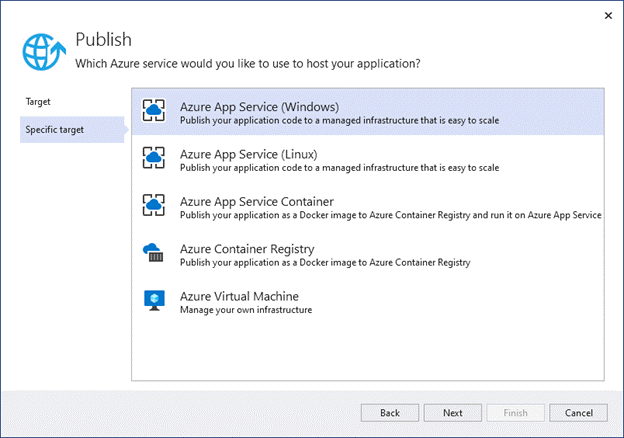
Follow the steps below to deploy a Blazor Server application to Azure app service.
Create a Blazor Server application
To create a blazor Server Application using the following steps
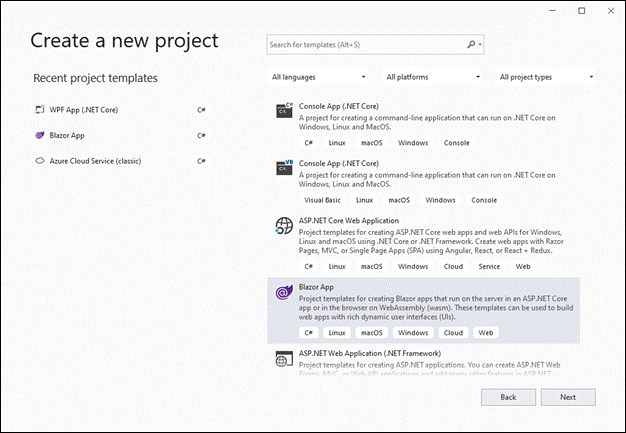
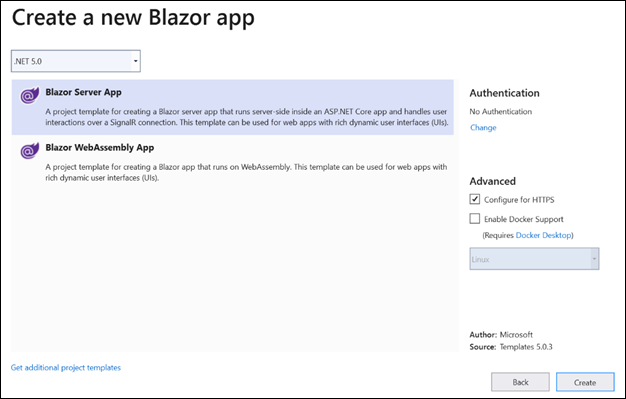
Open Visual Studio 2019 and create a new project.
Once Blazor App is selected, click Next button to configure the project name and location.
Save the application, and then click Create.
Select Blazor Server App and click Create to complete the application creation.
Deploying to Azure app service
To Deploying the Azure App Service using the following steps.
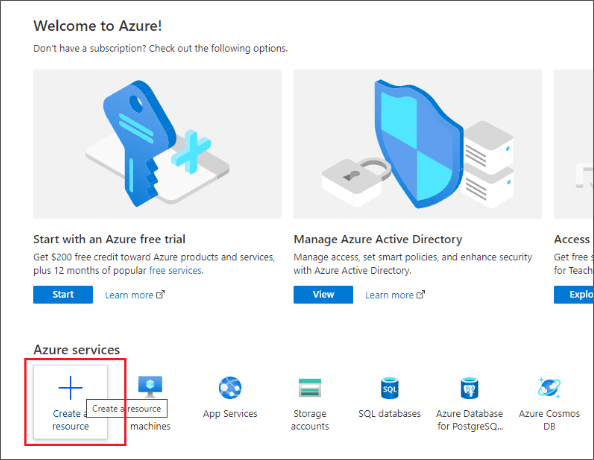
If you don’t have a login for Azure, sign up to access the Azure portal.
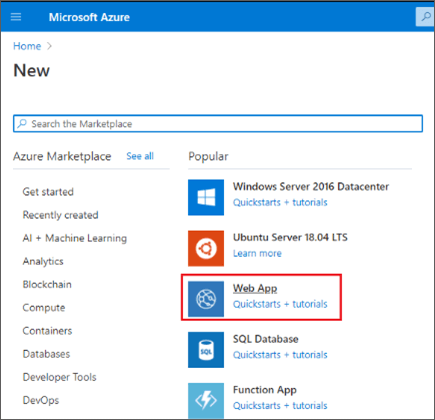
Click Create a resource in Azure to create a resource group.
Select the Web App Azure application service.
Once Web App is selected, select the following options:
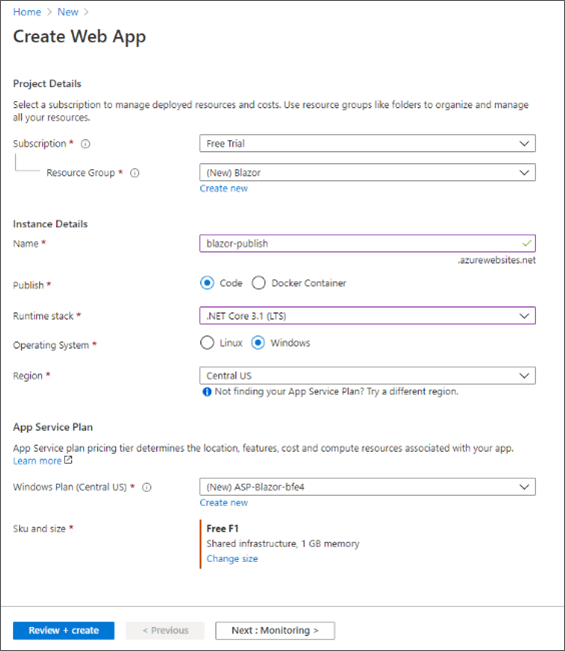
Select Free Trial as the subscription.
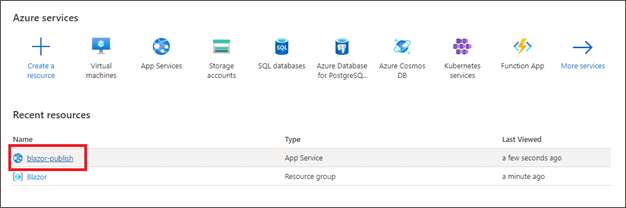
Create a resource group name, such as “Blazor.”
Update the Instance Details:
Name: blazor-publish. The application hosted will be available in this URL: blazor-publish.azurewebsites.net.
Select the Code radio button for Publish.
Choose the .NET Core 3.1 LTS runtime stack and Windows operating system.
Select the region in which to publish the app. Central US was chosen for this demo.
The app service plan with the Free F1 option will be selected by default, but this can be modified.
Once this is done, click Review + create.
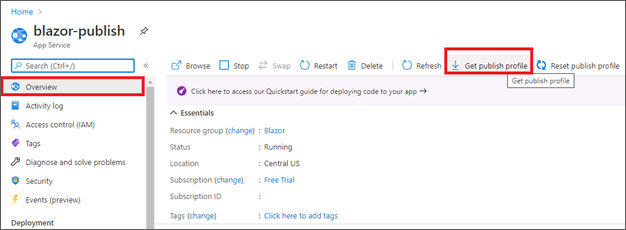
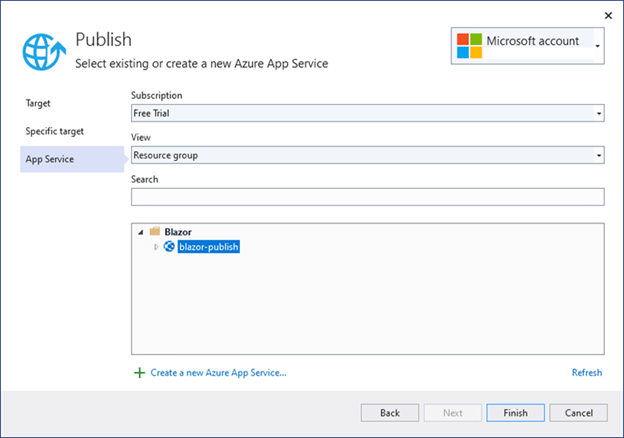
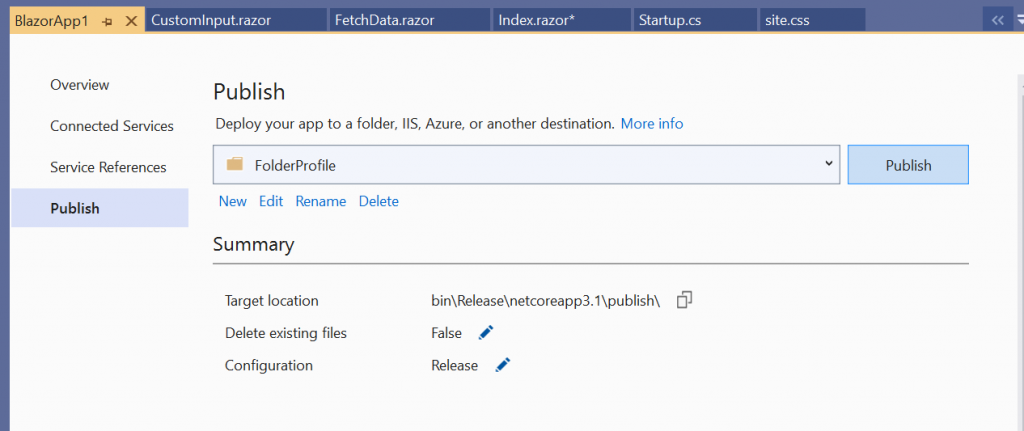
After configuring the Web App Service, get the publish profile for the Web App Service to host the Blazor Server application. Select the created web app service (blazor-publish).
Navigate to the overview section and click Get publish profile, and the save the profile locally.
Publish a Blazor Server application in Azure
Using import-profile option
To using import-profile option using the following steps.
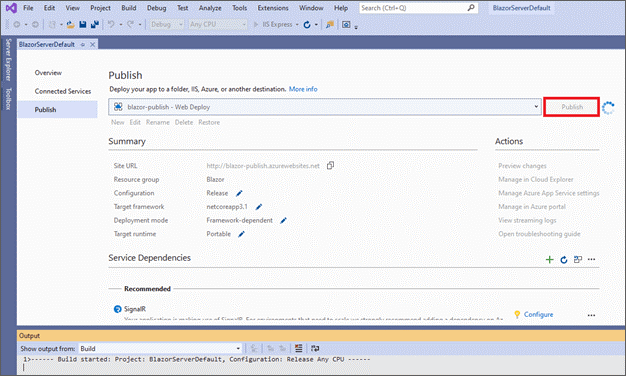
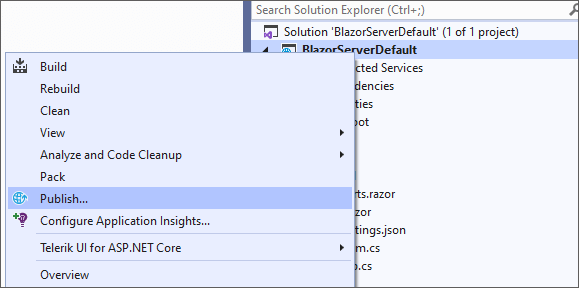
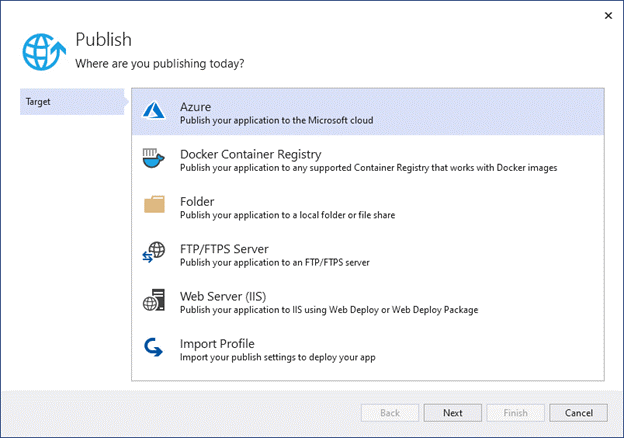
Right-click the project and click Publish in the context menu.
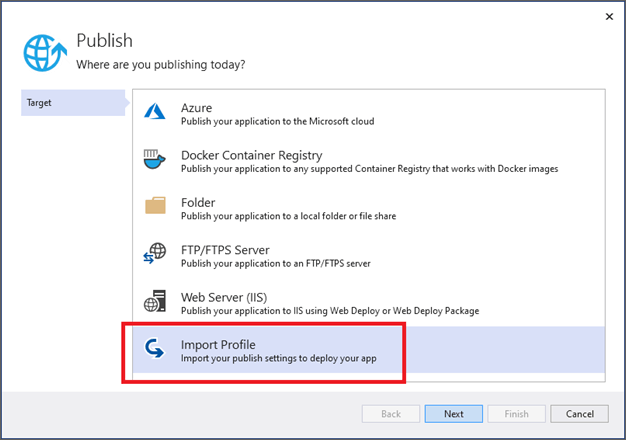
Choose Import Profile and click Next button. Then, locate the downloaded publish profile for the web app service.
Follow the steps below to deploy a Blazor WebAssembly application to Azure App Service.
Prerequisites:
.NET Core 3.1/.NET 5.0
Visual Studio 2019 or a more current version, which should include Azure and ASP.NET as well as web development workloads.
Azure App Service account.
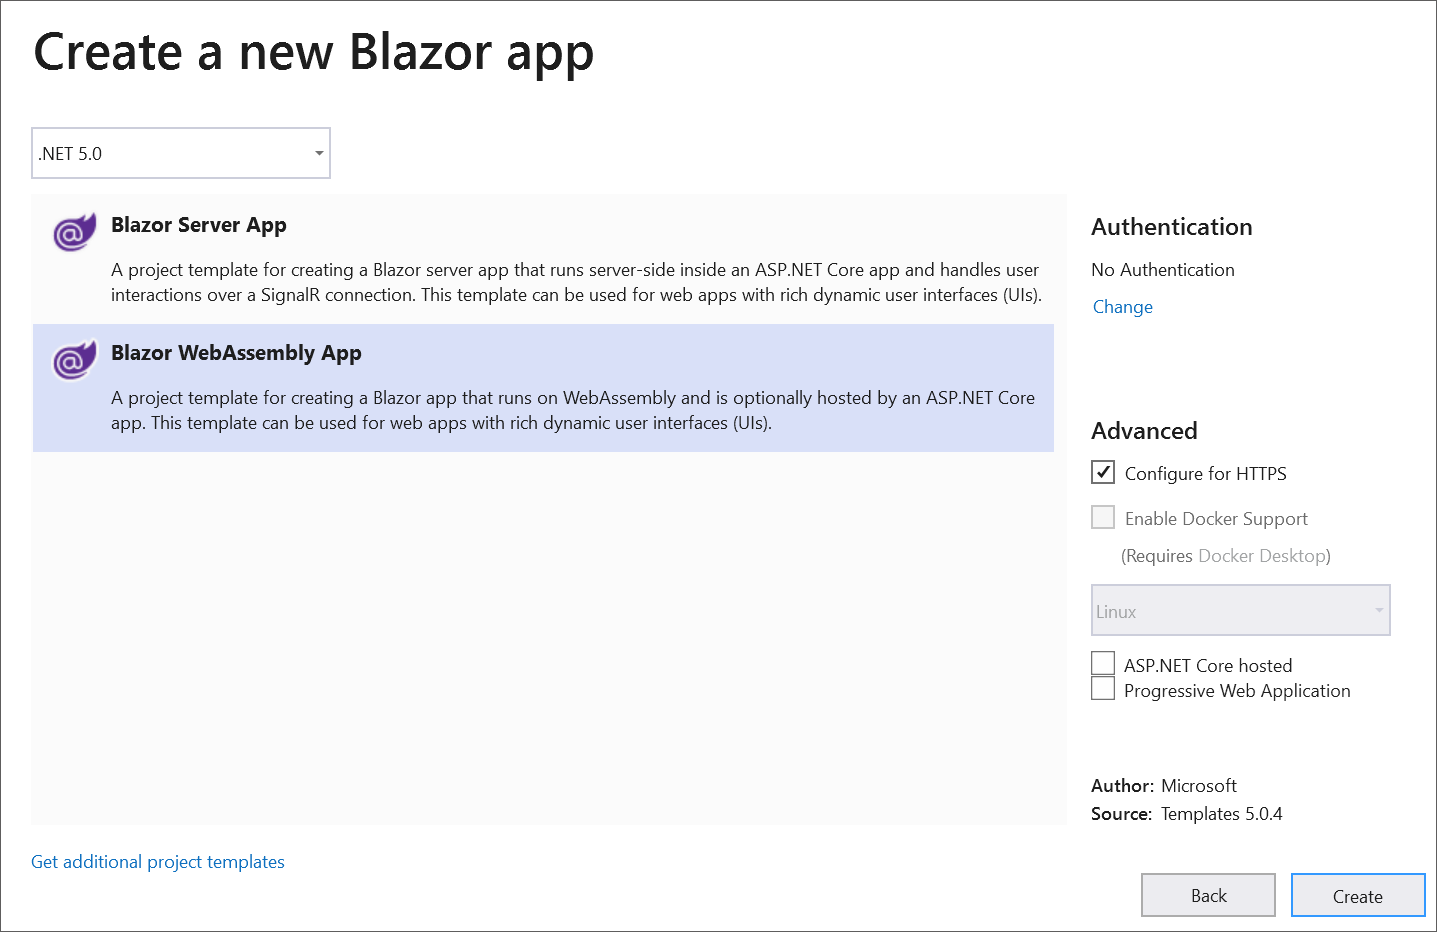
Create a Blazor WebAssemby Application
To create a blazor WebAssembly Application using the following steps
Open Visual Studio 2019 and create a new project.
Once Blazor App is selected, click Next button to configure the project name and location.
Save the application, and then click Create button.
Select Blazor WebAssembly App and click Create button to complete the application creation.
Deploying to Azure App Service
To Deploying the Azure App Service using the following steps.
If you don’t have a login for Azure, sign up to access the Azure portal.
Click Create a resource in Azure to create a resource group.
Select the Web App Azure application service.
Once Web App is selected, select the following options:
Select Free Trial as the subscription.
Create a resource group name, such as “Blazor.”
Update the Instance Details:
Name: blazor-publish. The application hosted will be available in this URL: blazor-publish.azurewebsites.net.
Select the Code radio button for Publish.
Choose the .NET Core 3.1 LTS runtime stack and Windows operating system.
Select the region in which to publish the app. Central US was chosen for this demo.
The app service plan with the Free F1 option will be selected by default, but this can be modified.
Once this is done, click Review + create.
After configuring the Web App service, get the publish profile for the Web App service to host the Blazor WebAssembly application. Select the created web app service (blazor-publish).
Navigate to the overview section, click on Get publish profile, and save the profile locally.
Publish a Blazor WebAssembly application in Azure
Using import-profile option
To using import-profile option using the following steps.
Right-click the project and click Publish in the context menu.
Choose Import Profile and click Next. Then, locate the downloaded publish profile for the web app service.
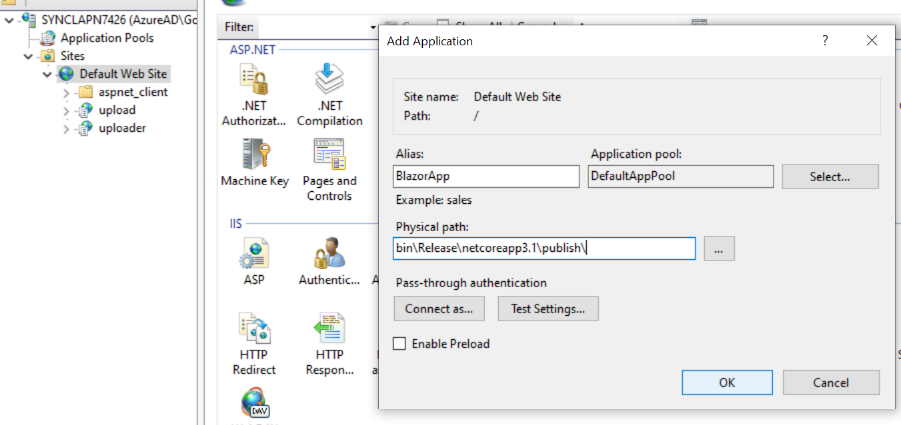
You must update the virtual app path or app base path in index.html to resolve this issue.
That is, the hosted application expects the assets from root folder of the web server. So, you have to update the subfolder name in index.html to serve the files from the path.
For example, if I am hosting an application in http://example.com/blazor/, the index.html looks like the following.
<base href="/blazor/" />
For more information, refer to this link for
updating app-base-path.