Live Chat Icon For mobile
Live Chat Icon

Blazor FAQ - WebAssembly

Find answers for the most frequently asked questions
Expand All Collapse All

To use .npm packages in a Blazor WebAssembly application, follow these steps:

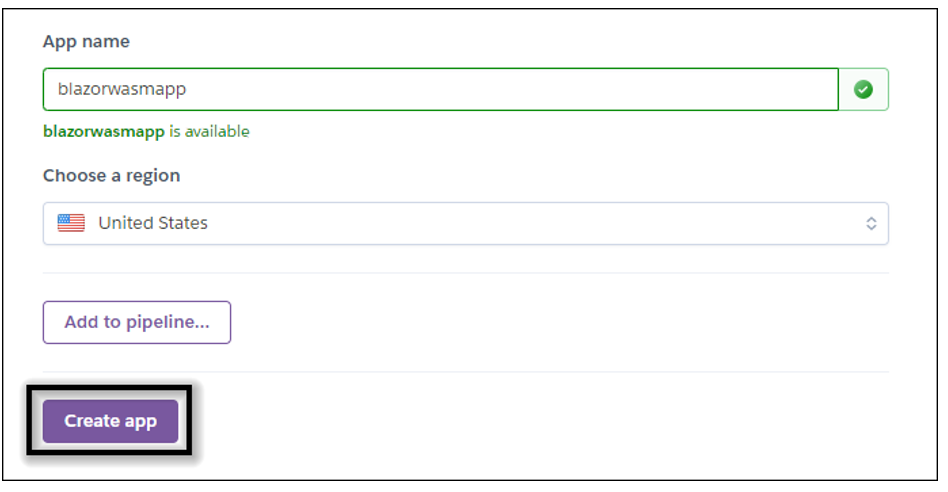
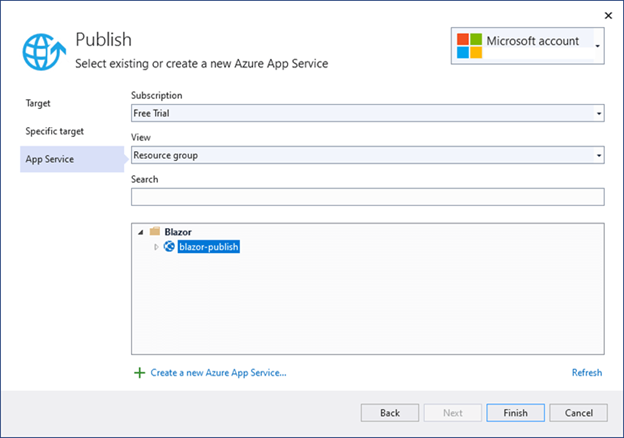
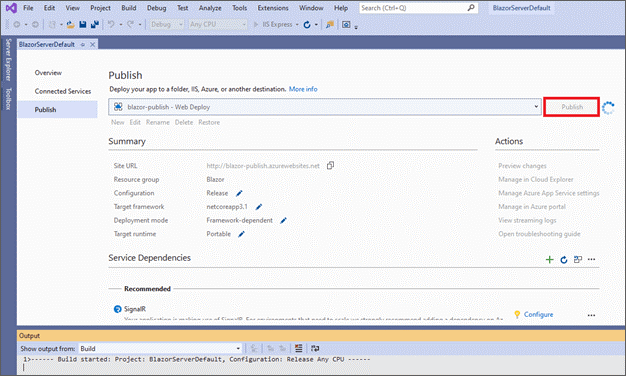
  1. Create a Blazor WebAssembly application in Visual Studio 2019 using this link.

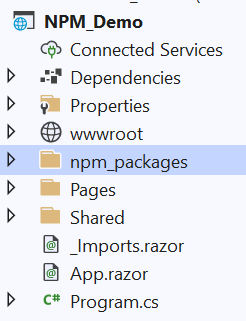
  2. Right-click on the application and create a new folder named npm_packages.
    NPM Demo

  3. Open the npm_packages folder directory via command prompt and run the following command to initialize NPM in the application.

    npm init -y


    Once the command is executed, it will create a new package.json file in the npm_packages directory.

  4. Continue in the command prompt by executing the following command to install a JavaScript bundler named webpack and its CLI as development dependencies.

    npm install webpack webpack-cli –save-dev

  5. Finally, install the required .npm package. In this demo, we installed Syncfusion Maps by running the following command.

    npm install @syncfusion/ej2-maps

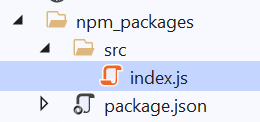
  6. Within the npm_packages folder, create a new folder called src, and then a JavaScript file called index.js.
    npm packages

  7. Include the build script for the package.json file, as shown in the following, which uses webpack to bundle the JavaScript file. This script tells webpack to use the index.js file in the src folder as the source file. The output directory of the bundled file is then set to be created under the js folder in the wwwroot folder directory as index.bundle.js.

      {
      "name": "npm_packages",
      "version": "1.0.0",
      "description": "",
      "main": "index.js",
      "scripts": {
        "build": "webpack ./src/index.js --output-path ../wwwroot/js --output-filename index.bundle.js --mode=development"
      },
      "keywords": [],
      "author": "",
      "license": "ISC",
      "devDependencies": {
        "webpack": "^5.58.1",
        "webpack-cli": "^4.9.0"
      },
      "dependencies": {
        "@syncfusion/ej2-maps": "^19.3.44"
      }
    }

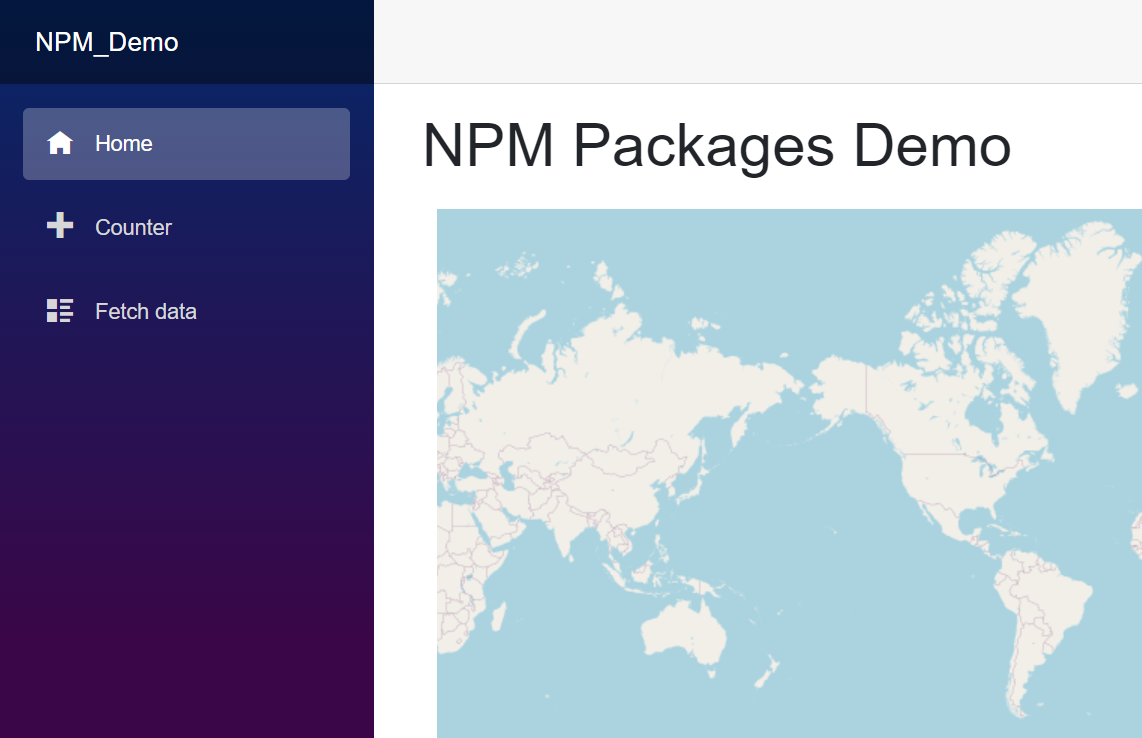
  8. Navigate to the Index.razor page and insert a div tag with the id set as element to display the Syncfusion Maps component.
    [Index.razor]  

    @page "/"
     
    <h1>NPM Packages Demo</h1>
     
    <div id="element"></div>
     

  9. In the index.js file, import and declare the Syncfusion Maps component. Finally, the component is appended to the div tag with the id set as element in the Index.razor page.
    [index.js]

     import { Maps } from '@syncfusion/ej2-maps';
     
    const map = new Maps({
        layers: [
            {
                layerType: "OSM"
            }
        ]
    });
    map.appendTo('#element');


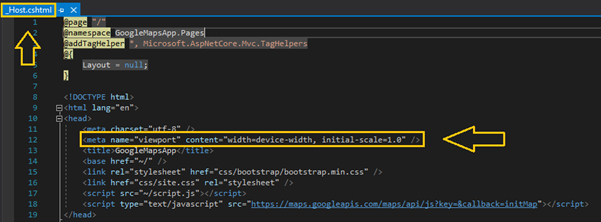
  10. Modify the index.html file with the following code to help Blazor inject a script after it starts.
    Note: This step is primarily for including the Syncfusion Maps component; if you’re using something else, you can skip it.
     
    [index.html]  

      <!DOCTYPE html>
    <html>
     
    <head>
        <title>NPM_Demo</title>
        <link href="css/bootstrap/bootstrap.min.css" rel="stylesheet" />
        <link href="css/app.css" rel="stylesheet" />
    </head>
     
    <body>
        ………………..
        <script src="_framework/blazor.webassembly.js" autostart="false"></script>
        <script>
            Blazor.start().then(function () {
                var customScript = document.createElement('script');
                customScript.setAttribute('src', 'js/index.bundle.js');
                document.head.appendChild(customScript);
            });
        </script>
    </body>
     
    </html>
     

  11. Add a prebuild step to the *.csproj file that will run the .npm commands whenever you compile or build the application.
     [.csproj]

     <Project Sdk="Microsoft.NET.Sdk.BlazorWebAssembly">
     
                 ………………………..
                <Target Name="PreBuild" BeforeTargets="PreBuildEvent">
                            <Exec Command="npm install" WorkingDirectory="npm_packages" />
                            <Exec Command="npm run build" WorkingDirectory=" npm_packages " />
                </Target>
    </Project>

    Run the sample to see the demonstration.
    NPM Packages demo output

Permalink

By using Blazor route parameters, you can pass values from one page to another page. Use NavigationManager to pass a value and route the parameter to another page.

Follow this example to achieve passing values from one page to another.
[Page1.razor]

@page "/page1"
@inject NavigationManager UriHelper

<h3>Click button to pass the value to other page.</h3>
<button class="btn btn-primary" @onclick="OnClick">Pass Value</button>

@code {

    private string parameter = "ParameterValue";
    private void OnClick()
    {
        UriHelper.NavigateTo($"counter/{parameter}");
    }
}

Get the passed Page1 parameter value in Page2.
[Page2.razor]

@page "/page2/{Value}"

<p>@Value</p>

@code {
    [Parameter]
    public string Value { get; set; }

}

Refer to this link for more details.

Permalink

The Dispose method is used to avoid memory leaks and allows proper garbage collection. Implement the IDisposable interface in the component and call the Dispose method. If the framework calls the Dispose method, the component is removed from the UI and unmanaged resources can be released.

The following example demonstrates the disposal of Timer in the counter page.

[Counter.Razor]

@page "/counter"
@using System.Timers
@implements IDisposable

<h1>Counter with Timer disposal</h1>

<p>Current count: @currentCount</p>

@code {
    private int currentCount = 0;
    private Timer timerObj = new(1000);

    protected override void OnInitialized()
    {
        timerObj.Elapsed += (sender, eventArgs) => OnTimerCallback();
        timerObj.Start();
    }

    private void OnTimerCallback()
    {
        InvokeAsync(() =>
        {
            currentCount++;
            StateHasChanged();
        });
    }

    public void Dispose()
    {
        timerObj?.Dispose();
    }
}    

View Sample in GitHub

Permalink

A progressive web application (PWA) is usually a single-page application (SPA) used to create a Blazor WebAssembly application to work offline. It runs in its own app window and independent of network speed.

Follow these steps to create a Blazor WebAssembly PWA application to work offline.

  1. Create a Blazor WebAssembly application with a progressive web application configuration.

  2. Press Ctrl + F5 to run the application. Users have the option of installing the app.

  3. Once the app is installed, the app appears in its own window without an address bar.

  4. To run the application offline:

    1. Publish the app using this documentation – https://learn.microsoft.com/en-us/aspnet/core/blazor/progressive-web-app?view=aspnetcore-7.0&tabs=visual-studio
    2. Deploy the app to a server that supports HTTPS and access the app in a browser at its secure HTTPS address.
    3. Run the deployed application in the browser and open the browser’s dev tools.
    4. Open the network tab in the browser dev tool and set the throttle setting to offline mode.
    5. Refresh the application. It still loads in offline mode, also.
Permalink

IndexedDB is used for the client-side storage of data and files. Follow these steps to use IndexedDB in Blazor WebAssembly:

  1. Create a Blazor WebAssembly app and install the IndexedDB.Blazor NuGet package using the NuGet package manager.

  2. Set up the IIndexedDbFactory configuration service in your Program.cs file and set it as scoped.
    [Program.cs]

    using IndexedDB.Blazor;
    builder.Services.AddScoped();
  3. Now add the properties inside the class to store and process data in the Data folder.
    [IndexDb.cs]

    using IndexedDB.Blazor; 
    using Microsoft.JSInterop;
    using System.ComponentModel.DataAnnotations;
    namespace Blazor_WebAssembly_App.Data
    {
    public class IndexDb : IndexedDb
    {
    public IndexDb ( IJSRuntime jSRuntime, string name, int version ) : base(jSRuntime, name, version) { }
    // These are like tables. Declare as many of them as you want.
    public IndexedSet employee { get; set; }
    }
    public class Employee
    {
    [Key]
    public int Id { get; set; }
    [Required]
    public string? FirstName { get; set; }
    [Required]
    public string? LastName { get; set; }
    }
    }
  4. Add the namespace for the IndexedDB in _Import.razor file.
    [_Import.razor]

    @using IndexedDB.Blazor 
    @using {{Your_App_Name}}.Data
  5. Add the Razor component to add and store the data using IndexedDB in the Index.razor file.
    [_Import.razor]

    @page "/" 
    @inject IIndexedDbFactory DbFactory
    <h1>employee</h1>
    @if (employee != null)
    {
    <table class="table">
    <thead>
    <tr>
    <th>ID</th>
    <th>First name</th>
    <th>Last name</th>
    <th></th>
    </tr>
    </thead>
    <tbody>
    @foreach (var Employee in employee)
    {
    <tr>
    <td>@Employee.Id</td>
    <td>@Employee.FirstName</td>
    <td>@Employee.LastName</td>
    <td>
    <button class="btn btn-danger" @onclick="() => DeleteEmployee(Employee.Id)">Delete</button>
    </td>
    </tr>
    }
    </tbody>
    </table>
    }
    <fieldset>
    <legend>Add new Employee</legend>
    <EditForm Model="@newEmployee" OnValidSubmit="@SaveNewEmployee">
    <InputText @bind-Value="@newEmployee.FirstName" placeholder="First name..." />
    <InputText @bind-Value="@newEmployee.LastName" placeholder="Last name..." />
    <button type="submit">Add</button>
    <p><ValidationSummary /></p>
    <DataAnnotationsValidator />
    </EditForm>
    </fieldset>
    @code {
    List<Employee>? employee;
    protected override async Task OnInitializedAsync ()
    {
    await RefreshEmployeeList();
    }
    Employee newEmployee = new Employee();
    async Task RefreshEmployeeList ()
    {
    using var db = await DbFactory.Create<IndexDb>();
    employee = db.employee.ToList();
    }
    async Task SaveNewEmployee ()
    {
    using var db = await this.DbFactory.Create();
    db.employee.Add(newEmployee);
    await db.SaveChanges();
    // Refresh list and reset the form
    newEmployee = new Employee();
    await RefreshEmployeeList();
    }
    async Task DeleteEmployee ( int id )
    {
    using var db = await this.DbFactory.Create<IndexDb>();
    var employeeToDelete = db.employee.FirstOrDefault(e => e.Id == id);
    if (employeeToDelete != null)
    {
    db.employee.Remove(employeeToDelete);
    await db.SaveChanges();
    await RefreshEmployeeList();
    }
    }
    }

View Sample in GitHub

Permalink

Follow these steps to add a Blazor WebAssembly project to an existing ASP.NET Core application:

  1. Create a ASP.NET Core application and Blazor WebAssembly application separately.

  2. Install the Microsoft.AspNetCore.Components.WebAssembly.Server NuGet package in the ASP.NET Core application and add the Blazor WebAssembly application project reference to the ASP.NET Core application.
    [AspNetCoreApp.csproj]

    <Project Sdk="Microsoft.NET.Sdk.Web">
       <ItemGroup>
        <PackageReference Include="Microsoft.AspNetCore.Components.WebAssembly.Server" Version="7.0.0" />
      </ItemGroup>
     
      <ItemGroup>
        <ProjectReference Include="..{Your Blazor App Path}" />
      </ItemGroup>
     
    </Project>

  3. Add the following configurations the Program.cs file in the ASP.NET Core app to include Blazor WebAssembly.
    [Program.cs]

    ....
    if (!app.Environment.IsDevelopment())
    {
    app.UseWebAssemblyDebugging();
    app.UseExceptionHandler("/Error");
    // The default HSTS value is 30 days. You may want to change this for production scenarios, see https://aka.ms/aspnetcore-hsts.
    app.UseHsts();
    }

    app.UseBlazorFrameworkFiles();
    app.MapFallbackToFile("index.html");
    //app.MapRazorPages(); // Remove this line.
    app.Run();
  4. To avoid conflicts during publishing between WebAssembly and ASP.NET Core applications, it is necessary to delete the favicon.ico file. By default, both projects create a favicon.ico file, which can lead to conflicts. To resolve this, remove one of the favicon.ico files from the project.

Refer to this link for more information. 

View Sample in GitHub 

Permalink

Blazor authentication is implemented to determine who a particular user is. Blazor follows the existing ASP.NET Core authentication mechanisms to show a user’s identity.
Follow these steps to implement authentication within Blazor WebAssembly:

  1. Create a Blazor WebAssembly app with individual user account authentication in Visual Studio 2019.

  2. Install the NuGet package named “Microsoft.AspNetCore.Components.WebAssembly.Authentication” using the NuGet package manager.

  3. To support the authenticating service, add the AddOidcAuthentication service configuration to the Program.cs file.
    [Program.cs]

    using Microsoft.Extensions.Configuration;
    using Microsoft.Extensions.DependencyInjection;
    . . .

      builder.Services.AddOidcAuthentication(options =>
          {
            builder.Configuration.Bind("Auth0", options.ProviderOptions);
            options.ProviderOptions.ResponseType = "code";
          });

  4. In wwwroot/appsettings.json file, replace the Authority and Client ID placeholders with the proper values taken from the Auth0 dashboard.
    Note: Use Auth0; it will let you integrate authentication for configuring your application. Refer to this link for how to configure the application.
    [wwwroot/appsetting.json]

    {
      "Auth0": {
        "Authority": "https://<YOUR_AUTH0_DOMAIN>",
        "ClientId": "<YOUR_CLIENT_ID>"
      }
    }

  5. Add the authentication service script reference to the index.html file, which handles the low-level details of the OIDC protocol.
    [index.html]

    <body>
     
        //. . .
     
        <script src="_content/Microsoft.AspNetCore.Components.WebAssembly.Authentication/AuthenticationService.js">
        </script>
        
    </body>

  6. Add CascadingAuthenticationState and AuthorizeRouteView to display the page matching the specified route only if the user is authorized. Otherwise, it redirects to the Login page.
    [App.razor]

    <CascadingAuthenticationState>
       
    <Router AppAssembly="@typeof(Program).Assembly">
        <Found Context="routeData">
            <AuthorizeRouteView RouteData="@routeData" DefaultLayout="@typeof(MainLayout)">
                <Authorizing>
                    <p>Loading...</p>
                </Authorizing>
                <NotAuthorized>
                    <p>You're not authorized to reach this page. You need to log in.</p>
                </NotAuthorized>
            </AuthorizeRouteView>
        </Found>
        <NotFound>       
            <p>Sorry, there's nothing at this address.</p>        
        </NotFound>
    </Router>
    </CascadingAuthenticationState>

  7. Create a Razor component to allow the user to log in to be authenticated in the Shared folder.
    [Shared/LoginControl.razor]

    @using Microsoft.AspNetCore.Components.WebAssembly.Authentication
     
    @inject NavigationManager UriHelper
    @inject SignOutSessionStateManager SignOutManager
     
    <AuthorizeView>
        <Authorized>
            Hello, @context.User.Identity.Name!
            <a href="#" @onclick="OnClickEvent">Log out</a>
        </Authorized>
        <NotAuthorized>
            <a href="authentication/login">Log in</a>
        </NotAuthorized>
    </AuthorizeView>
     
    @code{
        private async Task OnClickEvent(MouseEventArgs args)
        {
            await SignOutManager.SetSignOutState();
            UriHelper.NavigateTo("authentication/logout");
        }
    }

  8. Reference the LoginControl page in the MainLayout.razor page.
    [MainLayout.razor]

    <div class="main">
            <div class="top-row px-4 auth">
                <LoginControl />
                <a href="https://docs.microsoft.com/aspnet/" target="_blank">About</a>
            </div>
     
            <div class="content px-4">
                @Body
            </div>
        </div>

  9. Create an Authentication.razor component in the Pages folder to authenticate the user when logging in and out of the app.
    [Pages/Authentication.razor]

    @page "/authentication/{action}"
    @using Microsoft.AspNetCore.Components.WebAssembly.Authentication
    @using Microsoft.Extensions.Configuration
     
    @inject NavigationManager UriHelper
    @inject IConfiguration Config
     
    <RemoteAuthenticatorView Action="@Action">
        <LogOut>
            @{
                var authority = (string)Config["Auth0:Authority"];
                var clientId = (string)Config["Auth0:ClientId"];
     
                UriHelper.NavigateTo($"{authority}/v2/logout?client_id={clientId}");
            }
        </LogOut>
    </RemoteAuthenticatorView>
     
    @code{
        [Parameter]
        public string Action { get; set; }
    }

  10. Now display the authorized content when the app is authorized. If the app is not authorized, display the “Not Authorized” message to the user.
    [Index.razor]

    @page "/"
     
    <AuthorizeView>
        <Authorized>
            <h1>Hello, @context.User.Identity.Name !</h1>
     
            <p>Welcome to your new app.</p>
        </Authorized>
        <NotAuthorized>
            <p>Not Authorized</p>
        </NotAuthorized>
    </AuthorizeView>

  11. Press Ctrl + F5 to run the application and click Log in in the header to authenticate the user.

Refer to this documentation for more details.

View Sample in GitHub 

Permalink

Heroku is a cloud platform as a service that enables you to deploy, build, and run applications in the cloud. Following are the steps to deploy a Blazor WebAssembly application to Heroku.

  1. Prerequisites:
    • Blazor WebAssembly app in your GitHub
    • Heroku account
    Deploy a Blazor WebAssembly app in Heroku

  2. Go to the Heroku dashboard and create a new app.

  3. Provide the app name and create an app.

  4. Now the new app is created. Next connect your GitHub Blazor WebAssembly app repository to Heroku for deployment.

  5. By default, Heroku does not support .NET apps for deployment. So, we add third-party build packs to enable the .NET app deployment support. Go to the settings tab and click Add buildpack.

  6. Now the dialog box will open. Copy the link below, paste it into the Buildpack URL section, and save your changes.

  7. The build pack has been added. Go to the Deploy tab and deploy the repository manually. The Blazor app starts building now.

  8. Now the Blazor app is deployed. Click View to run the deployed application.

  9. The deployed application opens in the default browser. See the following image for reference.

Permalink

To redirect to the login page when a user is not authenticated in Blazor WebAssembly:

  • Create a login page component.
  • Add the login page component to the NotAuthorized tag.
Follow these steps to redirect to the login page if the user is not authenticated:

  1. Create a login page component for redirection.
    [LoginRedirect.razor]

    @inject NavigationManager UriHelper
    @code {
        protected override void OnInitialized()
        {
            UriHelper.NavigateTo("login");
        }
    }

  2. Now add the LoginRedirect component to the NotAuthorized tag to redirect to the login page if the user is not authorized.
    [App.razor]

    <Router AppAssembly="@typeof(Program).Assembly" PreferExactMatches="@true">
            <Found Context="routeData">
                <AuthorizeRouteView RouteData="@routeData" DefaultLayout="@typeof(MainLayout)">
                    <NotAuthorized>
                        <LoginRedirect />
                    </NotAuthorized>
                </AuthorizeRouteView>
            </Found>
            <NotFound>
                <LayoutView Layout="@typeof(MainLayout)">
                    <p>Sorry, there's nothing at this address.</p>
                </LayoutView>
            </NotFound>
        </Router>
    Refer to this documentation for more details.

    View Sample in GitHub

Permalink

To get a browser’s culture in Blazor WebAssembly, call the (navigator.language) property in JavaScript using the JavaScript interop function in Blazor. It will return the current browser’s language version.

Follow this code to get the browser’s culture in Blazor WebAssembly.

[Index.razor]

@page "/"
@inject IJSRuntime JSRuntime

@code{
    protected override async Task OnInitializedAsync()
    {
        var browserLanguage = await JSRuntime.InvokeAsync<string>("getBrowserLanguage");
        Console.WriteLine(browserLanguage);
    }
}

[index.html]

<body>
      . . .
      . . .
   <script>

      window.getBrowserLanguage = function () {
            return (navigator.languages && navigator.languages.length) ? navigator.languages[0] :
                navigator.userLanguage || navigator.language || navigator.browserLanguage || 'en';
        }  
        
   </script>
</body>
Permalink

To get the current data and time from client, use the date object (new Date()) in JavaScript using JavaScript Interop. It will return the browser’s date and time. Following is the code to get the current date and time from the client in Blazor WebAssembly.

[Index.razor] 

@page "/" 
@inject IJSRuntime JsRuntime 
 
<p id="date-time"></p> 
 
@code { 
    protected async override Task OnAfterRenderAsync(bool firstRender) 
    { 
        if (firstRender) 
        { 
            await JsRuntime.InvokeVoidAsync("GetDateTime"); 
        } 
    } 
} 

[index.html]

<body>  
      . . .  
      . . .  
 
   <script> 
        function GetDateTime() { 
           // Date object will return browser's date and time by default in JavaScript. 
           document.getElementById("date-time").innerHTML = new Date(); 
        } 
    </script> 
</body >

View Sample in GitHub

Permalink

Google reCaptcha is a process that helps to protect websites form spam and abuse. To implement Google reCaptcha in Blazor, refer to the Google reCaptcha script link the WebAssembly app and render the reCaptcha by calling the JavaScript function.
Follow these steps to implement Google reCaptcha in Blazor WebAssembly.

  1. Add the Google reCaptcha renderer function in a separate JavaScript file under the wwwroot folder.
    [googlereCaptcha.js]

    function googleRecaptcha(dotNetObject, selector, sitekeyValue) {
        return grecaptcha.render(selector, {
            'sitekey': sitekeyValue,
            'callback': (response) => { dotNetObject.invokeMethodAsync('CallbackOnSuccess', response); },
            'expired-callback': () => { dotNetObject.invokeMethodAsync('CallbackOnExpired', response); }
        });
    };
     
    function getResponse(response) {
        return grecaptcha.getResponse(response);
    }

  2. Add the reCaptcha script link and reference the reCaptcha.js file source in index.html.
    [index.html]

    <body> 
          . . . 
          . . . 
     
       <script src="googlereCaptcha.js"></script>
       <!-- reCaptcha rendering script -->
       <script src="https://www.google.com/recaptcha/api.js"></script>
    </body >

  3. Now call the rendering reCaptcha function in JavaScript from the Razor page using JavaScript Interop and show the reCaptcha response on button click.
    Note: To start using reCaptcha, you need to generate the API site key for your site. Refer to this link to generate the site key.
    [Index.razor]  

    @page "/"
    @inject IJSRuntime JSRuntime
    @using System.ComponentModel
     
    <h3>Google reCAPTCHA</h3>
     
    <div id="google_recaptcha "></div>
     
    <button class="btn btn-primary" @onclick="ShowResponse">Show Response</button>
     
    <br />
     
    <p>@captchaResponse</p>
     
    @code {
        private string captchaResponse;
     
        protected override async Task OnAfterRenderAsync(bool firstRender)
        {
            if (firstRender)
            {
                await JSRuntime.InvokeAsync<int>("googleRecaptcha", DotNetObjectReference.Create(this), "google_recaptcha ", "your-sitekey");
            }
            await base.OnAfterRenderAsync(firstRender);
        }
     
        [JSInvokable, EditorBrowsable(EditorBrowsableState.Never)]
        public void CallbackOnSuccess(string response)
        {
            captchaResponse = response;
        }
     
        [JSInvokable, EditorBrowsable(EditorBrowsableState.Never)]
        public void CallbackOnExpired(string response)
        {
            //...
        }
     
     
        private void ShowResponse()
        {
            captchaResponse = $"The response for the Google reCAPTCHA widget: {captchaResponse}";
        }
    }

    Google recaptcha

Permalink

In Blazor WebAssembly, a JSON response can be parsed by using the GetFromJsonAsync() method of HTTPClient. Get the JSON response through a Web API call and parse it using the GetFromJsonAsync() method. Use the following code to parse a JSON response in Blazor WebAssembly.

@inject HttpClient Http 
 
@code { 
    private BlazorData[] blazorData; 
    protected override async Task OnInitializedAsync() 
    { 
        // parses JSON response. 
        blazorData = await Http.GetFromJsonAsync<BlazorData[]>("api/blazorData"); 
    } 
} 

Refer to this documentation for more details.

Permalink

DotNet.invokeMethod and DotNet.invokeMethodAsync are used to call C# methods with parameters from JavaScript in Blazor WebAssembly.

Syntax to call C# from JavaScript: 

DotNet.invokeMethodAsync(“C# method assembly name”, “C# method name”, “C# method parameter”); 

[Index.razor]

@page "/"
@inject IJSRuntime JsRuntime;

<button class="btn btn-primary" @onclick="OnButtonClick">Call C# from JS</button><br /><br />

<p>@content</p>

@code {
    private static string content { get; set; }

    [JSInvokable] // Return call back from JavaScript with parameter to C#.
    public static void JStoCSCall(string value)
    {
        content = value;
    }

    private async Task OnButtonClick() // Invoked by button clicking and calls JavaScript function.
    {
        await JsRuntime.InvokeAsync<object>("invokeJSfromCS");
    }
}

[index.html]

<body> 
      . . . 
      . . . 
 
   <script> 
        Function invokeJSfromCS () { 
            var value = "C# Method called from JavaScript with parameter";
            // Invoke to call C# function from JavaScript with parameter.
            DotNet.invokeMethod('BlazorWasmApp', 'JStoCSCall', value); 
        } 
    </script> 
</body >

Refer to this documentation for more details.

Permalink

We can use NavigationManager, which has a built-in LocationChanged event that will be triggered when the user navigates away from the current page.
In the following code, we use an alert JS function by adding the IJSRuntime to show the user has navigated by overriding the OnInitialized() method through the alert message.

[Index.razor]

@page "/"
@inject NavigationManager nav
@inject IJSRuntime JSRuntime
<h1>Detect Navigation events</h1>
@code {
    protected override void OnInitialized()
    {
        nav.LocationChanged += (o, e) =>
        {
           JSRuntime.InvokeVoidAsync("alert", "User has navigated to other page");
        };  }}

When the user navigates from the home page to the counter page or vice versa, the alert message stating “User has navigated to other page” will be shown.

View Sample in GitHub

Permalink

We can bind a drop-down list in Blazor WebAssembly using the <select> tag and bind the values to the drop-down list using the @bind attribute in the tag. In the following code example, we have bind a country list along with its country codes. On changing the dropdown list, the codes corresponding to the country will appear below.

[Index.razor]

@page "/"

<p>Select country from the DropDownList</p>

<select class="form-control" @bind="@SelectedCountryID">

        @foreach (var country in CountryList)
        {
            <option value="@country.Code"> @country.Name </option>
        }
        
</select>
<br/>
    <p>@SelectedCountryID</p>

    @code {

        string selectedCountryID;

        string SelectedCountryID
        {
            get => selectedCountryID;
            set {selectedCountryID = value;}
        }

        List<Country> CountryList = new List<Country>() { new Country ("IND", "India"),new Country ("USA", "United States"),new Country ("UK", "United Kingdom")};

        public class Country
        {

            public Country(string code, string name)
            {
                Code = code;
                Name = name;
            }
            public string Code { get; set; }
            public string Name { get; set; }

        }
    }

Note: We also have our Syncfusion Dropdown List component. Please refer to the demo link for more information about our product.

View Sample in GitHub

Permalink
  • Blazor WebAssembly can run client-side C# code directly in the browser.
  • The Blazor application, as well as its dependencies and the .NET runtime, are all downloaded to the browser.
  • The application runs on the browser’s UI thread directly. The same method handles both UI notifications and event management.
  • We can re-use code and libraries from the server-side parts of the application while .NET runs on WebAssembly.
Permalink

Follow the steps below to deploy a Blazor WebAssembly application to GitHub Pages.

Prerequisites:

.NET Core 3.1/.NET 5.0
GIT
GitHub Account

Create a Blazor WebAssembly project using the below command in the CLI.

mkdir BlazorGitHubPagesDemo
cd BlazorGitHubPagesDemo
dotnet new blazorwasm

Add the .gitignore file to ignore the bin/obj files.

dotnet new gitignore

Now, create a new GitHub repository according to GitHub’s instructions and run the following commands in the CLI to push an existing repository to the created GitHub repository page.

// Create the Git repository
git init

// Track all files that are not ignore by .gitignore
git add –all

// Commit all changes to the repository
git commit -m “Initial commit”

// Push the changes to the existing repo master branch
git remote add origin https://github.com/{{GitHub_User_Name}}/BlazorGitHubPagesDemo.git

git push -u origin master

Now the changes have been committed in the newly created GitHub repository.

After the source code has been pushed to the created GitHub repository, create a new GitHub action workflow to build the project, commit the output, and push the published code to a separate branch. To deploy in GitHub, GitHub Pages will use a separate branch (named gh-pages) as the static files for your site.

To achieve this, navigate to the Action tab in the GitHub repository and click the set up a workflow yourself option to create a new GitHub workflow action.

Clicking set up a workflow yourself will navigate to the Edit new file page. This file will instruct GitHub actions to build and deploy your project using YAML. Refer to “GitHub Actions” for the workflow of YAML files.

Copy this code and paste it in your YML file.

[main.yml]

name: Deploy to GitHub pages

# Run workflow on every push to the master branch
on:
push:
branches: [ master ]

jobs:
deploy-to-github-pages:
# Use Ubuntu-latest image to run steps on
runs-on: ubuntu-latest
steps:
# Uses GitHub’s checkout action to check out code from the master branch
– uses: actions/checkout@v2

# Sets up .NET Core SDK 3.1
– name: Setup .NET Core SDK
uses: actions/setup-dotnet@v1
with:
dotnet-version: 3.1

# Publishes the Blazor project to the release folder
– name: Publish .NET Core Project
run: dotnet publish BlazorGitHubPagesDemo.csproj -c Release -o release –nologo

# Changes the base tag in index.html from ‘/’ to ‘BlazorGitHubPagesDemo’ to match the GitHub Pages repository subdirectory
– name: Change base-tag in index.html from / to BlazorGitHubPagesDemo
run: sed -i ‘s/<base href=”\/” \/>/<base href=”\/BlazorGitHubPagesDemo\/” \/>/g’ release/wwwroot/index.html

# Copy index.html to 404.html to serve the same file when a file is not found
– name: copy index.html to 404.html
run: cp release/wwwroot/index.html release/wwwroot/404.html

# Add the .nojekyll file to tell GitHub pages to not treat this as a Jekyll project. (Allow files and folders starting with an underscore)
– name: Add .nojekyll file
run: touch release/wwwroot/.nojekyll

– name: Commit wwwroot to GitHub pages
uses: JamesIves/github-pages-deploy-action@3.7.1
with:
GITHUB_TOKEN: ${{ secrets.GITHUB_TOKEN }}
BRANCH: gh-pages
FOLDER: release/wwwroot

Now that all steps are in place, commit the file.

Navigate back to the GitHub Actions overview page by clicking the Actions tab.

Create Main.yml

You can now find your GitHub Action Workflow and the workflow runs on this page. Click on the first run that was automatically created when you committed the workflow, and watch it publish your project to the gh-pages branch.

Once completed, you can see the result by navigating to the gh-pages branch in your repository.

To enable GitHub pages in the repository settings, navigate to the settings by clicking on the Settings tab. Scroll down to the “GitHub Pages” section and select the gh-pages branch in the Source dropdown.

Now, the GitHub Pages site should be available at in the below link. ‘[YOUR_USERNAME].github.io/[YOUR_REPOSITORY_NAME]’.

Refer to “How to deploy ASP.NET Blazor WebAssembly to GitHub Pages” for more details.

Permalink

Blazor prerendering is a process where web page elements are built and compiled on the server and static HTML is hosted in WebAssembly (client side). When Razor pages load, components are prerendered at the same time. This process improves page loading by making it faster for SPAs (single page applications), which improves search engine optimization.

To set up prerendering for a hosted Blazor WebAssembly app:


  1. Create the Blazor web Assembly App with ASP.net core Hosted. Here solution name is BlazorHosted.

  2. Delete wwwroot/index.html file from the Blazor WebAssembly Client project.

  3. In the Client project, delete the following lines in Program.cs:

    - builder.RootComponents.Add<App>("#app");
    - builder.RootComponents.Add<HeadOutlet>("head::after");

  4. Add the _Host.cshtml and _Layout.cshtml files to the Pages folder in the Server project. These files are already included in the Blazor Server template and can be obtained from there.
    Make the following changes to the _Host.cshtml file:

    • Modify the namespace based on APP namespace as BlazorHosted.Client.
    • Update the render-mode as ‘WebAssemblyPrerendered’ in host.cshtml
    <component type="typeof(App)" render-mode="WebAssemblyPrerendered" />
  5. Make the following changes to the _Layout.cshtml file:
    Update the Pages namespace at the top of the file to match namespace of the Server app’s pages like this,
    @namespace BlazorHosted.Server.Pages

    Add @using directive for the Client project at the top of the file:
    @using BlazorHosted.Client

    Update the stylesheet links to point to the WebAssembly project’s stylesheets. So, make the following changes.
    Remove the following lines
    <link href="css/site.css" rel="stylesheet" />
    <link href="{App Name space}.styles.css" rel="stylesheet" />
    <component type="typeof(App)" render-mode="ServerPrerendered" />
    Add the following lines
    <link href="css/app.css" rel="stylesheet" />
    <link href="BlazorHosted.Client.styles.css" rel="stylesheet" />
    <component type="typeof(App)" render-mode="WebAssemblyPrerendered" />
    Modify the Blazor script source of Server side Blazor:
    <script src="_framework/blazor.webassembly.js"></script>
  6. In the endpoint mapping of the Server project in Program.cs, update the fallback from the index.html file to the _Host.cshtml page.
    Remove the following line
    app.MapFallbackToFile("index.html");
    Add the following line
    app.MapFallbackToPage("/_Host");
  7. If the Client and Server projects use one or more common services during prerendering, factor the service registrations into a method that can be called from both projects. For more information, see ASP.NET Core Blazor dependency injection.
  8. Run the Server project. The hosted Blazor WebAssembly app is prerendered by the Server project for clients.

View Sample in GitHub

Permalink

Follow the steps below to deploy a Blazor WebAssembly application to Azure App Service.

  1. Prerequisites:

    • .NET Core 3.1/.NET 5.0

    • Visual Studio 2019 or a more current version, which should include Azure and ASP.NET as well as web development workloads.

    • Azure App Service account.

  2. Create a Blazor WebAssemby Application

    To create a blazor WebAssembly Application using the following steps

    1. Open Visual Studio 2019 and create a new project.

      Create a Blazor WebAssemby Application -1

    2. Once Blazor App is selected, click Next button to configure the project name and location.

    3. Save the application, and then click Create button.

    4. Select Blazor WebAssembly App and click Create button to complete the application creation.

      Create a Blazor WebAssemby Application

  3. Deploying to Azure App Service

    To Deploying the Azure App Service using the following steps.

    1. If you don’t have a login for Azure, sign up to access the Azure portal.

    2. Click Create a resource in Azure to create a resource group.

      Deploying to Azure App Service 2

    3. Select the Web App Azure application service.

      Deploying to Azure App Service 3

    4. Once Web App is selected, select the following options:

      • Select Free Trial as the subscription.

      • Create a resource group name, such as “Blazor.”

      • Update the Instance Details:

        1. Name: blazor-publish. The application hosted will be available in this URL: blazor-publish.azurewebsites.net.

        2. Select the Code radio button for Publish.

        3. Choose the .NET Core 3.1 LTS runtime stack and Windows operating system.

        4. Select the region in which to publish the app. Central US was chosen for this demo.

      • The app service plan with the Free F1 option will be selected by default, but this can be modified.

      • Once this is done, click Review + create.
        Deploying to Azure App Service 4

    5. After configuring the Web App service, get the publish profile for the Web App service to host the Blazor WebAssembly application. Select the created web app service (blazor-publish).

      Deploying to Azure App Service 5

    6. Navigate to the overview section, click on Get publish profile, and save the profile locally.

      Deploying to Azure App Service 6

  4. Publish a Blazor WebAssembly application in Azure

    • Using import-profile option

      To using import-profile option using the following steps.

      1. Right-click the project and click Publish in the context menu.

        Using-import-profile-option

      2. Choose Import Profile and click Next. Then, locate the downloaded publish profile for the web app service.

        Using import-profile option

      3. Finally, publish the application by clicking Publish. The application will be deployed and will be available in the URL https://blazor-publish.azurewebsites.net/.

        Using-import-profile-option-3

    • Using Azure account login

      To using Azure account login using the following steps.

      1. In Visual Studio 2019, right-click on the project and click Publish in the context menu.
        Using Azure account login 1

      2. Select Azure as the target.
        Using-Azure-account-login-2

      3. Select Azure App Service (Windows) as the specific target.
        Using Azure account login 3

      4. You need to log in to your Azure account and choose the web app service.
        Using-Azure-account-login-4

      5. Now click Publish to deploy the application.
        Using-Azure-account-login-5

      6. Now, the application will be deployed and will be available in the following URL. https://blazor-publish.azurewebsites.net/

Refer to “Publish an ASP.NET Core app to Azure with Visual Studio” for more details.

Permalink

The input element value is updated by the @bind event in Blazor. To get the current input value, use the oninput native event of the input element and get the current input value.

<input type="text" @bind="@inputValue" @oninput="OnInputEvent" />

@inputValue

@code {
    private string inputValue = "Hello, world";
    private void OnInputEvent(ChangeEventArgs changeEvent)
    {
        inputValue = (string)changeEvent.Value;
    }
}
Permalink

As opposed to how session cookies work, when opening a page in a new tab or window, a new session occurs with the browsing context. To access the browser sessionStorage in Blazor apps, write custom

code or use a third-party package. The accessed data can be stored in localStorage and sessionStorage. Know that localStorage is scoped to the user’s browser. If the user reloads the page or closes and reopens the browser, the state persists. Session storage is similar to local storage, but data in the session storage will be cleared after the session.

Install the Blazored.SessionStorage Nuget package in the NuGet package manager to store the session data in Blazor. Add the Blazored SessionStorage configuration to the WebAssembly app.

[Program.cs]

using Blazored.SessionStorage; 

. . . 
. . . 

            . . . 
            . . . 

            builder.Services.AddBlazoredSessionStorage(); 

[Index.razor]

@page "/" 

@inject Blazored.SessionStorage.ISessionStorageService sessionStorage 

<h2>@Name</h2> 

<button class="btn btn-primary" @onclick="Clear">Clear Session</button> 

@code { 
    public string Name; 
    protected override async Task OnInitializedAsync () 
    { 
        await sessionStorage.SetItemAsync("ID", "20019"); 
        await sessionStorage.SetItemAsync("Name", "John Smith"); 
        Name = "ID: " + await sessionStorage.GetItemAsync<string>("ID") + "Name : " + await sessionStorage.GetItemAsync<string>("Name"); 
    } 
    public async void Clear () 
    { 
        //this will clear the session data 
        await sessionStorage.ClearAsync(); 
    } 
} 
Permalink

To localize the text in a Blazor WebAssembly (client-side) app, follow these steps:

1. Create a Blazor WebAssembly project and add the Microsoft.Extensions.Localization NuGet package using NuGet Package Manager.

2. Add the culture resource files in the Shared/ResourceFiles folder and add a drop-down menu to switch between localized text.

[CultureDropDown.razor]

@using  System.Globalization
@inject IJSRuntime JSRuntime
@inject NavigationManager UrlHelpers

<strong>Culture:</strong>
<select class="form.control" @bind="Culture" style="width: 140px; margin-left: 10px;">
    @foreach (var culture in supportedCultures)
    {
        <option value="@culture">@culture.DisplayName</option>
    }
</select>

@code
{
    CultureInfo[] supportedCultures = new[]
    {
        new CultureInfo("en-US"),
        new CultureInfo("es-ES"),
        new CultureInfo("de")
    };

    CultureInfo Culture
    {
        get => CultureInfo.CurrentCulture;
        set
        {
            if (CultureInfo.CurrentCulture != value)
            {
                var jsInvoke = (IJSInProcessRuntime)JSRuntime;
                jsInvoke.InvokeVoid("blazorCulture.set", value.Name);

                UrlHelpers.NavigateTo(UrlHelpers.Uri, true);
            }
        }
    }
}

[MainLayout.razor]

<div class="top-row px-4">
      <CultureDropDown />
      . . .
 </div>

3. Now add the localization configuration and get the current locale’s culture using JSInterop, which is stored in browser window’s local storage.

[Program.cs]

…
using Microsoft.JSInterop;
using System.Threading.Tasks;

namespace BlazorLocaleWASM
{
  public class Program
  {
     public static async Task Main(string[] args)
     {
        …
        …
                builder.Services.AddLocalization();
                var host = builder.Build();
        var jsInterop = host.Services.GetRequiredService<IJSRuntime>();
        var result = await jsInterop.InvokeAsync<string>("blazorCulture.get");
        if (result != null)
        {
          var culture = new CultureInfo(result);
          CultureInfo.DefaultThreadCurrentCulture = culture;
          CultureInfo.DefaultThreadCurrentUICulture = culture;
        }

        await host.RunAsync();
    }
  }
}

[index.html]

<html>

<head>
    . . .
    . . .
</head>

<body>
  ...
     . . .
<script>
        window.blazorCulture = {
            get: () => window.localStorage['BlazorCulture'],
            set: (value) => window.localStorage['BlazorCulture'] = value
        };
    </script>
</body>

</html>

4. Add the text/content for localization in the Index.razor file.

[Index.Razor]

@page "/"
@using BlazorLocaleWASM.Shared.ResourceFiles
@inject Microsoft.Extensions.Localization.IStringLocalizer<Resource> Locale

<h1>@Locale["Hello world"]</h1>

@Locale["Welcome to your new app"]

<SurveyPrompt Title="How is Blazor working for you?" />

5. By default, Blazor WebAssembly carries minimal globalization resources required to display values, such as dates and currency, in the user’s culture. Applications that must support dynamically changing the culture should configure BlazorWebAssemblyLoadAllGlobalizationData in the project file.

[Project file]

<PropertyGroup>        <BlazorWebAssemblyLoadAllGlobalizationData>true</BlazorWebAssemblyLoadAllGlobalizationData>
</PropertyGroup>

6. Run the application.

You can download the reference sample here.

Please refer to this link for more information.

Permalink

Follow these steps to create a Blazor WebAssembly (client-side) application using a command-line interface (CLI).

Create a Blazor WebAssembly App in CLI

Open a command prompt where you want your project to be located and run the following command.

dotnet new blazorwasm -o BlazorWebAssemblyApp

Navigate to Blazor WebAssembly App

Run the cd BlazorWebAssemblyApp command to navigate to the BlazorWebAssemblyApp folder.

Run the application

The dotnet run command runs the application. See the following output in the default browser.

Note: If you have installed multiple SDK versions and need a specific framework version (e.g., net5.0, netcoreapp3.1) project, then add the -f flag to the dotnet new blazorwasm command. Refer here for the available flag options.

View Sample in GitHub

Permalink

Follow the step-by-step procedure below to create a Blazor WebAssembly (client-side) application in Visual Studio 2019.

Download and install Visual Studio 2019

Download and install the latest version of Visual Studio 2019 with the ASP.NET and web development workload.

Create a new project

Open Visual Studio 2019 and select Create a new project.

Select Blazor app from the template
Select Blazor App from the template list and click the Next.

Choose Blazor WebAssembly App
Select a target framework based on your requirements, choose Blazor WebAssembly App from the dashboard, and then click Create to create a new Blazor WebAssembly application.

Blazor WebAssembly App structure
Now the Blazor WebAssemblyApp is created, and the structure look like in the below image.

Run the application.
Press ctrl + F5 to run the application and see the below output in default browser.

Refer to this link for more details.

Permalink

You can customize the loading text in a Blazor WebAssembly application by editing the tag for target framework version 3.* or the
tag for target framework version 5.* in the index.html page. In the following example, I have customized the loading text while loading.

[index.html] for target framework version 3.*

<body>
    <app>
        <div style="position:absolute; top:30vh; width:100%; text-align:center">
            <h1> Blazor WASM Application</h1>
            <p>The application is loading...</p>
        </div>
    </app>
    . . .
    . . .
</body>

[index.html] for target framework version 5.*

<body>
    <div id="app">
        <div style="position:absolute; top:30vh; width:100%; text-align:center">
            <h1> Blazor WASM Application </h1>
            <p>The application is loading...</p>
        </div>
    </div>
    . . .
    . . .
</body>

Refer to this link for more details.

View Sample in GitHub

Permalink

Blazor application renders UI as HTML content in client-side (browser). So, you can determine whether it is a Desktop, or a Mobile device based on the viewport’s width.

The meta tag named “viewport” is used to design the webpage responsiveness and this is included in all Blazor applications, _Host.cshtml file in Blazor server-side application and index.html file in Blazor Web Assembly application. CSS styling makes designs responsive in Blazor apps.

Blazor app with responsive

Another way, you can create a responsive design using media queries that adjusts to the size of the user’s screen based on desktop or mobile browser.

For example, you define breakpoints for small, medium, and large screen sizes.  

<style>
    /* Default styles */ 
    @media (max-width: 576px) { 
        /* Styles for small screens */ 
    } 

    @media (min-width: 577px) and (max-width: 992px) { 
        /* Styles for medium screens */ 
    }  

    @media (min-width: 993px) { 
        /* Styles for large screens */ 
    } 
</style> 

For more details, refer to this link.

Permalink

State in Blazor:

In Blazor, the user’s state is held in the server’s memory in a circuit. State Management refers to the persisting state of an application even after the connection is lost or disconnected.  The state held for a user’s circuit may be any of the following, 

  • UI related data- component instances, rendered output
  • Property/field values of the component instances
  • Dependency injection service instance data

Need for State Management:

In Blazor, the application is connected through a circuit to the  server, which holds the user’s state and this can be lost or disconnected due to multiple reasons. Some of the reasons are as follows,

  • Large number of users accessing the server and increasing the memory used causing the pressure to disconnect the circuit.
  • Users reloading the application/webpage leading to circuit disconnection/loss.

Due to the above, user’s state may be lost and can also cause loss of crucial data gathered in the application such as,

  • Multistep webform
  • Shopping cart

When data is lost after completing processes with multiple steps or creating a shopping list, it results in unnecessary time consumption.  So, in Blazor, the data is stored in the local cache and state persists even when the circuit gets disconnected.

Persisting the State/State Management:

The three locations for persisting state in a Blazor application are as follows,

  • Server-side (Database)
  • Client-side (Browser)
  • URL

Server-side (Database):

To store data/state permanently or any data that spans multiple users or devices, the server-side database should be used.

Client-side (Browser):

Most suited when the user is actively creating transient data, that can be stored in the browsers,  localStorage and sessionStorage.

URL:

This is best suited when the data/state needs to persist when navigating from one page of the application to another.

For more information on state management, refer here.

View Sample in GitHub

Permalink

Blazor WebAssembly is a client-side web development framework that allows you to build interactive web applications using C# and .NET. It enables you to write code in C# that runs directly in the browser using WebAssembly, providing a rich and interactive user experience. 

Blazor WebAssembly offers a component-based architecture, enabling you to build reusable UI components, handle user interactions, perform data binding, and communicate with APIs and services.

Permalink

To debug a client-side Blazor app in a browser:

  1. Close the all instances in Chrome.
  2. Run the Blazor app in Chrome (version 70 or later).
  3. Open Win + R and run following command.
"%programfiles(x86)%\Google\Chrome\Application\chrome.exe"   --remote-debugging-port=9222 http://localhost:52902/
  • Now the Blazor app is running.
  • Then hit Shift+Alt+D on Windows or Linux and Shift+Cmd+D on macOS.

Reference link:

https://docs.microsoft.com/en-us/aspnet/core/blazor/debug?view=aspnetcore-3.1

https://www.hanselman.com/blog/CompilingCToWASMWithMonoAndBlazorThenDebuggingNETSourceWithRemoteDebuggingInChromeDevTools.aspx

Permalink
  • Client-side Blazor makes use of WebAssembly, which is used to run high-level languages on browsers.
  • Necessary .NET WebAssembly-related code and its dependencies are downloaded to the browser, and the app is executed directly on the browser UI thread.
  • All UI updates and event handling occur within the same process.

Permalink

You have to use JS Interop to create a cookie in Blazor.

[Razor Page]

@page "/" 

@inject IJSRuntime JSRuntime 
<p>Here created cookies</p> 
<button onclick="@(() => CreateCookie("myCookie", "myValue", 7))">Create Cookie</button> 

@code { 

    private async void CreateCookie ( string name, string value, int days ) 
    { 
        var test = await JSRuntime.InvokeAsync<string>("methods.CreateCookie", name, value, days); 
    } 
} 

[index.html]

<body> 
    …. 
    <script > 
        window.methods = { 
            CreateCookie: function (name, value, days) { 
                var expires; 
                if (days) { 
                    var date = new Date(); 
                    date.setTime(date.getTime() + (days * 24 * 60 * 60 * 1000)); 
                    expires = "; expires=" + date.toGMTString(); 
                } 
                else { 
                    expires = ""; 
                } 
                document.cookie = name + "=" + value + expires + "; path=/"; 
            } 
        } 
    </script> 
</body> 

View Sample in GitHub

Permalink

You  have to update the virtual app path or app base path in index.html to resolve this issue.

That is, the hosted application expects the assets from root folder of the web server. So, you have to update the subfolder name in index.html to serve the files from the path.

For example, if I am hosting the application in http://example.com/blazor/, the index.html looks like the following.

<base href="/blazor/" />   

For more information, refer to the link for updating app-base-path.

Permalink

To check if a browser supports WebAssembly, you can use the following code snippet in JavaScript: 

<script> 
        if (typeof WebAssembly !== 'undefined') { 
        // WebAssembly is supported 
        console.log(' WebAssembly is supported') 
        } else { 
        // WebAssembly is not supported 
        console.log('WebAssembly is not supported') 
        } 
</script> 
Permalink

Share with

Couldn't find the FAQs you're looking for?

Please submit your question and answer.