Heroku is a cloud platform as a service that enables you to deploy, build, and run applications in the cloud. Following are the steps to deploy a Blazor WebAssembly application to Heroku.
- Prerequisites:
- Blazor WebAssembly app in your GitHub
- Heroku account
-
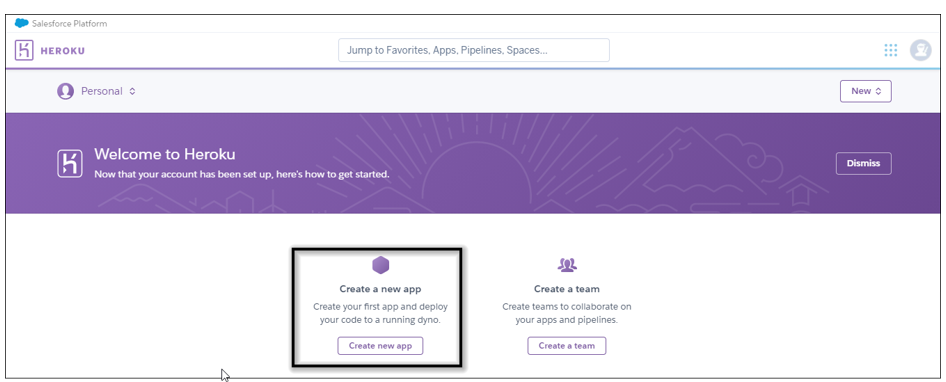
Go to the Heroku dashboard and create a new app.
-
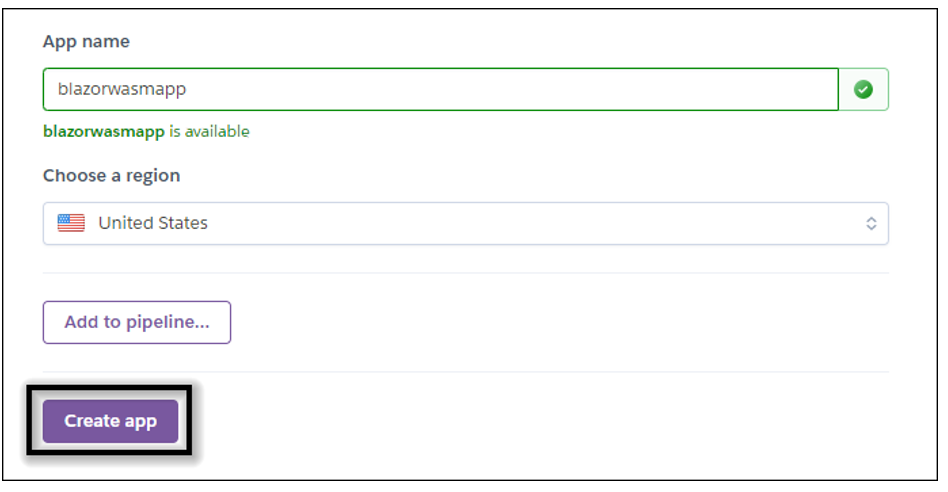
Provide the app name and create an app.
-
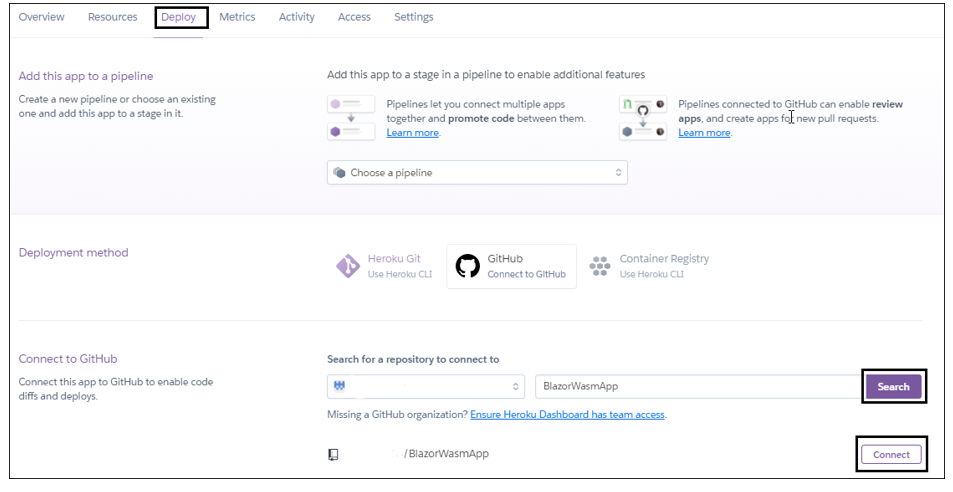
Now the new app is created. Next connect your GitHub Blazor WebAssembly app repository to Heroku for deployment.
-
By default, Heroku does not support .NET apps for deployment. So, we add third-party build packs to enable the .NET app deployment support. Go to the settings tab and click Add buildpack.

-
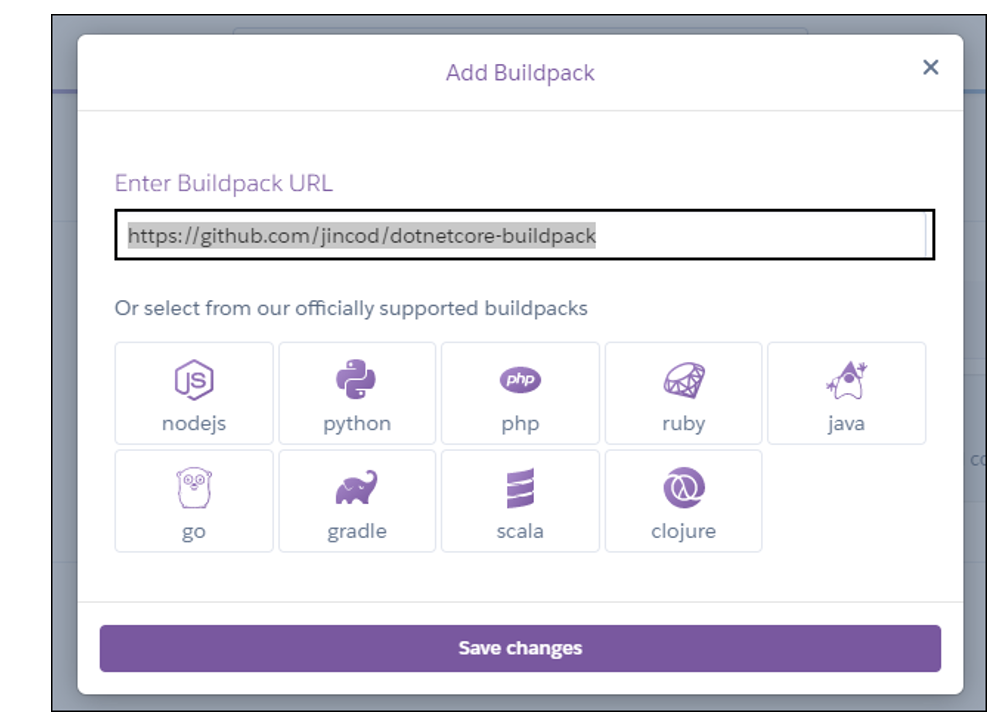
Now the dialog box will open. Copy the link below, paste it into the Buildpack URL section, and save your changes.
-
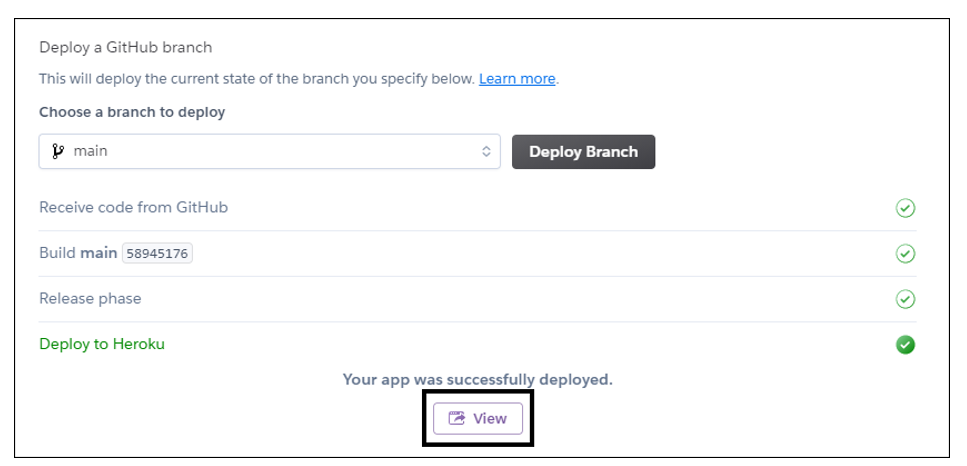
The build pack has been added. Go to the Deploy tab and deploy the repository manually. The Blazor app starts building now.

-
Now the Blazor app is deployed. Click View to run the deployed application.
-
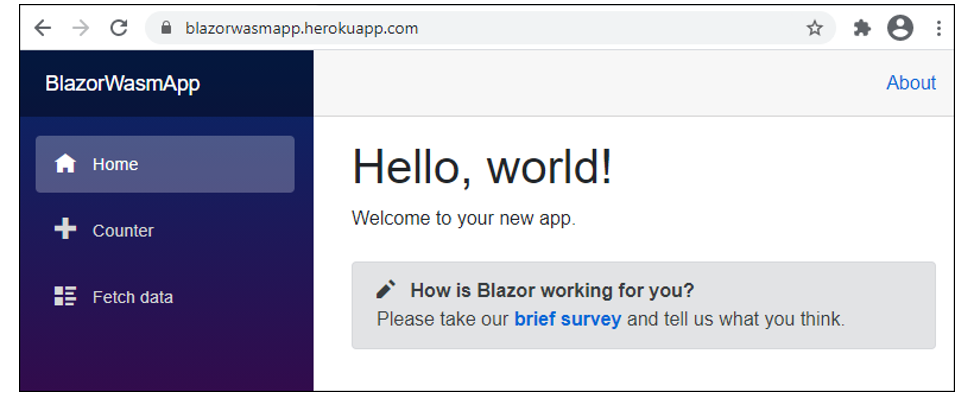
The deployed application opens in the default browser. See the following image for reference.


Share with