Follow the steps below to deploy a Blazor Server application to Azure app service.
- Create a Blazor Server application
To create a blazor Server Application using the following steps
-
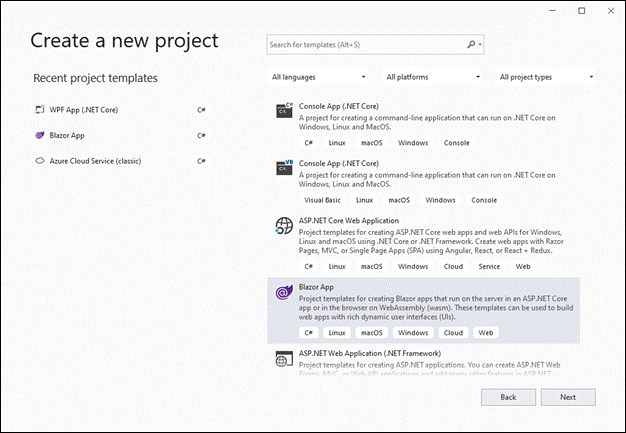
Open Visual Studio 2019 and create a new project.
-
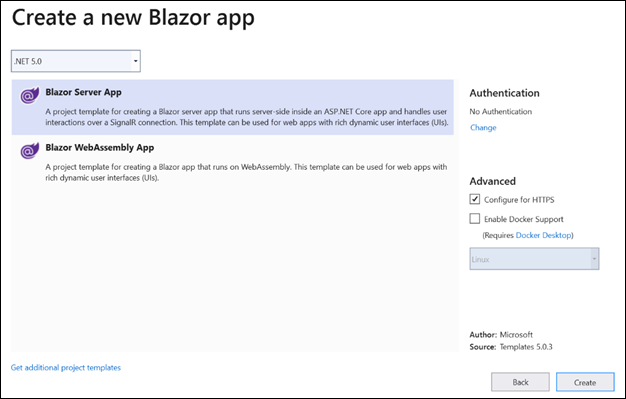
Once Blazor App is selected, click Next button to configure the project name and location.
-
Save the application, and then click Create.
-
Select Blazor Server App and click Create to complete the application creation.
- Deploying to Azure app service
To Deploying the Azure App Service using the following steps.
-
If you don’t have a login for Azure, sign up to access the Azure portal.
-
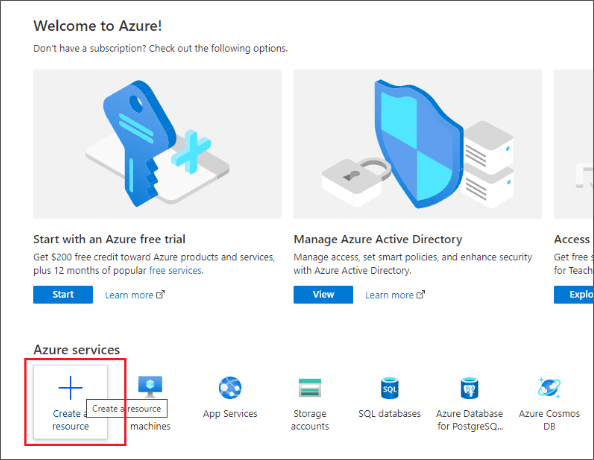
Click Create a resource in Azure to create a resource group.
-
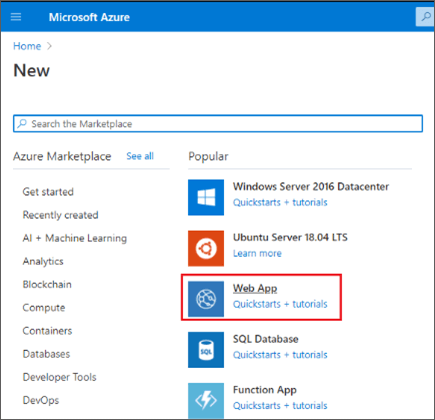
Select the Web App Azure application service.
-
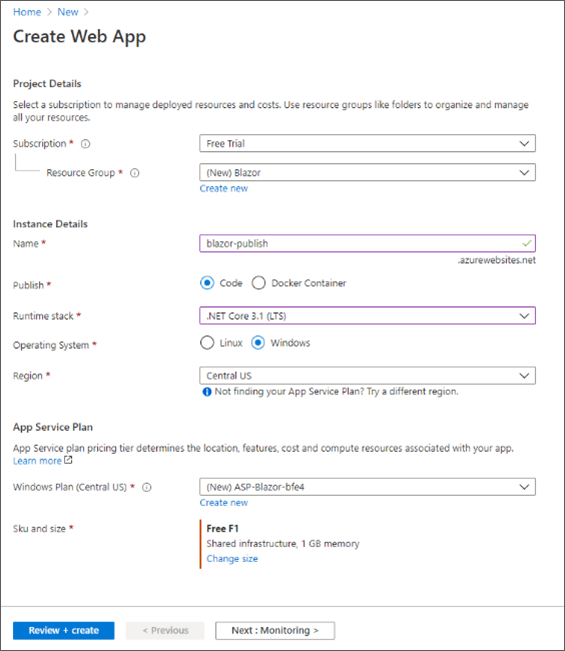
Once Web App is selected, select the following options:
-
Select Free Trial as the subscription.
-
Create a resource group name, such as “Blazor.”
-
Update the Instance Details:
-
Name: blazor-publish. The application hosted will be available in this URL: blazor-publish.azurewebsites.net.
-
Select the Code radio button for Publish.
-
Choose the .NET Core 3.1 LTS runtime stack and Windows operating system.
-
Select the region in which to publish the app. Central US was chosen for this demo.
-
The app service plan with the Free F1 option will be selected by default, but this can be modified.
-
Once this is done, click Review + create.
-
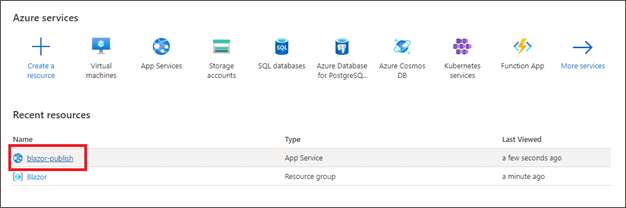
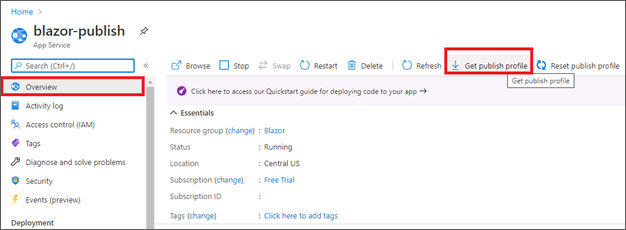
After configuring the Web App Service, get the publish profile for the Web App Service to host the Blazor Server application. Select the created web app service (blazor-publish).
-
Navigate to the overview section and click Get publish profile, and the save the profile locally.
- Publish a Blazor Server application in Azure
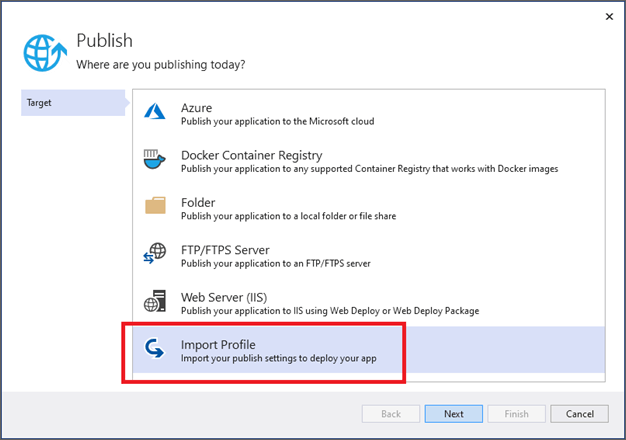
- Using import-profile option
To using import-profile option using the following steps.
-
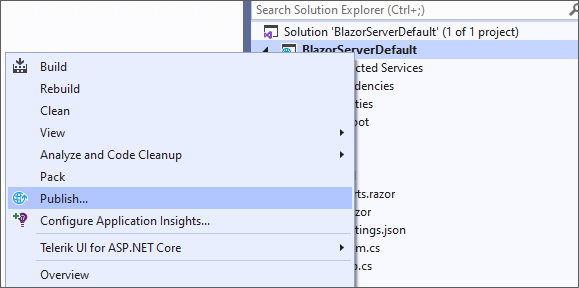
Right-click the project and click Publish in the context menu.
-
Choose Import Profile and click Next button. Then, locate the downloaded publish profile for the web app service.
-
Finally, publish the application by clicking Publish. The application will be deployed and will be available in the URL https://blazor-publish.azurewebsites.net/.

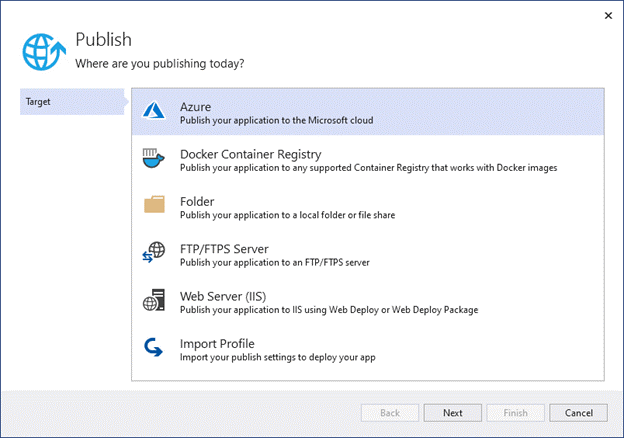
- Using Azure account login
To using Azure account login using the following steps.
-
In Visual Studio 2019, right-click on the project and click Publish in the context menu.

-
Select Azure as the target.
-
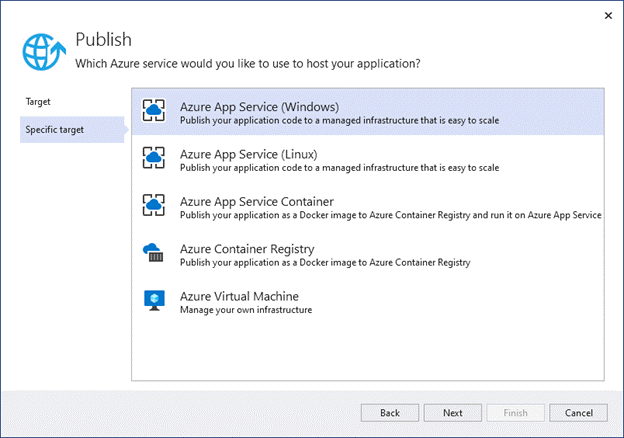
Select Azure App Service (Windows) as the specific target.
-
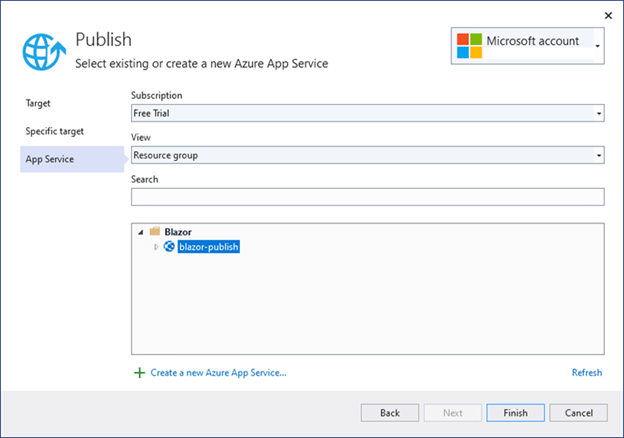
You need to log in to your Azure account and choose the web app service.
-
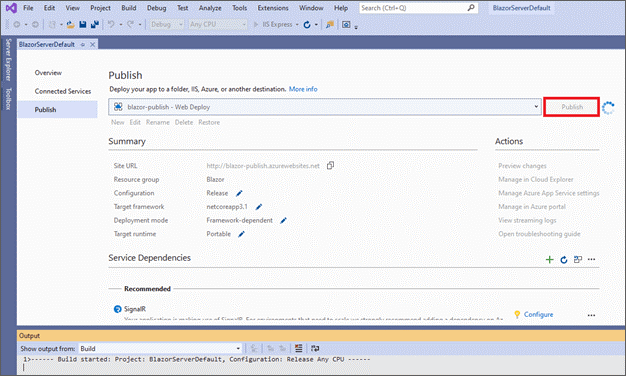
Now click publish to deploy the application.
-
Now, the application will be deployed and will be available in the following URL. https://blazor-publish.azurewebsites.net/
Refer to “Publish an ASP.NET Core app to Azure with Visual Studio” for more details.


Share with