
We are excited to share that the Syncfusion WinForms Item Template support for Visual Studio is now available in our Essential Studio® 2015 Volume 1 release.
The WinForms Item Templates are designed to simplify the integration of its controls. These templates let developers effortlessly incorporate essential designer files and assemblies for a chosen Syncfusion control directly through the user interface.
In this blog, we’ll guide you through the process of installing the Syncfusion WinForms extensions and incorporating Syncfusion WinForms controls into your app using the newly introduced item template support.
Install the Syncfusion WinForms extensions
To enable the WinForms item templates, we first need to install the Syncfusion WinForms extensions in Visual Studio. This process can be completed either directly within Visual Studio or through the Visual Studio Marketplace.
Install extensions using Visual Studio manage extensions dialog box
Follow these steps for installation:
- First, launch Visual Studio.
- Navigate to Extensions -> Manage Extensions.
Note: For Visual Studio 2017 or older versions, navigate to Tools -> Extensions and Updates.
- On the left panel, switch to the online tab and search for Syncfusion WinForms in the search box.
- Then, choose WinForms Extensions – Syncfusion from the search results and click Download.
- Close all instances of Visual Studio and initiate the installation by clicking Modify in the VSIX installer.
Install extension using Visual Studio Marketplace
- Obtain the Syncfusion WinForms Extensions directly from the Visual Studio Marketplace.
- If any instances of Visual Studio are running, close them.
- Double-click the downloaded extension to open the VSIX Installer window, then click Install.
Using the Syncfusion WinForms Item Template
1. Incorporate item templates
There are two ways to incorporate Syncfusion WinForms item templates into your app.
Option 1
Right-click on your WinForms app in the Solution Explorer window. Choose Add Syncfusion Item from the menu.
Refer to the following image.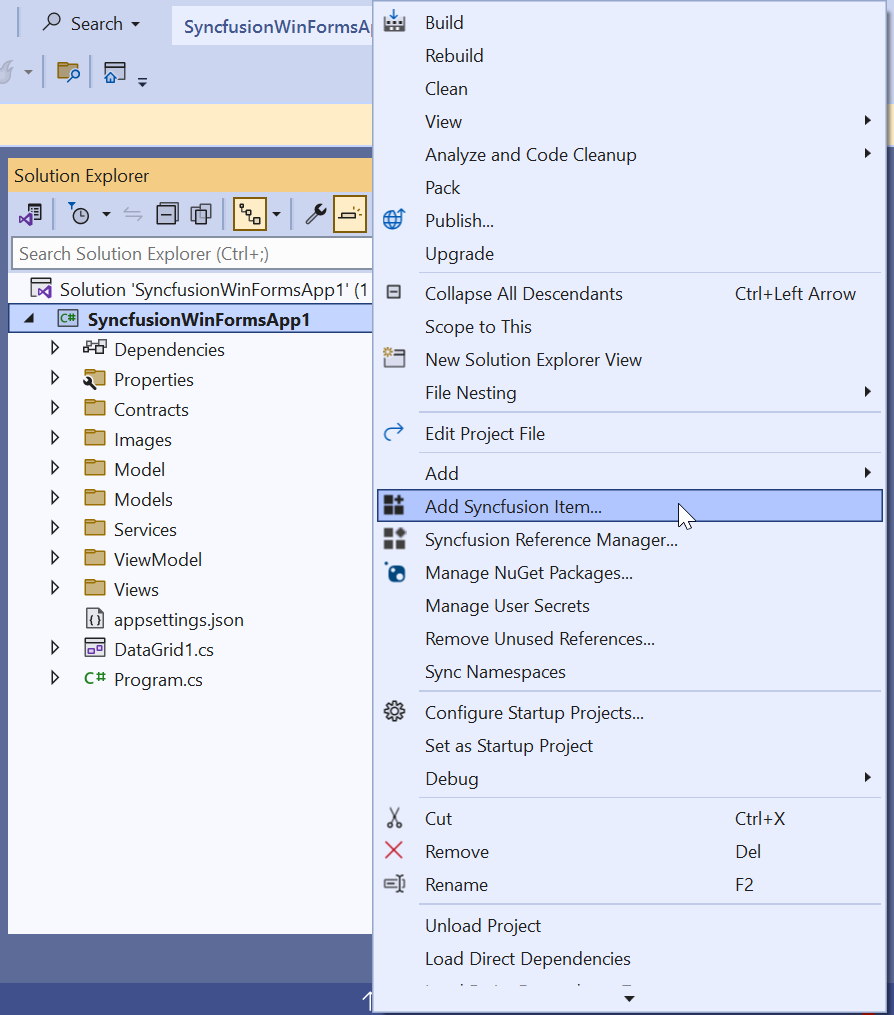
Option 2
Navigate to Extensions -> Syncfusion and then select Essential Studio® for WinForms -> Add Syncfusion Item.
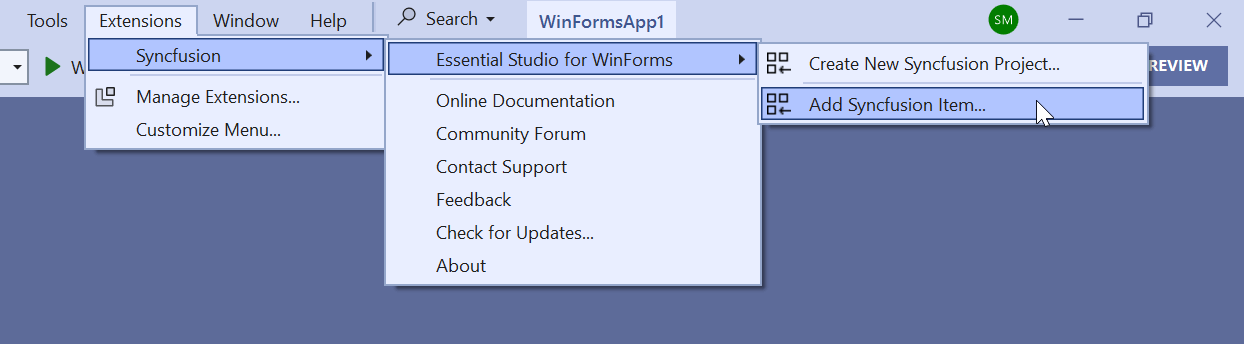
Note: In Visual Studio 2017 or earlier versions, you will find the Syncfusion menu directly within the Visual Studio menu.
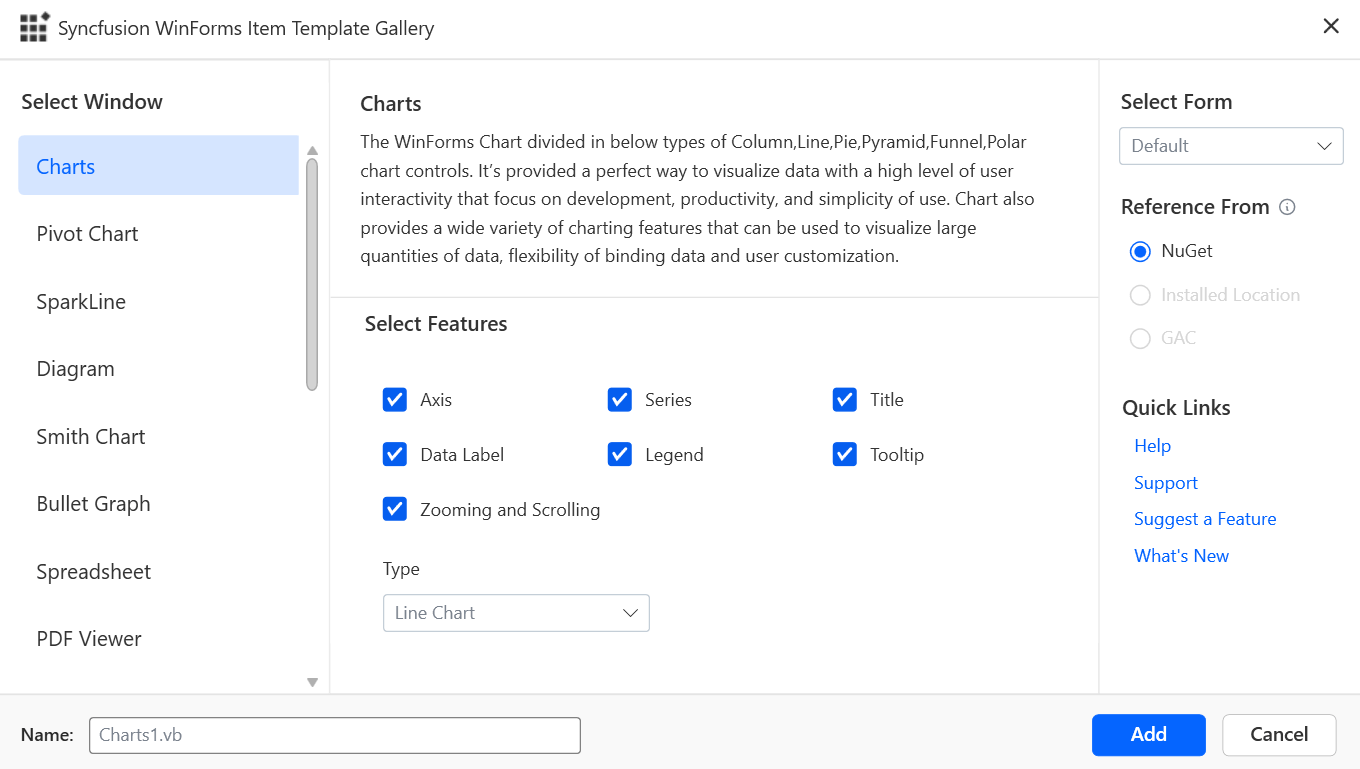
Now, the Syncfusion WinForms Item Template Gallery window will open.
Refer to the following image.
 Using the Syncfusion WinForms Item Template, we can add three types of forms. Please refer to the following table for details on how to add each type.
S.No | Form type | Control | Form details |
1 | Select a Default form. | Select any control | The Default form will be added to your app alongside the DataGrid control’s code snippet and features. |
2 | Select any form except Default. | Select a Blank control | The default Ribbon form will be added to your app. |
3 | Select any form except Default. | Select any control | The Ribbon form will be added to your app alongside the DataGrid control’s code snippet and features. |
2. Add Syncfusion WinForms form to your app
Select any option from the Select Form section to add the required form to your WinForms app.
Refer to the following image.
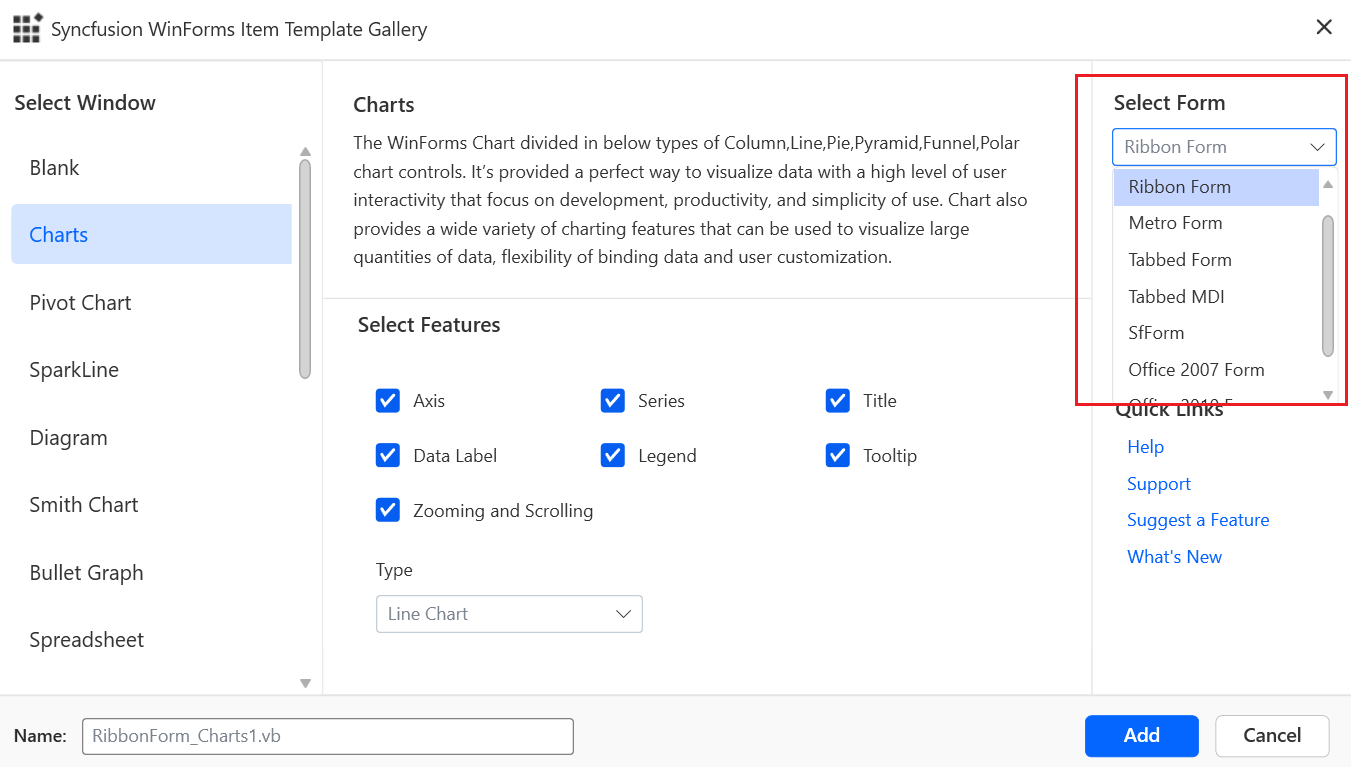
3. Add Syncfusion WinForms control to your app
Select your desired Syncfusion WinForms control from the Selection Window section to integrate it into your WinForms app.
4. Configure control’s features
Choose the required features of the selected control from the Select Features section. These features will be incorporated as code snippets in the integrating designer files within your WinForms app.
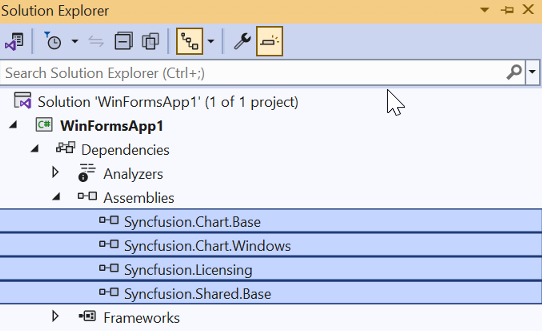
5. Configure assembly references
Select an assembly reference option (GAC location, Essential Studio® installed location, or NuGet packages) to specify where the necessary Syncfusion assemblies are added to the project.
Note: If the Syncfusion Essential WinForms build is installed, the installed location and GAC options will be enabled. Without installing the Syncfusion Essential WinForms setup, you can utilize only the NuGet option. The GAC option will not be available in a .NET Core app using Syncfusion WinForms components. The Version dropdown lists the installed WinForms versions.
5. Provide control name
Now, assign a name for the selected control.
6. Finalize control integration
Click the Add button to prompt the opening of the Adding Files and Assemblies window. In it, you can review the details of the assemblies and files being added to your WinForms app.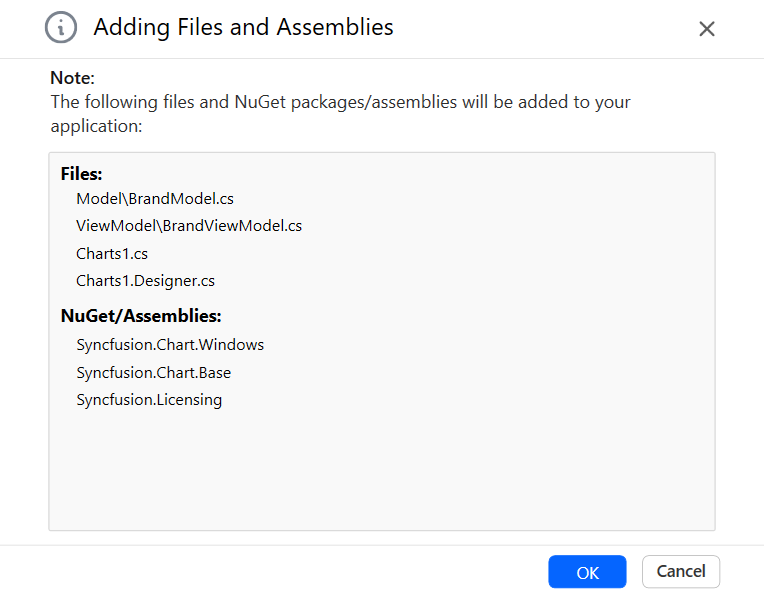
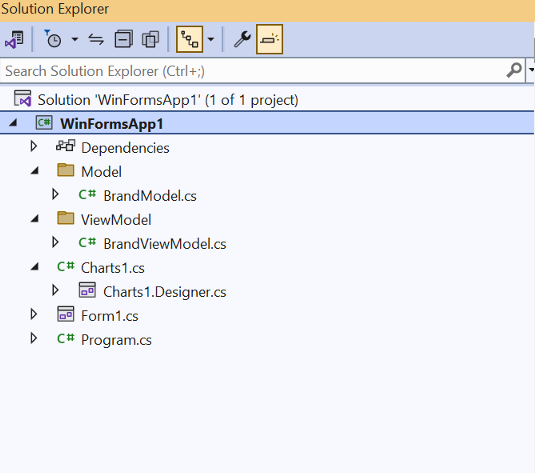
8. Confirmation
Then, choose OK to complete the process and add the selected Syncfusion WinForms control into your WinForms app, along with the required Syncfusion assemblies.
Refer to the following image.
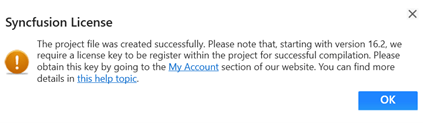
8. Licensing registration
Following integration, a Syncfusion license registration message box will appear if you installed the trial setup or NuGet packages. Choose the Claim license button in the licensing message box to generate and register the Syncfusion license key to your project.
How to run the app with the Syncfusion WinForms control
Follow these steps to run the app:
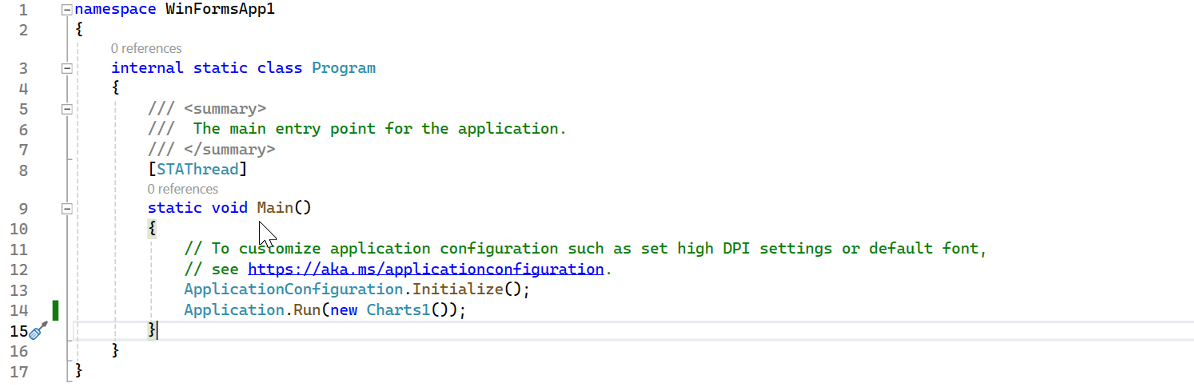
- First, open the Program.cs file in your WinForms app.
- Locate the method called Application.Run(new Form());.
- Change the control name in the parentheses to the desired Syncfusion WinForms control. For example, if the control name is Charts1, modify the method call to Application.Run(new Charts1()).
Refer to the following image.
- Then, save the changes.
- Finally, run the app. The added Syncfusion WinForms control will open in your app.
Conclusion
Thanks for reading! In this blog, we explored the Syncfusion WinForms Visual Studio Item Template support and its usage. For a more comprehensive understanding, please refer to our documentation on Adding Syncfusion components to WinForms apps documentation.
We encourage you to apply the steps discussed above and share your experiences in the comments section.
If you’re not yet a Syncfusion customer, consider starting a 30-day free trial to explore our features. We also invite you to test our demos on GitHub.
For any queries or feedback, feel free to reach out to us through our support forums, support portal, or feedback portal. We’re always ready to assist you!
 No spam, just valuable updates.