Google authentication is a process by which the user can use their Google accounts to get authorized to access particular data. Follow this procedure to implement Google authentication.
- Prerequisites
- Visual Studio latest version
- .NET Core SDK latest version.
-
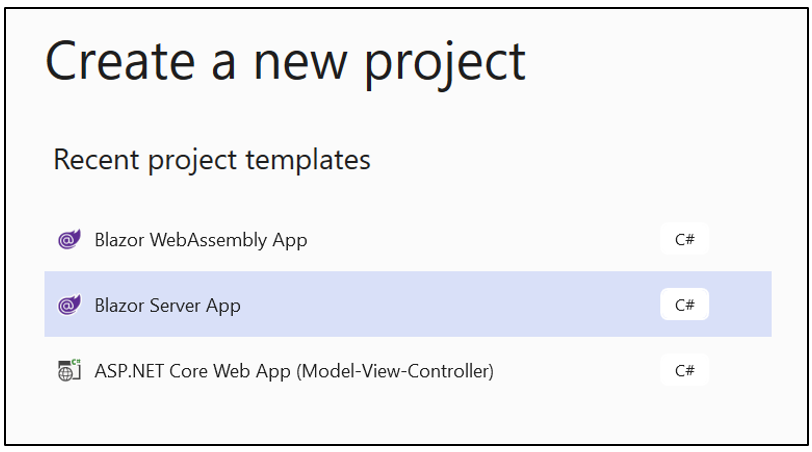
Create a Blazor Server app with the latest .NET support.
-
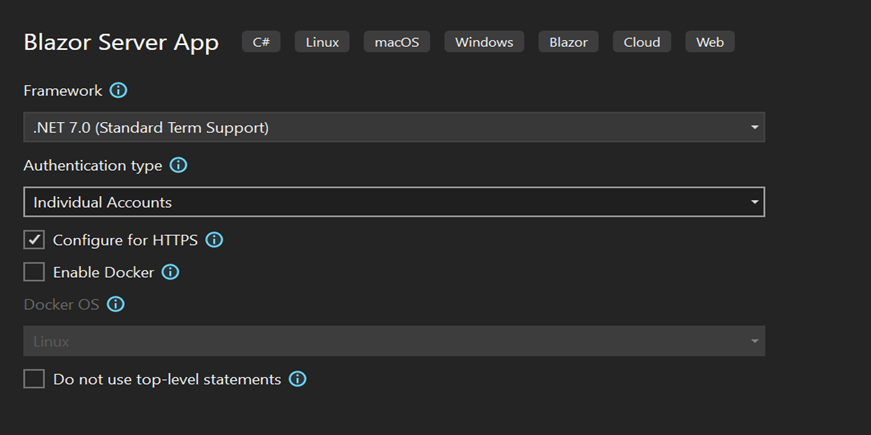
Set the Authentication Type as Individual Accounts and then click Create.
-
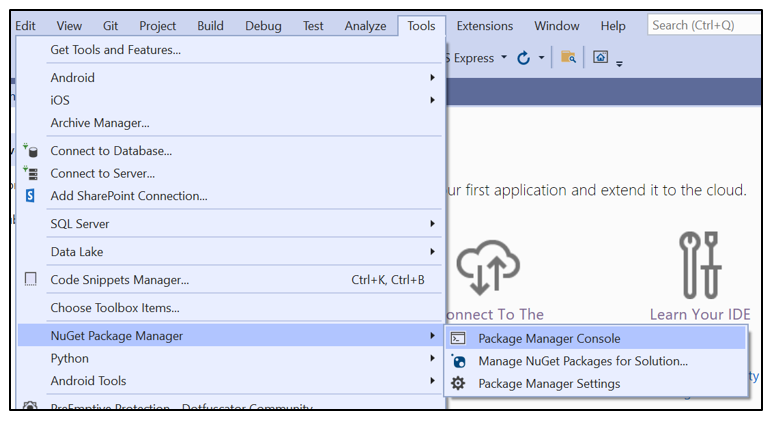
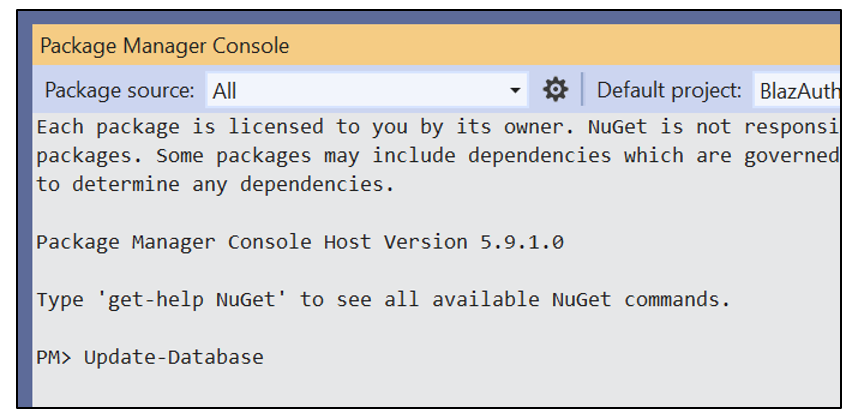
Go to Tools > NuGet Package Manager > Package Manager Console. Before running the app, we have to perform migration by running the following command in the Package Manager Console.
-
To create a Google API Console project, follow these steps.
-
Go to https://developers.google.com/identity/sign-in/web/sign-in#before_you_begin.
-
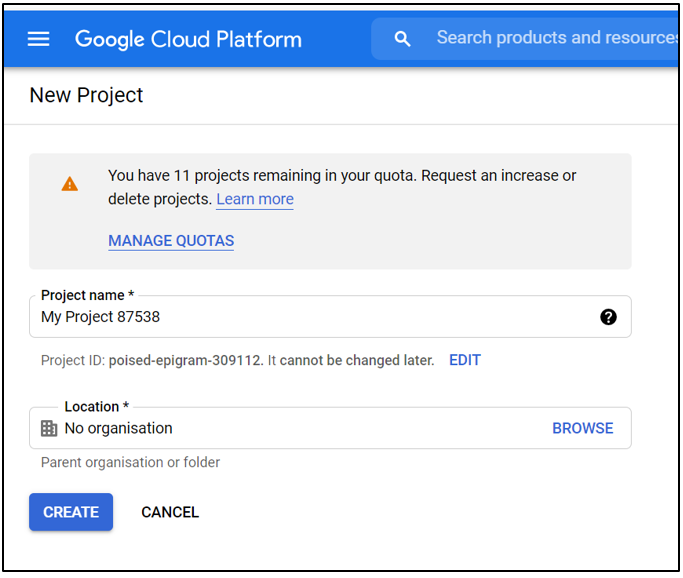
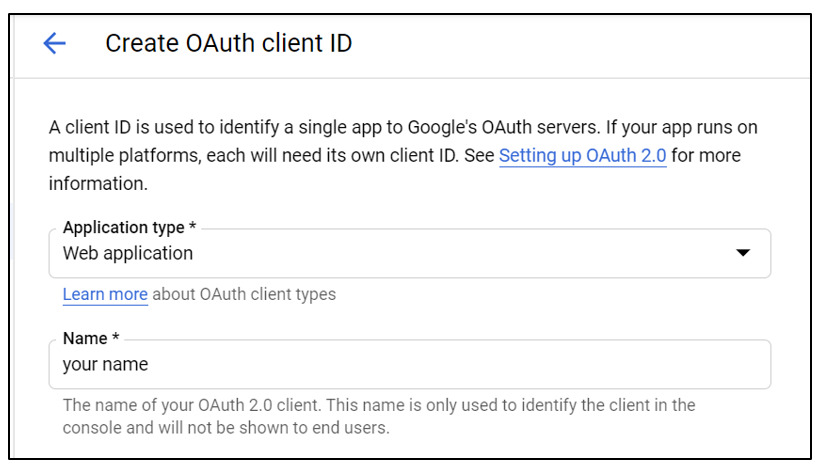
Click the Credentials page link under the topic “Create authorization credentials.” Sign in with your Google account and create a project by providing a project name.
Click Create Credentials and select OAuth client ID.

-
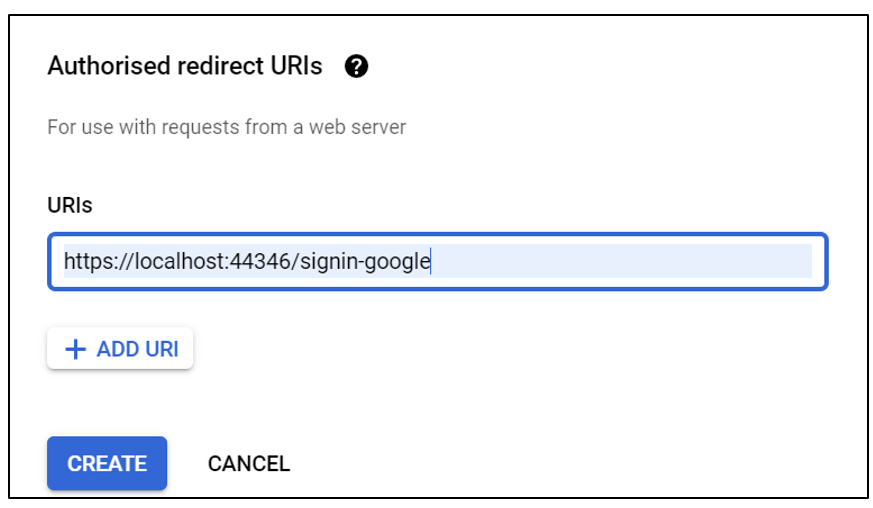
Select the Application type and type the name of the OAuth ID and the redirect URI (localhost URL given to enable SSL in your app) as shown.
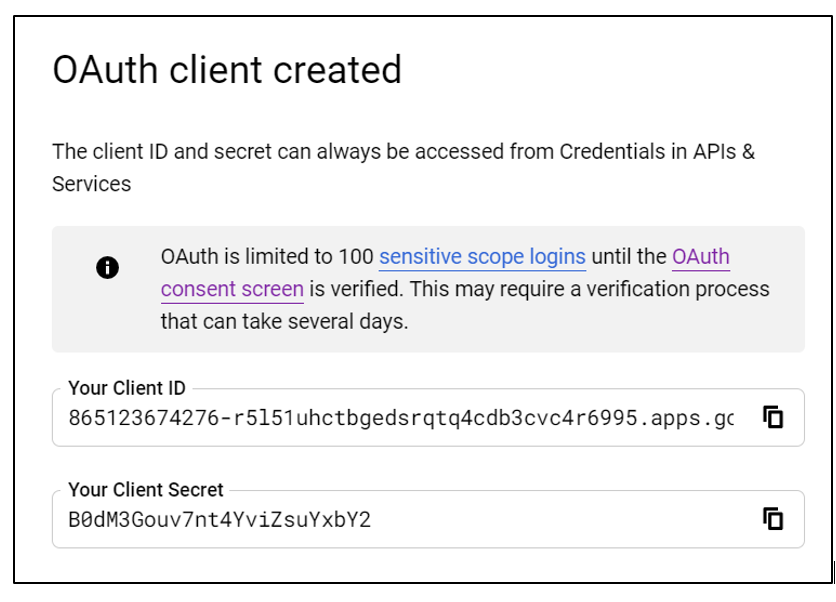
Click Create and note your client ID and client secret, which are important for Google authentication.
| Update-Database |
To configure a Google API Console project, check whether SSL is enabled by right-clicking the project name, selecting Properties, and selecting the Debug property. I need this URL for configuration.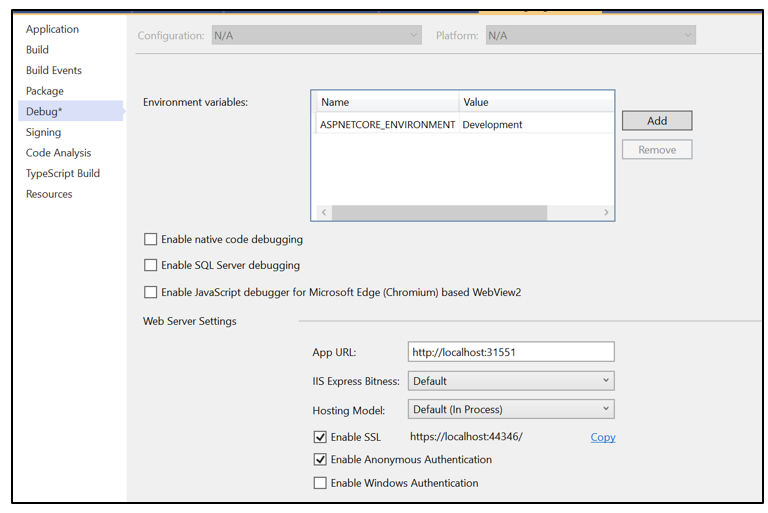
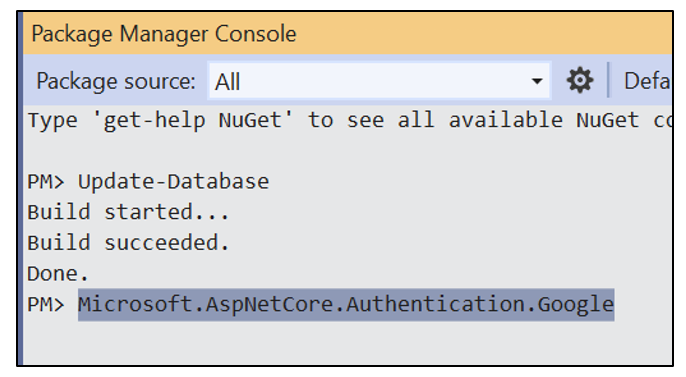
Install the Google Authentication middleware NuGet package by typing the following command in the Package Manager Console.
| NuGet\Install-Package Microsoft.AspNetCore.Authentication.Google -Version 7.0.9 |
Configure the Blazor app to use Google authentication. Right-click the project, select Manage User Secrets, and type the following code.
{  "Authentication:Google:ClientId": "your Google client ID",
   "Authentication:Google:ClientSecret": "your Google client secret"}
Open the Program.cs file and add the following code under the ConfigureServices method.
builder.Services.AddAuthentication().AddGoogle(googleOptions =>
{
	googleOptions.ClientId = "Authentication:Google:Your Google ClientId";
	googleOptions.ClientSecret ="Authentication:Google:Your Google ClientSecret here";
});
Note the following about this code:
The AddGoogle() method is used to configure the authentication process in our application.
- ClientID and ClientSecret will be read from the secrets.json file by the code.
Add Google authorization to the Blazor page.
Use the Authorize attribute by using the @ directive in a Blazor page to restrict unauthorized users.
 @page "/fetchdata"
 @attribute [Authorize]
@using Microsoft.AspNetCore.Authorization The following image shows the output after running the application.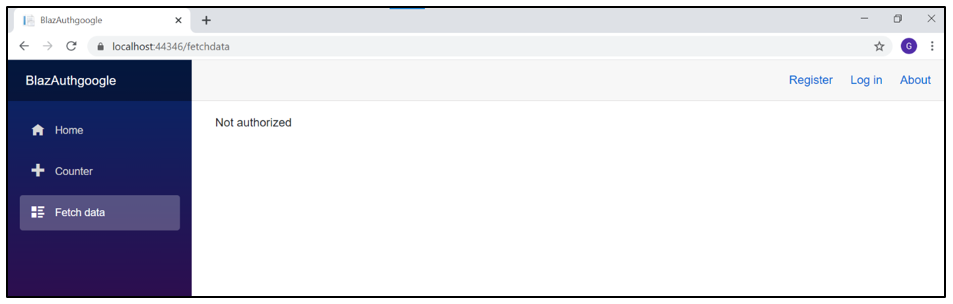
The following image shows the output after clicking Login to navigate to the authorization page.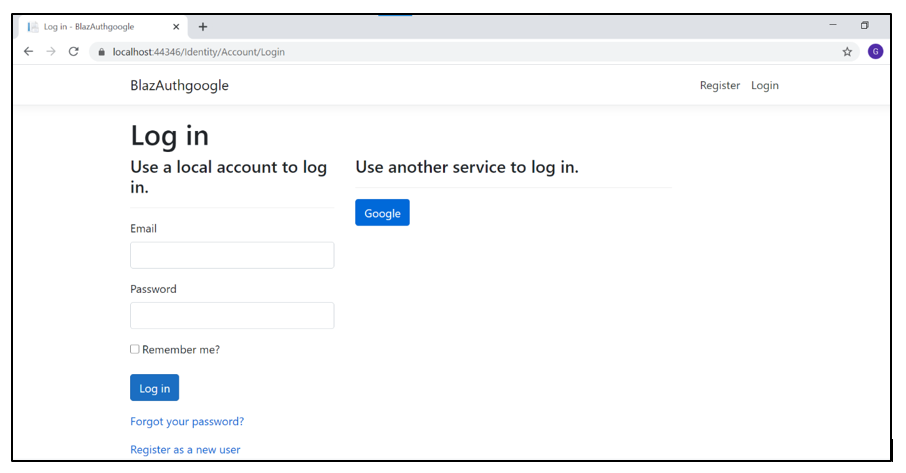
The following image shows the output after the user is authorized using their Google account.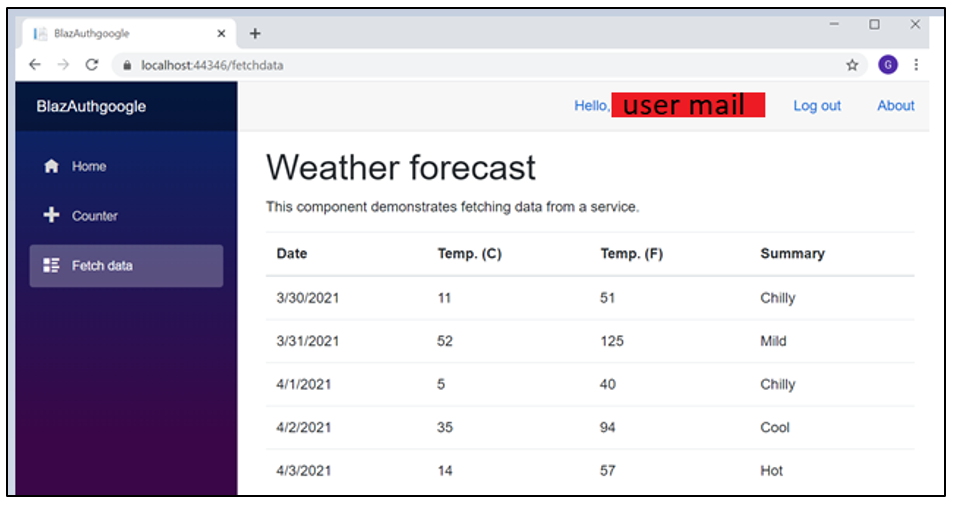


Share with