
TL;DR: Learn to set up and configure a .NET MAUI Blazor project, integrate Syncfusion Blazor Form Components, and implement form submission with validation. This will enable you to design tailored forms for your application’s specific requirements. Dive into the step-by-step guide to streamline form creation and enhance user experience in your Blazor hybrid apps.
Blazor, a robust framework for building web applications with .NET and C#, empowers developers to create custom forms with seamless client-side validation. With the advent of .NET MAUI (Multi-platform App UI), Blazor Hybrid apps have become even more versatile, supporting cross-platform mobile, desktop, and web applications.
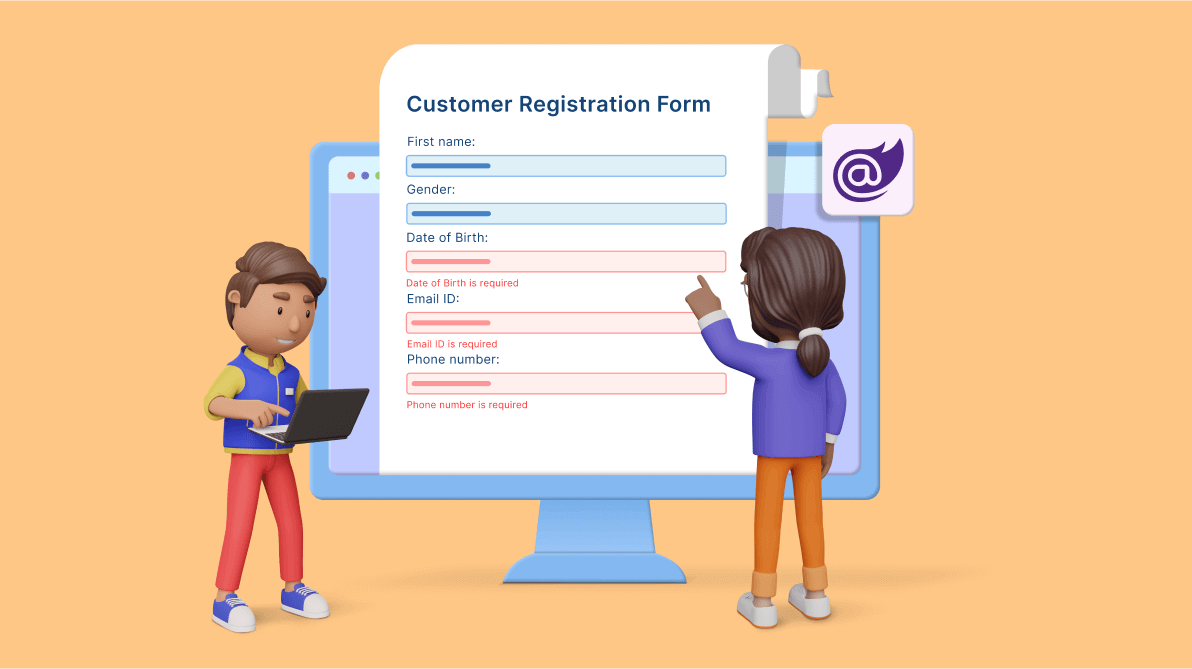
In this blog post, we will explore how to create custom forms with validation using Syncfusion Blazor Data Form Components in a .NET MAUI Blazor hybrid app. We’ll build robust and user-friendly forms by leveraging Blazor’s powerful feature and Syncfusion’s rich UI components.
Prerequisites
Before creating custom forms and validation in the .NET MAUI Blazor hybrid app, ensure you have the following prerequisites:
- Set up your development environment with the latest .NET framework.
- Install the necessary tools for .NET MAUI Blazor hybrid app development.
- Ensure you installed the .NET MAUI SDK.
- Add the necessary templates and extensions for Visual Studio or your preferred IDE.
Once you have the prerequisites, you can create custom forms and implement validation in your .NET MAUI Blazor hybrid app.
Setting up the Blazor Hybrid App
Before creating custom forms and validation, let’s set up the .NET MAUI Blazor hybrid app.
Follow the steps below:
- Launch Visual Studio and click Create a new project.
- Choose the .Net MAUI Blazor hybrid app project template and select next.
- Configure your .Net MAUI Blazor hybrid app and assign an appropriate name to your project.
- Select the desired target framework from the available list of frameworks.
- Click the Create button to generate the project structure.
After the project is created, you can install Syncfusion Form component packages and add dependent script and theme files to the app.
Setting up the Form Components
Include necessary dependencies and references for Syncfusion Blazor components in your new Blazor Hybrid app. We’ll build custom forms using Syncfusion Blazor Form Components like TextBox, ComboBox, DatePicker, and Button.
Follow the steps below:
Step 1: Install Syncfusion Blazor Packages and Thems NuGet
Open the NuGet package manager in Visual Studio (Tools → NuGet Package Manager → Manage NuGet Packages for Solution), search and install the following NuGet packages using the documentation.
- Syncfusion.Blazor.Buttons
- Syncfusion.Blazor.Calendars
- Syncfusion.Blazor.DropDowns
- Syncfusion.Blazor.Inputs
- Syncfusion.Blazor.Themes
Step 2: Register Blazor Service
Open the ~/_Imports.razor file and import the following namespaces.
@using Syncfusion.Blazor.Buttons
@using Syncfusion.Blazor.Inputs
@using Syncfusion.Blazor.Calendars
@using Syncfusion.Blazor.DropDowns
Now, register the Syncfusion Blazor service in the MauiPrograms.cs file of your MAUI Blazor App.
using Syncfusion.Blazor;
    ....
    builder.Services.AddSyncfusionBlazor();
    ....
Step 3: Add stylesheet and script resources
The theme stylesheet and script can be accessed from NuGet through Static Web Assets. They are referenced in the <head> of the ~wwwroot/index.html file.
<head>
    ....
 <link href="_content/Syncfusion.Blazor.Themes/bootstrap5.css" rel="stylesheet" />
 <script src="_content/Syncfusion.Blazor.Core/scripts/syncfusion-blazor.min.js" type="text/javascript"></script>
</head>
We can implement our custom form and validation once the project is set up with Syncfusion Blazor components.
Creating the Custom Form
To create a custom form in Blazor, follow these steps:
Step 1: Create a New Blazor Component
In your project, locate the Pages folder and create a new Blazor component for your form. For example, create a file called CustomForm.razor.
Step 2: Define the Form
Open the CustomForm.razor file and define the form using the EditForm component provided by Blazor.
Step 3: Add Form Fields
Inside the Edit Form component, define the form fields using various Syncfusion Blazor form components such as TextBox, DatePicker, and ComboBox.
These components provide rich user interface elements for input fields, dropdowns, date selection, and multiline text inputs.
Refer to the following example.
@using System.ComponentModel.DataAnnotations;
<EditForm Model="@_customerDetails" OnValidSubmit="@HandleValidSubmit">
 <DataAnnotationsValidator />
 <!-- Form fields go here -->
</EditForm>
@code {
    private Customer _customerDetails;
    private List<Gender> Genders;
    // Handle form submission
    private void HandleValidSubmit()
    {
        //process the valid form
    }
    protected override void OnInitialized()
    {
        _customerDetails = new Customer();
        Genders = new Gender().GetGender();
    }
    // Data model class
    public class Customer
    {
        // Properties with validation attributes
     }
    // ComboBox options class
    public class Gender
    {
        // Properties for gender options
        // Method to get gender options
    }
}
The above code example defines the following:
- The form is defined using the EditForm component, with the Model property bound to the _customerDetails object, representing the form’s data model.
- The OnValidSubmit event is wired to the HandleValidSubmit method, which will be invoked when the form is submitted successfully.
- Inside the EditForm component, include the DataAnnotationsValidator component to perform validation based on the data annotations applied to the properties in the data model. Adding Form Fields
Now that the form setup is complete, we can add the form fields using Syncfusion Blazor Form Components. Let’s dive into some examples to see how easily you can add various fields to your form.
Text Input Fields
For text input fields, the TextBox component is used. To add a First Name field, you can use the following code.
<div class="col-md-6">
 <label class="form-label">First Name :</label>
 <SfTextBox  @bind-Value="@_customerDetails.FirstName"></SfTextBox>
 <ValidationMessage For="@(() => _customerDetails.FirstName)"></ValidationMessage>
</div>
In the above code, the Value property of the TextBox component is bound to the _customerDetails.FirstName property in the data model and the ValidationMessage component ensures that any validation errors for this field are displayed.
Dropdown Select Fields
We can use the ComboBox component to create dropdown select fields. To add a Gender field, you can use the following code.
<div class="col-md-6">
 <label class="form-label">Gender :</label>
 <SfComboBox TValue="string" TItem="Gender" @bind-Value="@_customerDetails.Gender" DataSource="@_genders">
  <ComboBoxFieldSettings Text="Name" Value="Code"></ComboBoxFieldSettings>
 </SfComboBox>
 <ValidationMessage For="@(() => _customerDetails.Gender)"></ValidationMessage>
</div>
The @bind-Value property is bound to the _customerDetails.Gender property, which represents the selected value. The DataSource property is bound to the list of gender options (Genders), with the Text and Value properties of the ComboBoxFieldSettings defining how the options are displayed and mapped to the data model.
Date Picker Fields
The SfDatePicker component can be used to add date picker fields. For instance, we can use the following code to add a Date of Birth field.
<div class="col-md-6">
 <label class="form-label">Date of Birth :</label>
 <SfDatePicker @bind-Value="@_customerDetails.DateOfBirth"></SfDatePicker>
 <ValidationMessage For="@(() => _customerDetails.DateOfBirth)"></ValidationMessage>
</div>
In the above code, the @bind-Value property is bound to the _customerDetails.DateOfBirth property, which represents the selected date. The ValidationMessage displays validation error messages for the field.
Adding More Fields
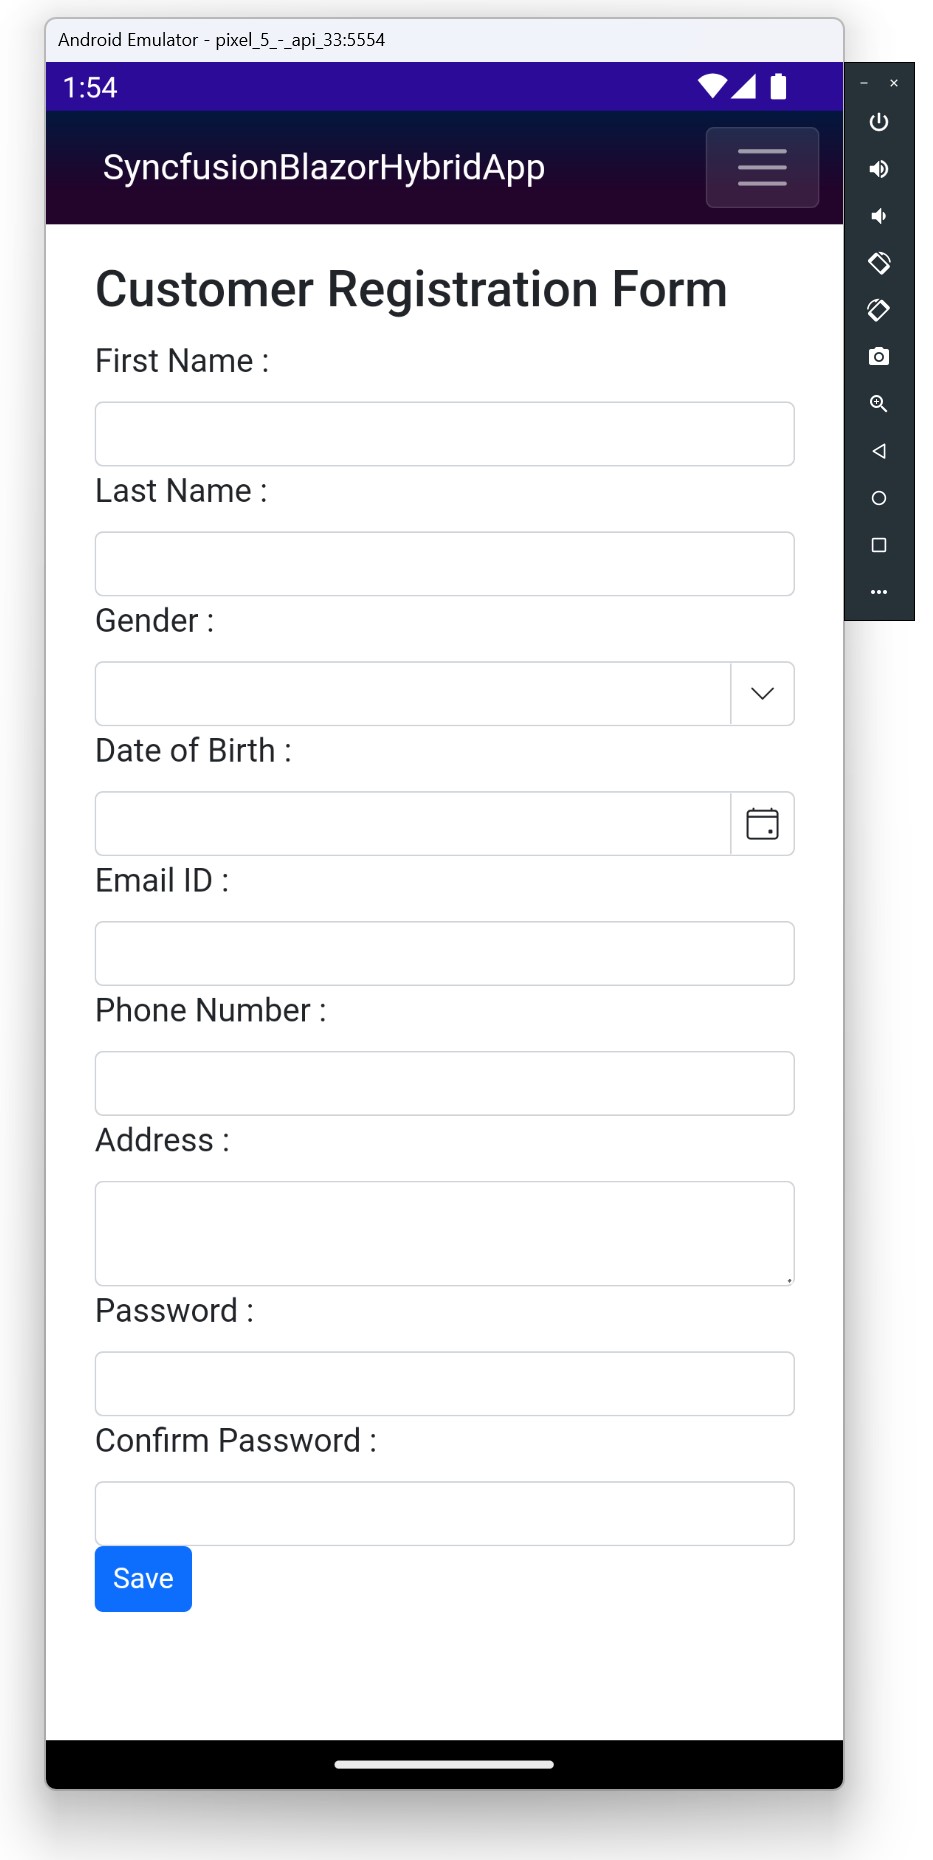
Ready to take your form to the next level? The versatile Syncfusion Blazor form components allow you to easily add fields with confirmation, such as email, phone number, address, and password. Remember to apply the necessary validation attributes to your data model properties to ensure your form is robust and user-friendly.
The following code example demonstrates how you can seamlessly integrate these additional fields.
@using System.ComponentModel.DataAnnotations;
<h2>Customer Registration Form</h2>
<EditForm Model="@_customerDetails" OnValidSubmit="@HandleValidSubmit">
    <DataAnnotationsValidator />
    <div class="row">
        <div class="col-md-6">
            <label class="form-label">First Name :</label>
            <SfTextBox  @bind-Value="@_customerDetails.FirstName"></SfTextBox>
            <ValidationMessage For="@(() => _customerDetails.FirstName)"></ValidationMessage>
        </div>
        <div class="col-md-6">
            <label class="form-label">Last Name :</label>
            <SfTextBox  @bind-Value="@_customerDetails.LastName"></SfTextBox>
            <ValidationMessage For="@(() => _customerDetails.LastName)"></ValidationMessage>
        </div>
    </div>
    <div class="row">
        <div class="col-md-6">
            <label class="form-label">Gender :</label>
            <SfComboBox  TValue="string" TItem="Gender" @bind-Value="@_customerDetails.Gender" DataSource="@_genders">
                <ComboBoxFieldSettings Text="Name" Value="Code"></ComboBoxFieldSettings>
            </SfComboBox>
            <ValidationMessage For="@(() => _customerDetails.Gender)"></ValidationMessage>
        </div>
        <div class="col-md-6">
            <label class="form-label">Date of Birth :</label>
            <SfDatePicker  @bind-Value="@_customerDetails.DateOfBirth"></SfDatePicker>
            <ValidationMessage For="@(() => _customerDetails.DateOfBirth)"></ValidationMessage>
        </div>
    </div>
    <div class="row">
        <div class="col-md-9">
            <label class="form-label">Email ID :</label>
            <SfTextBox  @bind-Value="@_customerDetails.Email"></SfTextBox>
            <ValidationMessage For="@(() => _customerDetails.Email)"></ValidationMessage>
        </div>
        <div class="col-md-3">
            <label class="form-label">Phone Number :</label>
            <SfTextBox  @bind-Value="@_customerDetails.PhoneNumber"></SfTextBox>
            <ValidationMessage For="@(() => _customerDetails.PhoneNumber)"></ValidationMessage>
        </div>
    </div>
    <div class="row">
        <div class="col-md-12">
            <label class="form-label">Address :</label>
            <SfTextBox  Multiline=true @bind-Value="@_customerDetails.Address"></SfTextBox>
            <ValidationMessage For="@(() => _customerDetails.Address)"></ValidationMessage>
        </div>
    </div>
    <div class="row">
        <div class="col-md-6">
            <label class="form-label">Password :</label>
            <SfTextBox  @bind-Value="@_customerDetails.Password"></SfTextBox>
            <ValidationMessage For="@(() => _customerDetails.Password)"></ValidationMessage>
        </div>
        <div class="col-md-6">
            <label class="form-label">Confirm Password :</label>
            <SfTextBox  @bind-Value="@_customerDetails.ConfirmPassword"></SfTextBox>
            <ValidationMessage For="@(() => _customerDetails.ConfirmPassword)"></ValidationMessage>
        </div>
    </div>
    <div class="row">
        <div class="col-12">
            <SfButton Type="submit" IsPrimary=true>Save</SfButton>
        </div>
    </div>
</EditForm>
@code {
    private Customer _customerDetails;
    private List<Gender> _genders;
    // Handle form submission
    private void HandleValidSubmit()
    {
        //process the valid form
    }
    protected override void OnInitialized()
    {
        _customerDetails = new Customer();
        _genders = new Gender().GetGender();
    }
    // Data model class
    public class Customer
    {
        // Properties with validation attributes
        [Required(ErrorMessage = "First Name is required")]
        [StringLength(20, MinimumLength = 3, ErrorMessage = "First Name cannot have less than 3 characters and more than 20 characters in length")]
        public string FirstName { get; set; }
        [Required(ErrorMessage = "Last Name is required")]
        [StringLength(20, MinimumLength = 3, ErrorMessage = "Last Name cannot have less than 3 characters and more than 20 characters in length")]
        public string LastName { get; set; }
        [Required(ErrorMessage = "Date Of Birth is required")]
        [Range(typeof(DateTime), "1-1-1950", "12-31-2005", ErrorMessage = "Date of Birth must between 1-Jan-1950 and 31-Dec-2005")]
        public DateTime? DateOfBirth { get; set; }
        [Required(ErrorMessage = "Email is required")]
        [DataType(DataType.EmailAddress)]
        [EmailAddress]
        public string Email { get; set; }
        [Required(ErrorMessage = "Gender is required")]
        public string Gender { get; set; }
        [Required(ErrorMessage = "Phone number is required")]
        [DataType(DataType.PhoneNumber)]
        [Phone]
        public string PhoneNumber { get; set; }
        [Required(ErrorMessage = "Address is required")]
        [StringLength(100, ErrorMessage = "Address cannot have more than 100 characters in length")]
        public string Address { get; set; }
        [Required(ErrorMessage = "Password is required")]
        [StringLength(8, MinimumLength = 4, ErrorMessage = "Password must be between 4 and 8 characters")]
        public string Password { get; set; }
        [Required(ErrorMessage = "Confirm Password is required")]
        [Compare(nameof(Password), ErrorMessage = "Password and Confirm Password do not match")]
        public string ConfirmPassword { get; set; }
    }
    // Combobox options class
    public class Gender
    {
        // Properties for gender options
        public string Name { get; set; }
        public string Code { get; set; }
        // Method for gender options
        public List<Gender> GetGender()
        {
            List<Gender> genders = new List<Gender>
            {
                new Gender() { Name = "Male", Code = "M" },
                new Gender() { Name = "Female", Code = "F" },
                new Gender() { Name = "Other", Code = "O" },
            };
            return genders;
        }
    }
}
Step 4: Handling Form Submission
To handle form submission, you’ll wire up the OnValidSubmit event of the EditForm component to a method named HandleValidSubmit. Inside the method, you can perform the necessary logic to process the form data. For example, you can save the data to a database or invoke an API endpoint.
// Handle form submission
private void HandleValidSubmit()
{
    //process the valid form
}
In this example, the HandleValidSubmit method is invoked when the form is submitted successfully and ensures that all the validation rules are satisfied.
GitHub reference
You can also download the complete source code for Custom Forms and Validation in a Blazor Hybrid App example on GitHub.

Conclusion
In this blog post, we have thoroughly explored the process of creating custom forms with robust validation in a .NET MAUI Blazor hybrid application. By following the outlined steps, you can easily design tailor-made forms that perfectly suit the unique requirements of your application.
For existing customers, the latest version of Essential Studio®is now available on the License and Downloads page. If you’re not a Syncfusion customer, we encourage you to try our 30-day free trial to explore all our exciting features.
Our dedicated support team is always ready to help if you need assistance. Contact us through our support forum, support portal, or feedback portal. We look forward to assisting you!


 No spam, just valuable updates.