
We are glad to announce that the Syncfusion WPF item template support for Visual Studio is now available in our Essential Studio® 2021 Volume 1 release.
Syncfusion WPF item templates are designed to facilitate the seamless integration of Syncfusion WPF controls. With these, developers can effortlessly incorporate the required XAML files and assemblies for a Syncfusion control directly from the user interface. This streamlined approach enhances productivity and simplifies the development process, ensuring a smoother experience when building WPF apps with Syncfusion’s feature-rich components.
In this blog, we are going to explain how to install the Syncfusion WPF extensions and then add the Syncfusion WPF controls to your app with the new item template support.
Install the Syncfusion WPF extensions
The new WPF item template support is included in the Syncfusion WPF extensions. So, to use them, we should install the Syncfusion WPF extensions in Visual Studio.
Install from the Visual Studio Manage Extensions dialog box
Follow these steps to install the Syncfusion WPF extensions through the Visual Studio Manage Extensions dialog box:
- Open Visual Studio 2022.
- Navigate to Extension ->Manage Extensions.
Note: If you’re using Visual Studio 2017 or older, you have to navigate to Tools -> Extensions and Updates.
- Select the online tab on the left side and search for Syncfusion WPF using the search box.
- Select the WPF Extensions -> Syncfusion option from the list and click the Download button.
- Close all Visual Studio instances and click Modify in the VSIX installer to install the extension.
Install from the Visual Studio Marketplace
Follow these steps to install the Syncfusion WPF extensions from the Visual Studio Marketplace:
- Download the Syncfusion WPF Extensions from the Visual Studio Marketplace.
- Close all running Visual Studio instances, if any.
- Double-click on the downloaded extension. The VSIX Installer window will open. In it, click the Install button.
How to use the Syncfusion WPF item template
Follow these steps to use Syncfusion WPF item template support:
- To integrate Syncfusion WPF item templates into your WPF app, use one of the following options:
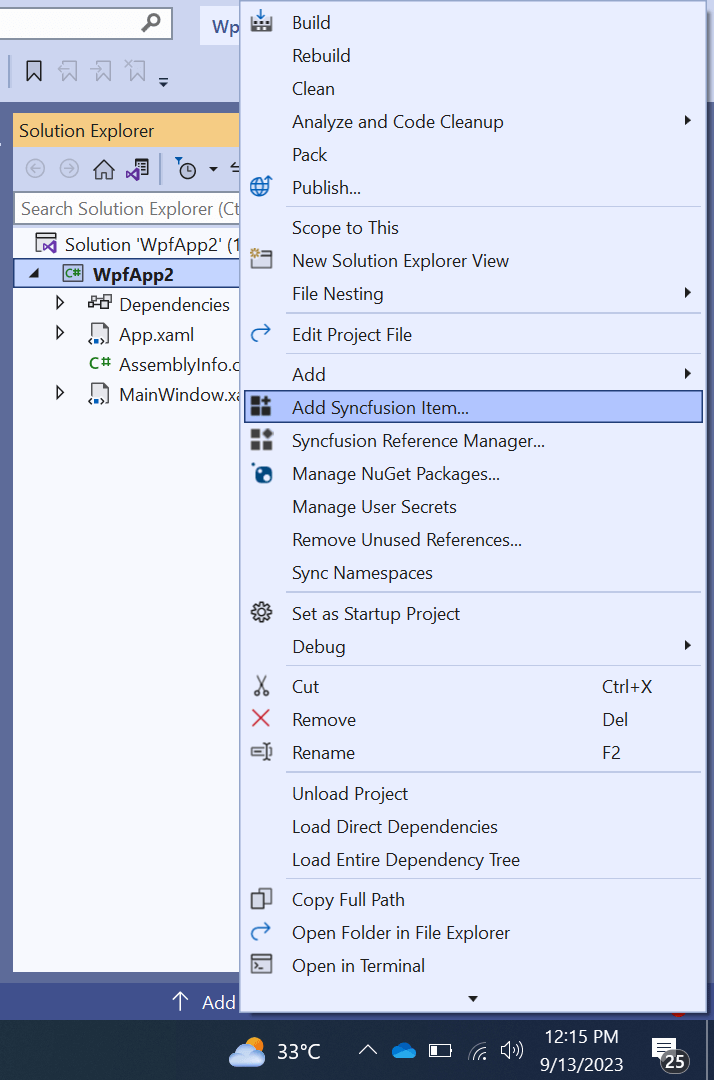
Option1: Right-click on your WPF app in the Solution Explorer window. Select the Add Syncfusion Item option from the menu.
 Option 2: In the Visual Studio toolbar, choose Extensions -> Syncfusion –> Essential Studio® for WPF -> Add Syncfusion Item.
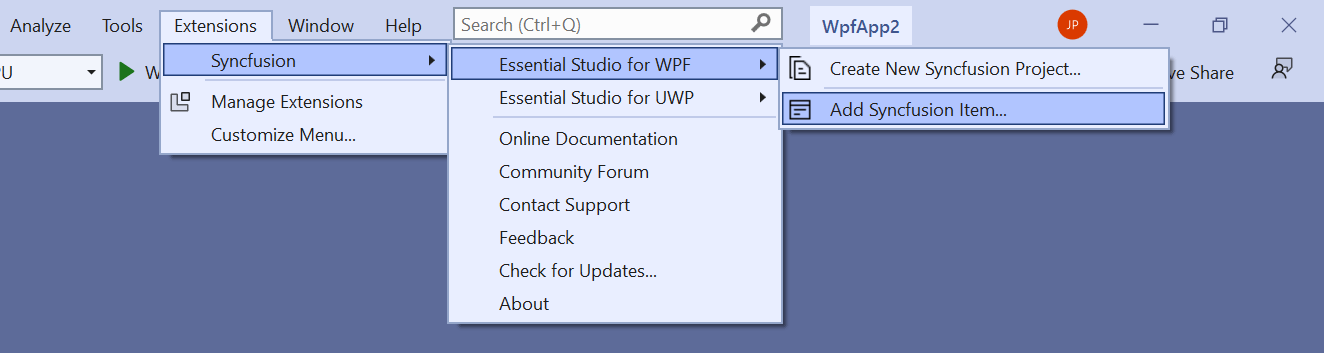
Note: In Visual Studio 2017 or older versions, the Syncfusion menu is directly in the Visual Studio menu.
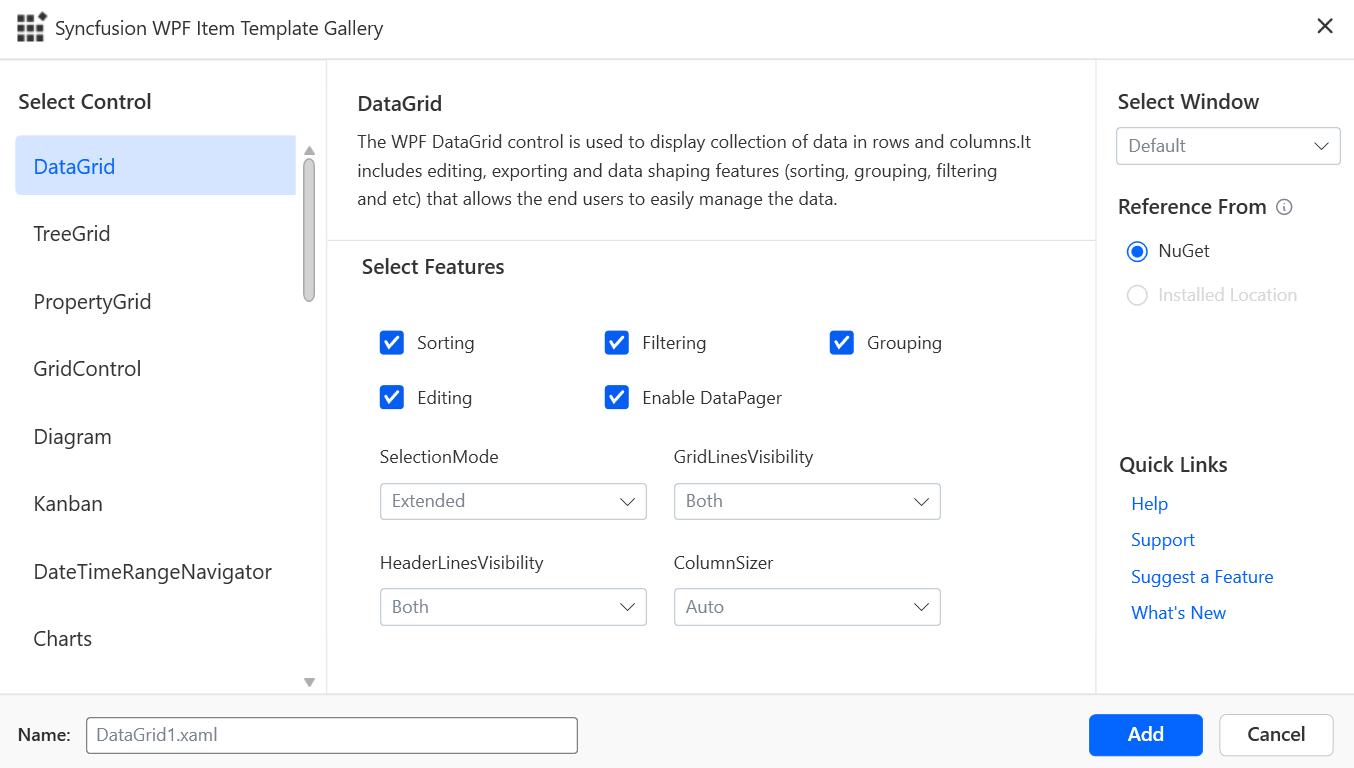
- The Syncfusion WPF Item Template Gallery window will open.
 Using the Syncfusion WPF Item Template, we can add three types of window items. Please refer to the following table for details on how to add each type.
S.No Window type Control Window details 1 Select a Default window.
If the Default window is selected, the Blank control option will not be enabled.Select any control.
Eg., DataGridThe Default window item will be added to your app alongside the DataGrid control’s code snippet and features. 2 Select any window except Default.
Eg., Chromeless WindowSelect a Blank control. The default Chromeless Window item will be added to your app. 3 Select any window except Default.
Eg., Chromeless WindowSelect any control.
Eg., DataGridThe Chromeless Window item will be added to your app alongside the DataGrid control’s code snippet and features. Select any option from the Select Window section to add the required window in your WPF app.
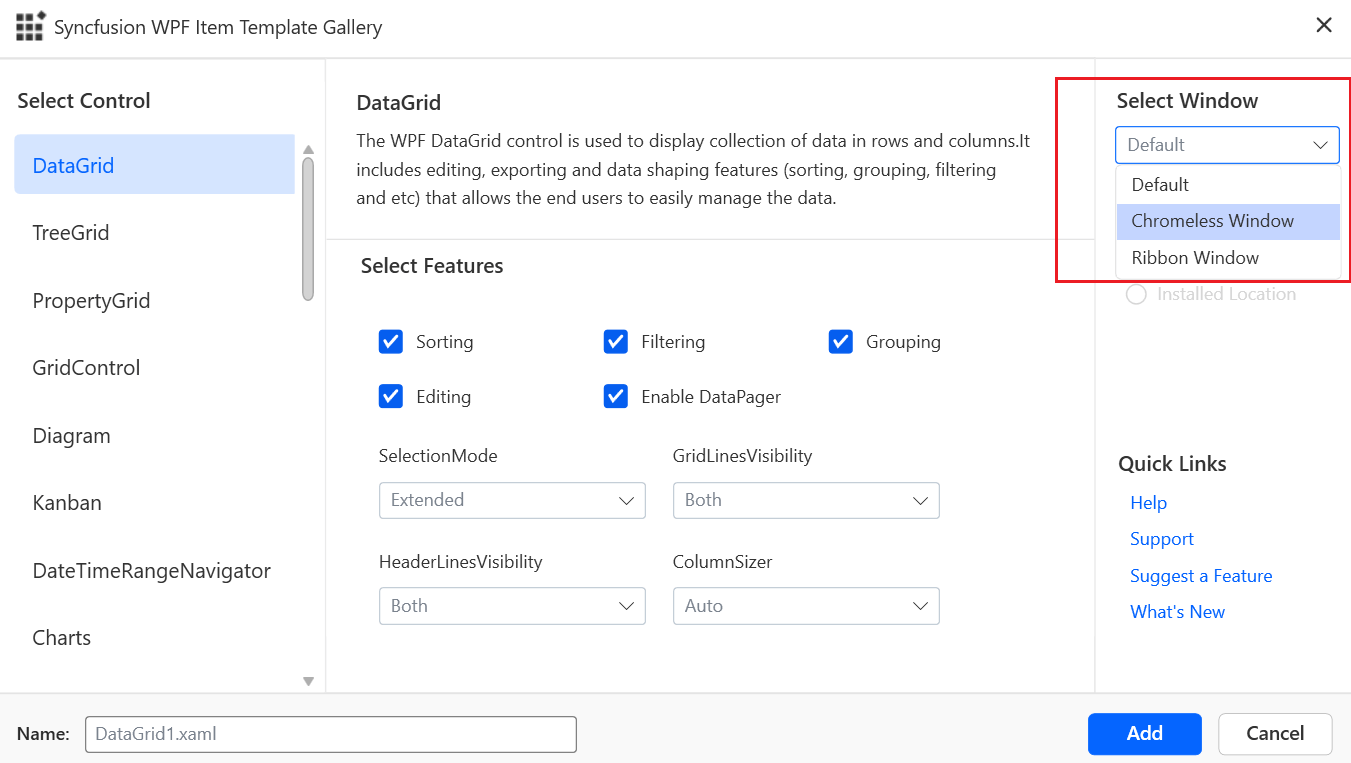
- Select the required Syncfusion WPF control from the Select Control section to add it to your app.
Note: In the Select Control section, the Blank control will be enabled only when a window other than the default is selected from the Select Window section.
- Choose the features of the selected control from the Select Features section. These features will be incorporated as code snippets in the XAML files within your WPF app.
- Choose an assembly reference option—GAC, Installed Location, or NuGet—to specify where the required Syncfusion assemblies need to be added from.
Note: The Installed Location and GAC options will be displayed only when the Syncfusion Essential WPF build is installed. If the Syncfusion Essential WPF build is not installed, you can only use the NuGet option. When using the Syncfusion WPF window in a .NET Core app, the GAC option will not be available. By default, the Version dropdown lists only the installed WPF versions.
- Provide a name for the selected window.
- Click Add. The Adding Files and Assemblies window will open, where you can view the details of the assemblies and files being added to our WPF app.
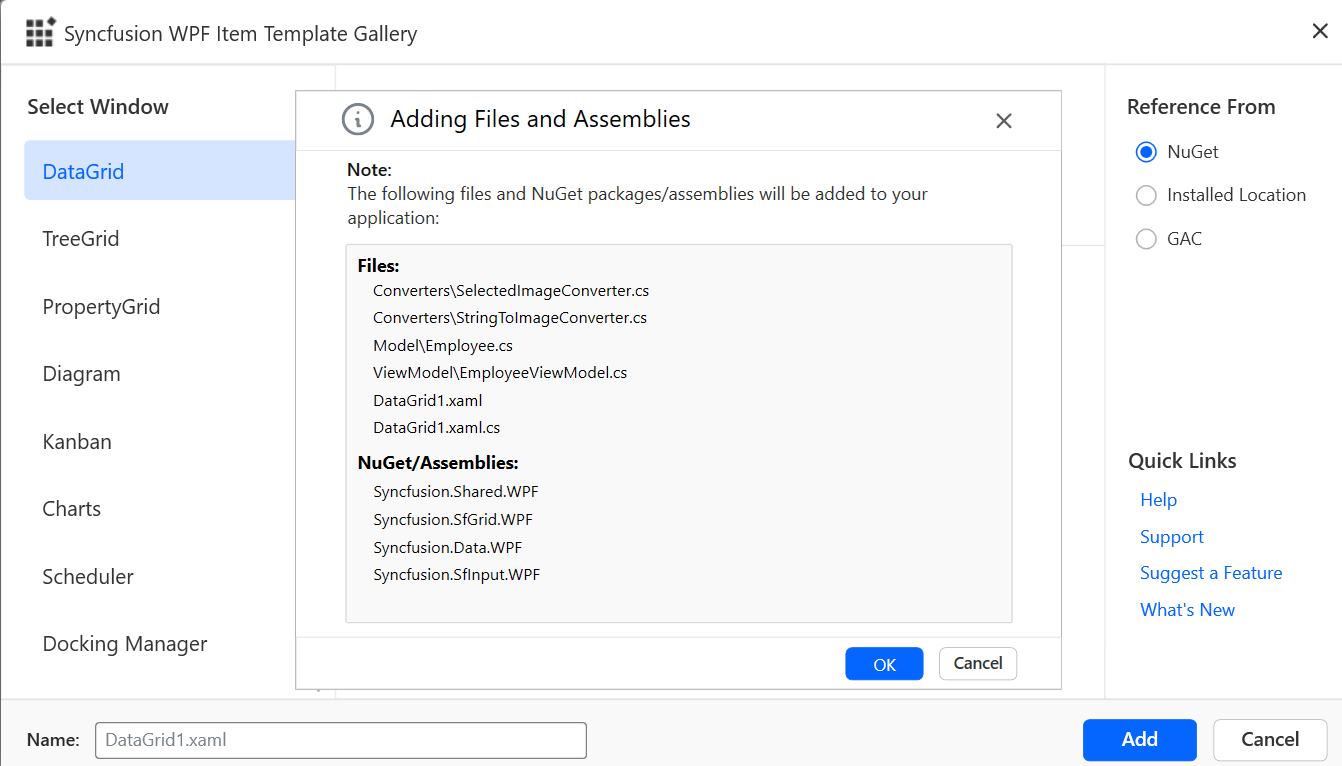
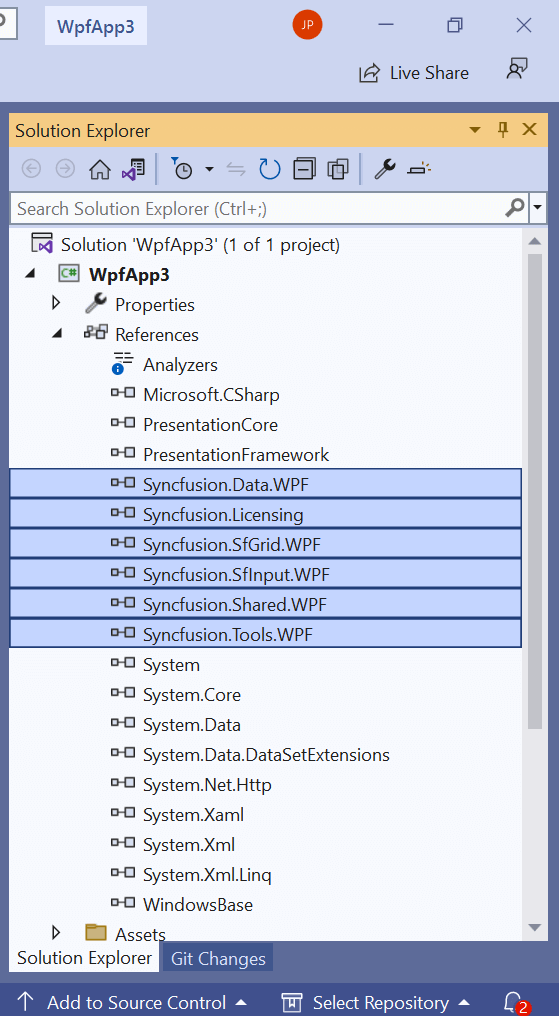
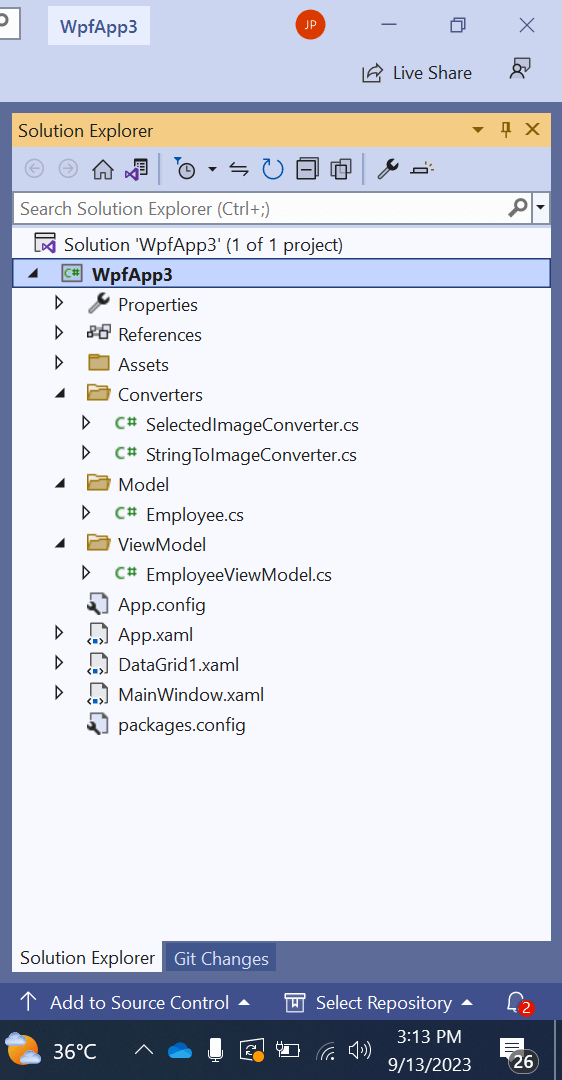
- Click OK to add the selected Syncfusion WPF control into your WPF app with the required Syncfusion assemblies.
Refer to the following images.
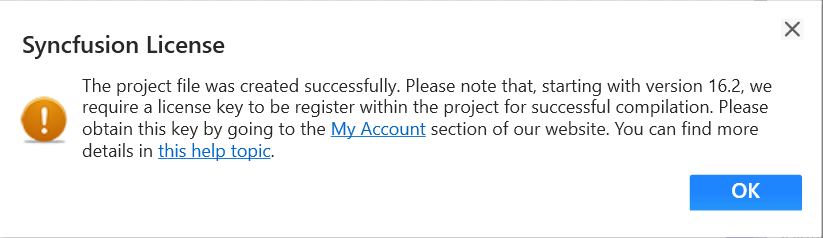
- A Syncfusion licensing message will be shown if you installed the trial setup or NuGet packages because Syncfusion introduced a licensing system in the 2018 Volume 2 (v16.2.0.41) Essential Studio® release. Click the help topic link for information on generating and registering the Syncfusion license key in your project. Refer to our blog on licensing to learn more.
How to run the Syncfusion WPF Window
Follow these steps to run the application with the created Syncfusion WPF control:
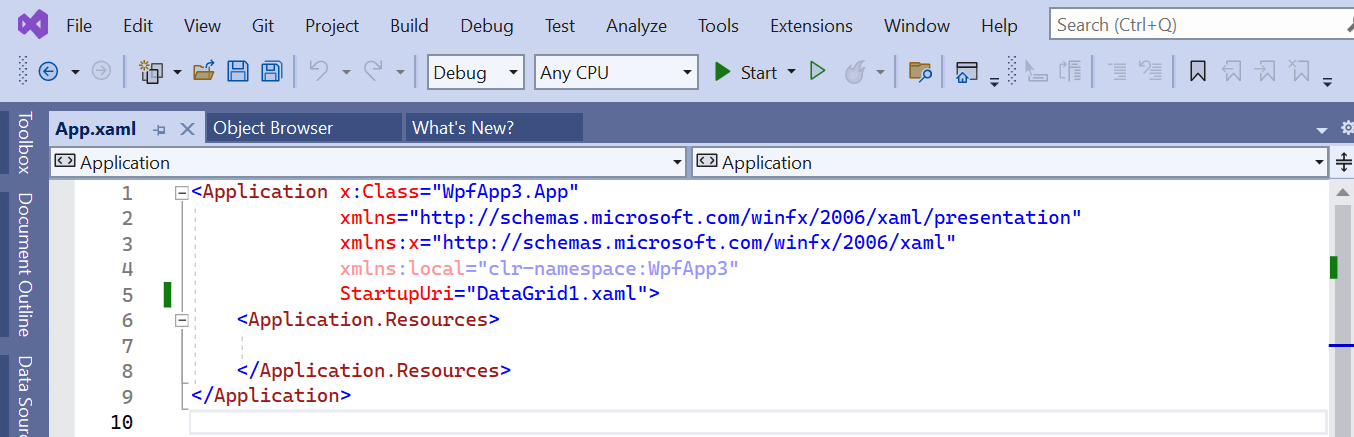
- Open the App.xaml file in your WPF app.
- Change the StartupUri attribute value to WindowName.xaml. For Example, if the added control name is DataGrid1, then change the value to DataGrid1.xaml as shown in the following markup.
- Now, run the app. The added Syncfusion WPF window will open in your app.
Conclusion
Thanks for reading! In this blog, we have seen how to install the Syncfusion WPF extensions and add a WPF window with the new WPF item template support for Visual Studio. For more information, refer to our adding Syncfusion window to WPF app documentation. This feature is available in our 2021 Volume 1 release. You can also check out other new WPF features in our Release Notes and What’s New pages.
The Syncfusion WPF controls include over 100 modern UI controls for building beautiful, high-performance line-of-business WPF applications. Use them to boost your application development speed.
If you aren’t a Syncfusion customer yet, you can try our 30-day free trial to check out our wares. Also, we encourage you to try our samples available at this GitHub location.
If you wish to send us feedback, please use the comments section below. If you would like to submit any questions, please feel free to contact us through our support forum, support portal, or feedback portal. We are always happy to assist you!


 No spam, just valuable updates.