

Syncfusion is glad to share details about the updates in our file format libraries based on your valuable feedback. Our file format libraries allow users to create, edit, write, and convert Excel, PDF, Word, and PowerPoint files in .NET Framework, .NET Core, Xamarin, and UWP applications without any Microsoft Office or Adobe dependencies.
In this blog, we’ll showcase the new features and enhancements included in the 2018 Volume 4 release of our file format libraries.
Draw text with OpenType fonts
OpenType is a cross-platform font format. It has an expanded character set, ligatures, glyph substitution, and layout features. The Syncfusion PDF library (Essential PDF) allows you to add text in PDF documents using OpenType fonts (OTF).
The following code example shows how to draw text in a PDF document using OTF.
//Create a new instance of PDF document class.
PdfDocument document = new PdfDocument();

//Add a new page to the document.
PdfPage page = document.Pages.Add();

//Text to draw.
string inputText = @"Adventure Works Cycles, the fictitious company on which the AdventureWorks sample databases are based, is a large, multinational manufacturing company. The company manufactures and sells metal and composite bicycles to North American, European and Asian commercial markets. While its base operation is located in Washington with 290 employees, several regional sales teams are located throughout their market base.";

//Read the OTF font file from disk.
FileStream fontFileStream = new FileStream("NotoSerif-Black.otf", FileMode.Open, FileAccess.Read, FileShare.ReadWrite);

//Create PDF font.
PdfFont font = new PdfTrueTypeFont(fontFileStream, 14);

//Draw the text.
page.Graphics.DrawString(inputText, font, PdfBrushes.Black, new RectangleF(0, 0, page.GetClientSize().Width, page.GetClientSize().Height);

//Save the document.
document.Save("OpenTypeFont.pdf");

//Close the document.
document.Close(true);

To learn more about drawing text in PDF documents, please refer to our Essential PDF documentation page, Drawing text in PDF.
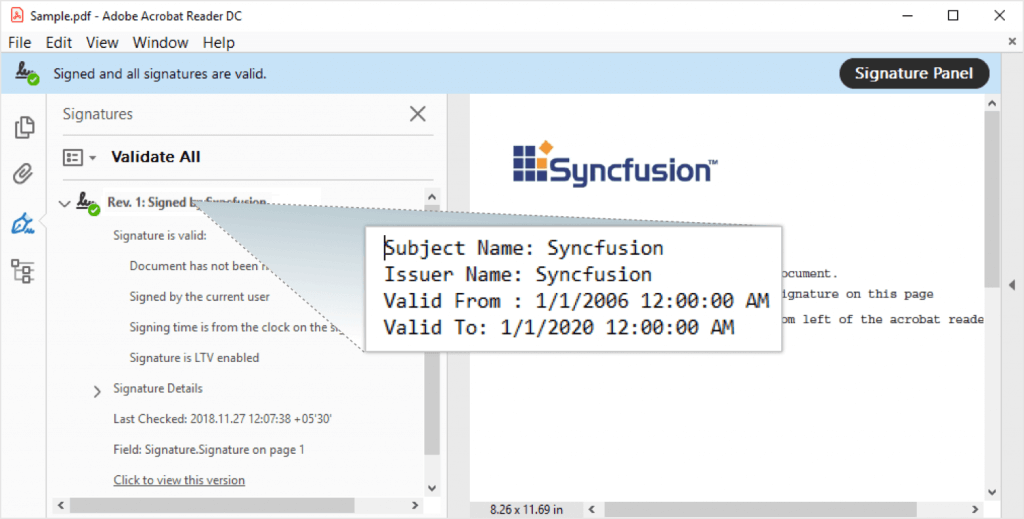
Get certificate details from PDFs
Now you can retrieve or get certificate details like subject, issuer, valid from, valid to, and more from an existing PDF file. Using Essential PDF, we can re-sign a document based on the signature validity.
The following code example shows how to get certificate details to verify the document’s validity.
//Load the existing PDF document certificate.
PdfLoadedDocument ldoc = new PdfLoadedDocument(“Input.pdf”);

//Get the existing signature field.
PdfLoadedSignatureField field = ldoc.Form.Fields[0] as PdfLoadedSignatureField;

//Get the certificate details.
var FromDate = field.Signature.Certificate.ValidFrom;
var ExpireDate = field.Signature.Certificate.ValidTo;

if (DateTime.Now > ExpireDate)
   {
      MessageBox.Show("Certificate was Expired.");
   }
else {
       MessageBox.Show("Certificate is Valid.");
   }
//Close the loaded document.
ldoc.Close(true);
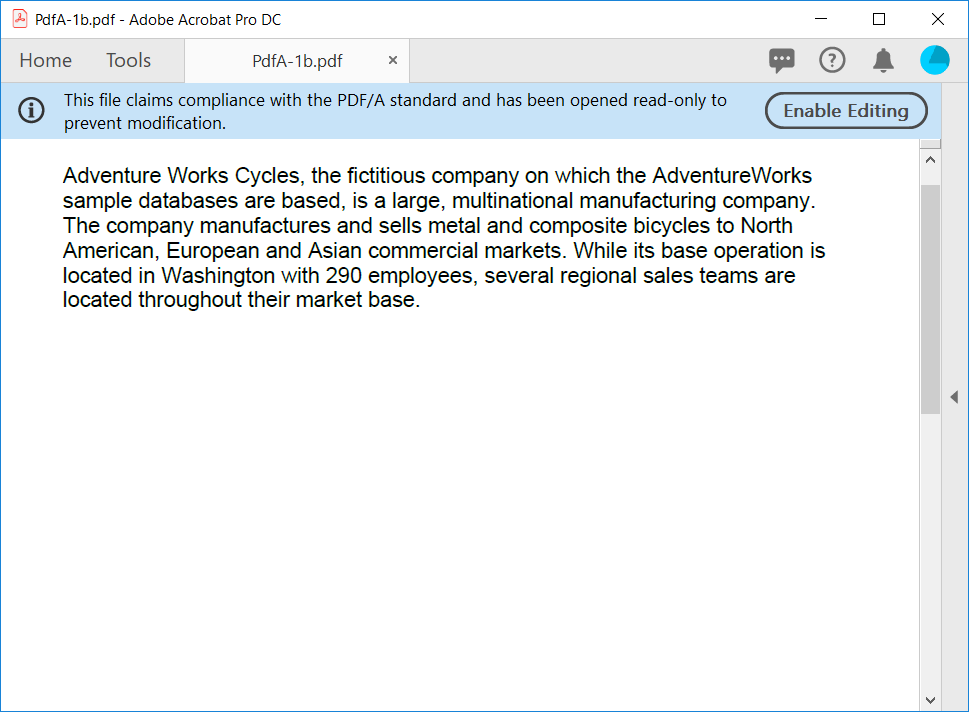
Create PDF/A-1b document
Essential PDF already supported creating PDF/A-1b documents in .NET Framework platforms. Now, it is extended to be supported in Xamarin.Forms, .NET Core, and UWP.
The following code example shows how to create a PDF/A-1b-compliant document.
//Create a new PDF document.
PdfDocument document = new PdfDocument(PdfConformanceLevel.Pdf_A1B);

//Add a page.
PdfPage page = document.Pages.Add();

//Create font.
Stream arialFontStream = typeof(Conformance).GetTypeInfo().Assembly.GetManifestResourceStream("SampleBrowser.PDF.Samples.Assets.arial.ttf");

PdfFont font = new PdfTrueTypeFont(arialFontStream, 14);

//Text to draw.
string text = @"Adventure Works Cycles, the fictitious company on which the AdventureWorks sample databases are based, is a large, multinational manufacturing company. The company manufactures and sells metal and composite bicycles to North American, European and Asian commercial markets. While its base operation is located in Washington with 290 employees, several regional sales teams are located throughout their market base.";

//Draw text.
page.Graphics.DrawString(text, font, PdfBrushes.Black, new RectangleF(0,0, page.Graphics.ClientSize.Width, page.Graphics.ClientSize.Height));

MemoryStream stream = new MemoryStream();

//Save the PDF document.
document.Save(stream);

//Close the PDF document.
document.Close();
To learn more about PDF conformance, please refer to our PDF conformance documentation page.
Excel
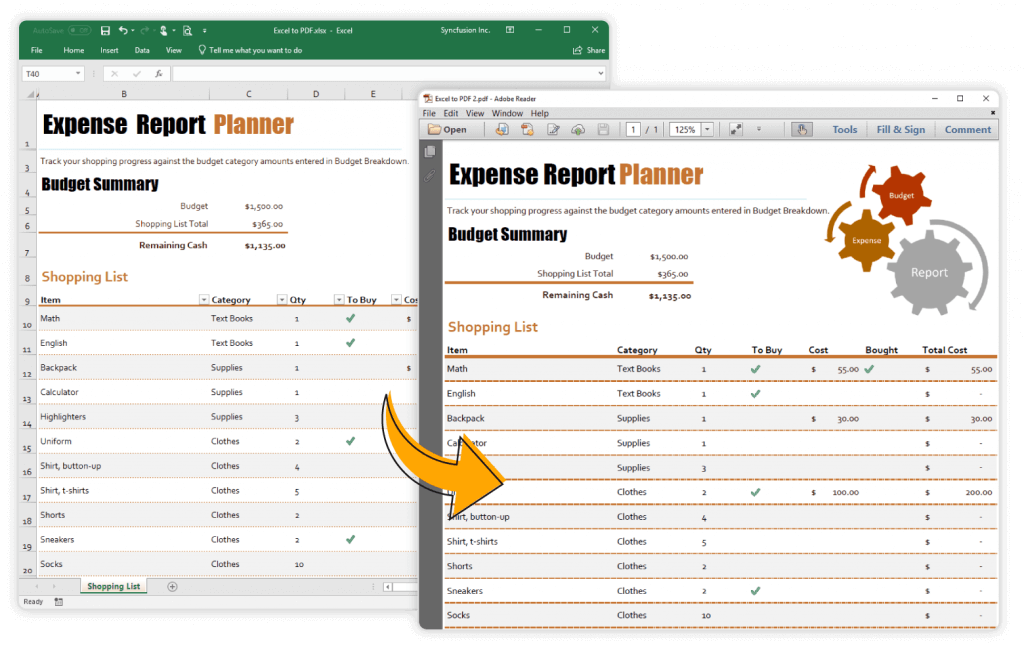
Convert Excel to PDF in .NET Core and Xamarin
Previously, the Syncfusion Excel library (Essential XlsIO) supported Excel-to-PDF conversion only in .NET Framework applications. Now, we have added support for Excel-to-PDF conversion from .NET Standard 1.4 onwards. You can convert entire workbook or a particular worksheet to PDF. With this support, now XlsIO converts Excel documents into PDF in ASP.NET Core, and Xamarin platforms.
To use Excel-to-PDF conversion in your application, you can install the NuGet packages from NuGet.org:
- XlsIORenderer.Net.Core for ASP.NET Core
- Xamarin.XlsIORenderer for Xamarin.
The following code illustrates exporting an Excel file to PDF.
class Program
{
    static void Main(string[] args)
    {
      using (ExcelEngine excelEngine = new ExcelEngine())
      {
IApplication application = excelEngine.Excel;

//Open the file as a stream.
FileStream XlsIOStream = new FileStream("Template.xlsx", FileMode.Open, FileAccess.Read);
IWorkbook workbook = application.Workbooks.Open(XlsIOStream);

// Creates an instance of XlsIORenderer for Excel-to-PDF conversion.
XlsIORenderer renderer = new XlsIORenderer();

//Convert the workbook to PDF.
PdfDocument document = renderer.ConvertToPDF(workbook);

//Saving the PDF as a stream.
FileStream stream = new FileStream("Output.pdf", FileMode.Create, FileAccess.ReadWrite);
document.Save(stream);

stream.Dispose();
XlsIOStream.Dispose();
document.Close();
      }
    }
}
For example, the following code converts an entire Excel file with renderer settings to PDF.
class Program
{
    static void Main(string[] args)
    {
      using (ExcelEngine excelEngine = new ExcelEngine())
      {
IApplication application = excelEngine.Excel;

//Open the file as a stream.
FileStream XlsIOStream = new FileStream("Template.xlsx", FileMode.Open, FileAccess.Read);
IWorkbook workbook = application.Workbooks.Open(XlsIOStream);

// Creates an instance of XlsIORenderer for Excel-to-PDF conversion.
XlsIORenderer renderer = new XlsIORenderer();

XlsIORendererSettings settings = new XlsIORendererSettings();
// Lay out the page using FitAllColumnsOnOnePage option.
settings.LayoutOptions = LayoutOptions.FitAllColumnsOnOnePage;

//Convert the workbook to PDF.
PdfDocument document = renderer.ConvertToPDF(workbook, settings);

//Saving the PDF as a stream.
FileStream stream = new FileStream("Output.pdf", FileMode.Create, FileAccess.ReadWrite);
document.Save(stream);

stream.Dispose();
XlsIOStream.Dispose();
        document.Close();
      }
    }
}
The following code illustrates exporting an Excel worksheet with renderer settings to PDF.
class Program
{
    static void Main(string[] args)
    {
      using (ExcelEngine excelEngine = new ExcelEngine())
      {
ExcelEngine excelEngine = new ExcelEngine();
IApplication application = excelEngine.Excel;

//Open the file as a stream.
FileStream XlsIOStream = new FileStream("Template.xlsx", FileMode.Open, FileAccess.Read);
IWorkbook workbook = application.Workbooks.Open(XlsIOStream);
IWorksheet worksheet = workbook.Worksheets[0];

// Creates an instance of XlsIORenderer for Excel-to-PDF conversion.
XlsIORenderer renderer = new XlsIORenderer();

XlsIORendererSettings settings = new XlsIORendererSettings();
// Lay out the page using FitAllColumnsOnOnePage options.
settings.LayoutOptions = LayoutOptions.FitAllColumnsOnOnePage;

//Convert the workbook to PDF.
PdfDocument document = renderer.ConvertToPDF(worksheet, settings);

//Saving the PDF as a stream.
FileStream stream = new FileStream("Output.pdf", FileMode.Create, FileAccess.ReadWrite);
document.Save(stream);

stream.Dispose();
XlsIOStream.Dispose();
document.Close();
}
    }
}
For more information, please refer to our Excel-to-PDF conversion documentation.
Word
Restart numbering in lists
The Syncfusion Word library (Essential DocIO) now allows numbering in lists to be restarted in Word documents while performing mail merge and merging multiple Word documents.
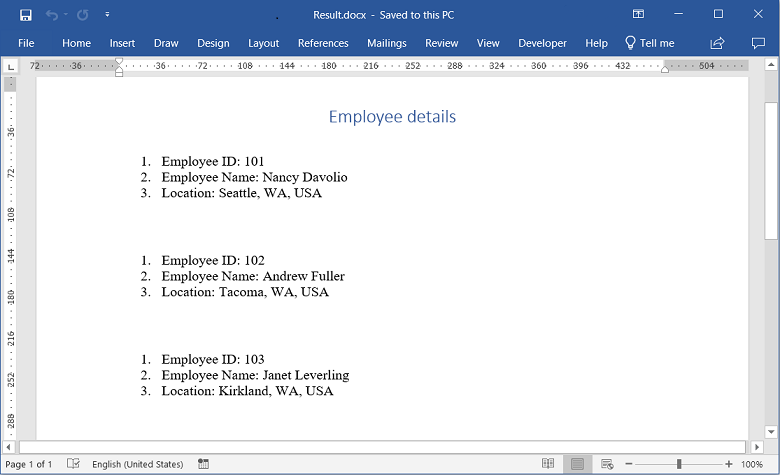
The following code example illustrates how to restart the list numberings in Word documents while performing mail merge and merging multiple Word documents.
FileStream fileStream = new FileStream("Template.docx", FileMode.Open);
//Loads an existing Word document.
WordDocument wordDocument = new WordDocument(fileStream, FormatType.Docx);
//Sets ImportOptions to restart the list numbering.
wordDocument.ImportOptions = ImportOptions.ListRestartNumbering;
//Creates the employee details as “IEnumerable” collection.
List employeeList = new List();
employeeList.Add(new Employee("101", "Nancy Davolio", "Seattle, WA, USA"));
employeeList.Add(new Employee("102", "Andrew Fuller", "Tacoma, WA, USA"));
employeeList.Add(new Employee("103", "Janet Leverling", "Kirkland, WA, USA"));
//Creates an instance of “MailMergeDataTable” by specifying mail merge group name and “IEnumerable” collection.
MailMergeDataTable dataTable = new MailMergeDataTable("Employees", employeeList);
//Performs mail merge.
wordDocument.MailMerge.ExecuteGroup(dataTable);
//Saves the Word document.
MemoryStream outputStream = new MemoryStream();
wordDocument.Save(outputStream, FormatType.Docx);
//Closes the instance of Word document object.
wordDocument.Close();

///
/// Represents a helper class to perform mail merge.
///
public class Employee { public string EmployeeID { get; set; } public string EmployeeName { get; set; } public string Location { get; set; }
///
/// Represents a constructor to create value for merge fields.
//
public Employee(string employeeId, string employeeName, string location) { EmployeeID = employeeId; EmployeeName = employeeName; Location = location; } }
Update field enhancements
Essential DocIO now allows updating the AutoNum and Set fields in a Word document.
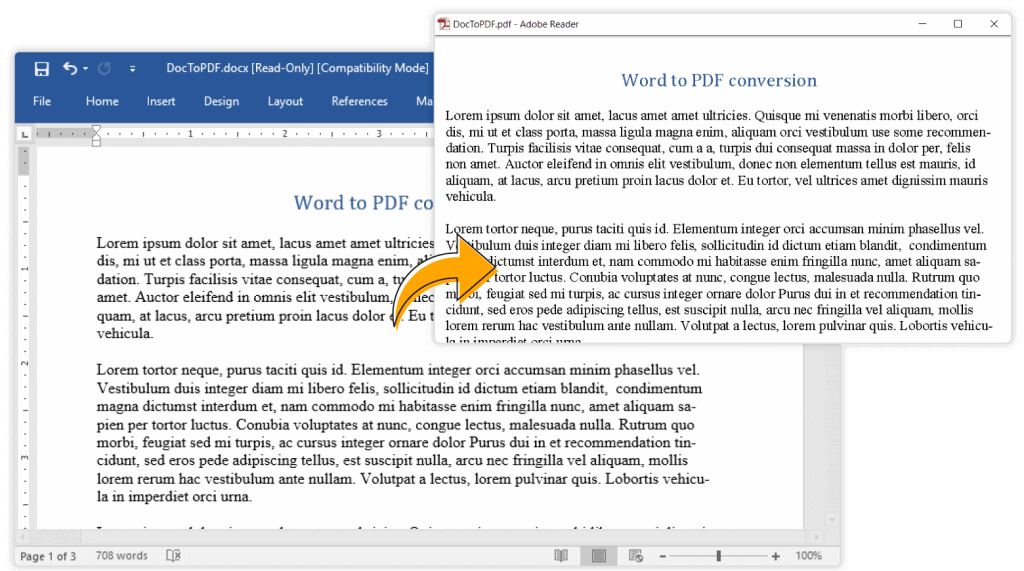
Hyphenation in Word-to-PDF and Word-to-image conversions
Essential DocIO now allows hyphenating text in a Word document while converting it to PDF or image formats.
The following code example illustrates setting the hyphenation properties during Word-to-PDF conversion.
FileStream fileStream = new FileStream("Template.docx", FileMode.Open);
//Loads an existing Word document.
WordDocument wordDocument = new WordDocument(fileStream, FormatType.Docx);
//Instantiates DocIORenderer instance for Word-to-PDF conversion.
DocIORenderer renderer = new DocIORenderer();
//Reads the language dictionary for hyphenation.
FileStream dictionaryStream = new FileStream("hyph_en_US.dic", FileMode.Open);
//Adds the hyphenation dictionary of the specified language.
Hyphenator.Dictionaries.Add("en-US", dictionaryStream);
//Converts Word document to PDF document.
PdfDocument pdfDocument = renderer.ConvertToPDF(wordDocument);
//Closes the instance of Word document object.
wordDocument.Close();
//Releases the resources occupied by DocIORenderer instance.
renderer.Dispose();
//Saves the PDF file.
MemoryStream outputStream = new MemoryStream();
pdfDocument.Save(outputStream);
//Closes the instance of PDF document object.
pdfDocument.Close();
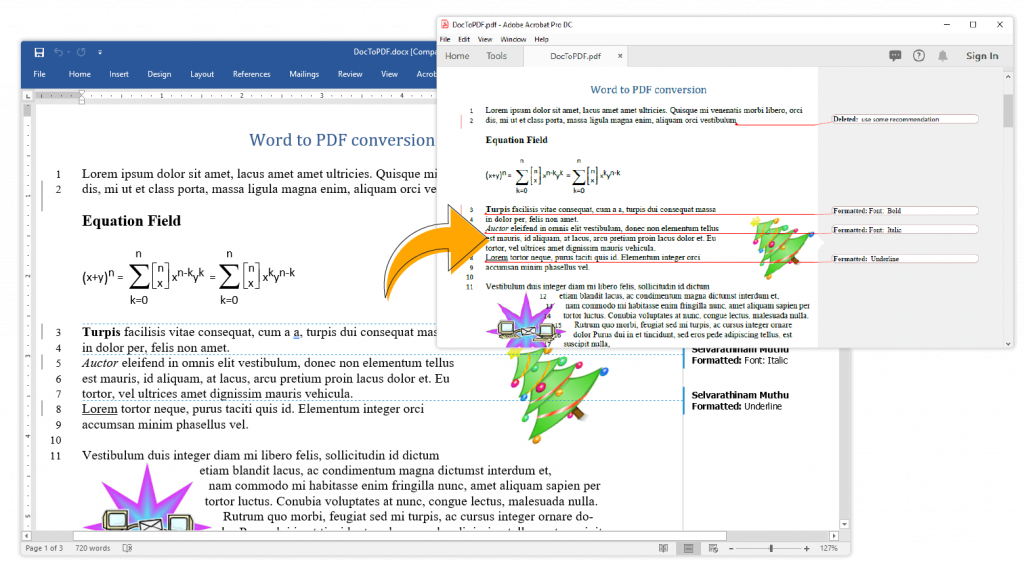
Track changes in Word-to-PDF conversion
Essential DocIO now allows showing revision marks in a generated PDF when converting Word documents with tracked changes or revisions.
The following code example illustrates setting these properties during Word-to-PDF conversion.
FileStream fileStream = new FileStream("Template.docx", FileMode.Open);
//Loads an existing Word document.
WordDocument wordDocument = new WordDocument(fileStream, FormatType.Docx);
//Sets revision types to preserve track changes in Word-to-PDF conversion.
wordDocument.RevisionOptions.ShowMarkup = RevisionType.Deletions | RevisionType.Formatting | RevisionType.Insertions;
//Instantiates DocIORenderer instance for Word-to-PDF conversion.
DocIORenderer renderer = new DocIORenderer();
//Converts Word document into PDF document.
PdfDocument pdfDocument = renderer.ConvertToPDF(wordDocument);
//Closes the instance of the Word document object.
wordDocument.Close();
//Releases the resources occupied by DocIORenderer instance.
renderer.Dispose();
//Saves the PDF file.
MemoryStream outputStream = new MemoryStream();
pdfDocument.Save(outputStream);
//Closes the instance of PDF document object.
pdfDocument.Close();
Word-to-PDF enhancements in ASP.NET Core and Xamarin platforms
Essential DocIO now provides the following features during Word-to-PDF conversion:
- 30% improvement in conversion performance.
- Improvements in text size calculation to paginate Word documents properly.
- Preservation of rotated images.
- Option to embed complete or subset font information for TrueType fonts.
- PDF conformance levels PDF/A1B and PDF/X-1a:2001.
- Preservation of complex script text.
The following code example illustrates how to set the font embedding and PDF conformance level options during Word-to-PDF conversion in ASP.NET Core and Xamarin platforms.
FileStream fileStream = new FileStream("Template.docx", FileMode.Open);
//Loads an existing Word document.
WordDocument wordDocument = new WordDocument(fileStream, FormatType.Docx);
//Instantiates DocIORenderer instance for Word to PDF conversion.
DocIORenderer renderer = new DocIORenderer();
//Sets EmbedFonts property as true to embed fonts in resultant PDF.
renderer.Settings.EmbedFonts = true;
//Sets EmbedCompleteFonts property as true to embed complete font information in converted PDF.
renderer.Settings.EmbedCompleteFonts = true;
//Sets PDF conformance level PDF/A1B or PDF/X-1a:2001 for long-term archiving.
renderer.Settings.PdfConformanceLevel = PdfConformanceLevel.Pdf_A1B;
//Sets AutoDetectComplexScript property as true to detect complex scripts automatically.
renderer.Settings.AutoDetectComplexScript = true;
//Converts Word document to PDF document.
PdfDocument pdfDocument = renderer.ConvertToPDF(wordDocument);
//Closes the instance of Word document object.
wordDocument.Close();
//Releases the resources occupied by DocIORenderer instance.
renderer.Dispose();
//Saves the PDF file.
MemoryStream outputStream = new MemoryStream();
pdfDocument.Save(outputStream);
//Closes the instance of PDF document object.
pdfDocument.Close();
PowerPoint
Connector
A connector is a line that links two shapes via their port positions which will automatically adjust its position when those shapes move. Each shape object has a different number of port points and that can be linked with a connector.
Connectors can be any of the following types and they are:
- Straight
- Elbow
- Curved
The Syncfusion PowerPoint library (Essential Presentation) provides support to add, edit, remove, format, and convert all three types of connectors in PowerPoint files.
The following code example shows how to draw a connector between two shapes.
// Create a new PowerPoint file.
using (IPresentation ppDocument = Presentation.Create())
{

  // Add a slide to the PowerPoint file.
  ISlide slide = ppDocument.Slides.Add(SlideLayoutType.Blank);

  // Add a rectangle to the slide.
  IShape rectangle = slide.Shapes.AddShape(AutoShapeType.Rectangle, 200, 300, 100, 100);

  // Add an oval to the slide.
  IShape oval = slide.Shapes.AddShape(AutoShapeType.Oval, 400, 10, 100, 100);

  // Add a connector and connect the start and end shapes with specified port positions.
  IConnector connector = slide.Shapes.AddConnector(ConnectorType.Straight, rectangle, 0, oval, 4);

  // Save the presentation file.
  ppDocument.Save("Sample.pptx");
}
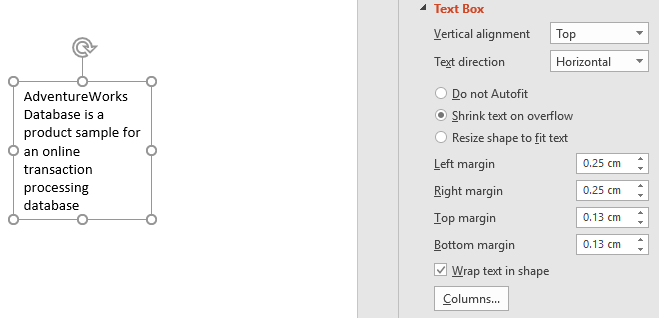
Shrink text on overflow
In a PowerPoint slide, if you add more text than a shape can hold, the text will overflow beyond the boundaries of the shape. By using a “shrink text on overflow” option, you can fit longer text within a shape. This option will reduce the font size and line spacing values of the text so that it fits within the shape. The Syncfusion PowerPoint library now provides support for shrinking text on overflow. The following screenshot shows how to enable this property in Microsoft PowerPoint.
The following code example shows how to enable the ShrinkTextOnOverFlow property for a text box using the Syncfusion PowerPoint library.
// Create a new PowerPoint file.
using (IPresentation ppDocument = Presentation.Create())
{

    // Add a slide to the PowerPoint file.
    ISlide slide = ppDocument.Slides.Add(SlideLayoutType.Blank);

    // Add a text box to the slide
   IShape textBox = slide.Shapes.AddTextBox(100, 100, 100, 100);

   //Add text to the text box.
   textBox.TextBody.AddParagraph("AdventureWorks Database is a product sample for an online transaction processing database");

   //Set the property to shrink text on overflow.
   textBox.TextBody.FitTextOption = FitTextOption.ShrinkTextOnOverFlow;

   // Save the PowerPoint file.
   ppDocument.Save("Sample.pptx");
}
Try it out
If you are an existing Syncfusion user, please download the latest version from the License & Downloads page and try the new features for yourself. Also, our NuGet packages are available on NuGet.org. If you aren’t a customer yet, you can try our 30-day free trial to check out these features.
If you are new to Syncfusion’s file format libraries, we highly recommend that you follow our user guide. In order to get started quickly with your desired file format, please follow these links:
- Create PDF file in C# without Adobe
- Generate Excel file in C# without Microsoft Office
- Create Word file in C# without Microsoft Office
- Generate PowerPoint file in C# without Microsoft Office
If you have any questions or require clarification on these features, please let us know in the comments below. You can also contact us through our support forum or Direct-Trac. We are happy to assist you!
If you liked this post, we think you will also enjoy the following:
- [Blog Post] Converting Word to PDF programmatically [C#]
- [Blog Post] Word to PDF conversion in Xamarin and .NET Core
- [Blog Post] Essential JS 2: Copying and Pasting Excel Sheet Data to Grid ASP.NET MVC
- [Blog Post] Adding Animation to PowerPoint Slide Elements in C#
- [Blog Post] 7 ways to compress PDF files in C#, VB.NET
- [Ebook] PDF Succinctly
 No spam, just valuable updates.