
Welcome back to our journey of building a full-stack web application using Angular and GraphQL.
In the previous article of this series, we learned how to create a GraphQL mutation. We created a GraphQL client with the help of Apollo GraphQL, which allows us to consume server endpoints.
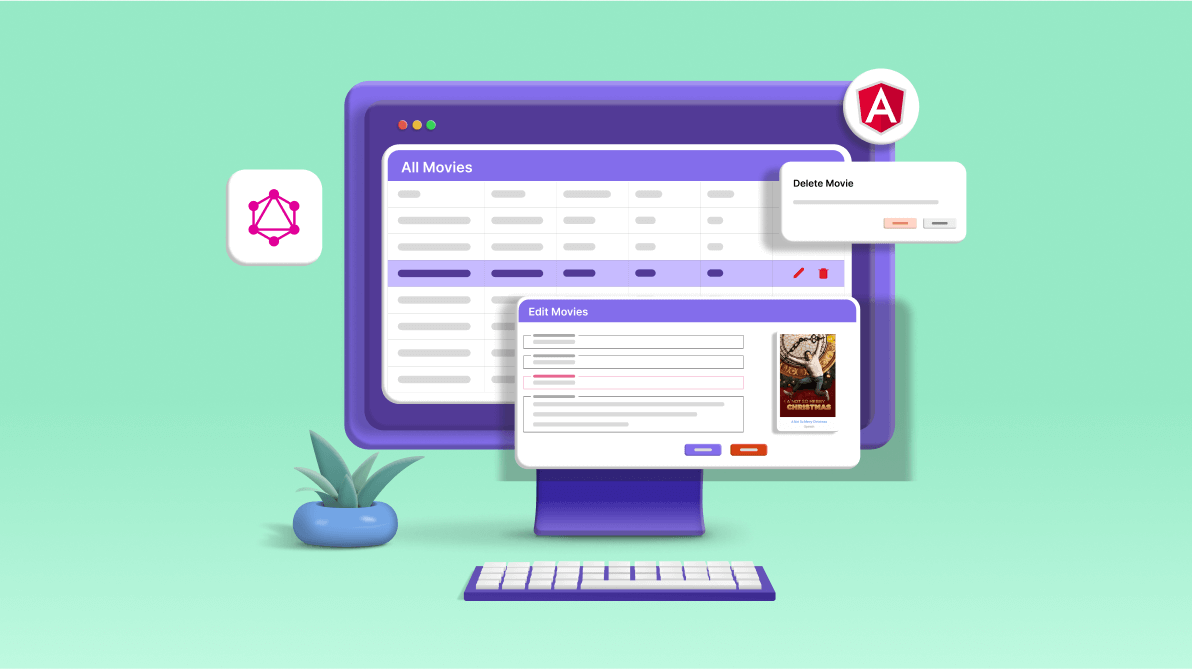
This article will cover how to add edit and delete capabilities to the movie data and configure the home page to display the list of movies. We will also provide sort and filter options to the users.
Update the IMovie interface
First, update the IMovie.cs file by adding the following method declarations.
public interface IMovie
{
    // other methods

    Task<List<Movie>> GetAllMovies();
    Task UpdateMovie(Movie movie);
    Task<string> DeleteMovie(int movieId);
}
Update the MovieDataAccessLayer class
Update the MovieDataAccessLayer class by implementing the GetAllMovies method, as shown in the following code example.
public async Task<List<Movie>> GetAllMovies()
{
    return await _dbContext.Movies.AsNoTracking().ToListAsync();
}
The GetAllMovies method is used to retrieve all the movies from the database without tracking changes to the entities, which can be useful for read-only operations.
Next, add the definition for the UpdateMovie method.
public async Task UpdateMovie(Movie movie)
{
    try
    {
        Movie? oldMovieData = await GetMovieData(movie.MovieId);

        if (oldMovieData?.PosterPath is not null)
        {
            if (movie.PosterPath is null)
            {
                movie.PosterPath = oldMovieData.PosterPath;
            }
        }
        _dbContext.Entry(movie).State = EntityState.Modified;
        await _dbContext.SaveChangesAsync();
    }
    catch
    {
        throw;
    }
}

async Task<Movie?> GetMovieData(int movieId)
{
    try
    {
        Movie? movie = await _dbContext.Movies.FindAsync(movieId);

        if (movie is not null)
        {
            _dbContext.Entry(movie).State = EntityState.Detached;
        }

        return movie;
    }
    catch
    {
        throw;
    }
}
The UpdateMovie method modifies a movie record in the database using the provided Movie object. It first fetches the existing movie data, retaining the original PosterPath if no new value is provided, and then commits the changes to the database.
The GetMovieData method retrieves a movie from the database based on its ID. Then, it detaches it from the context to prevent any changes from being tracked and saved to the database.
Next, we’ll define the DeleteMovie method, as the following code outlines.
public async Task<string> DeleteMovie(int movieId)
{
    try
    {
        Movie? movie = await GetMovieData(movieId);

        if (movie is not null)
        {
            _dbContext.Movies.Remove(movie);
            await _dbContext.SaveChangesAsync();

            return movie.PosterPath;
        }

        return string.Empty;
    }
    catch
    {
        throw;
    }
}
The DeleteMovie method is used to delete a movie from the database using its ID. Then, it returns the PosterPath of the deleted movie. If no movie is found with the provided ID, it returns an empty string.

Add the GraphQL server query to fetch all movie data
Add the following query definition in the MovieQueryResolver class.
[GraphQLDescription("Gets the list of movies.")]
[UseFiltering]
public async Task<IQueryable<Movie>> GetMovieList()
{
    List<Movie> availableMovies = await _movieService.GetAllMovies();
    return availableMovies.AsQueryable();
}
This method retrieves all movies from the movie service and returns them as an IQueryable<Movie>, enabling further data querying. It serves as a GraphQL endpoint supporting sorting and filtering.
The UseFiltering attribute facilitates the filtering of movie data based on object properties like movieId, title, and rating.
Add the GraphQL server mutation
Next, we’ll incorporate mutations to edit and delete movie data. These mutations allow for modifying and removing movie entries. Refer to the following code example to add the mutation to edit movie data in the MovieQueryResolver class.
[GraphQLDescription("Edit an existing movie data.")]
public async Task<AddMoviePayload> EditMovie(Movie movie)
{
    bool IsBase64String = CheckBase64String(movie.PosterPath);

    if (IsBase64String)
    {
        movie.PosterPath = WriteImageToServer(movie);
    }

    await _movieService.UpdateMovie(movie);

    return new AddMoviePayload(movie);
}

static bool CheckBase64String(string base64)
{
    Span<byte> buffer = new(new byte[base64.Length]);
    return Convert.TryFromBase64String(base64, buffer, out int bytesParsed);
}
The EditMovie method is used to edit an existing movie entry. It vefrifies whether the PosterPath of the movie is a Base64 string. If so, it uploads the image to the server and updates the PosterPath accordingly. Subsequently, it updates the movie within the movie service and returns a new AddMoviePayload with the updated movie.
While updating the movie data, we should handle the following two scenarios:
- Case 1: Updating the movie poster: In this scenario, the PosterPath property of the movie object contains a Base64 string.
- Case 2: No poster image update: If the poster image remains unchanged, we receive the name of the image stored in the database during the initial movie addition.
We’ve implemented a helper method named CheckBase64String to facilitate these distinctions. This method validates whether a given string is a valid Base64 string by attempting to convert it into a byte array. If the conversion succeeds, the method returns true: otherwise, it returns false.
The following code example is the mutation for deleting movie data.
[GraphQLDescription("Delete a movie data.")]
public async Task<int> DeleteMovie(int movieId)
{
    string coverFileName = await _movieService.DeleteMovie(movieId);

    if (!string.IsNullOrEmpty(coverFileName) && coverFileName != _config["DefaultPoster"])
    {
        string fullPath = System.IO.Path.Combine(posterFolderPath, coverFileName);
        if (File.Exists(fullPath))
        {
            File.Delete(fullPath);
        }
    }
    return movieId;
}
The purpose of this method is to remove a movie from the movie service based on its ID. Additionally, if the movie’s cover file exists on the server and is not the default poster, it is also deleted. The method then returns the ID of the deleted movie.
Configuring filtering and error handling
Register the extension methods in the Program.cs file to enable support for filtering and error handling. Please refer to the following example for the required configuration.
builder.Services.AddGraphQLServer()
    .AddQueryType<MovieQueryResolver>()
    .AddMutationType<MovieMutationResolver>()
    .AddFiltering()
    .AddSorting()
    .AddErrorFilter(error =>
    {
        return error;
    });
With the server configuration complete, let’s transition to the client-side implementation of the application.
Adding GraphQL query and mutation
To integrate GraphQL functionality, follow these steps:
- Navigate to the “src\app\GraphQL\query.ts”
- Add the following GraphQL query.
export const GET_MOVIES = gql`
  query FetchMovieList {
    movieList {
      movieId
      title
      posterPath
      genre
      rating
      language
      duration
    }
  }
`;

export const GET_MOVIE_BY_ID = gql`
  query FetchMovieList($filterInput: Int!) {
    movieList(where: { movieId: { eq: $filterInput } }) {
      movieId
      title
      posterPath
      genre
      rating
      language
      duration
      overview
    }
  }
`;
The GET_MOVIES query fetches the list of movies, while the GET_MOVIE_BY_ID query retrieves a specific movie based on the movieId parameter.
- Add the following mutations in the src\app\GraphQL\mutation.ts file to implement the updating and deleting movie data functionality.
export const UPDATE_MOVIE = gql`
  mutation EditMovieData($movieData: MovieInput!) {
    editMovie(movie: $movieData) {
      movie {
        title
      }
    }
  }
`;

export const DELETE_MOVIE = gql`
  mutation DeleteMovieData($movieId: Int!) {
    deleteMovie(movieId: $movieId)
  }
`;
Create the required services
To create the necessary services, execute the following command in the ClientApp directory.
ng g s services\fetch-movie-by-id
Then, incorporate the following code into the fetch-movie-by-id.service.ts file.
import { Injectable } from '@angular/core';
import { MovieType } from '../models/movie';
import { GET_MOVIE_BY_ID } from '../GraphQL/query';
import { Query } from 'apollo-angular';

@Injectable({
  providedIn: 'root',
})
export class FetchMovieByIdService extends Query<MovieType> {
  document = GET_MOVIE_BY_ID;
}
To streamline movie data retrieval, we’re setting up a dedicated service. Initially configured to fetch movie data by ID, this service will expand to accommodate additional data retrieval tasks. Utilizing a GraphQL query, we extend the Query class from the apollo-angular library. This allows us to fetch movie details seamlessly using the GET_MOVIE_BY_ID query.
To implement this functionality, let’s create a new service named fetch-movielist. Following is the code to be added to the src\app\services\fetch-movielist.service.ts file.
import { Injectable } from '@angular/core';
import { Query } from 'apollo-angular';
import { MovieType } from '../models/movie';
import { GET_MOVIES } from '../GraphQL/query';

@Injectable({
  providedIn: 'root',
})
export class FetchMovielistService extends Query<MovieType> {
  document = GET_MOVIES;
}
The service retrieves the movie list through a GraphQL query. To proceed, create a new service named update-movie and include the following code snippet in the src\app\services\update-movie.service.ts file.
import { Injectable } from '@angular/core';
import { UPDATE_MOVIE } from '../GraphQL/mutation';
import { Mutation } from 'apollo-angular';

@Injectable({
  providedIn: 'root',
})
export class UpdateMovieService extends Mutation {
  document = UPDATE_MOVIE;
}
This service facilitates the updating of movie data via GraphQL mutation.
Let’s create a new service named delete-movie to implement the deletion functionality. The code snippet will be added to the src\app\services\delete-movie.service.ts file.
import { Injectable } from '@angular/core';
import { Mutation } from 'apollo-angular';
import { DELETE_MOVIE } from '../GraphQL/mutation';

@Injectable({
  providedIn: 'root',
})
export class DeleteMovieService extends Mutation {
  document = DELETE_MOVIE;
}
Managing movie data deletion via GraphQL mutation is integral for seamless interaction with the database. This service lets users remove movies effortlessly through GraphQL operations.
On the home page, movies are presented in a visually appealing card layout. Each card elegantly showcases essential movie details such as title, poster image, and rating. This intuitive design enhances user engagement and facilitates quick browsing of available movies.
Furthermore, to enrich the user experience, clicking on any movie card redirects users to a dedicated movie details page. In it, users can delve deeper into comprehensive movie information.
The home page is enhanced with functionality to filter movies based on genre. Moreover, a dropdown list feature is incorporated to facilitate better organization and ease of access. It lets users sort movie data based on various criteria, enhancing overall usability.
Creating the custom Angular pipe
We’ll use a custom pipe to extend the functionality of and customize Angular components. This pipe is a versatile tool for transforming data and enriching display capabilities within Angular applications.
To create this custom pipe, execute the following Angular CLI command.
ng g p pipes\convertMinToHour
This command generates a new pipe file named convert-min-to-hour.pipe.ts inside your Angular project’s pipes directory.
Now, let’s dive into the implementation details. Open the src/app/pipes/convert-min-to-hour.pipe.ts file and add the following code.
import { Pipe, PipeTransform } from '@angular/core';

@Pipe({
  name: 'convertMinToHour',
})
export class ConvertMinToHourPipe implements PipeTransform {
  transform(value: number): string {
    const hours = Math.floor(value / 60);
    const minutes = value % 60;

    return `${hours}h ${minutes}mins`;
  }
}
This Angular pipe, tailored to our needs, converts a numerical representation of minutes into a string denoting the equivalent time in hours and minutes. We’ll employ this pipe to convert the movie duration from minutes to the hours and minutes format.
Create the rating component
Initiating component generation
We’ll craft a dedicated rating component with a customized style to ensure an aesthetically pleasing and informative presentation of the movie rating on both the home and movie details pages.
Step 1: Generating the component
Begin by executing the following command in your Angular CLI.
ng g c components\movie-rating
This command will create a new folder named movie-rating within the components directory of your Angular application, along with the necessary files for the component.
Step 2: Implementing rating logic
Upon generating the component, navigate to the src\app\components\movie-rating\movie-rating.component.ts file and append the following code to the MovieRatingComponent class.
rating = '';

  @Input({ required: true }) set movieRating(rating: number) {
    this.rating = rating.toPrecision(2);
  }
Step 3: Creating the template
Open the movie-rating.component.html file and include the following code snippet.
<button ejs-button cssClass="e-small e-round" [disabled]="true">
  {{ rating }}
</button>
This template will serve as the visual representation of the movie rating within the MovieRatingComponent.
Step 4: Styling the component
To ensure the movie rating component aligns with your application’s visual design, follow these steps:
- Create a stylesheet: Begin by crafting a dedicated stylesheet for the MovieRatingComponent named movie-rating.component.css. You can define and customize the styles within this stylesheet per your requirements.
- Implement rating logic: The MovieRatingComponent accepts a movie rating as an input property and converts it into a string with a precision of 2 decimal places. This formatted string is stored in the rating property and utilized within the component’s template to display the movie rating.
- Add custom styling: Incorporate the desired styles within the movie-rating.component.css. Following is an example code snippet demonstrating how to style the disabled state of the button.
.e-btn:disabled {
  background: #e0b600;
  color: #fff;
  font-weight: 500;
}
Create the movie details component
Introduction to the movie details component
The movie details component presents the user with comprehensive information about a selected movie.
Step 1: Generating the component
Command execution
To generate the movie details component, begin executing the following command in your Angular CLI.
ng g c components\movie-details
This command will create a new folder named movie-details within the components directory of your Angular application, along with the necessary files for the component.
Step 2: Implementing movie details logic
Code addition
Navigate to the src\app\components\movie-details\movie-details.component.ts file and add the following code to the MovieDetailsComponent class.
readonly movieDetails$ = this.activatedRoute.paramMap.pipe(
    switchMap((params: Params) => {
      const selectedMovieId = Number(params.get('movieId'));
      if (selectedMovieId > 0) {
        return this.fetchMovieByIdService
          .watch(
            {
              filterInput: Number(selectedMovieId),
            },
            {
              fetchPolicy: 'network-only',
            }
          )
          .valueChanges.pipe(map((result) => result?.data?.movieList[0]));
      } else {
        return EMPTY;
      }
    })
  );

  constructor(
    private readonly activatedRoute: ActivatedRoute,
    private readonly fetchMovieByIdService: FetchMovieByIdService
  ) {}
Explanation of logic
The movieDetails$ property is an Observable that emits the details of the selected movie. It’s created by piping the paramMap Observable from ActivatedRoute through the switchMap operator. Inside the switchMap, the movieId parameter is retrieved and converted to a number. If the movieId is greater than 0, the fetchMovieByIdService.watch() method is called to fetch the movie details. The EMPTY Observable is returned if the movieId is not greater than 0. This Observable completes immediately without emitting any values. The fetchPolicy: network–only option ensures that the data is always fetched from the network, not a local cache.
Step 3: Creating the template
HTML structure
Place the following code in the src\app\components\movie-details\movie-details.component.html file.
<ng-container *ngIf="movieDetails$ | async as movie; else noMovieFound">
 <div class="col-12 title-container p-2">
  <h2 class="m-0">Movie Details</h2>
 </div>
 <div class="e-card">
  <div class="e-card-content row g-0">
   <div class="col-md-3 col-sm-12">
    <div class="e-card-image">
     <img
         class="image-width"
         src="Poster/{{ movie.posterPath }}"
         alt="Movie cover image"
         />
    </div>
   </div>

   <div class="col-md-9 col-sm-12 d-flex flex-column justify-content-between">
    <div>
     <div class="d-flex justify-content-between">
      <h1 class="">{{ movie.title }}</h1>
      <span>
       <app-movie-rating [movieRating]="movie.rating"></app-movie-rating>
      </span>
     </div>
     <p class="my-4">{{ movie.overview }}</p>
    </div>
    <div class="d-flex justify-content-between">
     <span><strong>Language</strong> : {{ movie.language }}</span>
     <span><strong>Genre</strong> : {{ movie.genre }}</span>
     <span><strong>Duration</strong> : {{ movie.duration | convertMinToHour }}</span>
    </div>
   </div>
  </div>
 </div>
</ng-container>

<ng-template #noMovieFound>
 <div class="d-flex flex-column align-items-center mt-4">
  <div>
   <h1 class="display-4">No movies found.</h1>
  </div>
  <div>
   <button
          ejs-button
          cssClass="e-link"
          iconCss="e-icons e-back e-medium"
          [routerLink]="['/']">
    Back to Home
   </button>
  </div>
 </div>
</ng-template>
This HTML structure will utilize the Syncfusion Card component to display various movie details such as poster image, title, rating, overview, language, genre, and duration.
The app-movie-rating component presents the movie’s rating, with its movieRating input property bound to the movie.rating property.
The convertMinToHour pipe is also applied to convert the movie’s duration from minutes to hours.
Create the card component
Step 1: Generating the component
Execute the following command to generate the movie card component in your Angular CLI.
ng g c components\movie-card
This command will create a new folder named movie-card within the components directory of your Angular application, along with the necessary files for the component.
Step 2: Implementing component logic
Navigate to the movie-card.component.ts file and add the following code.
import { Component, Input } from '@angular/core';
import { Movie } from 'src/app/models/movie';

@Component({
  selector: 'app-movie-card',
  templateUrl: './movie-card.component.html',
  styleUrls: ['./movie-card.component.css'],
})
export class MovieCardComponent {
  @Input({ required: true })
  movie!: Movie;

  isActive = false;
}
This component is designed to display a movie card. It includes an input movie property that receives data from the parent component and an isActive property that can be used to toggle the movie card’s active state.
Step 3: Creating the template
Open the movie-card.component.html file and include the following code.
<div class="e-card">
 <div class="e-card-image">
  <ejs-tooltip id="tooltip" content="{{ movie.title }}">
   <a [routerLink]="['/movies/details/', movie.movieId]"><img class="preview-image" src="Poster/{{ movie.posterPath }}" alt="Movie cover image"/></a>
  </ejs-tooltip>
 </div>
 <div class="e-card-header">
  <span class="card-rating">
   <app-movie-rating [movieRating]="movie.rating"></app-movie-rating>
  </span>
  <div class="e-card-header-caption">
   <div class="e-card-header-title">
    <a [routerLink]="['/movies/details', movie.movieId]">{{movie. Title}}</a>
   </div>
   <div class="e-card-sub-title">{{ movie.language }}</div>
  </div>
 </div>
</div>
This template renders a movie card with a poster, title, and rating. Clicking on the poster or title navigates the user to the movie’s details page.
Create the movie filter component
Generating the component
Execute the following command in your Angular CLI to generate the movie filter component.
ng g c components\movie-filter
This command will create a new folder named movie-filter within the components directory of your Angular application, along with the necessary files for the component.
Implementing component logic
Navigate to the src\app\components\movie-filter\movie-filter.component.ts file and include the following code within the MovieFilterComponent class.
readonly defaultGenre = 'All Genres';
  allGenre: Genre = { genreId: 0, genreName: this.defaultGenre };

  genreList$ = this.movieHelperService.genreList$.pipe(
    map((result) => {
      if (result) {
        return result.genreList.concat(this.allGenre).reverse();
      } else {
        return [];
      }
    })
  );

  public setfield = {
    text: 'genreName',
    value: 'genreId',
    tooltip: 'genreName',
  };

  constructor(
    private readonly movieHelperService: MovieHelperService,
    private readonly router: Router
  ) {}

  filterMovie(event: any) {
    const selectedGenre = event.target.innerText.toLocaleLowerCase();

    if (selectedGenre === this.defaultGenre.toLocaleLowerCase()) {
      this.router.navigate(['/']);
    } else {
      this.router.navigate(['/filter'], {
        queryParams: { genre: selectedGenre },
        queryParamsHandling: 'merge',
      });
    }
  }
Description of MovieFilterComponent
The MovieFilterComponent is an Angular component designed to filter movies based on their genre. It relies on the MovieHelperService to retrieve the list of genres and the Router to navigate between different components. The filterMovie method is invoked when a genre is selected. If the selected genre is All Genres, it navigates to the root URL. Otherwise, it navigates to the /filter URL with the selected genre as a query parameter.
Adding the template
Insert the following code into the movie-filter.component.html file.
<ejs-listview
  class="genre-list"
  [dataSource]="genreList$ | async"
  [fields]="setfield"
  (click)="filterMovie($event)"
></ejs-listview>
This template utilizes Syncfusion’s ListView component to display the list of genres in the user interface.
Create the movie sort component
Initiating component creation
Start by executing the following command in your Angular CLI to generate the movie sort component.
ng g c components\movie-sort
This command will create a new folder named movie-sort within the components directory of your Angular application, along with the necessary files for the component.
Implementing sort functionality
Now, let’s add the following code to the MovieSortComponent class in the src\app\components\movie-sort\movie-sort.component.ts file.
  @Input()
  selectedSort = '';

  public sortOptions: Object[] = [
    { Id: 'title', genre: 'Title' },
    { Id: 'rating', genre: 'Rating' },
    { Id: 'duration', genre: 'Duration' },
  ];

  public fields: Object = { text: 'genre', value: 'Id' };

  constructor(private readonly router: Router) {}

  sortMovieData(event: any) {
    this.router.navigate(['/filter'], {
      queryParams: { sortBy: event.value.toLocaleLowerCase() },
      queryParamsHandling: 'merge',
    });
  }
This component provides sorting options for movies and navigates to a filtered view based on the selected sort option. The sortMovieData method is a handler for a UI event. It navigates to the /filter route and adds a query parameter sortBy with the value of the selected sort field. The queryParamsHandling: ‘merge’ option ensures that the new query parameters are merged with the existing ones.
Creating the template
Next, add the following code to the movie-sort.component.html file.
<div class="row g-0 my-4">
 <div class="col-12 title-container p-2">
  <h3 class="m-0">Sort Movies</h3>
 </div>
 <div class="e-card">
  <div class="e-card-content row p-3">
   <ejs-dropdownlist [(value)]="selectedSort" [fields]="fields" [dataSource]="sortOptions" placeholder="Select sort parameter" (change)="sortMovieData($event)"></ejs-dropdownlist>
  </div>
 </div>
</div>
We utilize Syncfusion’s Dropdown List component to display a list of sorting options for the movie.
Note: In the subsequent sections of this article, we will configure the routes to filter the movies based on the genre.
Create the home component
Initiating component creation
The project already includes a home component located at the src\app\home path, which was created as part of the default template. We’ll delete and recreate the existing component in the correct location to ensure proper organization.
Step 1: Generate the component
Execute the following command to create a new home component at the correct location.
ng g c components\home
This command will generate a new folder named home within the components directory of your Angular application, along with the necessary files for the component.
Step 2: Implement component logic
Navigate to the src\app\components\home\home.component.ts file and include the following code.
import { Component } from '@angular/core';
import { ActivatedRoute } from '@angular/router';
import { combineLatestWith, map } from 'rxjs';
import { Movie } from 'src/app/models/movie';
import { FetchMovielistService } from 'src/app/services/fetch-movielist.service';

@Component({
  selector: 'app-home',
  templateUrl: './home.component.html',
  styleUrls: ['./home.component.css'],
})
export class HomeComponent {
  private readonly movie$ = this.fetchMovielistService
    .watch({
      fetchPolicy: 'network-only',
    })
    .valueChanges.pipe(map((result) => result?.data));

  vm$ = this.activatedRoute.queryParams.pipe(
    combineLatestWith(this.movie$),
    map(([params, movies]) => {
      let homeVm = new Vm();

      homeVm.selectedGenre = params['genre'];
      homeVm.selectedSort = params['sortBy'];

      if (homeVm.selectedGenre) {
        const filteredMovieByGenre = movies?.movieList.filter(
          (movie) => movie.genre.toLocaleLowerCase() === homeVm.selectedGenre
        );
        homeVm.movieList = filteredMovieByGenre;
      } else {
        homeVm.movieList = movies?.movieList;
      }

      if (homeVm.selectedSort && movies?.movieList) {
        homeVm.movieList = this.sortMovie(
          homeVm.selectedSort,
          homeVm.movieList
        );
      } else {
        homeVm.movieList = this.sortMovie('title', homeVm.movieList);
      }

      return homeVm;
    })
  );

  constructor(
    private readonly activatedRoute: ActivatedRoute,
    private readonly fetchMovielistService: FetchMovielistService
  ) {}

  private sortMovie(sortParam: string, movieList: Movie[]): Movie[] {
    const sortedMovieList = movieList?.slice();
    switch (sortParam) {
      case 'rating':
        sortedMovieList?.sort((a, b) => {
          return a.rating > b.rating ? -1 : 1;
        });
        break;

      case 'duration':
        sortedMovieList?.sort((a, b) => {
          return a.duration > b.duration ? -1 : 1;
        });
        break;

      case 'title':
      default:
        sortedMovieList?.sort((a, b) => a.title.localeCompare(b.title));
        break;
    }

    return sortedMovieList;
  }
}

class Vm {
  movieList: Movie[];
  selectedGenre: string;
  selectedSort: string;

  constructor() {
    this.movieList = [];
    this.selectedGenre = '';
    this.selectedSort = '';
  }
}
Step 3: Crafting the ViewModel
The HomeComponent class includes a vm$ property, representing an observable emitting the view model. This view model is constructed by combining query parameters and the movie list, encompassing the selected genre, sort parameter, and the filtered and sorted movie list.
Step 4: Sorting functionality
Utilize the sortMovie method to sort the movie list based on the specified sorting parameter.
Rendering the template
Include the following HTML code snippet in the home.component.html file.
<ng-container *ngIf="vm$ | async as vm; else loading">
 <div class="row pt-3">
  <div class="col-md-3 col-sm-12 d-flex justify-content-center">
   <div class="filter-container">
    <app-movie-filter></app-movie-filter>
    <app-movie-sort [selectedSort]="vm.selectedSort"></app-movie-sort>
   </div>
  </div>
  <div class="col-md-9 mb-3 tile_layout">
   <div class="row e-card-layout">
    <div class="row">
     <ng-container *ngIf="vm.movieList; else nodata">
      <div *ngFor="let movie of vm.movieList" class="p-1 col-xs-6 col-sm-6 col-lg-3 col-md-6">
       <app-movie-card [movie]="movie"></app-movie-card>
      </div>
     </ng-container>
    </div>
   </div>
  </div>
 </div>
</ng-container>

<ng-template #loading>
 <div class="d-flex justify-content-center mt-4">
  <h2>Loading...</h2>
 </div>
</ng-template>

<ng-template #nodata>
 <div class="d-flex justify-content-center mt-4">
  <h1>No movies found.</h1>
 </div>
</ng-template>
This template code is responsible for rendering the list of movies on the home page, along with the filter and sort options.
Configure app routing
App routing configuration
Open the src\app\app-routing.module.ts file and append the following routes within the appRoutes array.
const appRoutes: Routes = [
  { path: '', component: HomeComponent, pathMatch: 'full' },
  { path: 'filter', component: HomeComponent },
  { path: 'movies/details/:movieId', component: MovieDetailsComponent },
  // Existing code
];
By configuring these routes, you define the navigation paths within your application, ensuring seamless traversal between different views and components.
Configure app proxy
To configure the app proxy, we will open the proxy.conf.js file and update the PROXY_CONFIG constant by adding a new route, as shown.
const PROXY_CONFIG = [
  {
    context: [
      // existing paths
      "/Poster",
    ],
    // existing code
  }
]
Explanation
By adding this configuration, the application gains access to resources stored in the /Poster folder on the server.
Note: Missing routes in the proxy configuration can lead to HTTP 404 errors when the application attempts to access these endpoints. Ensure all necessary routes are included for uninterrupted functionality.
Execution demo
Once the application is launched, you gain access to a comprehensive array of operations, enabling you to do the following.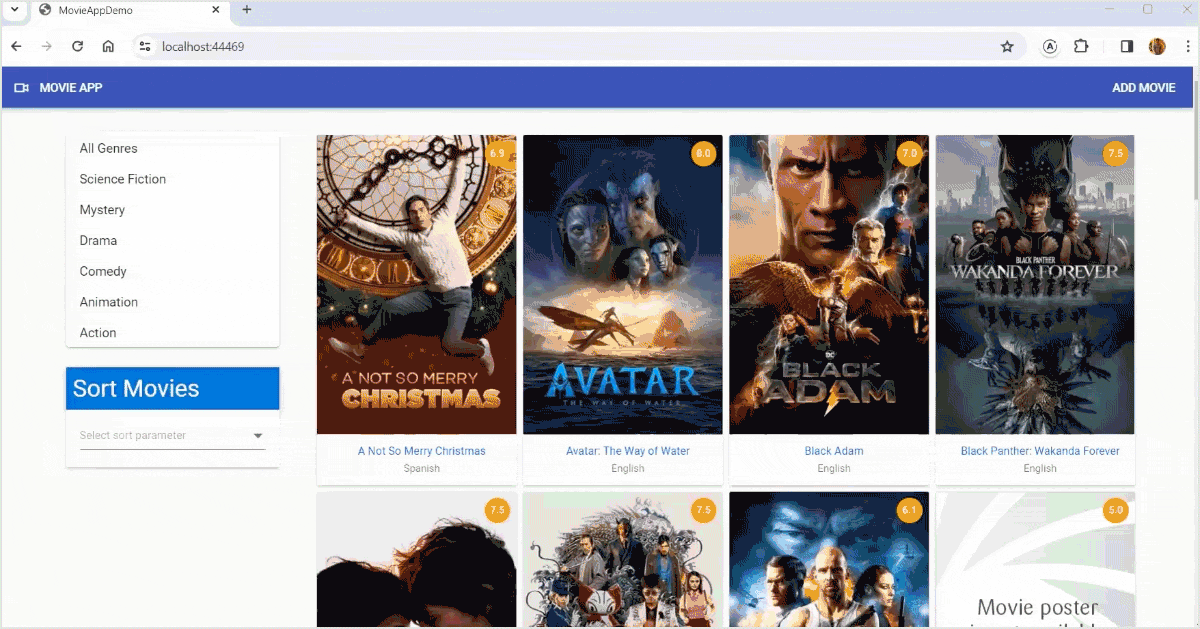
Update the MovieForm component
Implementing edit functionality
We’re enhancing the MovieForm component to incorporate the functionality for editing movie details. This involves updating the src\app\admin\components\movie-form\movie-form.component.ts file as follows.
export class MovieFormComponent implements OnInit, OnDestroy {
  // Existing code

  movieId!: number;

  constructor(
    // Existing code
    private readonly activatedRoute: ActivatedRoute,
    private readonly fetchMovieByIdService: FetchMovieByIdService,
    private readonly fetchMovielistService: FetchMovielistService,
    private readonly updateMovieService: UpdateMovieService

  ) {
    this.initializeForm();
  }

  ngOnInit() {
    this.fetchMovieDetails();
  }

  private fetchMovieDetails() {
    this.activatedRoute.paramMap
      .pipe(
        switchMap((params) => {
          this.movieId = Number(params.get('movieId'));
          if (this.movieId > 0) {
            this.formTitle = 'Edit';
            return this.fetchMovieByIdService
              .watch(
                {
                  filterInput: Number(this.movieId),
                },
                {
                  fetchPolicy: 'network-only',
                }
              )
              .valueChanges.pipe(map((result) => result.data));
          } else {
            return EMPTY;
          }
        }),
        takeUntil(this.destroyed$)
      )
      .subscribe({
        next: (result) => {
          if (result != undefined) {
            this.setMovieFormData(result.movieList[0]);
          }
        },
        error: (error) => {
          ToastUtility.show({
            content:
              'Error occurred while fetching movie data. Please reload the page.',
            position: { X: 'Right', Y: 'Top' },
            cssClass: 'e-toast-danger',
          });
          console.error('Error occurred while fetching movie data : ', error);
        },
      });
  }

  private setMovieFormData(movieFormData: Movie) {
    this.movieForm.setValue({
      movieId: movieFormData.movieId,
      title: movieFormData.title,
      genre: movieFormData.genre,
      language: movieFormData.language,
      duration: movieFormData.duration,
      rating: movieFormData.rating,
      overview: movieFormData.overview,
    });
    this.moviePosterPath = movieFormData.posterPath;
    this.posterPreview = '/Poster/' + this.moviePosterPath;
  }

  // Existing code
}
The fetchMovieDetails method retrieves movie details based on the movie ID obtained from the route parameters. If the movieId is greater than 0, it invokes the fetchMovieByIdService.watch method to fetch the movie details from a GraphQL server. It employs the fetchPolicy: ‘network-only’ option to ensure consistent data retrieval from the network. However, if the movieId is not greater than 0, it returns an EMPTY Observable, which promptly completes without emitting any values. In case of an error during the movie details retrieval, a toast notification is displayed with an error message, and the error is logged to the console.
The setMovieFormData method is responsible for configuring the form data for a movie. It assigns the properties of a Movie object to the value of movieForm, along with the moviePosterPath and posterPreview properties of the component.
To integrate this functionality, add the following function in the MovieFormComponent class. Refer to the next code example for implementation details.
private updateMovie() {
    const movieData: Movie = {
      movieId: this.movieForm.controls.movieId.value,
      title: this.movieForm.controls.title.value,
      duration: Number(this.movieForm.controls.duration.value),
      rating: Number(this.movieForm.controls.rating.value),
      genre: this.movieForm.controls.genre.value,
      language: this.movieForm.controls.language.value,
      overview: this.movieForm.controls.overview.value,
      posterPath:
        this.posterFile !== '' ? this.posterFile : this.moviePosterPath,
    };

    this.updateMovieService
      .mutate({ movieData: movieData })
      .pipe(
        switchMap(() => this.fetchMovielistService.watch().refetch()),
        takeUntil(this.destroyed$)
      )
      .subscribe({
        next: () => {
          ToastUtility.show({
            content: 'The movie data is updated successfully.',
            position: { X: 'Right', Y: 'Top' },
            cssClass: 'e-toast-success',
          });
          this.navigateToAdminPanel();
        },
        error: (error) => {
          ToastUtility.show({
            content: 'Error occurred while updating movie data.',
            position: { X: 'Right', Y: 'Top' },
            cssClass: 'e-toast-danger',
          });
          console.error('Error occurred while updating movie data : ', error);
        },
      });
  }

  navigateToAdminPanel() {
    this.router.navigate(['/admin/movies']);
  }
The updateMovie method serves to modify the details of a movie. It initializes a Movie object from the form controls, invokes the mutate method of updateMovieService to update the movie data, and subscribes to the resulting observable to handle the outcome or potential errors.
Enhance the onFormSubmit method as follows.
protected onFormSubmit(): void {
    this.submitted = true;
    if (!this.movieForm.valid) {
      return;
    }

    if (this.movieId) {
      this.updateMovie();
    } else {
      this.addMovie();
    }
  }
This method validates the form. If the movieId property is true, it indicates that an existing movie is being edited. Then, the updateMovie method is invoked to update the movie. Conversely, if movieId is false, a new movie is added. Thus, the addMovie method is called to append the movie.
Create the admin panel
Establishing admin rights management
We’ll construct an admin panel tailored to this specific purpose to manage admin rights effectively within our application.
Step 1: Generating the manage-movies component
Initiate the creation of the manage-movie component by executing the following Angular CLI command.
ng g c admin\components\manage-movies
This command will generate a new folder named manage-movies within the components directory of our admin module, along with the requisite files for the component.
Step 2: Component Implementation
Navigate to the src\app\admin\components\manage-movies\manage-movies.component.ts file and insert the following code.
import { Component, OnDestroy } from '@angular/core';
import { DialogUtility } from '@syncfusion/ej2-angular-popups';
import { ReplaySubject, map, switchMap, takeUntil } from 'rxjs';
import { DeleteMovieService } from 'src/app/services/delete-movie.service';
import { FetchMovielistService } from 'src/app/services/fetch-movielist.service';
import { ToastUtility } from '@syncfusion/ej2-notifications';
import { ToolbarItems } from '@syncfusion/ej2-angular-grids';

@Component({
  selector: 'app-manage-movies',
  templateUrl: './manage-movies.component.html',
  styleUrls: ['./manage-movies.component.css'],
})
export class ManageMoviesComponent implements OnDestroy {
  public dialogObj: any;
  private destroyed$ = new ReplaySubject<void>(1);
  public initialPage = { pageSizes: true };
  public initialSort = {
    columns: [{ field: 'title', direction: 'Ascending' }],
  };
  public toolbarOptions?: ToolbarItems[];

  readonly movie$ = this.fetchMovielistService
    .watch()
    .valueChanges.pipe(map((result) => result.data));

  constructor(
    private readonly fetchMovielistService: FetchMovielistService,
    private readonly deleteMovieService: DeleteMovieService
  ) {
    this.toolbarOptions = ['Search'];
  }

  deleteConfirm(movieId: number): void {
    this.dialogObj = DialogUtility.confirm({
      title: 'Delete movie',
      content: 'Do you want to delete this movie?',
      width: '400px',
      okButton: { click: this.confirmOkAction.bind(this, movieId) },
      cancelButton: { click: this.confirmCancelAction.bind(this) },
    });
  }

  private confirmOkAction(movieId: number): void {
    this.deleteMovieService
      .mutate({
        movieId: movieId,
      })
      .pipe(
        switchMap(() => this.fetchMovielistService.watch().refetch()),
        takeUntil(this.destroyed$)
      )
      .subscribe({
        next: () => {
          this.confirmCancelAction();
          ToastUtility.show({
            content: 'The movie was deleted successfully.',
            position: { X: 'Right', Y: 'Top' },
            cssClass: 'e-toast-success',
          });
        },
        error: () => {
          this.confirmCancelAction();
          ToastUtility.show({
            content: 'Error occurred while deleting the movie data.',
            position: { X: 'Right', Y: 'Top' },
            cssClass: 'e-toast-danger',
          });
        },
      });
  }

  private confirmCancelAction(): void {
    this.dialogObj.hide();
  }

  ngOnDestroy(): void {
    this.destroyed$.next();
    this.destroyed$.complete();
  }
}
This component facilitates movie management within the application. It enables the deletion of movies and the configuration of the movie list display.
The movie$ property is an Observable that emits the list of movies. It fetches the movie list from a GraphQL server using the fetchMovielistService.watch().valueChanges Observable. The map operator extracts the data property from the result.
The deleteConfirm method is invoked to confirm movie deletion, displaying a confirmation dialog via the DialogUtility.confirm method. The okButton and cancelButton options bind the click events of the OK and Cancel buttons to the confirmOkAction and confirmCancelAction methods, respectively. Upon clicking OK, confirmOkAction invokes the deleteMovieService.mutate method to delete the specified movie by its movieId. Subsequently, it calls fetchMovielistService.watch().refetch to update the movie list. Finally, a toast notification indicates the success or failure of the deletion.
Place the following code in the manage-movies.component.html file for implementation.
Refer to this code example.
<div class="my-2 justify-content-end d-flex">
 <button ejs-button cssClass="e-info" [routerLink]="['/admin/movies/new']">
    Add Movie
 </button>
</div>

<div class="my-2">
 <div class="title-container p-2">
  <h2 class="m-0">All Movies</h2>
 </div>

 <div class="e-card">
  <div class="e-card-content">
   <ng-container *ngIf="movie$ | async as movies">
    <ejs-grid
     #grid
     [dataSource]="movies?.movieList"
     [allowPaging]="true"
     [allowSorting]="true"
     [pageSettings]="initialPage"
     [toolbar]="toolbarOptions">
     <e-columns>
      <e-column field="title" headerText="Title" width="200"></e-column>
      <e-column field="genre" headerText="Genre" width="150"></e-column>
      <e-column field="language" headerText="Language" width="150"></e-column>
      <e-column field="duration" headerText="Duration" width="150"></e-column>
      <e-column field="rating" headerText="Rating" width="150"></e-column>
      <e-column headerText="Operation" width="150">
       <ng-template #template let-movieData>
        <ejs-tooltip content="Edit movie">
         <button
          ejs-button
          cssClass="e-small e-round e-flat"
          iconCss="e-icons e-edit-4 e-medium"
          [isPrimary]="true"
          [routerLink]="['/admin/movies/', movieData.movieId]"></button>
        </ejs-tooltip>
        <ejs-tooltip content="Delete movie">
         <button
          ejs-button
          cssClass="e-small e-round e-danger e-flat"
          iconCss="e-icons e-trash e-medium"
          (click)="deleteConfirm(movieData.movieId)"></button>
        </ejs-tooltip>
       </ng-template>
      </e-column>
     </e-columns>
    </ejs-grid>
   </ng-container>
  </div>
 </div>
</div>
The template presents a comprehensive list of movies, offering functionalities to seamlessly add, edit, and delete movies.
The button adorned with the ejs-button directive and routerLink attribute facilitates navigation to the /admin/movies/new route, enabling users to incorporate new movie entries. Additionally, the ejs-grid component, sourced from the Syncfusion Angular UI library, exhibits a structured grid layout of movies. The dataSource attribute is linked to the movies?.movieList property, which serves as the source for movie data. Furthermore, allowPaging and allowSorting facilitate pagination and sorting operations within the grid.
To configure the admin routing effectively, update the src\app\admin\admin-routing\admin-routing.module.ts file by incorporating the path for the ManageMoviesComponent .
Configure the admin routing
To configure the admin routing, follow these steps:
- Navigate to the src\app\admin\admin-routing\admin-routing.module.ts
- Update the file by adding the path for the ManageMoviesComponent.
// Existing code
const adminRoutes: Routes = [
  {
    path: '',
    children: [
       // Existing route
      { path: '', component: ManageMoviesComponent },
    ],
  },
];

// Existing code
This ensures that the ManageMoviesComponent is accessible within the admin section of your application.
Update the navigation bar
Open the app\components\nav-bar\nav-bar.component.html file. Remove the Add Movie nav-link and add the link to the admin panel.
<button ejs-button cssClass="e-inherit" [routerLink]="['/admin/movies']" [isToggle]="true"> Admin Panel
</button>
Demo execution
Launch the application and perform the edit and delete operations on the movie list. Refer to the following image to see it in action.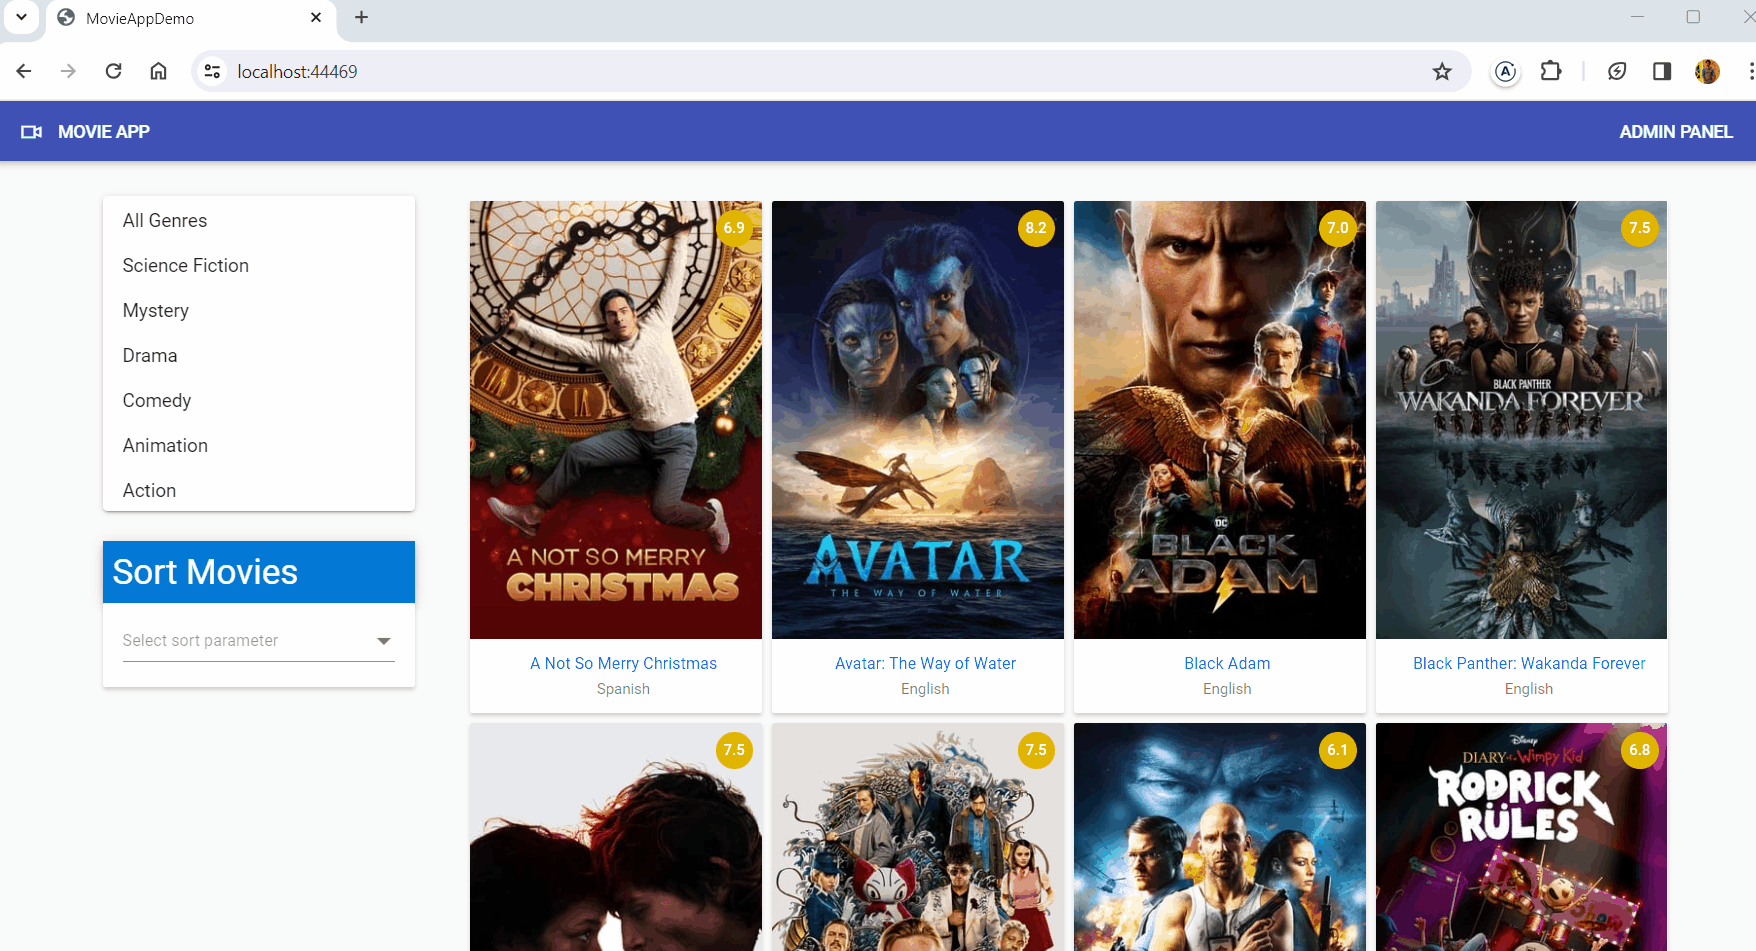
Resource
The complete source code of this full-stack web app with Angular and GraphQL is available in the GitHub repository.
Summary
Thank you for taking the time to read our article. Today, we delved into implementing edit and delete functionalities within our application, augmenting it with an admin panel to empower admin users to manage movie data effectively.
Our next endeavor involves integrating authentication and authorization features into the application. Stay tuned for the upcoming article in this series, where we’ll guide you through incorporating user registration functionality.
If you’re new to our platform, we invite you to explore our Angular components with a complimentary trial. Should you require assistance or have any inquiries, our dedicated support system is at your disposal. Reach out to us through our support forum, access our support portal, or engage with us on our feedback portal. Your success is our priority, and we’re committed to assisting you every step of the way on your development journey!


 No spam, just valuable updates.