
Hierarchical trees with multiple parents are also known as directed acyclic graphs (DAGs). They are powerful tools to represent complex relationships in various domains.
The Syncfusion Angular Diagram Library offers comprehensive features to create hierarchical diagrams with multiple parents. With these features and an intuitive API, you’ll be able to visualize intricate relationships with ease.
This blog is a quick guide to creating a hierarchical tree diagram with multiple parents using the Angular Diagram library.
Create flowcharts, organizational charts, and visual workflows with Syncfusion Angular Diagram. Easily add nodes, connectors, automatic layouts, editing tools, and customizable diagram elements to your apps.
Start with Angular DiagramCreate a hierarchical tree diagram with multiple parents
The Syncfusion Angular Diagram component supports visualizing hierarchical trees with multiple parents from external data sources. In addition, data in any format can be easily converted, mapped, and consumed in the Diagram by setting a few properties.
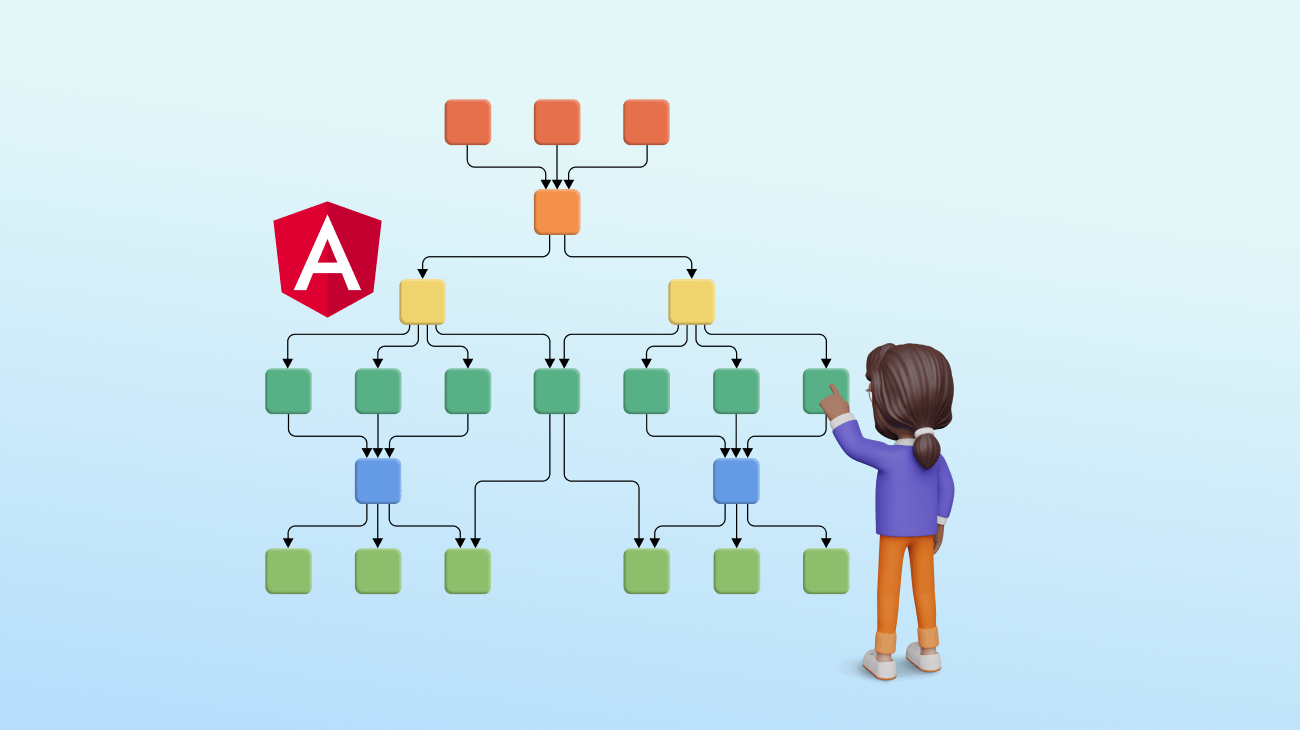
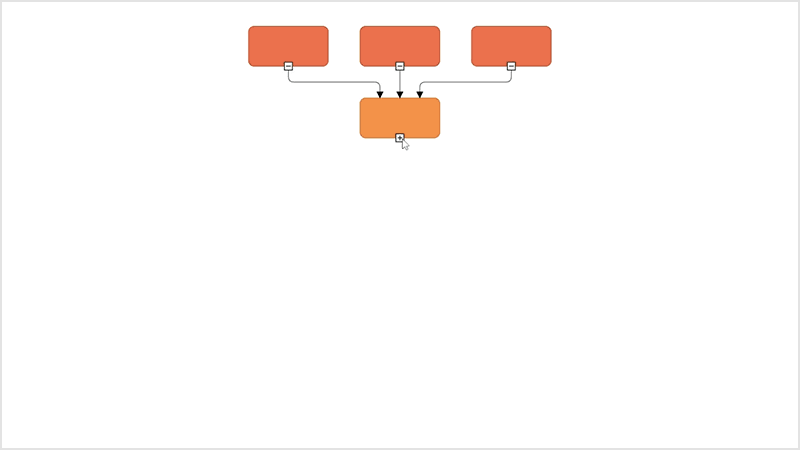
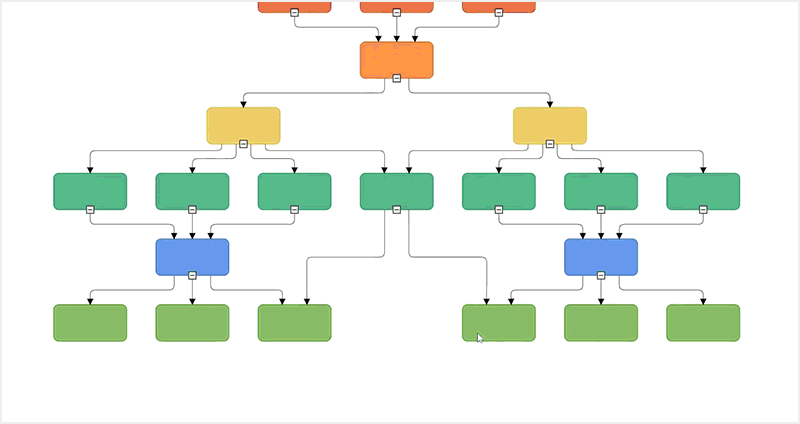
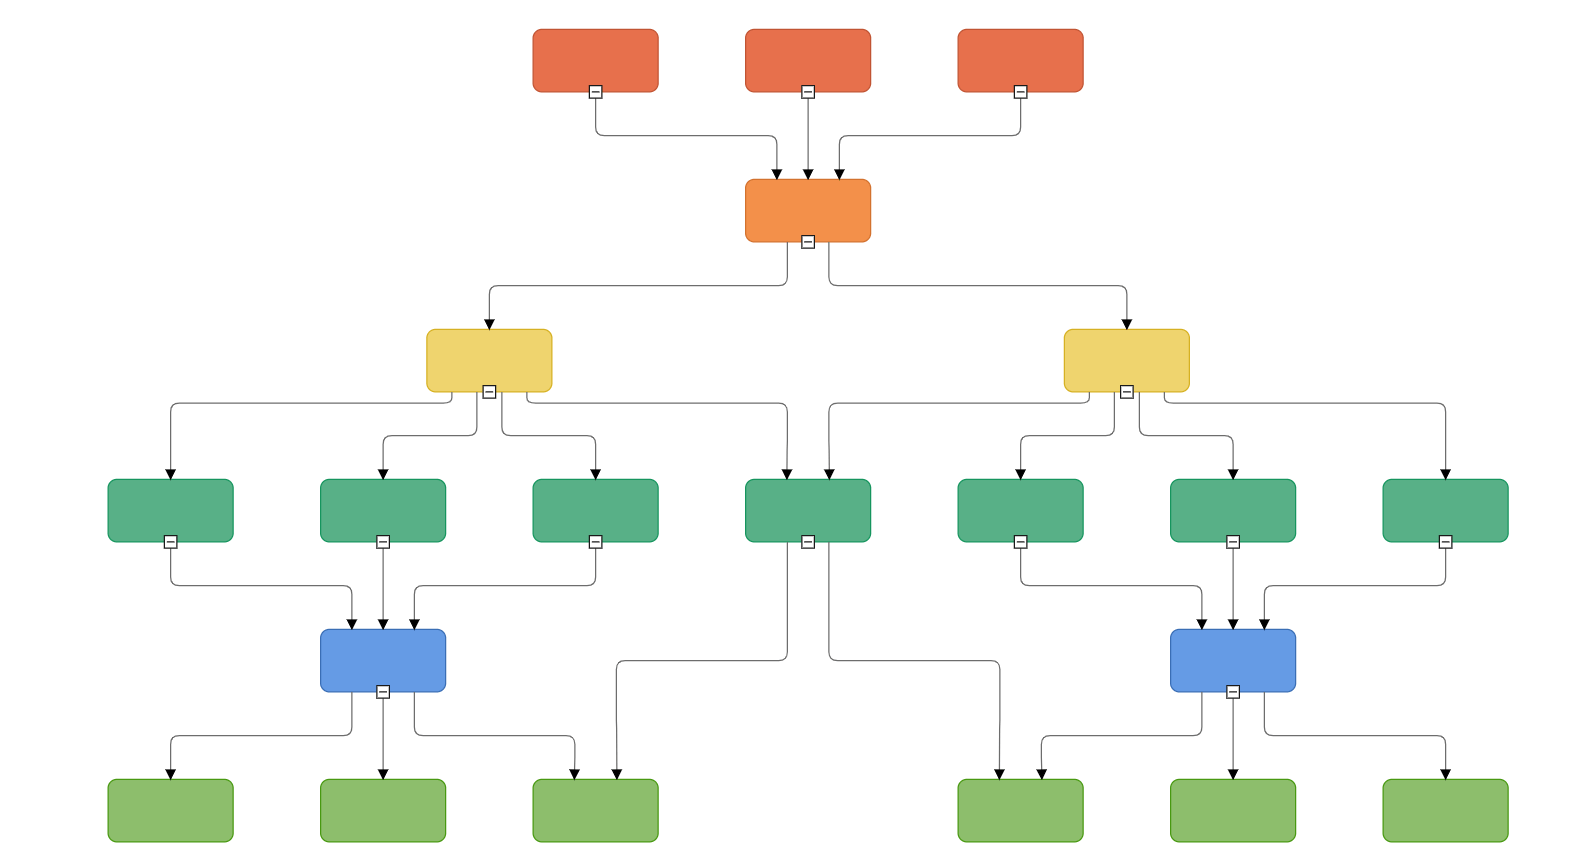
We are going to design the following hierarchical tree in this article.
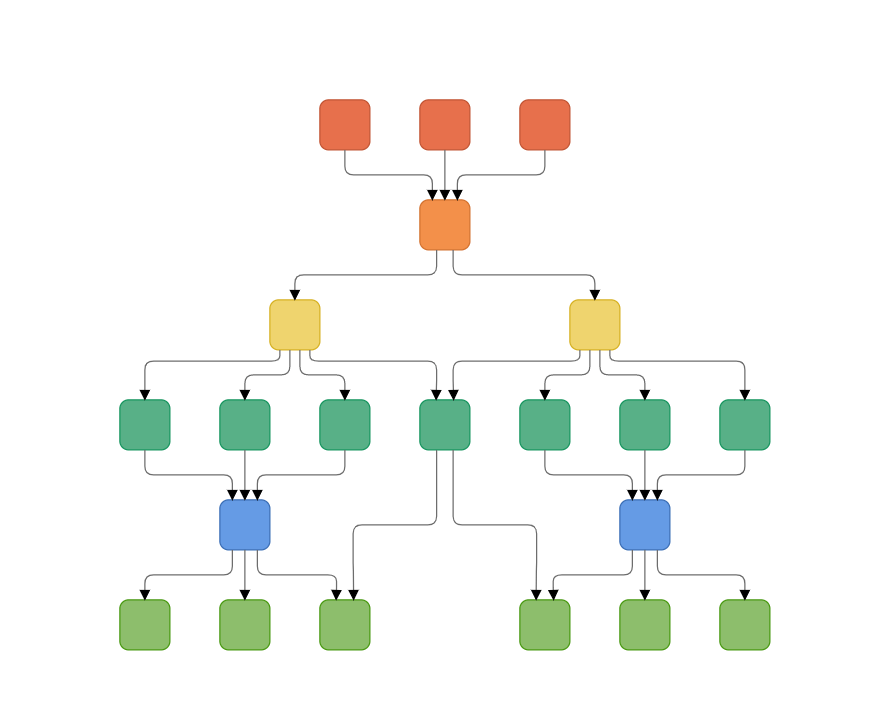
In this image, the rectangular boxes represent the nodes, and the curved lines represent the connectors.
Follow these steps to create this diagram:
- First, refer to the Getting Started with Angular Diagram library documentation to see the dependent scripts and theme files required to integrate the Diagram component into an Angular app.
- Define the tree information as a JSON array.
- Create an instance of the Angular Diagram component.
- Configure the data to the dataSourceSettings property of the created diagram instance.
- Define the common formatting for all nodes and connectors through the getNodeDefaults and getConnectorDefaults methods, respectively.
- After configuring the data source, define the layout type as ComplexHierarchicalTree to automatically arrange the nodes’ positions.
The following code example includes all these steps. You can also find the same code on StackBlitz.
[HTML]
<div class="control-section diagram-complex-hierarchical-tree">
 <div class="content-wrapper">
  <ejs-diagram #diagram id="diagram" width="100%" height="580px" [getConnectorDefaults]="connDefaults" [getNodeDefaults]="nodeDefaults" [tool]="tool" [layout]="layout" [dataSourceSettings]="data" [snapSettings]="snapSettings" (created)="created()">
  </ejs-diagram>
 </div>
</div>
[TS]
import { Component, ViewEncapsulation, ViewChild } from '@angular/core';


import {
  DiagramComponent,
  LineDistribution,
} from '@syncfusion/ej2-angular-diagrams';


import {
  NodeModel,
  ConnectorModel,
  DiagramTools,
  Diagram,
  DataBinding,
  ComplexHierarchicalTree,
  SnapConstraints,
  SnapSettingsModel,
  LayoutModel,
  LayoutOrientation,
  ConnectionPointOrigin,
} from '@syncfusion/ej2-diagrams';
import { DataManager } from '@syncfusion/ej2-data';
import { ChangeEventArgs as NumericChangeEventArgs } from '@syncfusion/ej2-inputs';
import { ChangeEventArgs as CheckBoxChangeEventArgs } from '@syncfusion/ej2-buttons';
Diagram.Inject(DataBinding, ComplexHierarchicalTree, LineDistribution);

export interface DataInfo {
  [key: string]: string;
}

/**
 * Multiple parent sample.
 */
@Component({
  selector: 'app-root',
  templateUrl: 'app.component.html',
  styleUrls: ['app.component.css'],
  encapsulation: ViewEncapsulation.None,
})


export class AppComponent {
  @ViewChild('diagram')
  public diagram: DiagramComponent;

  public Data: any = [
    { Name: 'node11', fillColor: '#e7704c', border: '#c15433' },
    {
      Name: 'node12',
      ReportingPerson: ['node114'],
      fillColor: '#efd46e',
      border: '#d6b123',
    },
    {
      Name: 'node13',
      ReportingPerson: ['node12'],
      fillColor: '#58b087',
      border: '#16955e',
    },
    {
      Name: 'node14',
      ReportingPerson: ['node12'],
      fillColor: '#58b087',
      border: '#16955e',
    },
    {
      Name: 'node15',
      ReportingPerson: ['node12'],
      fillColor: '#58b087',
      border: '#16955e',
    },
    {
      Name: 'node116',
      ReportingPerson: ['node22', 'node12'],
      fillColor: '#58b087',
      border: '#16955e',
    },
    { Name: 'node16', ReportingPerson: [], fillColor: '#14ad85' },
    {
      Name: 'node17',
      ReportingPerson: ['node13', 'node14', 'node15'],
      fillColor: '#659be5',
      border: '#3a6eb5',
    },
    { Name: 'node18', ReportingPerson: [], fillColor: '#14ad85' },
    {
      Name: 'node19',
      ReportingPerson: ['node16', 'node17', 'node18'],
      fillColor: '#8dbe6c',
      border: '#489911',
    },
    {
      Name: 'node110',
      ReportingPerson: ['node16', 'node17', 'node18'],
      fillColor: '#8dbe6c',
      border: '#489911',
    },
    {
      Name: 'node111',
      ReportingPerson: ['node16', 'node17', 'node18', 'node116'],
      fillColor: '#8dbe6c',
      border: '#489911',
    },
    { Name: 'node21', fillColor: '#e7704c', border: '#c15433' },
    {
      Name: 'node22',
      ReportingPerson: ['node114'],
      fillColor: '#efd46e',
      border: '#d6b123',
    },
    {
      Name: 'node23',
      ReportingPerson: ['node22'],
      fillColor: '#58b087',
      border: '#16955e',
    },
    {
      Name: 'node24',
      ReportingPerson: ['node22'],
      fillColor: '#58b087',
      border: '#16955e',
    },
    {
      Name: 'node25',
      ReportingPerson: ['node22'],
      fillColor: '#58b087',
      border: '#16955e',
    },
    { Name: 'node26', ReportingPerson: [], fillColor: '#14ad85' },
    {
      Name: 'node27',
      ReportingPerson: ['node23', 'node24', 'node25'],
      fillColor: '#659be5',
      border: '#3a6eb5',
    },
    { Name: 'node28', ReportingPerson: [], fillColor: '#14ad85' },
    {
      Name: 'node29',
      ReportingPerson: ['node26', 'node27', 'node28', 'node116'],
      fillColor: '#8dbe6c',
      border: '#489911',
    },
    {
      Name: 'node210',
      ReportingPerson: ['node26', 'node27', 'node28'],
      fillColor: '#8dbe6c',
      border: '#489911',
    },
    {
      Name: 'node211',
      ReportingPerson: ['node26', 'node27', 'node28'],
      fillColor: '#8dbe6c',
      border: '#489911',
    },
    { Name: 'node31', fillColor: '#e7704c', border: '#c15433' },
    {
      Name: 'node114',
      ReportingPerson: ['node11', 'node21', 'node31'],
      fillColor: '#f3904a',
      border: '#d3722e',
    },
  ];

  public nodeDefaults(obj: NodeModel): NodeModel {
    obj.width = 40;
    obj.height = 40;
    //Initialize shape.
    obj.shape = { type: 'Basic', shape: 'Rectangle', cornerRadius: 7 };
    return obj;
  }


  public data: Object = {
    id: 'Name',
    parentId: 'ReportingPerson',
    dataSource: new DataManager(this.Data),
    //Binds the external data with the node.
    doBinding: (nodeModel: NodeModel, data: DataInfo, diagram: Diagram) => {
      /* tslint:disable:no-string-literal */
      nodeModel.style = {
        fill: data['fillColor'],
        strokeWidth: 1,
        strokeColor: data['border'],
      };
    },
  };


  public created(): void {
    this.diagram.fitToPage();
  }


  public connDefaults(connector: ConnectorModel): void {
    connector.type = 'Orthogonal';
    connector.cornerRadius = 7;
    connector.targetDecorator.height = 7;
    connector.targetDecorator.width = 7;
    connector.style.strokeColor = '#6d6d6d';
  }

  public tool: DiagramTools = DiagramTools.ZoomPan;

  public snapSettings: SnapSettingsModel = {
    constraints: SnapConstraints.None,
  };

  public layout: LayoutModel = {
    type: 'ComplexHierarchicalTree',
    connectionPointOrigin: ConnectionPointOrigin.DifferentPoint,
    horizontalSpacing: 40,
    verticalSpacing: 40,
    orientation: 'TopToBottom',
    margin: { left: 10, right: 0, top: 50, bottom: 0 },
  };
}
Expand and collapse children
You can use the expandIcon and collapseIcon properties of nodes to implement the expand and collapse features in the hierarchical tree’s children nodes.
Refer to the following code example and find the same on StackBlitz.
private getNodeDefaults(obj: NodeModel): NodeModel {
    ........
    obj.expandIcon = {
      shape: 'Minus',
    };
    obj.collapseIcon = {
      shape: 'Plus',
    };
    ........
    return obj;
}
Drag and drop
You can easily change the multiparent tree layout by dragging a topic or subtopic and dropping it at the required location.
Add the following code to the Diagram control’s drop method to enable editing in the hierarchical tree structure. The same code is also available on StackBlitz.
public drop(args: IDropEventArgs) {
    //Argument element is used to get the dropped node.
    let node: NodeModel = args.element as NodeModel;
    //Gets the connector that connected to dropped node.
    let edges: string[] = this.diagram.getEdges(node);
    let connector: ConnectorModel = this.diagram.getObject(edges[0]);
    //Argument target is used to get the hovered node.
    connector.sourceID = (args.target as NodeModel).id;
    this.diagram.dataBind();
    // doLayout is used to rearrange the nodes and connectors in the diagram.
    this.diagram.doLayout();
}
Spacing
You can adjust the spacing between each level of the multiparent tree diagram both horizontally and vertically. You can also define a margin around the multiparent diagram.
Refer to the following code example and find it on StackBlitz.
public layout: LayoutModel = {
    type: 'ComplexHierarchicalTree',
    connectionPointOrigin: ConnectionPointOrigin.DifferentPoint,
    horizontalSpacing: 70,
    verticalSpacing: 70,
    orientation: 'TopToBottom',
    margin: { left: 10, right: 0, top: 50, bottom: 0 },
};
Zooming and panning
Viewing a large diagram on a small screen can be challenging. In that case, zooming and panning help us provide a more detailed view of the hierarchical tree diagram.
You can zoom in and out of the diagram using the Ctrl + mouse wheel shortcut key.
Refer to the following code examples (or on StackBlitz) to enable zooming and panning support in the Diagram component.
[HTML]
<div class="control-section diagram-complex-hierarchical-tree">
 <div class="content-wrapper">
  <ejs-diagram #diagram id="diagram" width="100%" height="800px" [getConnectorDefaults]="connDefaults" [getNodeDefaults]="nodeDefaults" [layout]="layout" [tool]="tool" [dataSourceSettings]="data" [snapSettings]="snapSettings" (created)="created()" (drop)="drop($event)">
  </ejs-diagram>
 </div>
</div>
[TS]
//Enable pan tool
  public tool: DiagramTools = DiagramTools.ZoomPan;
Exporting
You can easily export the diagram to different image formats such as PNG, JPEG, and SVG.
Refer to the following code example (or on StackBlitz) to explore this feature.
let exportOptions: IExportOptions = {};
    exportOptions.format = args.item.text as FileFormats;
    exportOptions.mode = 'Download';
    exportOptions.region = 'Content';
    exportOptions.multiplePage = false;
    exportOptions.fileName = HierarchicalTree;
    this.diagram.exportDiagram(exportOptions);
Conclusion
Thanks for reading! In this blog, we’ve seen how to create and customize a multiparent hierarchical tree diagram using the Syncfusion Angular Diagram library. With the same component, you can also create flowcharts, organizational charts, floor plans, UML diagrams, and BPMN charts. Try out the steps in this blog, and give us your feedback in the comments section!
If you want to try the Diagram library, you can download our free trial. You can see the Diagram library live demo and documentation for detailed explanations.
If you have any questions, you can contact us through our support forum, support portal, or feedback portal. We are always happy to assist you!
 No spam, just valuable updates.