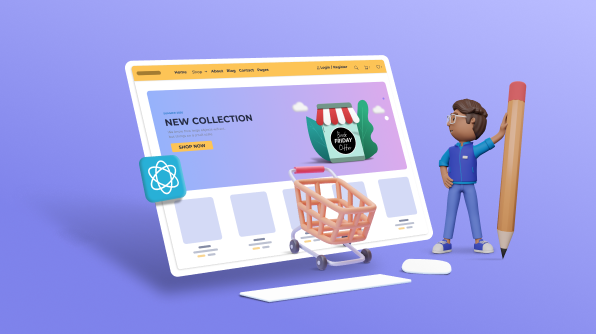
Welcome to the first part of our blog series, “Designing a React E-Commerce App for Digital Products.” This series is designed to guide you through building a fully functional, client-side, single-page e-commerce platform specializing in digital products such as e-books, themes, templates, thumbnails, and NFTs using React.
As this project is primarily for learning purposes, we will focus on creating a single-page app rendered on the client side rather than optimization for SEO. Throughout this process, we will adhere to the best practices of software engineering and front-end development.
So, let’s embark on this exciting journey of creating a digital marketplace with React.
Requirements
In any typical product development process, we need to understand the product’s purpose, its target audience, and the specific features it needs to serve its users effectively.
Once the product specifications are established, the next step is to translate these requirements into a functional design. This design serves as a blueprint that guides the development team in building the app.
We will follow a similar approach. We’ll identify the necessary pages for our e-commerce app and create a visual flow diagram to represent the user journey through these pages. This diagram will act as our roadmap throughout development, ensuring we build a cohesive and user-friendly app.
Here are some key components we need to outline for our e-commerce app:
- Landing page: A page where users can browse the listed products.
- Product page: Each product should have a dedicated page for detailed descriptions.
- Checkout page: A necessary page for users to finalize their purchases.
- Login page: A page where users can log into the app.
- Dashboard page: A page where users can create their products.
- Product add page: A page where the products can be listed.
- Thank you page: A page to acknowledge users after they have made a purchase.
Refer to the following image.
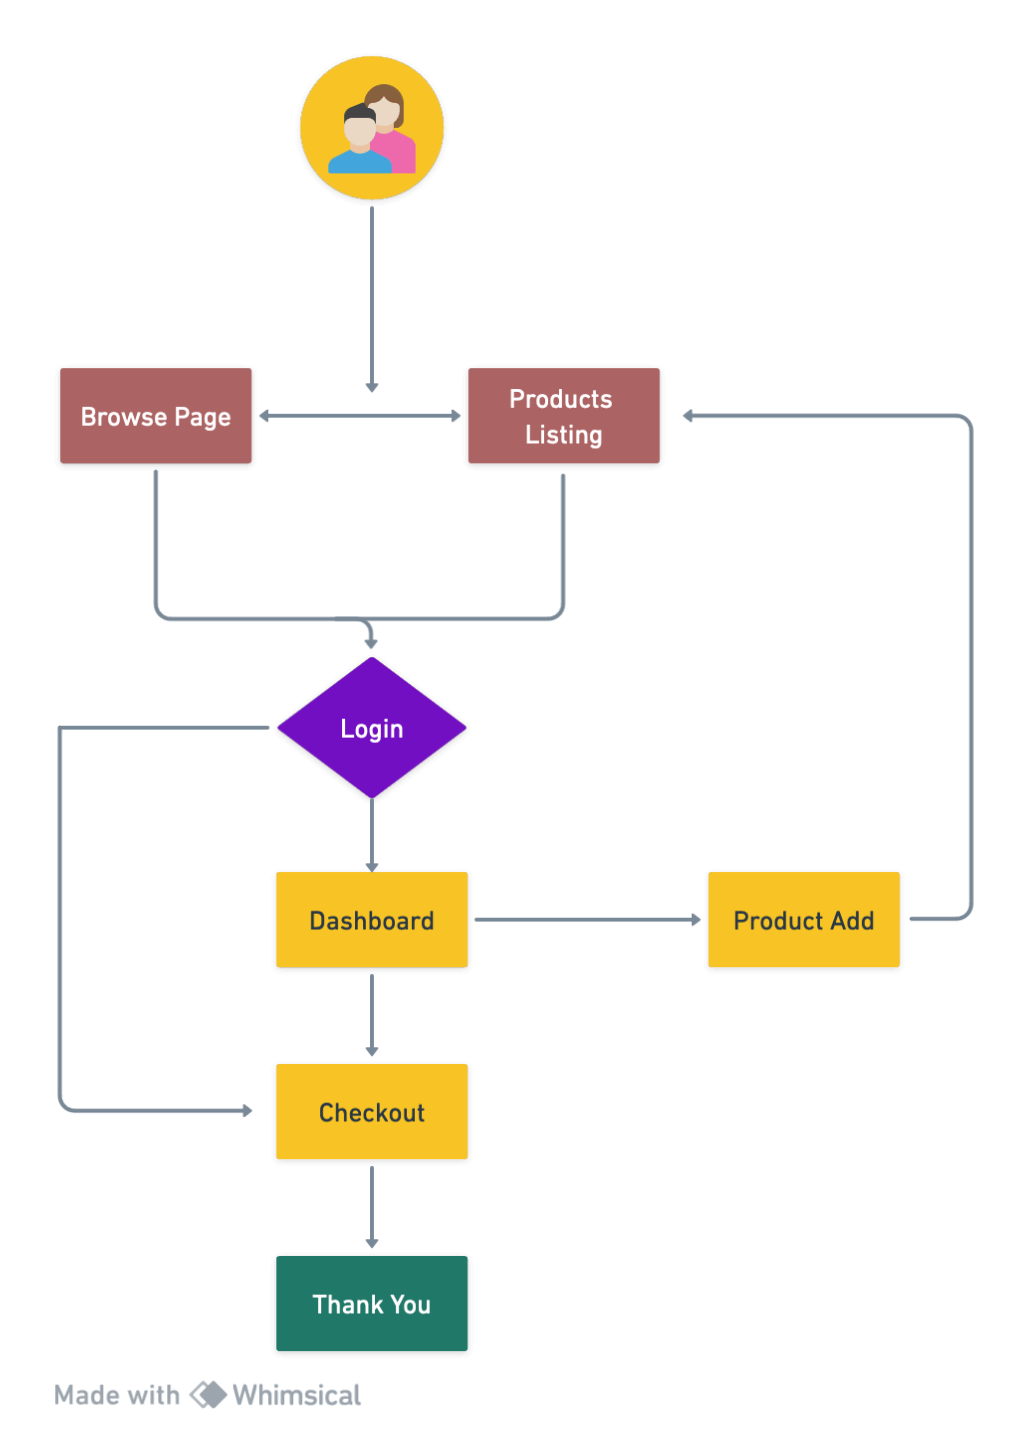
The flow diagram actively assists in determining the data flow from one page to another. Given that we employ component-driven development in React, we can actively analyze the state of each component and identify the data that needs centralization for sharing.
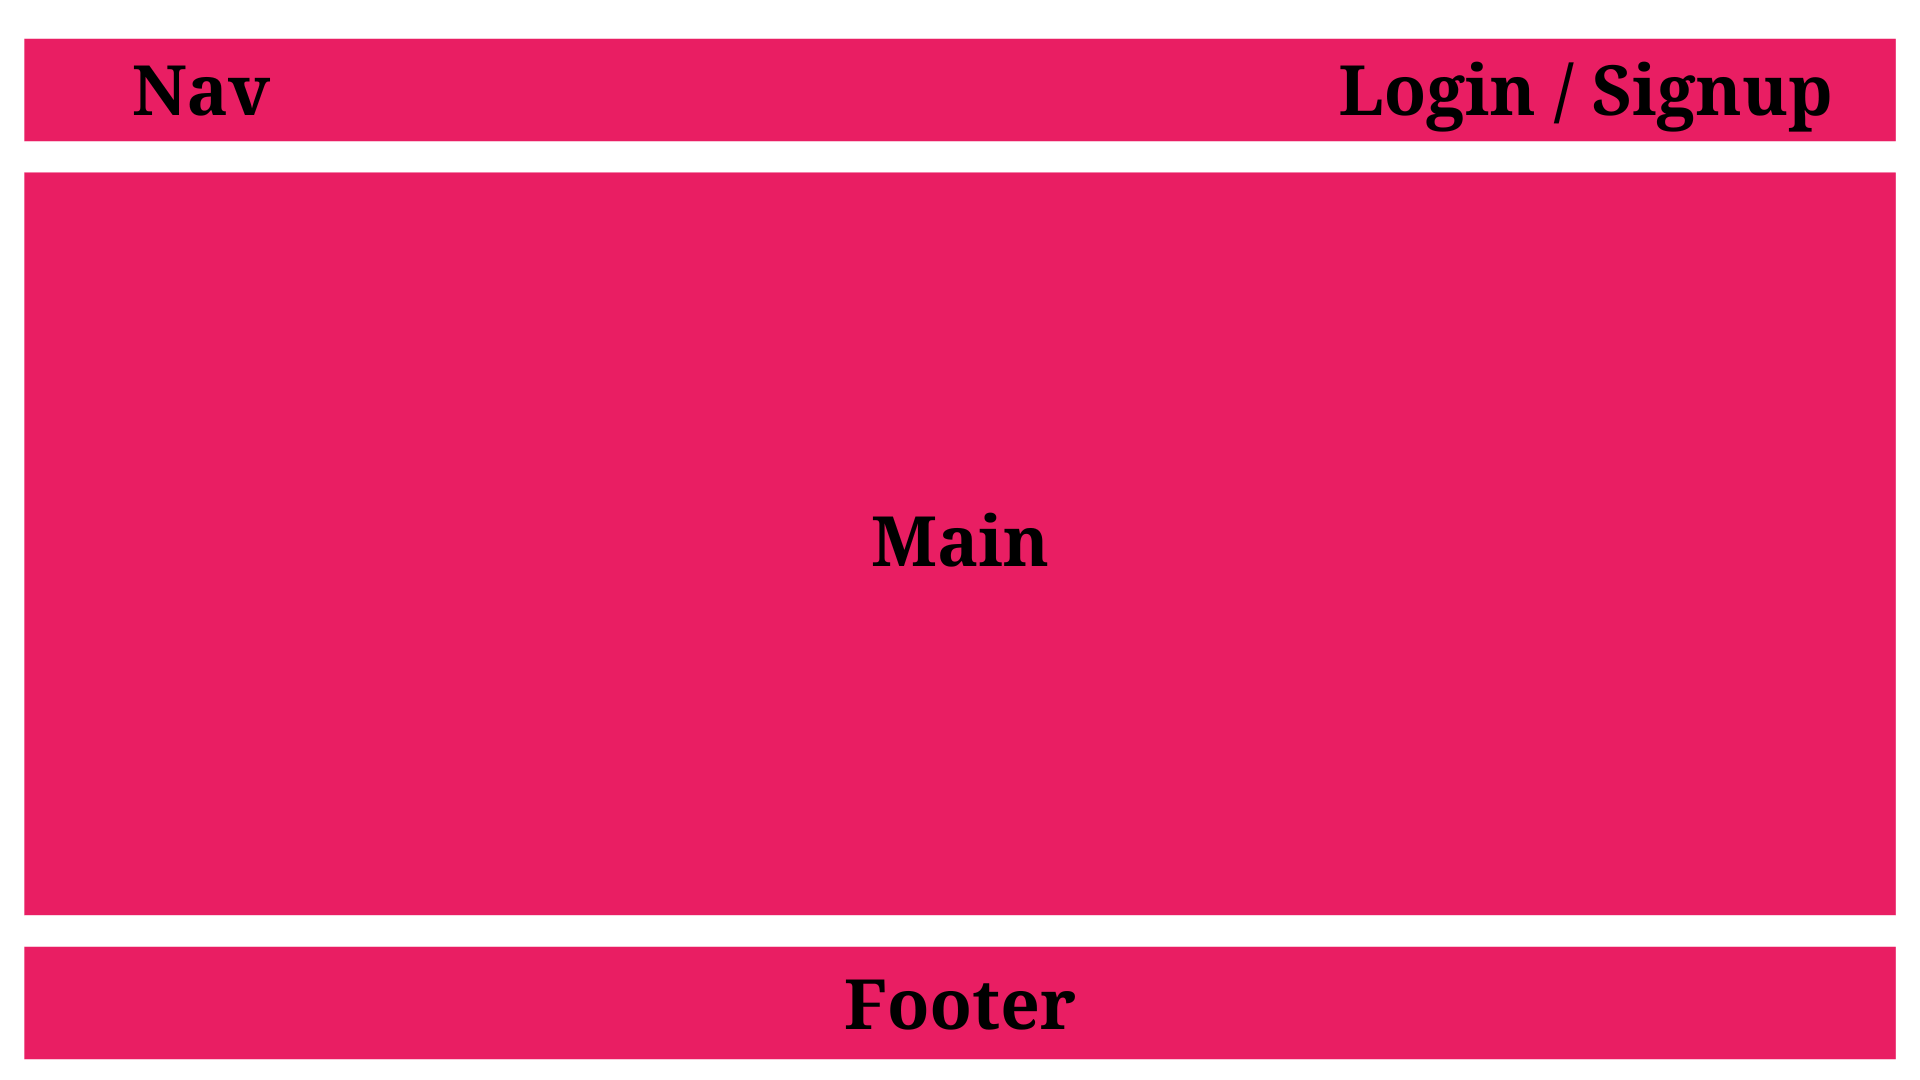
Wireframes
Without a pre-existing architecture or flow, we typically construct these elements using Figma or from the designs we receive. To gain a clear perspective on the appearance of my pages, I have actively created a wireframe for each page.
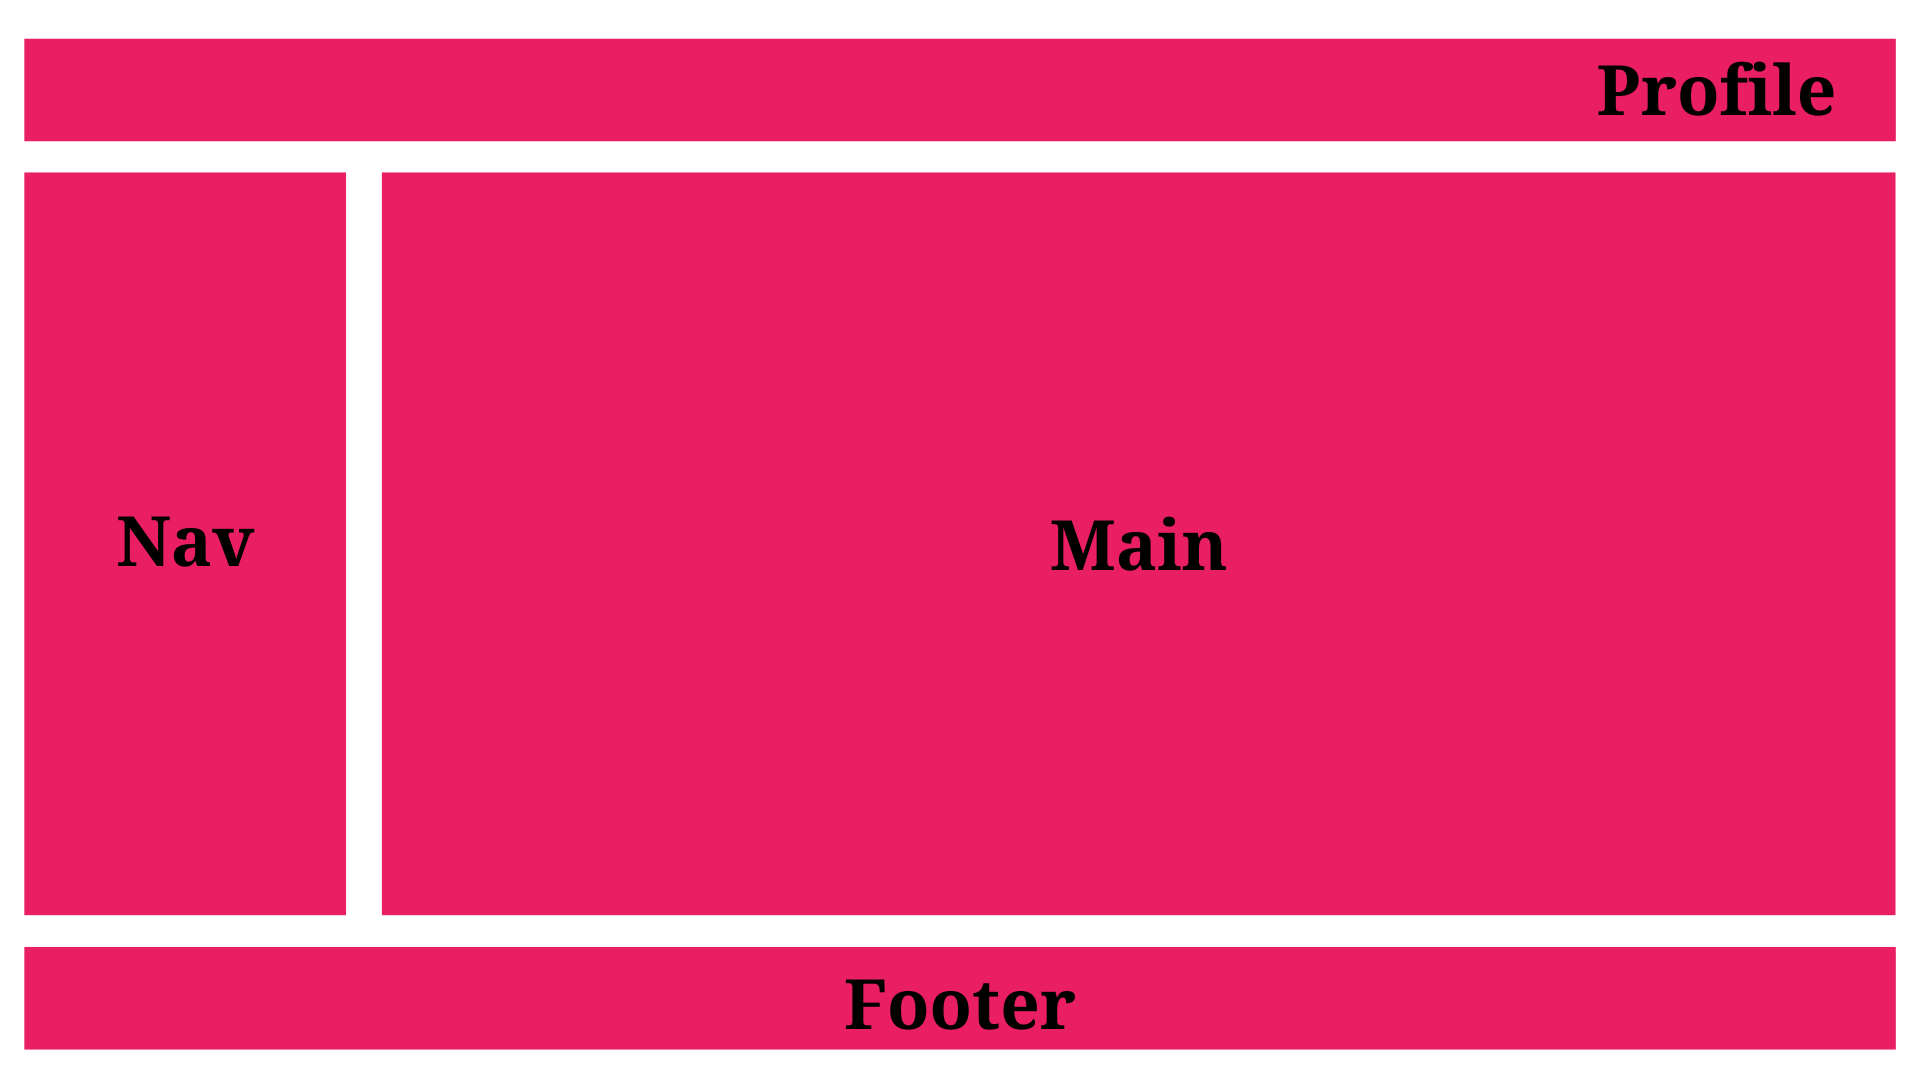
Landing Page
This is the first point of contact between the user and our e-commerce site. The landing page plays a vital role in shaping the user’s experience. It showcases the catalog of digital products available on the site, each accompanied by a brief description and a thumbnail image. Products are organized into categories for easy navigation, and a search function is available for quick access to specific items.
Moreover, the landing page facilitates user authentication with a prominent Login button. This will lead to the login page.
In summary, the landing page provides a comprehensive snapshot of the e-commerce site’s offerings and equips users with the necessary tools to interact with its content.
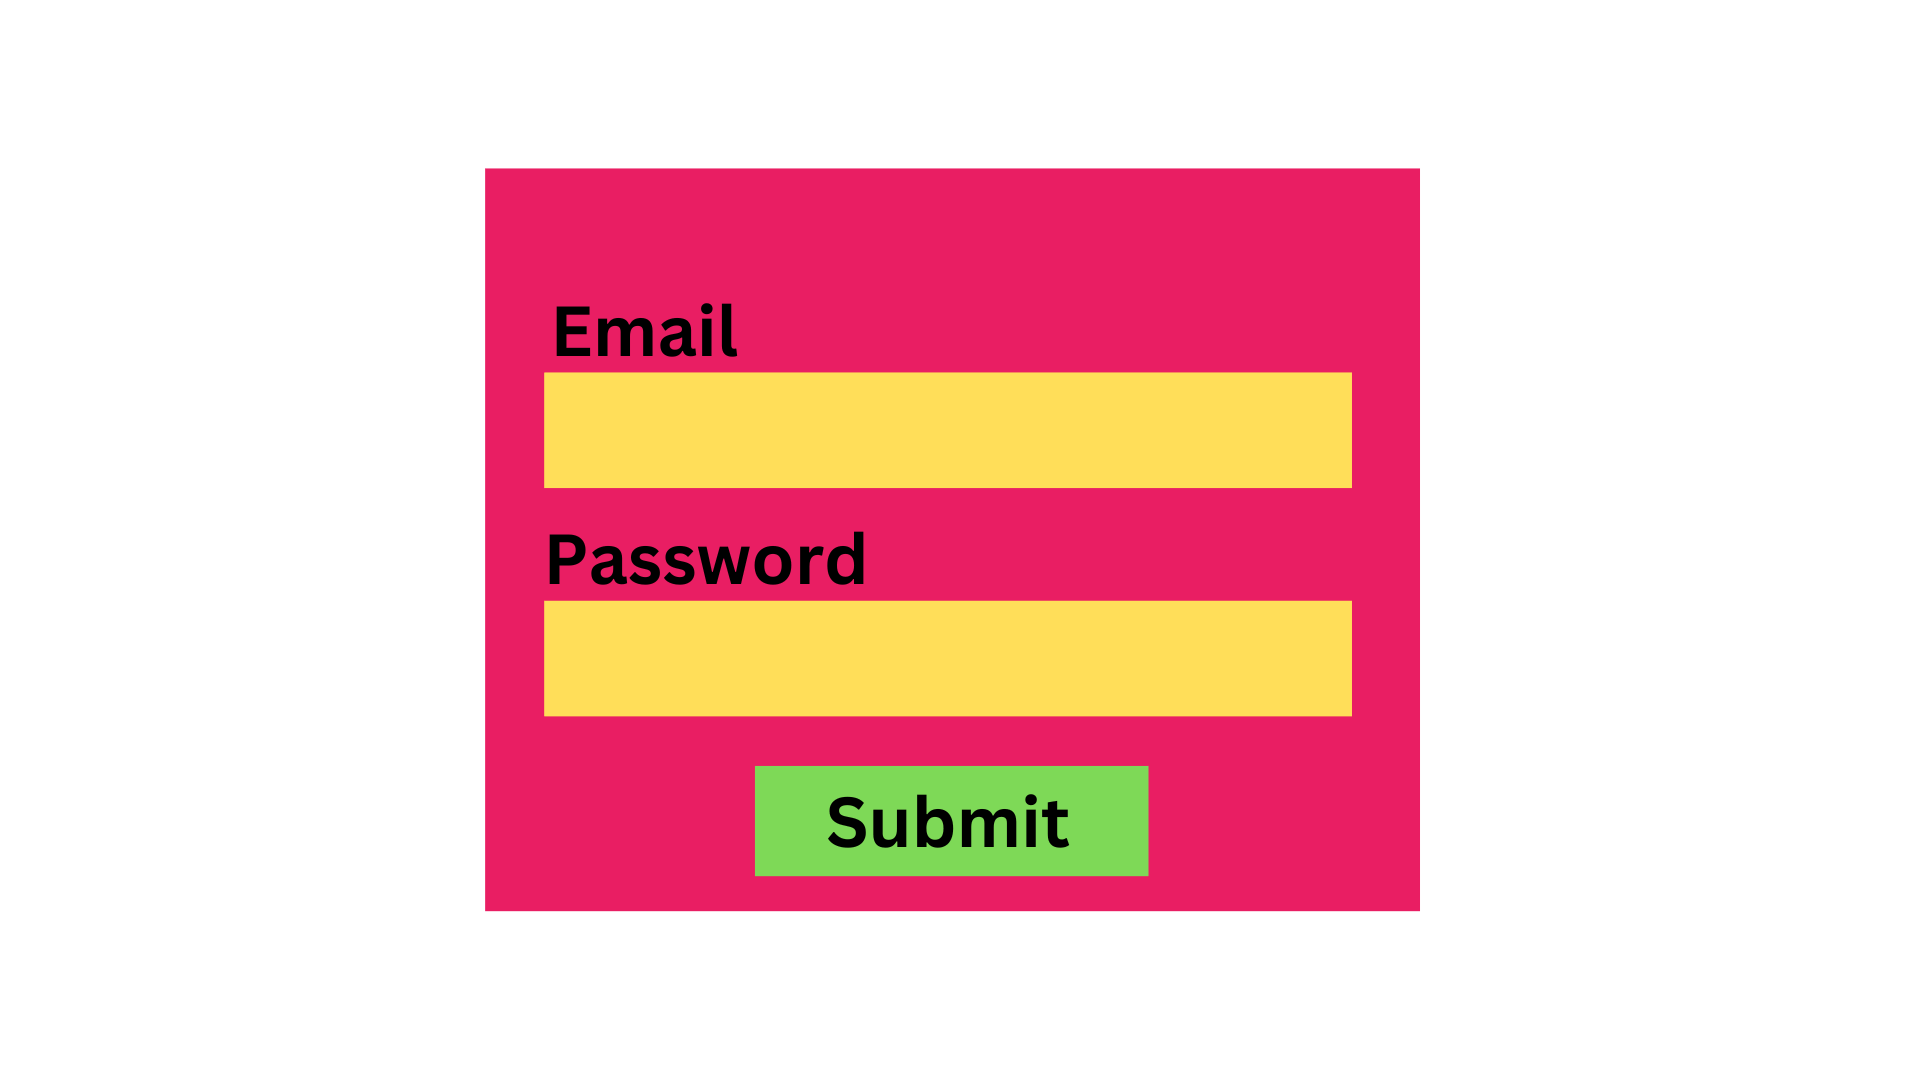
Login Page
The login page is another key element of our e-commerce site, acting as a secure gateway for user authentication. Users enter their username or email and password, which are verified to grant access to the system.
Upon successful login, users can explore and purchase digital products. They can browse categories, view product details, add items to their cart, and proceed to checkout.
Moreover, authenticated users can create new products for sale. They can fill out a product creation form with details like product name, description, price, and the digital file for download.
In summary, the login page not only ensures secure access to the system but also facilitates user engagement in buying and selling activities. This page is a vital component in delivering a comprehensive and user-friendly e-commerce experience.
Dashboard Page
We can access the dashboard page post-login. This page serves as a personalized hub for users to manage their activities and view pertinent site information.
It prominently features a display of all user-created products presented in a list or grid format. Each item, complete with its name, image, and price, can be managed by the user. They can edit details, delete a product, or add new ones.
Additionally, the dashboard page offers an order summary, providing users with a comprehensive overview of their purchase history. This includes details like the product name, purchase date, payment amount, and order status (delivered, pending, cancelled).
In summary, the dashboard page is a user-centric space that facilitates efficient management of products and order tracking. Thus, it enhances the overall user experience on our e-commerce site.
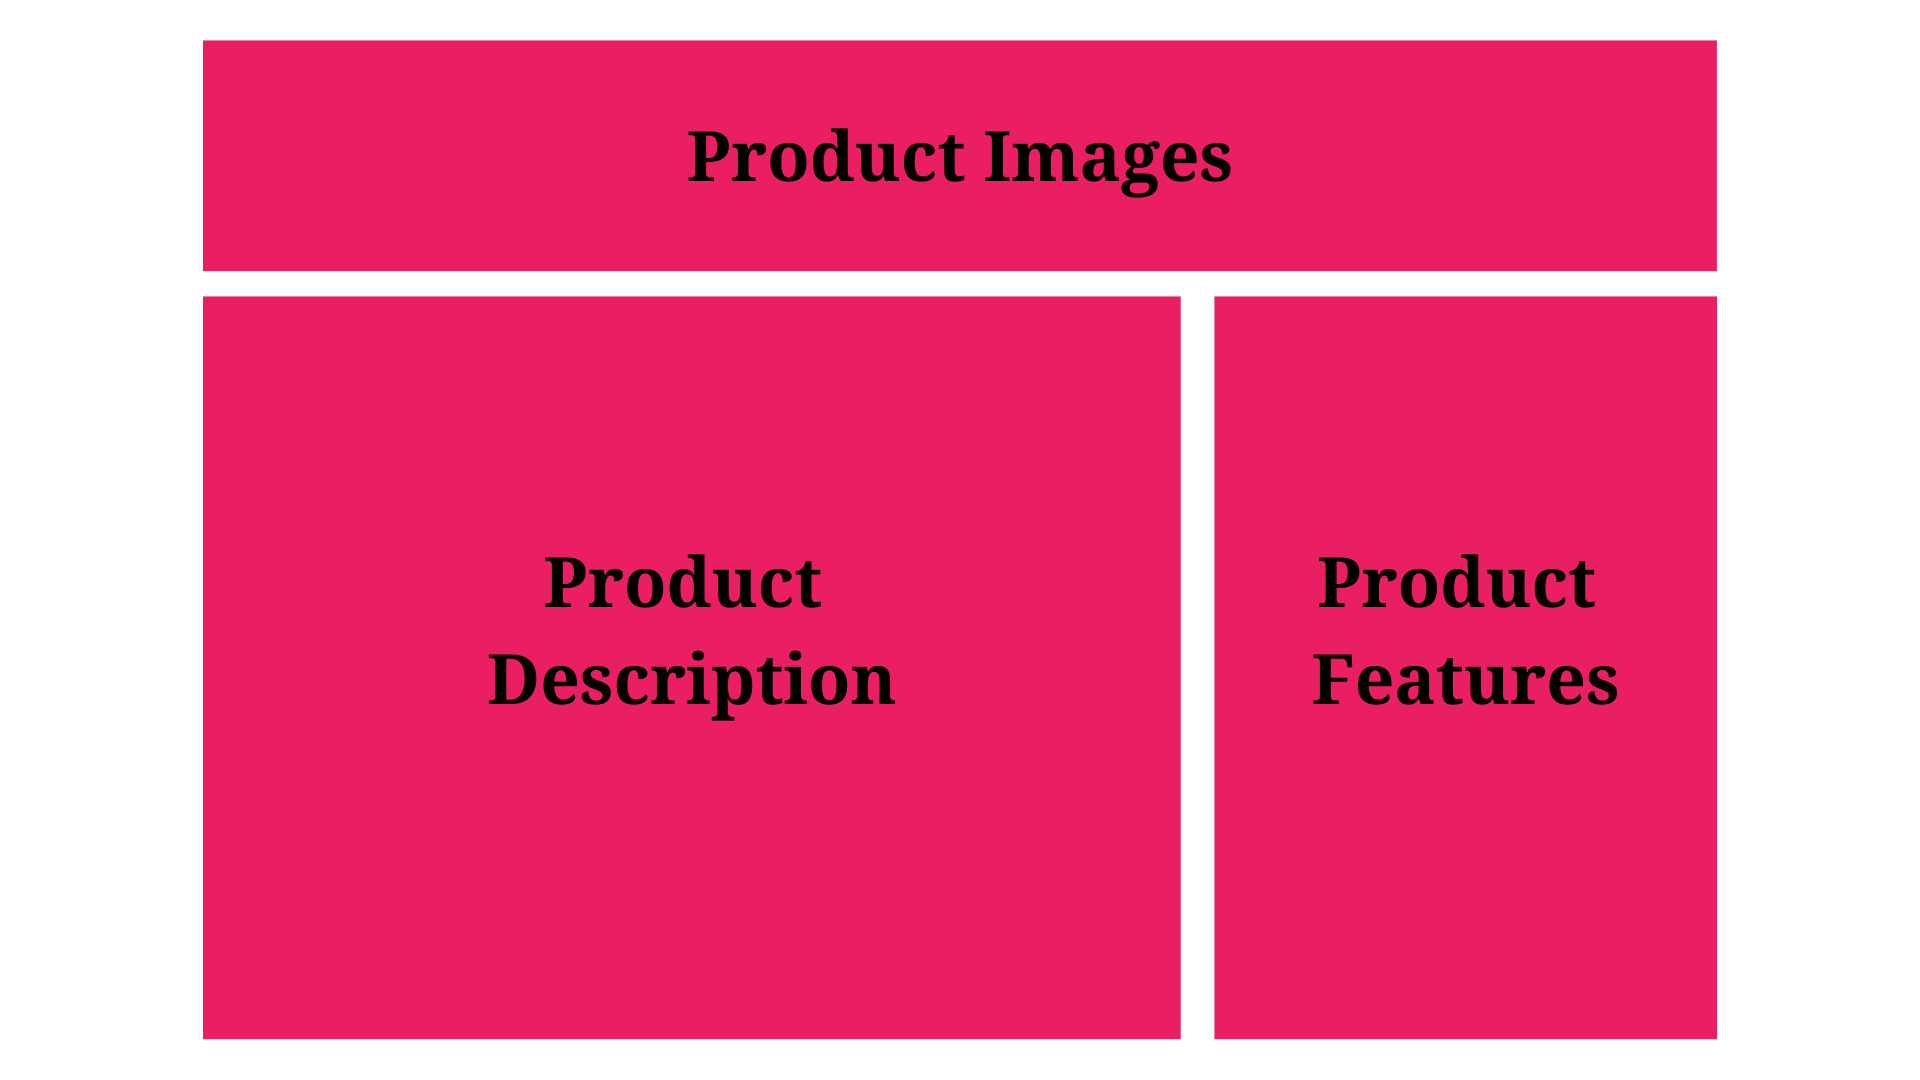
Product Add Page
This page enables users to add a new product for sale and specify its details using a WYSIWYG editor.
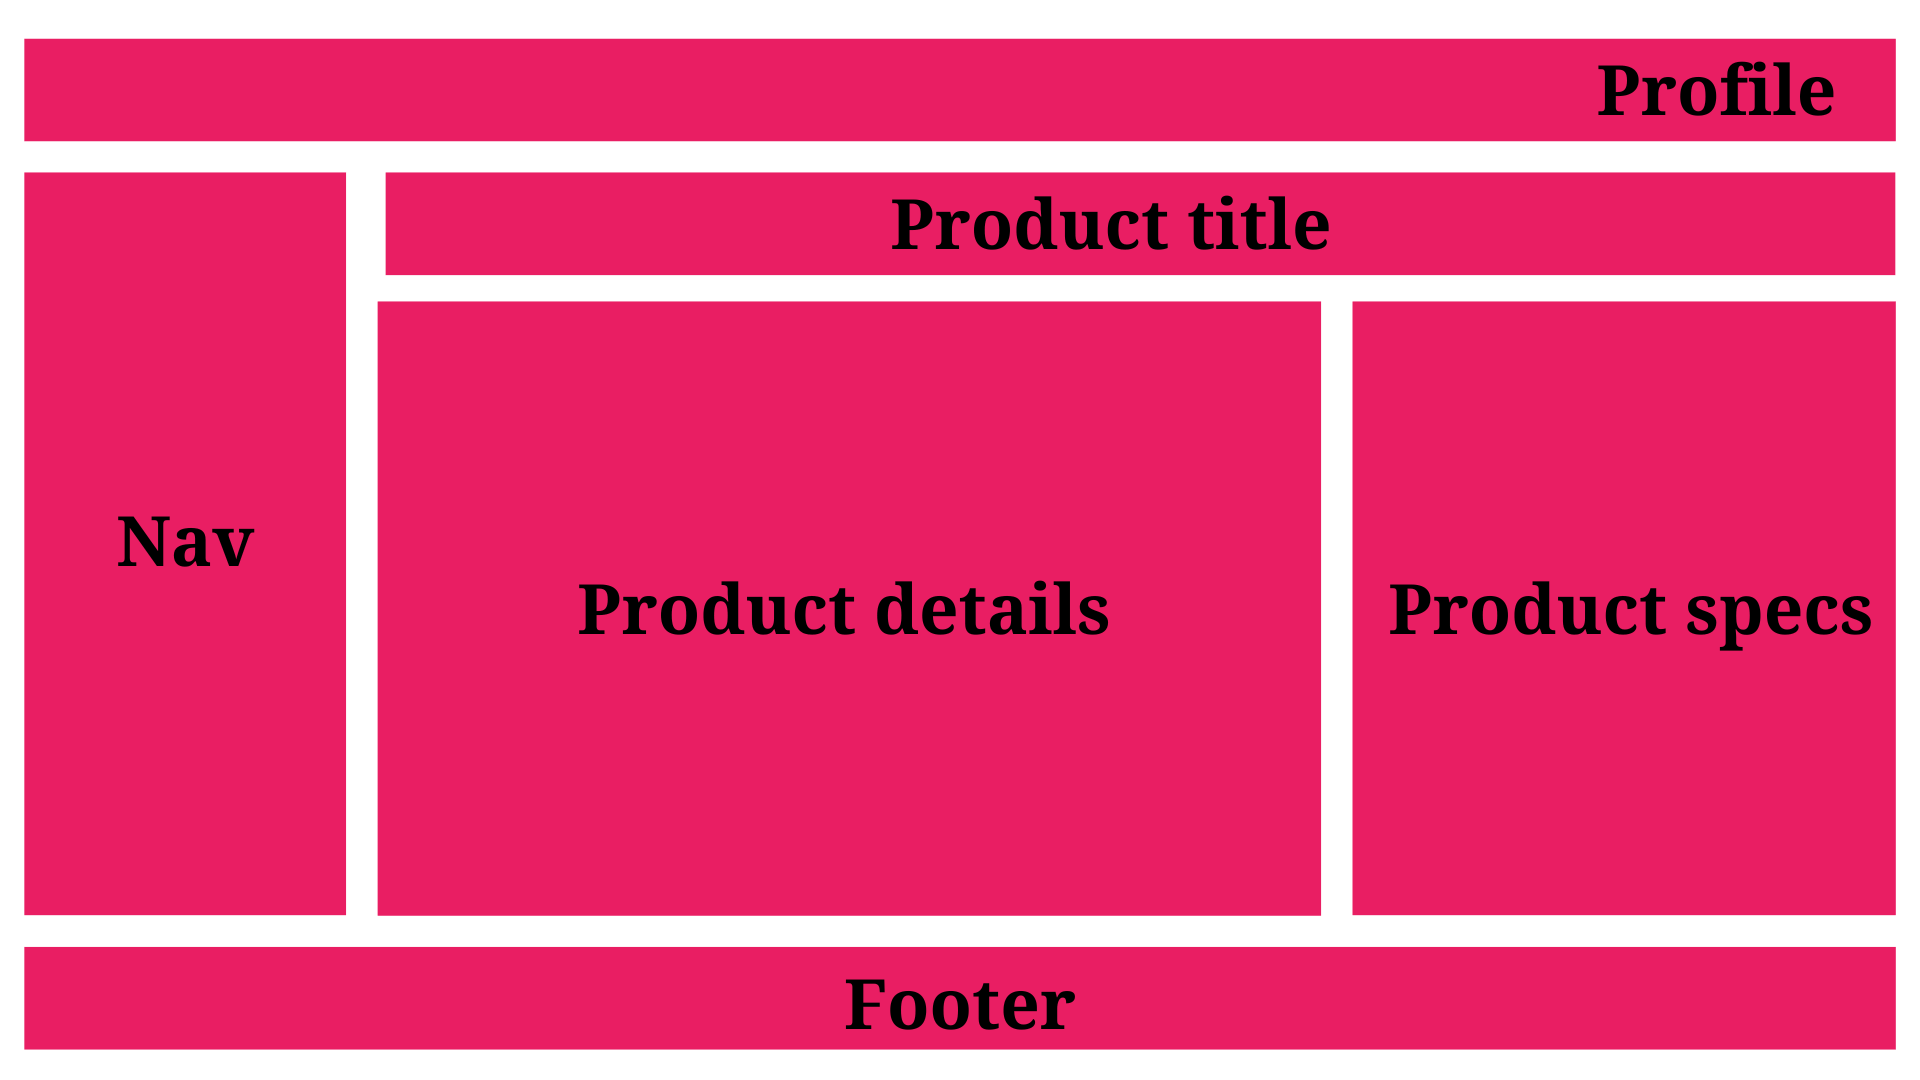
Product List Page
A dedicated page will exist for each product that will show its details.
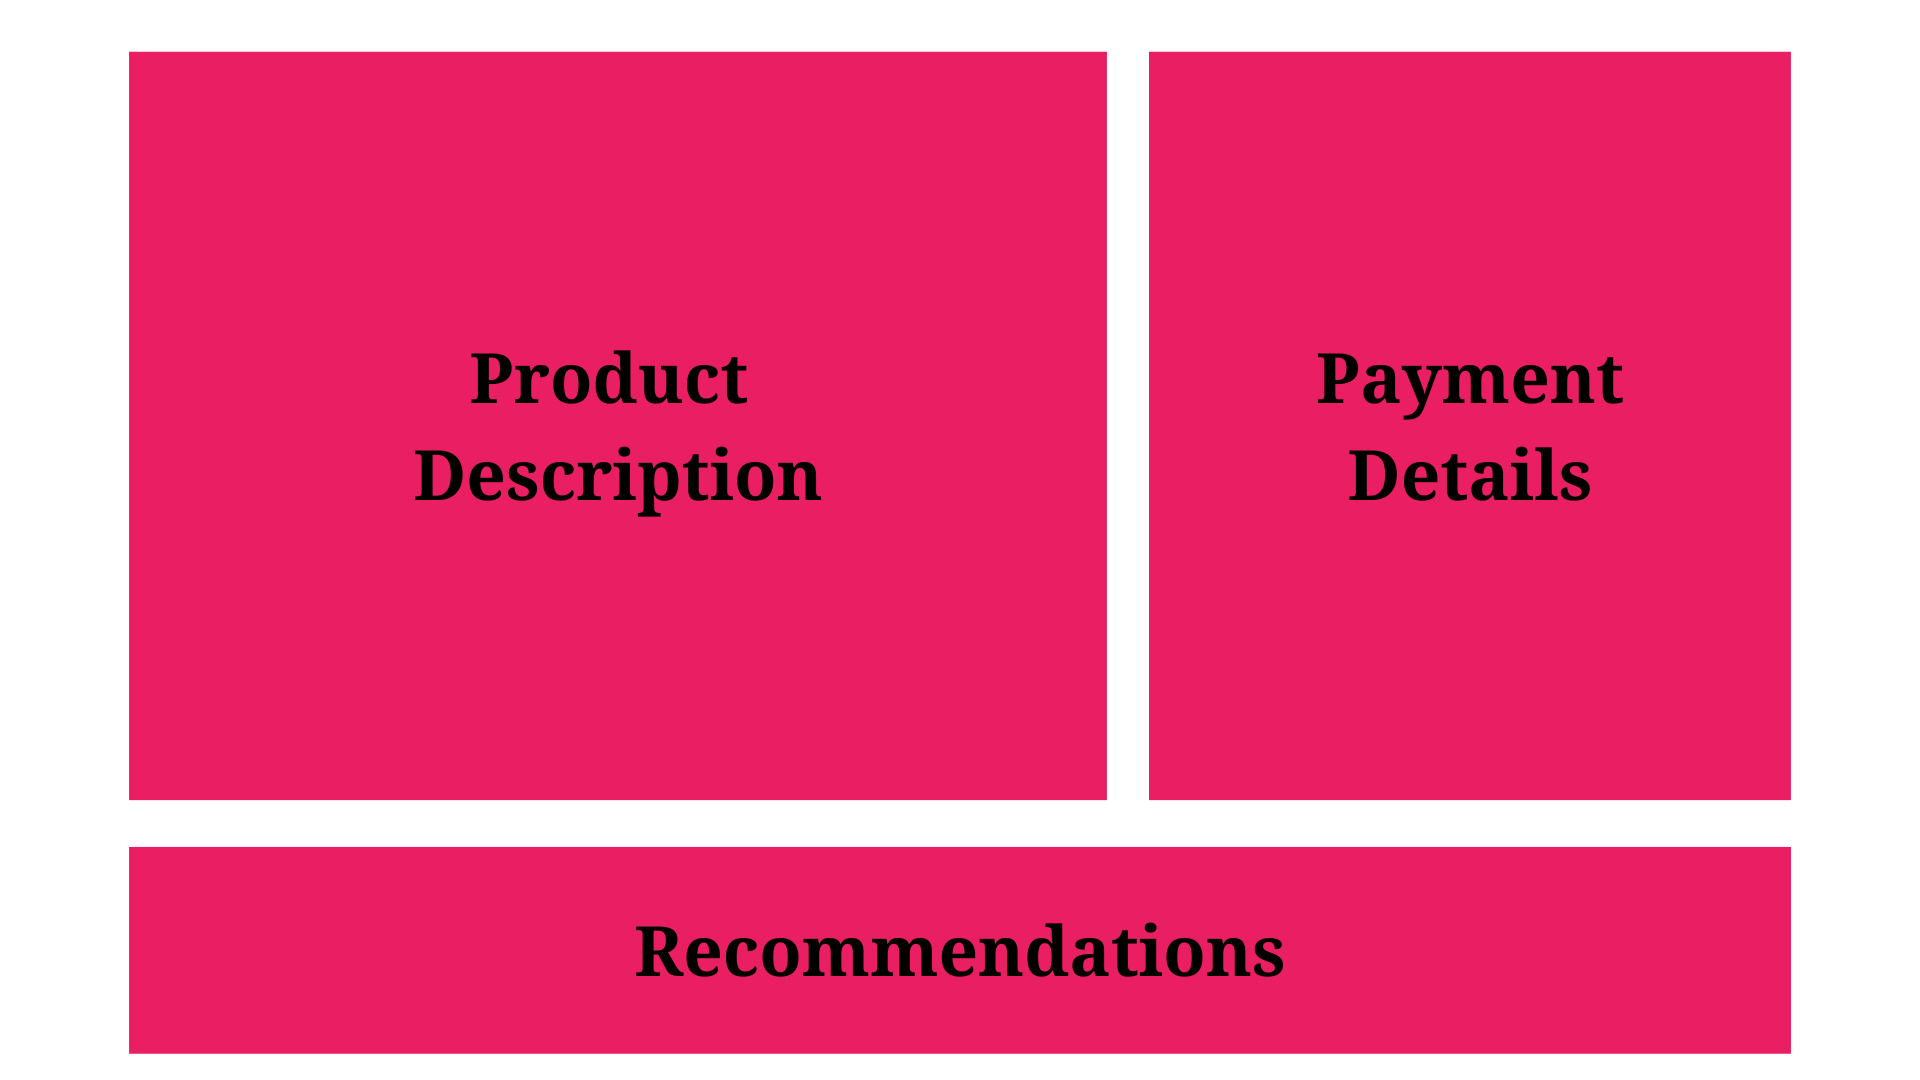
Checkout Page
Once the user has decided to purchase a product, they can check out and make the payment on this page.
Thank You Page
After a successful payment, the user can download the product and will see the thank you page.

Tech Stack
With the previously shown flow diagram and wireframes, it’s time to finalize our technology stack and set up the app’s boilerplate.
We’ll use React as this project’s front-end JavaScript framework. Zustand will be our state management tool, while React-Router-V6 will handle client-side routing. Lastly, the Synfusion React component library will aid in our development process.
Boilerplate
- First, set up a new React client-side rendered app using the following command.
npx create-react-app digital-shop
- Once the app is ready, please install the following packages in it.
npm i zustand react-router-dom
- After that, create the following three folders in the root of the app:
- Store: This will contain all the centralized stores of Zustand to share the data across the components.
- Pages: To contain all the pages of the app.
- Routes: This will contain public and private route wrappers that restrict users from accessing pages depending on their authentication state.
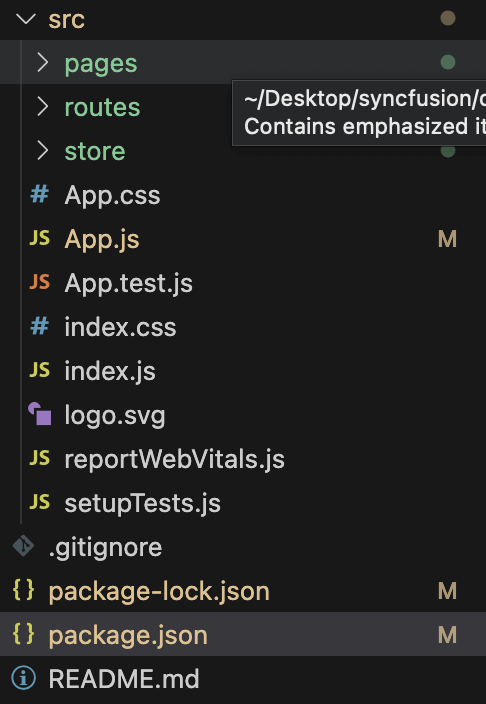

Creating folders in the React app
Note: This structure will change as we proceed more with the development, but this is enough to get us started.
Starting with Coding
Let’s start designing the React e-commerce app for digital products.
User Login State
First, create the user store to hold the session details of whether the user is logged in or not. These details will help us to restrict the users’ access to pages.
Under the store folder, create a file named user.js and add the following code to it.
import { create } from "zustand";
import { persist } from "zustand/middleware";
let store = (set) => ({
  isLoggedIn: false,
  setUserState: (isLoggedIn) => set(() => ({ isLoggedIn })),
});
//persist the state with key "randomKey"
store = persist(store, { name: "user-store" });
//create the store
let useStore = create(store);
export default useStore;
We have created a hook that has the initial state of is logged in as false and the method setUserState to update the state.
The state is persisted in the local storage. We can access this state using the hook, and we will update its data once the user logs in. Using the default state, we will create the route wrappers for now.
Defining the Public and Private Routes
Our client-side routing approach needs to manage routes based on state data.
For instance, if an unauthenticated user attempts to access a page that requires authentication, we’ll redirect them to the login page. Conversely, if an authenticated user tries to access a page that doesn’t require login, such as the login page itself, we’ll redirect them to the dashboard page.
To accomplish this, we’ll utilize the Outlet, which only renders route elements when the route is visited. If the user isn’t authenticated, we’ll create a wrapper to facilitate redirection to the appropriate page.
First, we create two files, private.js and public.js, within the routes folder.
The private.js file will restrict access to pages that necessitate authentication.
Refer to the following code example.
import React from 'react';
import { Outlet, Navigate } from 'react-router-dom';
import  useStore  from '../store/user';
const Private = () => {
  const isLoggedIn = useStore((state) => state.isLoggedIn);
  return isLoggedIn ? <Outlet /> : <Navigate to="/" />;
};
export default Private;
The public.js page is used to restrict access to public pages after authentication.
import React from 'react';
import { Outlet, Navigate } from 'react-router-dom';
import  useStore  from '../store/user';
const Public = () => {
  const isLoggedIn = useStore((state) => state.isLoggedIn);
  return !isLoggedIn ? <Outlet /> : <Navigate to="/dashboard" />;
};
export default Public;
Once the wrappers are ready, we add them to the routes in our app.js file.
import { BrowserRouter, Routes, Route } from "react-router-dom";
import Login from "./pages/login";
import PrivateRoutes from "./routes/private";
import PublicRoutes from "./routes/public";
const App = () => {
  return (
	<BrowserRouter >
  	<Routes>
    	<Route path="/" element={<PublicRoutes />}>
        	<Route index element={<h1>Browse</h1>} />
        	<Route path="product-list" element={<h1>Product List</h1>}></Route>
        	<Route path="login" element={<Login />}></Route>
    	</Route>
    	<Route path="/" element={<PrivateRoutes />}>
        	<Route path="dashboard" element={<h1>Dashboard</h1>}></Route>
        	<Route path="product-add" element={<h1>Product Add</h1>}></Route>
        	<Route path="checkout" element={<h1>checkout</h1>}></Route>
        	<Route path="thank-you" element={<h1>Thank You</h1>}></Route>
    	</Route>
  	</Routes>
	</BrowserRouter>
  );
}
export default App;
Now, we run the app using the npm run start command and then try to access a private route like /dashboard. It will redirect us to the login page.
Similarly, we update the user state in store/user.js and set the default state to LoggedIn.
let store = (set) => ({
  isLoggedIn: true,
  setUserState: (isLoggedIn) => set(() => ({ isLoggedIn })),
});
When we restart the app, clear the local storage, or run the app in incognito mode and try to access the public pages, we will be redirected to the dashboard page.
Now that our setup is ready, in the next part, we will create the login page, authenticate the user, and then design the dashboard and product add pages.
Conclusion
We appreciate your time and effort in reading this blog! We are providing a comprehensive guide on constructing a fully functional e-commerce app for digital products with React. We encourage you to put this knowledge into practice and share your experiences in the comments section below!
Syncfusion’s Essential Studio for React is a one-stop solution offering over 80 high-performance, lightweight, modular, and responsive UI components. It’s the perfect suite to build any web app.
For our existing Syncfusion users, the latest version of Essential Studio is readily available for download on the License and Downloads page. If you’re new to Syncfusion, we invite you to explore our products’ features and capabilities with our 30-day free trial.
For questions, you can contact us through our support forum, support portal, or feedback portal. We are always here to assist you!