In the Essential Studio® 2019 Volume 1 release, Syncfusion has included the Theme Studio (beta version) for WinForms controls. It helps users transform their visual presentation with a new theme in a few minutes, without any involvement of code or a designer.
 Home screen of WinForms Theme Studio
Launching WinForms Theme Studio
For convenience, the Theme Studio application reserves a special place in the start-up panel for its launch. On launching the application, you can see a couple of panels. One for theme customization on the left and the other for the control’s preview on the right. The theme customization panel has the primary color brushes mapped to appropriate colors from the controls skin. The skin of the control on the right-hand side will get refreshed automatically on changing these colors.
Important Note:
|
Modifying colors using Theme Studio
Tapping on the color mapped to the primary brush will open a color picker control, which displays a range of standard colors.
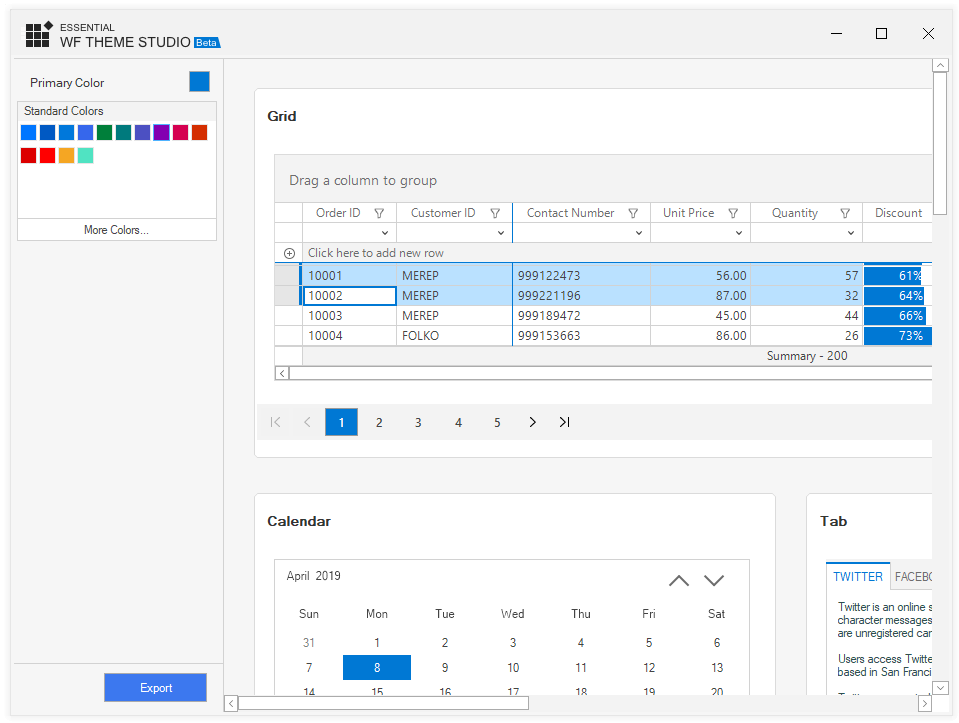
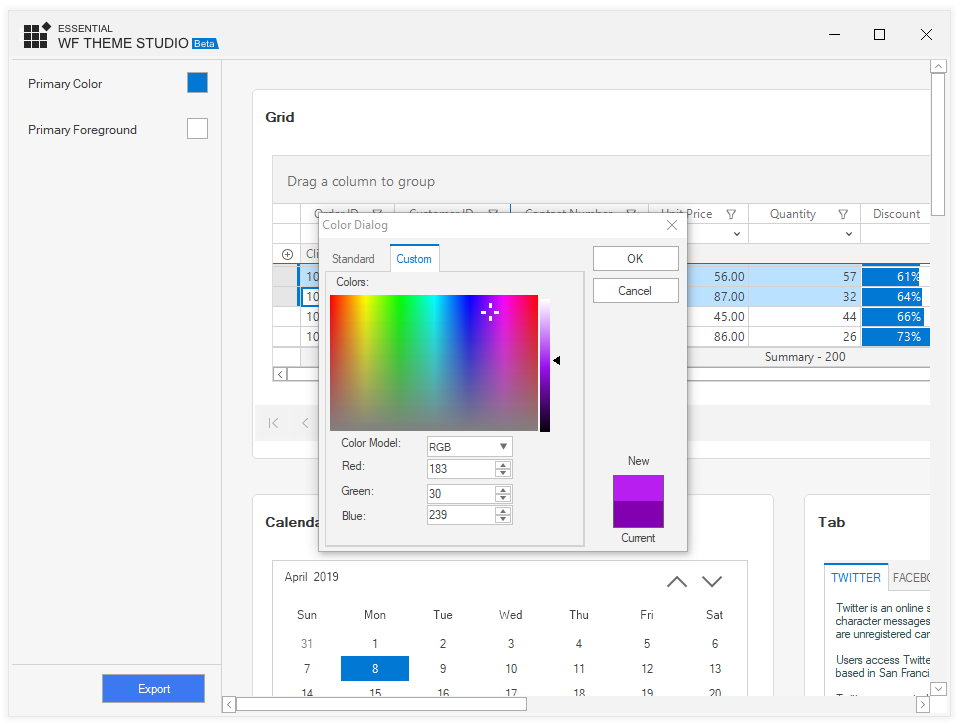
If you want to choose a different color, use the More Colors… option.
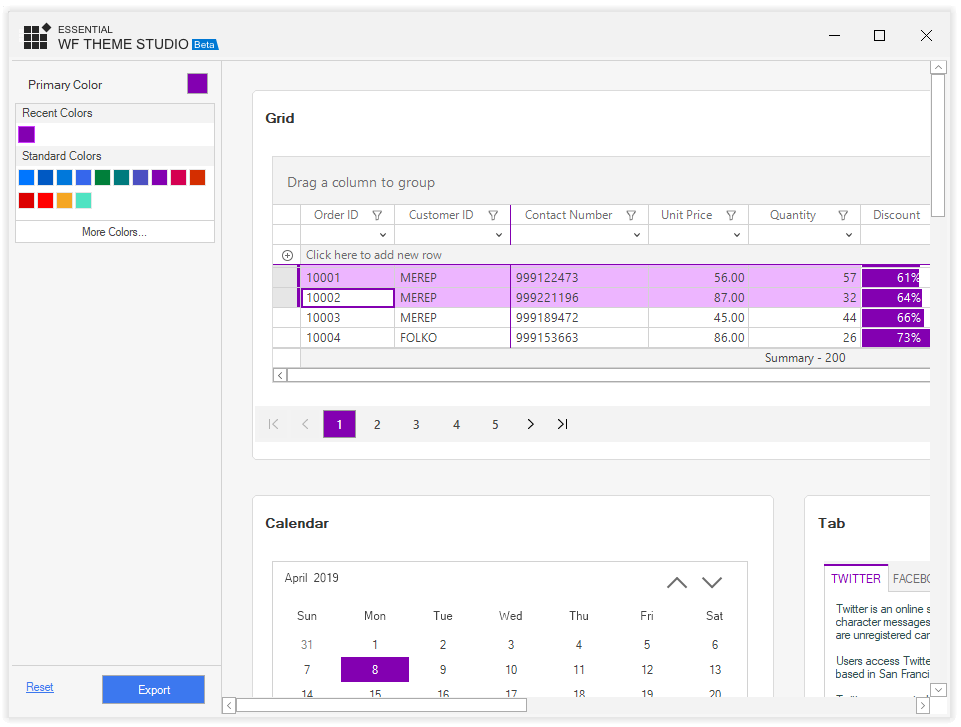
 The chosen color from the More Colors… section is included in the Recent Colors section for quick access in the future.
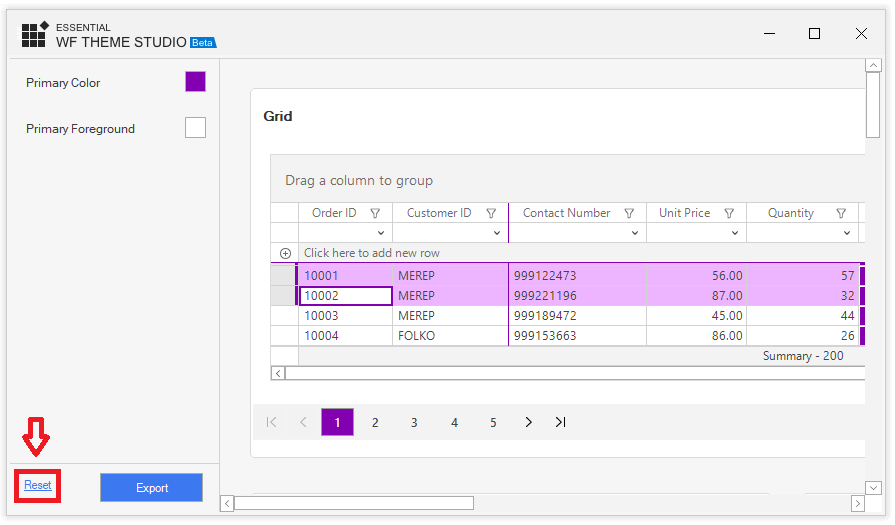
 A modification made to a color will enable the Reset button in the bottom of the left pane. The user can use it to reset the color changes made to the control’s skin for a fresh start.
Exporting color changes as theme dll
After making the necessary changes to a color, the user can export it in library format (*.dll). Click Export in the bottom of the left pane. In the export dialog that appears, all the controls are showcased based on their category. The user can click Select All to select all the listed controls, or choose individual controls as required. The size of the output assembly is proportional to the number and size of the selected controls.
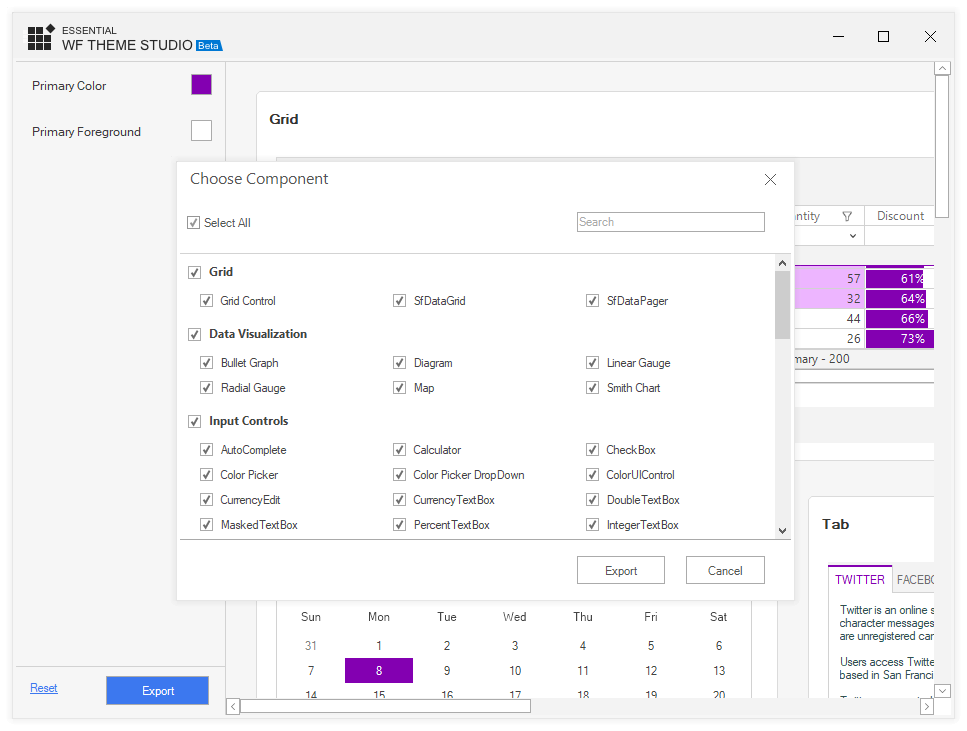 Choosing the controls to which to apply the appearance changes.
| Important Note: The name used for applying the theme to the control should be same as the one used for saving the theme library. |
Applying a theme to Syncfusion WinForms controls
To apply a theme to Syncfusion Windows Forms controls:
- Add a reference to the exported theme library in the application.
- Load the assembly using the SkinManager.
- Set the ThemeName property of the appropriate controls to the name of the theme.
Now, run the application and experience the control’s rich user interface.
The following code demonstrates the application of a custom theme to the DataGrid control.
//Load Theme assembly into application using SkinManager
SkinManager.LoadAssembly(typeof(CustomTheme).Assembly);
//Apply theme to SfDataGrid
this.sfDataGrid.ThemeName = "CustomTheme";
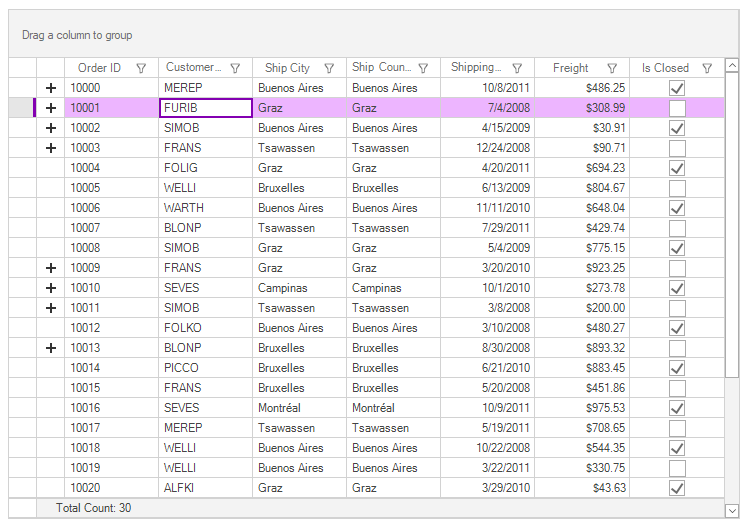 Custom theme applied to SfDataGrid control
If you wish to override any part of the theme applied, you can set the CanOverrideStyle property of the appropriate control to false. Now, use the built-in appearance API under the ThemeStyle property to provide the desired color. For SF series controls, use the Style property instead of ThemeStyle.
For instance, here I don’t want to adopt Cell BackColor from the applied custom theme in the DataGrid control.
sfDataGrid.Style.CellStyle.BackColor = Color.LightGray;
//Restrict adopting colors from applied custom theme assembly in SfDataGrid, which is customized.
sfDataGrid.CanOverrideStyle = false;
sfDataGrid.ThemeName = "CustomTheme";
What’s next?
For the Theme Studio for WinForms controls, we are planning to provide a couple of additional themes, along with a few more controls like menus, a pivot grid, and a spreadsheet. One of the additional themes planned is high contrast, in order to provide a rounded user experience.
Conclusion
If you are an existing customer, please download the new version of Essential Studio® from the download page and try the Theme Studio for WinForms and its features for yourself. If you are a new customer, you can try our 30-day free trial to check out this new application.
Please post your queries in the comments section below. You can also contact us through our support forum or Direct-Trac.
