
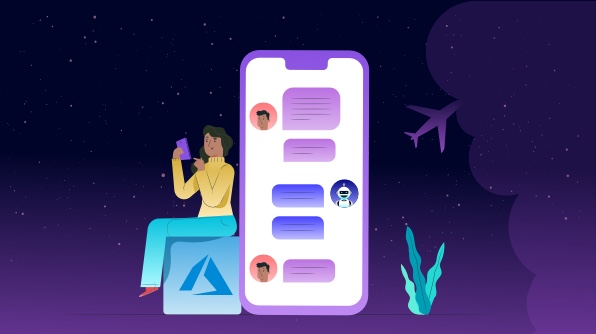
This blog will help you connect with Azure Bot Service and configure it in your Xamarin.Forms application using Syncfusion’s Chat control, which you will then use to send and receive messages between the bot and the user.
Don’t have a bot service yet? Follow Microsoft’s documentation to create a bot service and generate a direct line address for it.
We have already created an Azure Bot Service named ChatBot_Testing_Syncfusion to demonstrate the Azure connectivity with our Chat control. This Azure Bot Service simulates a flight ticket booking service.
Required packages
First, install the following NuGet packages from nuget.org in your Xamarin.Forms application:
Setting up the Chat control
Create an instance of the Chat control and set up all the basic things like binding a message collection, setting up a current user for conversation, and setting up the typing indicator.
The following code example demonstrates the basic setup of an SfChat instance.
……
<sfChat:SfChat x:Name="sfChat"
            Messages="{Binding Messages}"
            TypingIndicator="{Binding TypingIndicator}"
            ShowTypingIndicator="{Binding ShowTypingIndicator}"
            CurrentUser="{Binding CurrentUser}" />
……
Initializing connections
After setting up the Chat control, create a new class (BotService.cs in our examples) that will be used to send and receive messages between the user and the bot. Messages between the bot and the client application can be exchanged using HttpClient GetAsync and Http PostAsync requests or by using a web socket. Here, we have used HttpClient to establish the connection between the bot and the application.
A direct line key is a unique secret key that enables your client application to communicate with your bot by using the Direct Line channel. This secret key will be provided when you create an Azure Bot Service. So, in this class, initialize the required HTTP connections with the proper direct line key of the Bot Service as shown below.
In the following code example, the directLineKey and botBaseAddress fields hold the corresponding values to establish the connection.
…..
/// <summary>
/// Direct line address to establish connection.
/// </summary>
private string botBaseAddress = "https://directline.botframework.com/v3/directline/conversations/";

/// <summary>
/// Direct line key to establish connection to syncfusion bot.
/// </summary>
private string directLineKey = "XYeLq1aytPw.4wbtMs2r7XEzdkG2_wyxGpP676wpfFS_hSaSJW8IjQg";

public BotService(FlightBookingViewModel viewModel)
{
    this.ViewModel = viewModel;
    InitializeHttpConnection();
}

private void InitializeHttpConnection()
{
    this.httpClient = new HttpClient();
    this.httpClient.BaseAddress = new Uri(this.botBaseAddress);
    this.httpClient.DefaultRequestHeaders.Accept.Clear();
    this.httpClient.DefaultRequestHeaders.Accept.Add(new MediaTypeWithQualityHeaderValue("application/json"));
    this.httpClient.DefaultRequestHeaders.Authorization = new AuthenticationHeaderValue("Bearer", this.directLineKey);
    this.httpClient.Timeout = Timeout.InfiniteTimeSpan;

    // Initializes a new conversation and gets the first message from the bot.
    if (CheckInternetConnection())
    {
    SetupConversation();
    }
}
………
You can initialize this BotService.cs class in the ViewModel’s constructor.
//FlightBookingViewModel.cs

public class FlightBookingViewModel : INotifyPropertyChanged
{
………..
public FlightBookingViewModel()
{
…….
    this.BotService = new BotService(this);
……
}
…………..
}
Setting up a conversation
Once the connections are established, it’s time to send and receive messages to and from the bot. To get the first message from the bot, set up a conversation by adding an empty activity and add this activity to the Bot Service using the httpClient.PostAsync method.
//BotService.cs

private async void SetupConversation()
{
    HttpContent contentPost = new StringContent(JsonConvert.SerializeObject(new Conversation()), Encoding.UTF8, "application/json");
    try
    {
        HttpResponseMessage response = await this.httpClient.PostAsync("/v3/directline/conversations", contentPost);
        if (response.IsSuccessStatusCode)
        {
            string conversationInfo = await response.Content.ReadAsStringAsync();
            this.conversation = JsonConvert.DeserializeObject<Conversation>(conversationInfo);
            await Task.Delay(2000);

            Activity activity = new Activity();
            activity.From = new ChannelAccount()
            {
                Id = ViewModel.CurrentUser.Name,
                Name = ViewModel.CurrentUser.Name,
            };

            activity.Type = "add";
            activity.Action = "add";
            this.PostActvity(activity);
        }
    }
    catch(Exception ee)
    {

    }
}
All the bot conversations happen in the form of Activities: the bot receives messages in the form of an activity and sends its responses in the form of an activity. So, we convert the user message into an activity and send it to the bot for further processing as shown in the following code example.
//BotService.cs

private async void PostActvity(Activity activity)
{
    StringContent contentPost = new StringContent(JsonConvert.SerializeObject(activity), Encoding.UTF8, "application/json");
    string conversationUrl = this.BotBaseAddress + this.conversation.ConversationId + "/activities";

    try
    {
        // Calling this method posts the user message as an activity to the bot.
        await this.httpClient.PostAsync(conversationUrl, contentPost);

        // Calling this method gets the reply message from the bot, processes the reply, adds it to the message collection, and sends it to the user.
        await this.ReadMessageFromBot();
    }
    catch { }
}
Send and receive messages between the user and the bot
To send user responses to the bot and send bot responses to the user, first handle the collection change of the bound message collection using the Messages.CollectionChanged event. From this event handler, send the user response to the bot and change the visibility of the typing indicator while the bot responds to the user message as shown below.
We have triggered this event in the FlightBookingBehavior class file.
public class FlightBookingBehavior : Behavior<SampleView>
{
…..
protected override void OnAttachedTo(SampleView bindable)
{
    ……
    this.viewModel.Messages.CollectionChanged += OnMessagesCollectionChanged;
    ….
}
……..
private  async void Messages_CollectionChanged(object sender, System.Collections.Specialized.NotifyCollectionChangedEventArgs e)
{
    if (e.Action == NotifyCollectionChangedAction.Add)
    {
        foreach (var chatItem in e.NewItems)
        {
            TextMessage textMessage = chatItem as TextMessage;
            if (textMessage != null && textMessage.Author == this.viewModel.CurrentUser)
            {
                this.viewModel.ShowTypingIndicator = true;
                // Calling this method sends the user response to the bot.
                this.viewModel.BotService.SendMessageToBot(textMessage.Text);
            }
            else
            {
                await Task.Delay(50);
                this.sfChat.ScrollToMessage(chatItem);
            }
        }
    }
}

…….
}
//BotService.cs
internal void SendMessageToBot(string text)
{
    Activity activity = new Activity()
    {
        From = new ChannelAccount()
        {
            Id = this.ViewModel.CurrentUser.Name
        },

        Text = text,
        Type = "message"
    };

    // Sends user message as activity to the bot.
    PostActvity(activity);
}
Once the user message is sent to the bot, the bot replies to the user message in a new activity. To read messages from the bot, deserialize the activity obtained from the Bot Service as shown in the following code example.
internal async Task ReadMessageFromBot()
{
    try
    {
        string conversationUrl = this.BotBaseAddress + this.conversation.ConversationId + "/activities?watermark=" + this.watermark;
        using (HttpResponseMessage messagesReceived = await this.httpClient.GetAsync(conversationUrl, HttpCompletionOption.ResponseContentRead))
        {
            string messagesReceivedData = await messagesReceived.Content.ReadAsStringAsync();
            ActivitySet messagesRoot = JsonConvert.DeserializeObject<ActivitySet>(messagesReceivedData);

            if (messagesRoot != null)
            {
                this.watermark = messagesRoot.Watermark;
                Device.BeginInvokeOnMainThread(() =>
                {
                    foreach (Activity activity in messagesRoot.Activities)
                    {
                        if (activity.From.Id == "ChatBot_Testing_Syncfusion" && activity.Type == "message")
                        {
                            this.ProcessBotReplyAndAddMessage(activity);
                        }
                    }
                });
            }
        }
    }
    catch (Exception ex)
    {
        System.Diagnostics.Debug.WriteLine("Exception while reading Bot activity. exception message - {0}", ex.Message);
    }

    this.ViewModel.ShowTypingIndicator = false;
    this.ViewModel.ShowBusyIndicator = false;
}
After deserializing the bot’s reply message, add it to the message collection and send this to the user as shown in the following code example.
private void ProcessBotReplyAndAddMessage(Activity activity)
{
    if (!string.IsNullOrEmpty(activity.Text))
    {
        if (activity.Text == "What else can I do for you?")
        {
            return;
        }

        if (activity.Text == "When are you planning to travel?" || activity.Text == "Oops! This doesn’t seem to be a valid date. Please select a valid date.")
        {
            this.AddCalendarMessage(activity.Text);
        }
        else
        {
            this.AddTextMessage(activity);
        }
    }
}
Add message to chat and display suggested actions
Each bot activity will come with a SuggestedActions property that provides the list of available options as a response to a user message. To display suggestions along with the messages in the Chat control, check for the bot’s Activity.SuggestedActions property and assign this to the Message.Suggestions property as shown below. You can find more details about showing suggestions in the Chat control here.
private void AddTextMessage(Activity activity)
{
    TextMessage message = new TextMessage();
    message.Text = activity.Text;
    message.Author = this.ViewModel.Bot;
    message.DateTime = DateTime.Now;

    if (activity.SuggestedActions != null && activity.SuggestedActions.Actions.Count > 0)
    {
        ChatSuggestions suggestions = new ChatSuggestions();
        var suggestionItems = new ObservableCollection<ISuggestion>();
        foreach (CardAction action in activity.SuggestedActions.Actions)
        {
            var suggestion = new Suggestion();
            suggestion.Text = action.Title;
            suggestionItems.Add(suggestion);
        }

        suggestions.Items = suggestionItems;
        message.Suggestions = suggestions;
    }

    ViewModel.Messages.Add(message);
}
Conclusion
You can find the entire sample on GitHub where we have used the Chat control to configure an Azure Bot Service that simulates a flight ticket booking service. I hope you will now play around with the Chat control and Azure Bot Service yourself. These documentation links on the Chat control and DirectLine key concepts might come in handy, just in case you need them.
If you’re interested in a step-by-step video tutorial to set up Azure, integrate AI with it, and configure it in your Xamarin.Forms application with the Chat control, check out my video tutorial on YouTube.
I hope you found this blog interesting and exciting. Let me know your thoughts of the new Chat control in the comments section below.
As always, you can also contact us through our support forum, Direct-Trac, or feedback portal. We’re happy to assist you.
 No spam, just valuable updates.
Comments (2)
Thanks for your blog. The information in the blog is rich and creates a great place to start for beginners however it would be more beginner-focused if it could be in video format. As a novice beginner, I kinda struggled to follow as it was not specifying where to create the codes or classes or folders. Is it possible to create a video version of this and possibly upload it to Youtube so as to aid beginners like me to follow?
Thanks
Hi Danny,
Thanks for sharing your thoughts. Do checkout this video on YouTube where we explain step by step on how to create a chat bot using Azure.
Video Link : https://www.youtube.com/watch?v=ARiGtjjh5Z0