
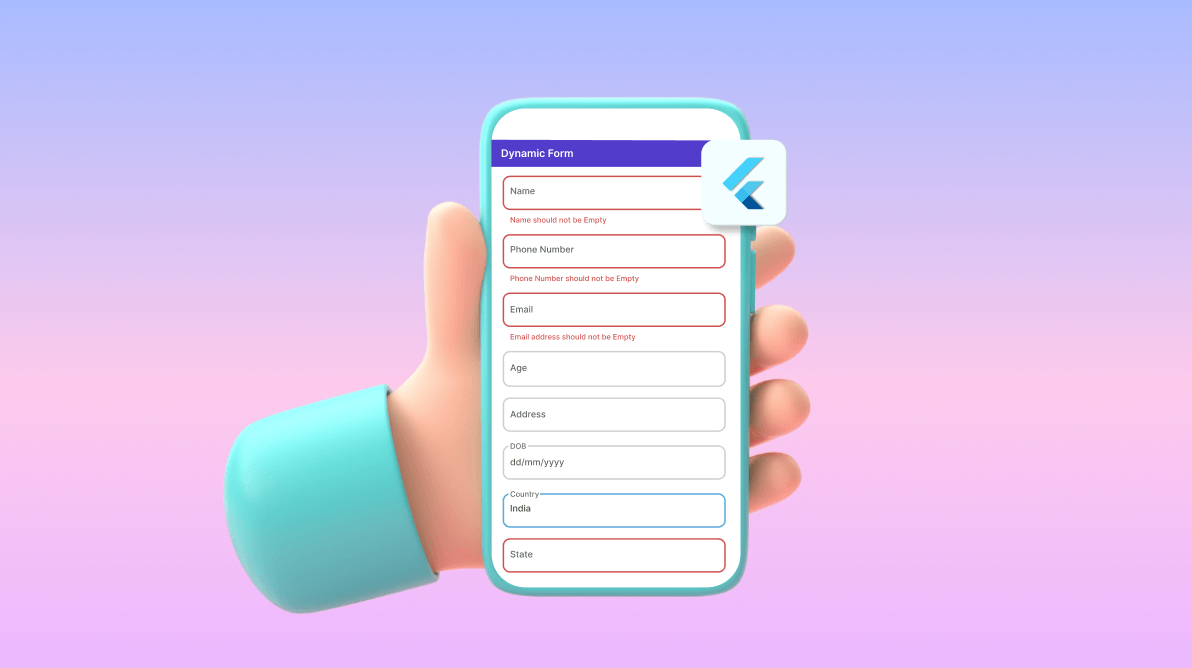
In this blog post, I will guide you through creating dynamic forms that can be modified at runtime using Flutter. Dynamic forms are designed to change their structure or behavior based on various factors, including user input or data from an API. By implementing dynamic forms, developers can create more flexible and adaptable forms better suited to meet the needs of users and applications.
I will provide clear, step-by-step instructions and explanations to help you understand how to create dynamic forms in Flutter.
Dynamic forms implementation
Here is a list of prerequisites necessary for creating and developing this application:
Tool: Visual Studio Code
Supported platforms: Android and iOS
Supported OS: Android (4.4 and above), iOS (11 and above)
Step 1: Creating a Flutter project
To create a new Flutter project in Visual Studio Code, adhere to the following steps:
- Open the Command Palette (Ctrl+Shift+P). On macOS, use Cmd+Shift+P.
- Select the Flutter: New Project command and click Enter.
- Select Application and press Enter.
- Select a project location.
- Enter your desired project name.
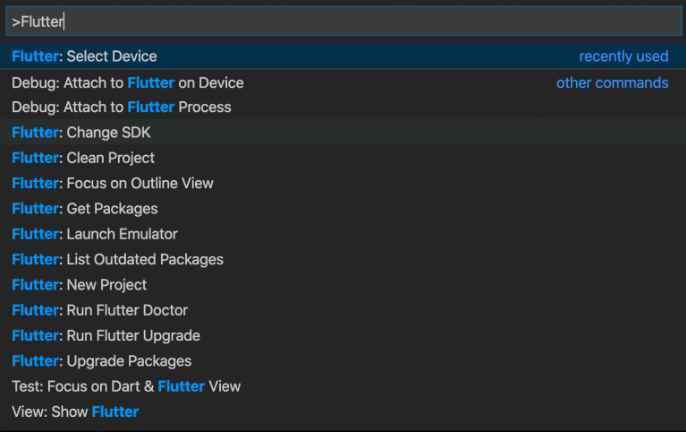
- You can find the steps for creating a Flutter app in Visual Studio Code in the Flutter documentation.
Step 2: Creating a model
Create a DynamicModel that contains the control name, form type, value, list of items, and validators. You will use this model to add form fields at runtime.
class DynamicModel {
  String controlName;
  FormType formType;
  String value;
  List<ItemModel> items;
  ItemModel? selectedItem;
  bool isRequired;
  List<DynamicFormValidator> validators;
  DynamicModel(this.controlName, this.formType,
      {this.items = const [],
      this.selectedItem,
      this.isRequired = false,
      this.validators = const []});
}
The controlName property is used to display the name of the form field. FormType is an enum property that is used to add a form field based on its type.
enum FormType
{
  Text,
  Multiline,
  Dropdown,
  AutoComplete,
  RTE,
  DatePicker
}
The isRequired property is used to check whether the form is mandatory or not. The Value property is used to set the initial value for the form field.
The Validators list is used to set the validation for each field. This model contains validatorType, errorMessage, and textLength. Through this, you can add multiple validations for each field.
class DynamicFormValidator {
  validatorType type;
  String errorMessage;
  int textLength;
  DynamicFormValidator(this.type, this.errorMessage, {this.textLength = 0});
}

enum validatorType { Notempty, TextLength, PhoneNumber, Age, Email }
The ItemModel class is used to bind items in the drop-down and autocomplete lists.
class ItemModel {
  int id;
  int parentId;
  String name;
  ItemModel(this.id, this.name, {this.parentId = 0});}
Step 3: Default form field widget
Here, I created the default form field widgets: text, drop-down, autocomplete, and HTML reader. You can utilize these widgets at runtime according to user input. The getTextWidget method is used to return a text-field widget at runtime.
TextFormField getTextWidget(index) {
    return TextFormField(
      decoration: InputDecoration(
    helperText: dynamicFormsList[index].hintText,
          labelText: formsList[index].controlName,
          border: const OutlineInputBorder(
              borderRadius: BorderRadius.all(Radius.circular(14.0)))),
      keyboardType: TextInputType.text,
      maxLines: null,
      validator: (text) {
        var selectedField = formsList[index];

        //To validate non-empty, it returns an error message if the text is empty.
        if (selectedField.isRequired &&
            selectedField.validators
                .any((element) => element.type == validatorType.TextNotempty) &&
            (text == null || text.isEmpty)) {
          return selectedField.validators
              .firstWhere(
                  (element) => element.type == validatorType.TextNotempty)
              .errorMessage;
        }

        //To validate text length, it returns an error message if the text length is greater than the fixed length.
        if (selectedField.validators
            .any((element) => element.type == validatorType.TextLength)) {
          var validator = selectedField.validators.firstWhere(
              (element) => element.type == validatorType.TextLength);
          int? len = text?.length;
          if (len != null && len > validator.textLength) {
            return validator.errorMessage;
          }
        }
        return null;
      },
      onChanged: (text) {
        formsList[index].value = text;
      },
    );
  }
The getDropDown method is used to return a drop-down field widget.
  DropdownButtonFormField getDropDown(index, List<ItemModel> listItems) {
    return DropdownButtonFormField<ItemModel>(
      value: formsList[index].selectedItem,
      items: listItems.map<DropdownMenuItem<ItemModel>>((ItemModel value) {
        return DropdownMenuItem<ItemModel>(
          value: value,
          child: Text(value.name),
        );
      }).toList(),
      onChanged: (value) {
        setState(() {
          formsList[index].selectedItem = value;
          if (formsList[index].controlName == "Country") {
            //Get states based on the selected country by parent ID.
            var filteredstates = states
                .where((element) => value?.id == element.parentId)
                .toList();

            if (formsList.any((element) => element.controlName == "State")) {
              formsList[index + 1].selectedItem = null;
              var existingitem = formsList
                  .firstWhere((element) => element.controlName == "State");
              formsList.remove(existingitem);
            }

            if (filteredstates.isNotEmpty) {
              formsList.insert(
                  index + 1,
                  DynamicModel("State", FormType.Dropdown,
                      items: filteredstates));
            }
          }
        });
      },
      validator: (value) => value == null ? 'Field required' : null,
      decoration: InputDecoration(
          labelText: formsList[index].controlName,
          border: const OutlineInputBorder(
              borderRadius: BorderRadius.all(Radius.circular(14.0)))),
    );
  }
The getAutoComplete method is used to return an autocomplete widget for the search field widget.
Widget getAutoComplete(index) {
    return DropdownSearch<String>.multiSelection(
      items: const ["Facebook", "Twitter", "Microsoft"],
      popupProps: const PopupPropsMultiSelection.menu(
        isFilterOnline: true,
        showSelectedItems: true,
        showSearchBox: true,
        favoriteItemProps: FavoriteItemProps(
          showFavoriteItems: true,
        ),
      ),
      onChanged: print,
      selectedItems: const ["Facebook"],
    );
  }
The getHtmlReadOnly method is used to read HTML text.
Widget getHtmlReadOnly(index) {
    return Html(
      data: formsList[index].value,
      shrinkWrap: true,
      style: {
        // tables will have the below background color
        "table": Style(
          backgroundColor: const Color.fromARGB(0x50, 0xee, 0xee, 0xee),
        ),
        // some other granular customizations are also possible
        "tr": Style(
          border: const Border(bottom: BorderSide(color: Colors.grey)),
        ),
        "th": Style(
          padding: const EdgeInsets.all(6),
          backgroundColor: Colors.grey,
        ),
        "td": Style(
          padding: const EdgeInsets.all(6),
          alignment: Alignment.topLeft,
        ),
      },
    );
  }
The getDatepicker method is used to choose a date using the Syncfusion SfDateRangePicker (Flutter DateRangePicker) control.
Widget getDatePicker(index) {
    return TextFormField(
      controller: textEditingController,
      decoration: InputDecoration(
          labelText: dynamicFormsList[index].controlName,
          border: const OutlineInputBorder(
              borderRadius: BorderRadius.all(Radius.circular(14.0)))),
      maxLines: null,
      readOnly: true,
      onTap: () {
        showDialog<Widget>(
            context: context,
            builder: (BuildContext context) {
              return SfDateRangePicker(
                controller: dateRangePickerController,
                selectionColor: Colors.green,
                showActionButtons: true,
                backgroundColor: Colors.white,
                todayHighlightColor: Colors.transparent,
                initialSelectedDate: DateTime(2023, 1, 22),
                onSubmit: (Object? value) {
                  Navigator.pop(context);
                  setState(() {
                    dynamicFormsList[index].value = DateFormat("dd/MM/y")
                        .format(dateRangePickerController.selectedDate!);
                    textEditingController.text = dynamicFormsList[index].value;
                  });
                },
                onCancel: () {
                  Navigator.pop(context);
                },
              );
            });
      },
    );
  }
Step 4: Create a form widget
A form widget is used to create forms. It serves as a container that enables you to group multiple form fields. To create a form, you must provide a GlobalKey that will uniquely identify the form and be used for validating the form fields.
All of the form fields have been added to the list property dynamicFormsList. Below is the code for adding form fields to the list. The control name and form type should be specified in the list.
The usage of the Validators list property was discussed in Step 1.
DynamicModel dynamicModel =
        DynamicModel("Name", FormType.Text, isRequired: true);
    dynamicModel.validators = [];
    dynamicModel.validators.add(DynamicFormValidator(
        validatorType.TextNotempty, "Name should not be Empty"));
    dynamicModel.validators.add(DynamicFormValidator(
        validatorType.TextLength, "Maximum length should be 10",
        textLength: 10));
    dynamicFormsList.add(dynamicModel);

    dynamicModel =
        DynamicModel("Phone Number", FormType.Number, isRequired: true);
    dynamicModel.validators = [];
    dynamicModel.validators.add(DynamicFormValidator(
        validatorType.TextNotempty, "Phone number should not be Empty"));
    dynamicModel.validators.add(DynamicFormValidator(
        validatorType.PhoneNumber, "Phone number should be 10 digits",
        textLength: 10));
    dynamicFormsList.add(dynamicModel);

    dynamicFormsList.add(DynamicModel("Address", FormType.Multiline));
    dynamicFormsList.add(DynamicModel("Country", FormType.Dropdown, items: countries));
    dynamicFormsList.add(DynamicModel("Contact", FormType.AutoComplete));
The form method _dynamicWidget() contains the ListView and Button widgets. All the form fields are displayed in the ListView by using the dynamicFormsList property. If you add any field at runtime, you have to add it to the dynamicFormsList property. It will be updated in the UI by using the setState() method.
GlobalKey<FormState> globalFormKey = GlobalKey<FormState>();
  late List<DynamicModel> dynamicFormsList = [];
  late List<ItemModel> countries = [];
  late List<ItemModel> states = [];

  Widget _dynamicWidget() {
    return Form(
      key: globalFormKey,
      child: SingleChildScrollView(
        child: Padding(
          padding: const EdgeInsets.all(10),
          child: Column(
            mainAxisAlignment: MainAxisAlignment.start,
            crossAxisAlignment: CrossAxisAlignment.start,
            children: <Widget>[
              Column(
                crossAxisAlignment: CrossAxisAlignment.start,
                mainAxisAlignment: MainAxisAlignment.start,
                children: [
                  dynamicLists(),
                  Align(
                    alignment: Alignment.bottomRight,
                    child: FormHelper.submitButton("Save", () async {
                      if (validateAndSave()) {}
                    }, btnColor: const Color.fromARGB(255, 84, 60, 206)),
                  )
                ],
              ),
            ],
          ),
        ),
      ),
    );
  }

  Widget dynamicLists() {
    return ListView.builder(
      shrinkWrap: true,
      physics: const ScrollPhysics(),
      itemCount: dynamicFormsList.length,
      itemBuilder: (context, index) {
        return GestureDetector(
          child: Column(
            children: <Widget>[
              Row(children: <Widget>[
                Flexible(
                  fit: FlexFit.loose,
                  child: Padding(
                    padding: const EdgeInsets.all(10),
                    child: Row(
                      children: [
                        Flexible(
                          flex: 1,
                          child: getWidgetBasedFormType(index),
                        ),
                      ],
                    ),
                  ),
                ),
              ]),
            ],
          ),
          onTap: () async {
            selectedIndex = index;
            var selectedform = dynamicFormsList[index].formType;
            if (selectedform == FormType.HTMLReader) {
              final result = await Navigator.push(
                context,
                MaterialPageRoute(
                  builder: (context) =>
                      HTMLEditorPage(htmlText: dynamicFormsList[index].value),
                ),
              );
              setState(() {
                dynamicFormsList[index].value =
                    result ?? dynamicFormsList[index].value;
              });
            }
          },
        );
      },
    );
  }
The getWidgetBasedFormType() method is used to display the form field based on the form type.
Widget getWidgetBasedFormType(index) {
    var form = dynamicFormsList[index];
    FormType type = form.formType;
    switch (type) {
      case FormType.Text:
        return getTextWidget(index);
      case FormType.Number:
        return getNumberTextWidget(index);
      case FormType.Multiline:
        return getMultilineTextWidget(index);
      case FormType.Dropdown:
        return getDropDown(index, form.items);
      case FormType.AutoComplete:
        return getAutoComplete(index);
      case FormType.HTMLReader:
        return getHtmlReadOnly(index);
case FormType.DatePicker:
        return getDatePicker(index);

    }
  }
Step 5: Add a form field at runtime
If we add a field at runtime, we must include it in the dynamicFormsList property. This can be updated in the UI using the setState() method. Please refer to the code below as an example of how to add a form field at runtime.
dynamicFormsList.add(DynamicModel("Address", FormType.Multiline));You can use the this code to add a form field from anywhere and add form fields based on the form type as needed.
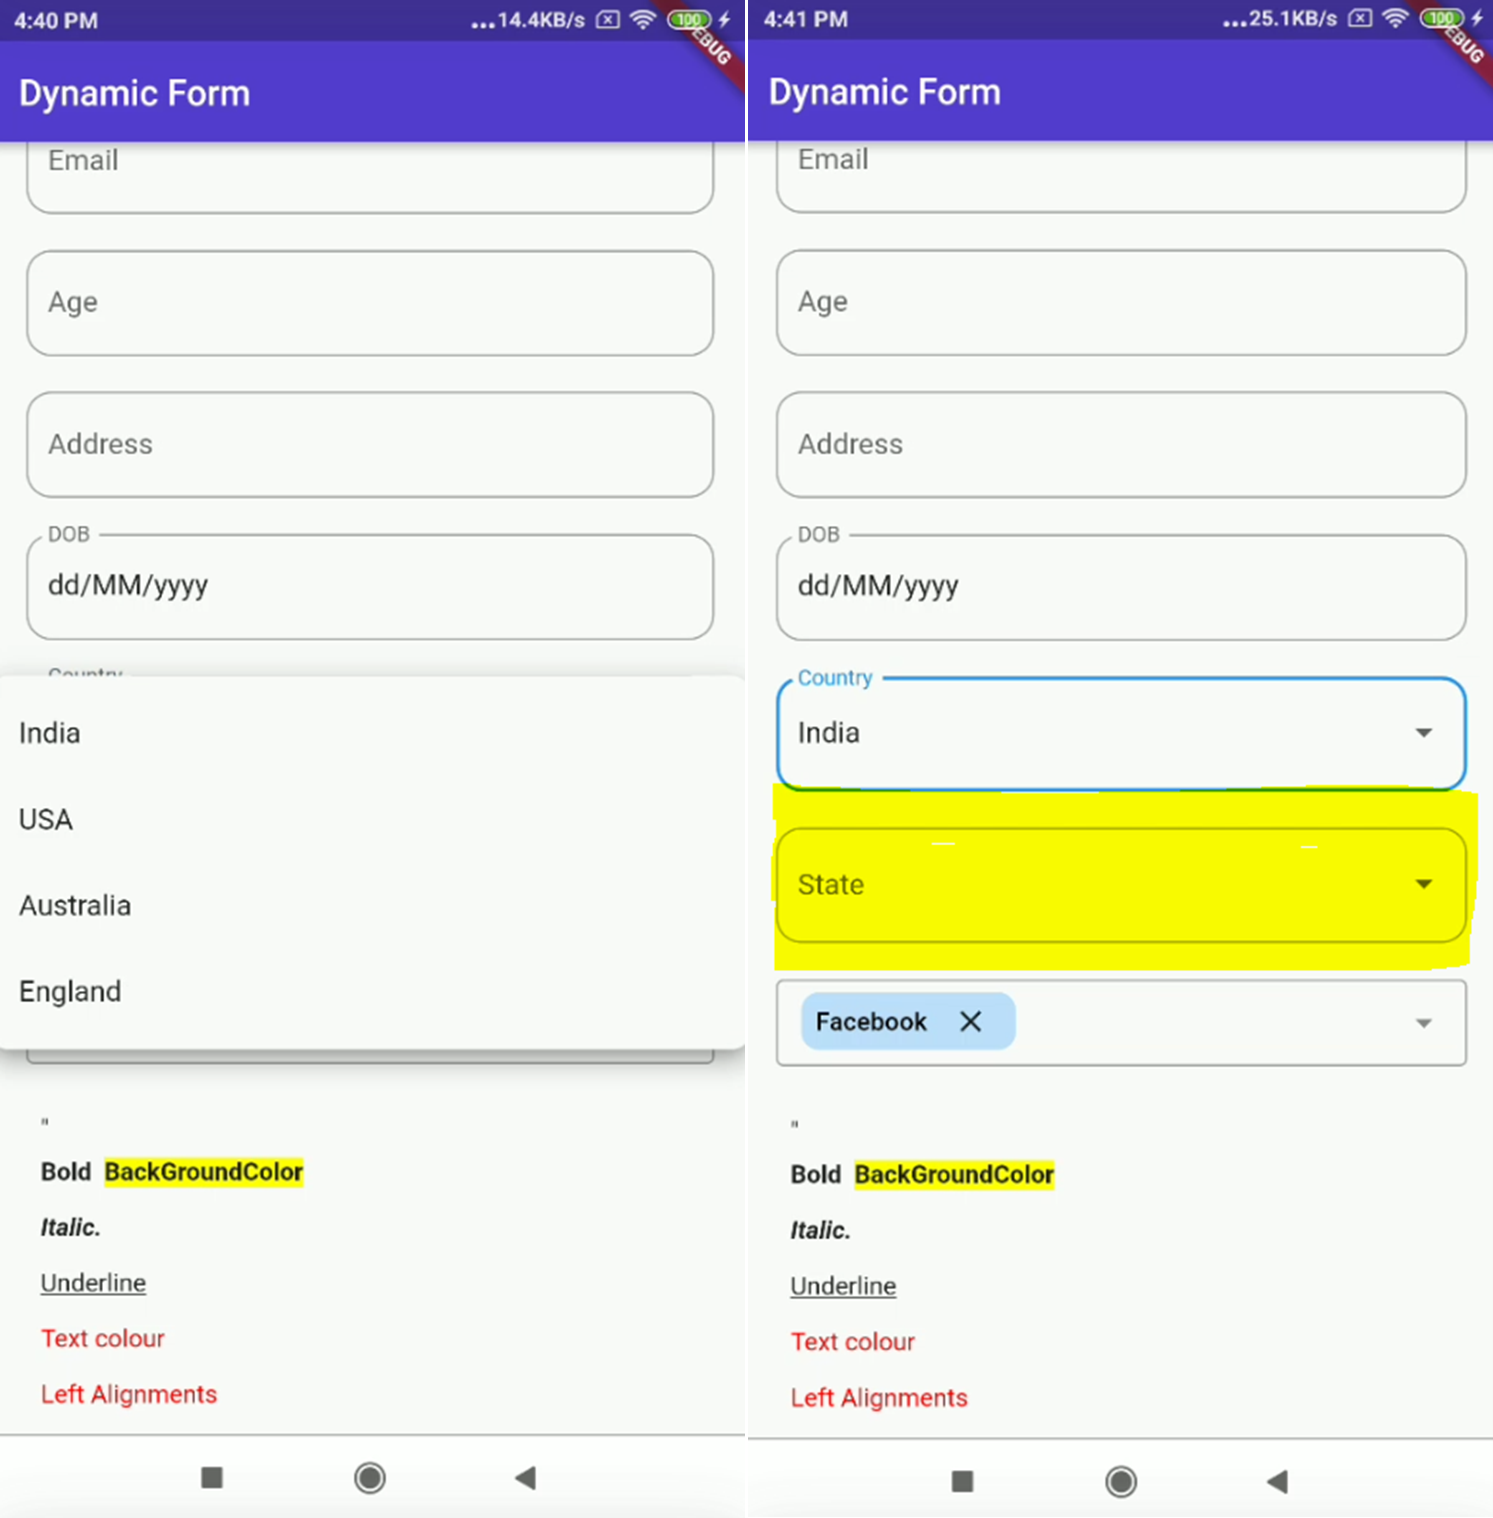
Note: It will only be updated in the UI if you use the form field by adding code inside the setState() method with proper syntax.
Please refer to the highlighted field, as it will be added based on the selected country.
Step 6: Form validation
You need to apply validation to each required form field. As discussed earlier, you can add validation in the Validation list property. Then, you should create a validation function that runs the form validation, and you can check the validation for all the form fields by using the globalFormKey, as shown.
I have initialized the globalFormKey during the creation of the form widget. It is used to validate all the widgets in the form. The GlobalKey can access the current state of the FormState.
bool validateAndSave() {
    final form = globalFormKey.currentState;
    if (form!.validate()) {
      form.save();
      return true;
    }
    return false;
  }
When we call the form.validate() method, the validator method is called on each field. The validator function will return an error message when the user’s input is not valid; otherwise, it will return a null value.
validator: (text) {
var selectedField = dynamicFormsList[index];
if (selectedField.isRequired &&
selectedField.validators
.any((element) => element.type == validatorType.TextNotempty) &&
(text == null || text.isEmpty)) {
return selectedField.validators
.firstWhere(
(element) => element.type == validatorType.TextNotempty)
.errorMessage;
}
if (selectedField.validators
.any((element) => element.type == validatorType.TextLength)) {
var validator = selectedField.validators.firstWhere(
(element) => element.type == validatorType.TextLength);
int? len = text?.length;
if (len != null && len > validator.textLength) {
return validator.errorMessage;
}
}
return null;
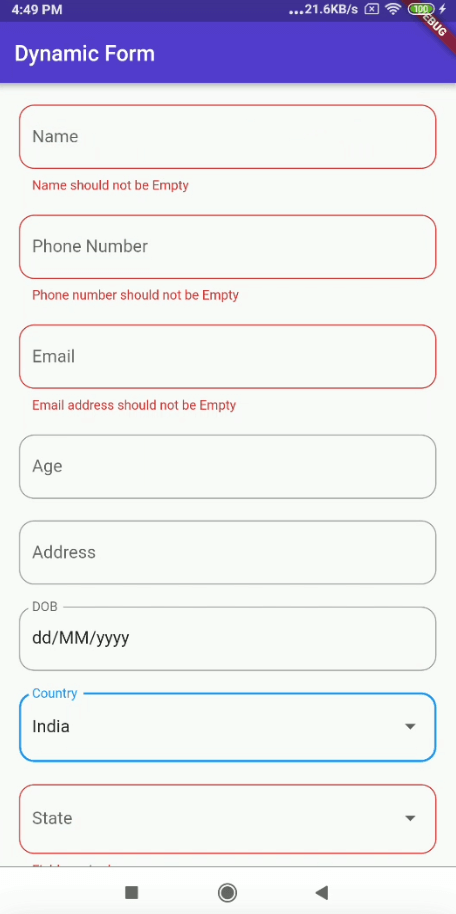
}OUTPUT:
Conclusion
I trust you found this blog post informative and engaging. When following the steps outlined in this post, if you have any queries, please don’t hesitate to ask us by leaving a comment. We would love to hear how this blog post has helped you.
New versions are available for existing customers on the license and downloads page. If you are not a Syncfusion customer, try our 30-day free trial to check out our available features. Contact us through our support forum, support portal, or feedback portal. We are here to help you succeed!
 No spam, just valuable updates.
Comments (4)
please also explain how to retrieve value after that
Hi AKHIL ANAND,
Thanks for your comment.
All the input values are stored in dynamic forms list. In this sample, you can get the value based on controlName like below,
var inputValue = dynamicFormsList.firstWhere(
(element) => element.controlName == “Name”).value;
Regards,
Sameer M
can i get the example sourcecode github project for this?
Hi DAVID JONES
You can get it source from below link,
https://github.com/SyncfusionExamples/dynamic-forms-flutter
Regards,
Sameer M