
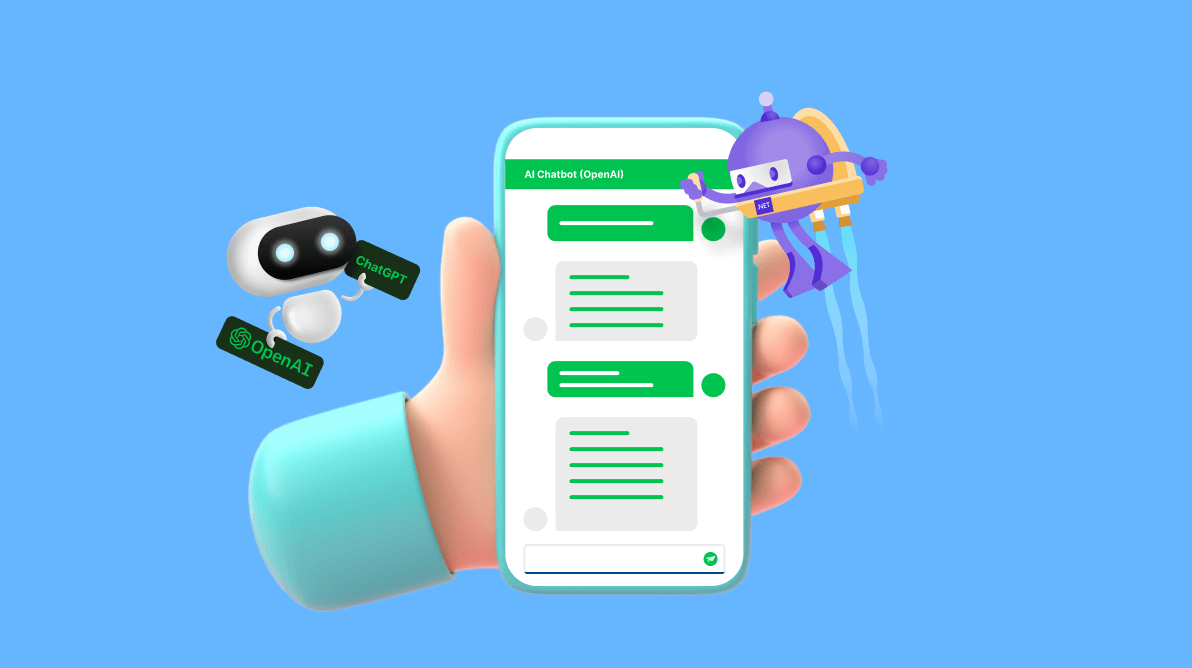
Creating a cross-platform app leveraging AI’s power can be a game-changer in today’s fast-paced digital world. In this blog, we will create a ChatGPT-like service app using Syncfusion .NET MAUI controls and the OpenAI API.
.NET MAUI (Multiplatform App UI) is a versatile framework. It allows developers to create native user interfaces and apps for various platforms, including Android, iOS, Windows, and macOS, using a single codebase. You can save time and effort while ensuring your app delivers a consistent and native experience across multiple devices.
To enhance the functionality of your cross-platform app, you can integrate it with the OpenAI API. OpenAI’s powerful language models, such as GPT-3.5, can generate human-like text and facilitate natural language processing.
Let’s see how to create a ChatGPT-like service app using Syncfusion .NET MAUI controls and the OpenAI API. This app will understand and respond to user input, making conversations more interactive and engaging.
Implementation of ChatGPT-like app
The following modules need to be implemented for the app:
- ChatGPT Engine: To process the chat conversation using OpenAI APIs.
- Chat-like UI: To provide an intuitive chatting experience.
- Data template selector: To define the appearance of chat messages from the bot and the user.
- Model object: For messages.
- Chat back-end logic: To handle and process the text with the ChatGPTEngine class.

Creating the ChatGPTEngine class
First, we need to create the ChatGPTEngine class to process the chat conversation using OpenAI APIs.
Step 1: Import the necessary dependencies
Import the following dependencies at the beginning of the code file.
using System.Net.Http;
using System.Net.Http.Headers;
using System.Text;
using System.Text.Json;
using System.Text.RegularExpressions;
using System.Threading.Tasks;
Step 2: Define the ChatGPTEngine class
Now, define the ChatGPTEngine class to handle the interactions with the OpenAI API.
internal class ChatGPTEngine
{

}
Step 3: Set up properties and variables
Inside the ChatGPTEngine class, we need to declare the following private properties and variables:
- httpClient: An instance of the HttpClient class, to make HTTP requests to the OpenAI API.
- OPENAI_KEY: A string variable where we should add our valid OpenAI API key.
- OPENAI_MODEL: A string variable representing the OpenAI language model we want to use. In this case, it’s set to “text-davinci-003“.
- API_ENDPOINT: A string variable representing the URL endpoint of the OpenAI API.
Refer to the following code example.
internal class ChatGPTEngine
{
    private HttpClient httpClient { get; set; }

    private string OPENAI_KEY = "";// Add a valid OpenAI key here.

    private string OPENAI_MODEL = "text-davinci-003";

    private string API_ENDPOINT = "https://api.openai.com/v1/completions";

}
Step 4: Create the constructor
Now, create the constructor for the ChatGPTEngine class to initialize the httpClient property by creating a new instance of the HttpClient class.
internal class ChatGPTEngine
{
    private HttpClient httpClient { get; set; }

    private string OPENAI_KEY = "";// Add a valid OpenAI key here.

    private string OPENAI_MODEL = "text-davinci-003";

    private string API_ENDPOINT = "https://api.openai.com/v1/completions";

    public ChatGPTEngine()
    {
        httpClient = new HttpClient();
    }

}
Step 5: Implement the ProcessTheUserInput method
Implement the ProcessTheUserInput() method to send a prompt to the OpenAI API and retrieve the completion result.
internal class ChatGPTEngine
{
    private HttpClient httpClient { get; set; }

    private string OPENAI_KEY = "";// Add a valid OpenAI key here.

    private string OPENAI_MODEL = "text-davinci-003";

    private string API_ENDPOINT = "https://api.openai.com/v1/completions";

    public ChatGPTEngine()
    {
        httpClient = new HttpClient();
    }

    internal async Task<string> ProcessTheUserInput(string prompt)
    {
        var val = new AuthenticationHeaderValue("Bearer", OPENAI_KEY);
        httpClient.DefaultRequestHeaders.Authorization = val;
        var openAIPrompt = new
        {
            model = OPENAI_MODEL,
            prompt,
            temperature = 0.5,
            max_tokens = 1500,
            top_p = 1,
            frequency_penalty = 0,
            presence_penalty = 0
        };

        var content = new StringContent(JsonSerializer.Serialize(openAIPrompt), Encoding.UTF8, "application/json");
        var response = await httpClient.PostAsync(API_ENDPOINT, content);
        var jsonContent = await response.Content.ReadAsStringAsync();
        var choices = JsonDocument.Parse(jsonContent).RootElement.GetProperty("choices").GetRawText();
        var result = JsonDocument.Parse(Regex.Replace(choices, @"[\[\]]", string.Empty)).RootElement;
        return result.GetProperty("text").GetString();
    }
}
In the previous code example, ProcessTheUserInput() method will:
- Take a prompt parameter representing the text input given to the language model.
- Set up the necessary headers for authentication by adding the OpenAI API key to the request headers.
- Create an object called openAIPrompt that holds the model, prompt and other parameters for the API request.
- Serialize the openAIPrompt object into JSON format and create a StringContent object for the HTTP request.
- Send a POST request to the API_ENDPOINT with the serialized openAIPrompt as the requested content.
- Read the response content as a JSON string and extract the choices property from the JSON.
- Remove the square brackets from the choices property using regular expressions.
- Parse the modified JSON content and retrieve the text property containing the completion result.
- Finally, return the processed result as a string.
That’s it! The ChatGPTEngine class will now provide a convenient way to interact with the OpenAI API and retrieve completion results based on the given prompt.
Note: Replace the OPENAI_KEY variable with a valid OpenAI API key before running the code.
Creating a chat UI
Follow these steps to create a UI that provides an intuitive chat experience.
Step 1: Define namespaces and class
Let’s define the necessary XML namespaces for the Syncfusion .NET MAUI controls:
- Syncfusion .NET MAUI SfListView: To display the chat conversation in a scrollable list format.
- Syncfusion .NET MAUI SfBusyIndicator: To animate the processing state when the query gets processed through OpenAI APIs.
- Syncfusion .NET MAUI SfAvatarView: To display the bot and user image.
<ContentPage xmlns="http://schemas.microsoft.com/dotnet/2021/maui"
             xmlns:x="http://schemas.microsoft.com/winfx/2009/xaml"
             xmlns:local="clr-namespace:MAUIChatGPT"
             xmlns:listView="clr-namespace:Syncfusion.Maui.ListView;assembly=Syncfusion.Maui.ListView"
             xmlns:core="clr-namespace:Syncfusion.Maui.Core;assembly=Syncfusion.Maui.Core"
             x:Class="MAUIChatGPT.MainPage" Background="Blue">
Step 2: Define resources for data templates
Define two DataTemplate objects: botTemplate and userTemplate. These templates will determine the appearance of chat messages from the bot and the user, respectively.
<ContentPage xmlns="http://schemas.microsoft.com/dotnet/2021/maui"
             xmlns:x="http://schemas.microsoft.com/winfx/2009/xaml"
             xmlns:local="clr-namespace:MAUIChatGPT"
             xmlns:listView="clr-namespace:Syncfusion.Maui.ListView;assembly=Syncfusion.Maui.ListView"
             xmlns:core="clr-namespace:Syncfusion.Maui.Core;assembly=Syncfusion.Maui.Core"
             x:Class="MAUIChatGPT.MainPage" Background="Blue">
 <ContentPage.Resources>
  <DataTemplate x:Key="botTemplate">
   <Grid ColumnDefinitions="40,*" VerticalOptions="Center" Margin="5,5,40,5" >
    <core:SfAvatarView VerticalOptions="End" StrokeThickness="0" AvatarShape="Circle" AvatarSize="Small" ContentType="AvatarCharacter" AvatarCharacter="Avatar1" BackgroundColor="LightGray"/>
    <Grid Grid.Column="1" >
     <BoxView CornerRadius="10,10,0,10" Color="#EEEEEE"/>
     <Label Text="{Binding Text}" VerticalOptions="Start" Margin="10,5"/>
    </Grid>
   </Grid>
  </DataTemplate>
  <DataTemplate x:Key="userTemplate">
   <Grid ColumnDefinitions="*,40" Margin="40,5,5,5" HorizontalOptions="End" >
    <Grid>
     <BoxView CornerRadius="10,10,10,0" Color="LightGreen" Opacity="0.7"/>
     <Label Text="{Binding Text}" VerticalOptions="Start" Margin="10,5"/>
    </Grid>
    <core:SfAvatarView Grid.Column="1" VerticalOptions="End" StrokeThickness="0"  AvatarShape="Circle" AvatarSize="Small" ContentType="Custom" ImageSource="selva.png" BackgroundColor="LightGray"/>
   </Grid>
  </DataTemplate>
  <local:MessageDataTemplateSelector x:Key="messageDataTemplateSelector" />
 </ContentPage.Resources>
</ContentPage>
Step 3: Define MessageDataTemplateSelector
Now, define a custom MessageDataTemplateSelector object using the local namespace. It allows selecting the appropriate DataTemplate based on the type of message (bot or user). In the following code, the BotTemplate and UserTemplate properties are set to the previously defined botTemplate and userTemplate resources.
<ContentPage xmlns="http://schemas.microsoft.com/dotnet/2021/maui"
             xmlns:x="http://schemas.microsoft.com/winfx/2009/xaml"
             xmlns:local="clr-namespace:MAUIChatGPT"
             xmlns:listView="clr-namespace:Syncfusion.Maui.ListView;assembly=Syncfusion.Maui.ListView"
             xmlns:core="clr-namespace:Syncfusion.Maui.Core;assembly=Syncfusion.Maui.Core"
             x:Class="MAUIChatGPT.MainPage" Background="Blue">
 <ContentPage.Resources>
  <DataTemplate x:Key="botTemplate">
   <Grid ColumnDefinitions="40,*" VerticalOptions="Center" Margin="5,5,40,5" >
    <core:SfAvatarView VerticalOptions="End" StrokeThickness="0"  AvatarShape="Circle" AvatarSize="Small" ContentType="AvatarCharacter" AvatarCharacter="Avatar1" BackgroundColor="LightGray"/>
    <Grid  Grid.Column="1" >
     <BoxView CornerRadius="10,10,0,10" Color="#EEEEEE"/>
     <Label Text="{Binding Text}" VerticalOptions="Start" Margin="10,5"/>
    </Grid>
   </Grid>
  </DataTemplate>
  <DataTemplate x:Key="userTemplate">
   <Grid ColumnDefinitions="*,40" Margin="40,5,5,5" HorizontalOptions="End" >
    <Grid>
     <BoxView CornerRadius="10,10,10,0" Color="LightGreen" Opacity="0.7"/>
     <Label Text="{Binding Text}" VerticalOptions="Start" Margin="10,5"/>
    </Grid>
    <core:SfAvatarView Grid.Column="1" VerticalOptions="End" StrokeThickness="0"  AvatarShape="Circle" AvatarSize="Small" ContentType="Custom" ImageSource="selva.png" BackgroundColor="LightGray"/>
   </Grid>
  </DataTemplate>
  <local:MessageDataTemplateSelector x:Key="messageDataTemplateSelector"
                                     BotTemplate="{StaticResource botTemplate}"
                                     UserTemplate="{StaticResource userTemplate}" />
 </ContentPage.Resources>
</ContentPage>
Step 4: Define the UI layout
In the following code, we’ve defined a Grid element with three rows. The first row has a height of 40, the second row takes up the remaining vertical space using *, and the third row adjusts its height based on its contents using Auto values. The grid has a width request of 300 and a white background.
<ContentPage xmlns="http://schemas.microsoft.com/dotnet/2021/maui"
             xmlns:x="http://schemas.microsoft.com/winfx/2009/xaml"
             xmlns:local="clr-namespace:MAUIChatGPT"
             xmlns:listView="clr-namespace:Syncfusion.Maui.ListView;assembly=Syncfusion.Maui.ListView"
             xmlns:core="clr-namespace:Syncfusion.Maui.Core;assembly=Syncfusion.Maui.Core"
             x:Class="MAUIChatGPT.MainPage" Background="Blue">
 <ContentPage.Resources>
  <DataTemplate x:Key="botTemplate">
   <Grid ColumnDefinitions="40,*" VerticalOptions="Center" Margin="5,5,40,5" >
    <core:SfAvatarView VerticalOptions="End" StrokeThickness="0"  AvatarShape="Circle" AvatarSize="Small"  ContentType="AvatarCharacter" AvatarCharacter="Avatar1" BackgroundColor="LightGray"/>
     <Grid  Grid.Column="1" >
      <BoxView CornerRadius="10,10,0,10" Color="#EEEEEE"/>
      <Label Text="{Binding Text}" VerticalOptions="Start" Margin="10,5"/>
     </Grid>
   </Grid>
  </DataTemplate>
  <DataTemplate x:Key="userTemplate">
   <Grid ColumnDefinitions="*,40" Margin="40,5,5,5" HorizontalOptions="End" >
    <Grid>
     <BoxView CornerRadius="10,10,10,0" Color="LightGreen" Opacity="0.7"/>
     <Label Text="{Binding Text}" VerticalOptions="Start" Margin="10,5"/>
    </Grid>
    <core:SfAvatarView Grid.Column="1" VerticalOptions="End" StrokeThickness="0"  AvatarShape="Circle" AvatarSize="Small" ContentType="Custom" ImageSource="selva.png" BackgroundColor="LightGray"/>
   </Grid>
  </DataTemplate>
  <local:MessageDataTemplateSelector x:Key="messageDataTemplateSelector"
                                     BotTemplate="{StaticResource botTemplate}"
                                     UserTemplate="{StaticResource userTemplate}" />
  </ContentPage.Resources>


  <Grid RowDefinitions="40,*,Auto" WidthRequest="300" Background="White">

  </Grid>
</ContentPage>
Step 5: Define the header
Inside the first row of the grid, define a Grid element with a green background color. In the following code, it contains a Label element displaying the header text for the chatbot.
<ContentPage xmlns="http://schemas.microsoft.com/dotnet/2021/maui"
             xmlns:x="http://schemas.microsoft.com/winfx/2009/xaml"
             xmlns:local="clr-namespace:MAUIChatGPT"
             xmlns:listView="clr-namespace:Syncfusion.Maui.ListView;assembly=Syncfusion.Maui.ListView"
             xmlns:core="clr-namespace:Syncfusion.Maui.Core;assembly=Syncfusion.Maui.Core"
             x:Class="MAUIChatGPT.MainPage" Background="Blue">
 <ContentPage.Resources>
  <DataTemplate x:Key="botTemplate">
   <Grid ColumnDefinitions="40,*" VerticalOptions="Center" Margin="5,5,40,5" >
    <core:SfAvatarView VerticalOptions="End" StrokeThickness="0"  AvatarShape="Circle" AvatarSize="Small" ContentType="AvatarCharacter" AvatarCharacter="Avatar1" BackgroundColor="LightGray"/>
    <Grid  Grid.Column="1" >
     <BoxView CornerRadius="10,10,0,10" Color="#EEEEEE"/>
     <Label Text="{Binding Text}" VerticalOptions="Start" Margin="10,5"/>
    </Grid>
   </Grid>
  </DataTemplate>
  <DataTemplate x:Key="userTemplate">
   <Grid ColumnDefinitions="*,40"  Margin="40,5,5,5" HorizontalOptions="End" >
    <Grid>
     <BoxView CornerRadius="10,10,10,0"  Color="LightGreen" Opacity="0.7"/>
     <Label Text="{Binding Text}" VerticalOptions="Start" Margin="10,5"/>
    </Grid>
    <core:SfAvatarView Grid.Column="1" VerticalOptions="End" StrokeThickness="0"  AvatarShape="Circle" AvatarSize="Small" ContentType="Custom" ImageSource="selva.png" BackgroundColor="LightGray"/>
   </Grid>
  </DataTemplate>
  <local:MessageDataTemplateSelector x:Key="messageDataTemplateSelector"
                                     BotTemplate="{StaticResource botTemplate}"
                                     UserTemplate="{StaticResource userTemplate}" />
 </ContentPage.Resources>


 <Grid RowDefinitions="40,*,Auto" WidthRequest="300" Background="White">

  <Grid BackgroundColor="#00CA50">
   <Label Text="AI Chatbot (OpenAI)" Margin="20,0,0,0" FontSize="14" TextColor="White" FontAttributes="Bold" HorizontalOptions="Start" VerticalOptions="Center"/>
  </Grid>

 </Grid>
</ContentPage>
Step 6: Define the chat message ListView
In the following code block, within the second row of the grid, an instance of the Syncfusion SfListView is added. We’ve set its value to usingGrid.Row=”1″ to occupy the entire row. The x: name attribute is set to listView for future reference.
The AutoFitMode property is set to DynamicHeight to adjust the item height based on the content. The ItemsSource property is bound to a collection named Messages. The ItemTemplate property is set to the messageDataTemplateSelector resource defined earlier, which dynamically selects the appropriate DataTemplate based on the message type.
<ContentPage xmlns="http://schemas.microsoft.com/dotnet/2021/maui"
             xmlns:x="http://schemas.microsoft.com/winfx/2009/xaml"
             xmlns:local="clr-namespace:MAUIChatGPT"
             xmlns:listView="clr-namespace:Syncfusion.Maui.ListView;assembly=Syncfusion.Maui.ListView"
             xmlns:core="clr-namespace:Syncfusion.Maui.Core;assembly=Syncfusion.Maui.Core"
             x:Class="MAUIChatGPT.MainPage" Background="Blue">
 <ContentPage.Resources>
  <DataTemplate x:Key="botTemplate">
   <Grid ColumnDefinitions="40,*" VerticalOptions="Center" Margin="5,5,40,5" >
    <core:SfAvatarView VerticalOptions="End" StrokeThickness="0"  AvatarShape="Circle" AvatarSize="Small"  ContentType="AvatarCharacter" AvatarCharacter="Avatar1" BackgroundColor="LightGray"/>
     <Grid Grid.Column="1" >
      <BoxView CornerRadius="10,10,0,10" Color="#EEEEEE"/>
      <Label Text="{Binding Text}" VerticalOptions="Start" Margin="10,5"/>
     </Grid>
   </Grid>
  </DataTemplate>
  <DataTemplate x:Key="userTemplate">
   <Grid ColumnDefinitions="*,40" Margin="40,5,5,5" HorizontalOptions="End" >
    <Grid>
     <BoxView CornerRadius="10,10,10,0" Color="LightGreen" Opacity="0.7"/>
     <Label Text="{Binding Text}" VerticalOptions="Start" Margin="10,5"/>
    </Grid>
    <core:SfAvatarView Grid.Column="1" VerticalOptions="End" StrokeThickness="0"  AvatarShape="Circle" AvatarSize="Small"  ContentType="Custom" ImageSource="selva.png" BackgroundColor="LightGray"/>
   </Grid>
  </DataTemplate>
  <local:MessageDataTemplateSelector x:Key="messageDataTemplateSelector"
                                     BotTemplate="{StaticResource botTemplate}"
                                     UserTemplate="{StaticResource userTemplate}" />
 </ContentPage.Resources>


 <Grid RowDefinitions="40,*,Auto" WidthRequest="300" Background="White">

  <Grid BackgroundColor="#00CA50">
   <Label Text="AI Chatbot (OpenAI)" Margin="20,0,0,0" FontSize="14" TextColor="White" FontAttributes="Bold" HorizontalOptions="Start" VerticalOptions="Center"/>
  </Grid>

  <listView:SfListView Grid.Row="1" x:Name="listView"  AutoFitMode="DynamicHeight" ItemsSource="{Binding Messages}" ItemTemplate="{StaticResource  messageDataTemplateSelector}" />

 </Grid>
</ContentPage>
Step 7: Define the user input section
In the next code block, in the third row of the grid, a Grid element is defined with two columns. The first column occupies the remaining width using *, and the second column has a fixed width of 50. The grid has a padding of 10 pixels on all sides.
An Editor control named queryView is added within the first column. It allows users to input text for their chat messages. The BackgroundColor property sets the background color of the editor.
The SfBusyIndicator control and an Image control are added within the second column. The SfBusyIndicator displays a loading animation while the chatbot processes the user’s input. The Image control displays a send button icon. The TapGestureRecognizer is used to handle the tap event on the send button.
Overall, this XAML code defines the layout and appearance of a chat UI using the Syncfusion SfListView, SfAvatarView, and SfBusyIndicator .NET MAUI controls. It provides an intuitive chatting experience with a header, a list view for displaying chat messages, and an input section for users to enter their messages.
Refer to the following code example.
<ContentPage xmlns="http://schemas.microsoft.com/dotnet/2021/maui"
             xmlns:x="http://schemas.microsoft.com/winfx/2009/xaml"
             xmlns:local="clr-namespace:MAUIChatGPT"
             xmlns:listView="clr-namespace:Syncfusion.Maui.ListView;assembly=Syncfusion.Maui.ListView"
             xmlns:core="clr-namespace:Syncfusion.Maui.Core;assembly=Syncfusion.Maui.Core"
             x:Class="MAUIChatGPT.MainPage" Background="Blue">
 <ContentPage.Resources>
  <DataTemplate x:Key="botTemplate">
   <Grid ColumnDefinitions="40,*" VerticalOptions="Center" Margin="5,5,40,5" >
    <core:SfAvatarView VerticalOptions="End" StrokeThickness="0"  AvatarShape="Circle" AvatarSize="Small"  ContentType="AvatarCharacter" AvatarCharacter="Avatar1" BackgroundColor="LightGray"/>
    <Grid  Grid.Column="1" >
     <BoxView CornerRadius="10,10,0,10" Color="#EEEEEE"/>
     <Label Text="{Binding Text}" VerticalOptions="Start" Margin="10,5"/>
    </Grid>
   </Grid>
  </DataTemplate>
  <DataTemplate x:Key="userTemplate">
   <Grid ColumnDefinitions="*,40" Margin="40,5,5,5" HorizontalOptions="End" >
    <Grid>
     <BoxView CornerRadius="10,10,10,0" Color="LightGreen" Opacity="0.7"/>
     <Label Text="{Binding Text}" VerticalOptions="Start" Margin="10,5"/>
    </Grid>
    <core:SfAvatarView Grid.Column="1" VerticalOptions="End" StrokeThickness="0"  AvatarShape="Circle" AvatarSize="Small"  ContentType="Custom" ImageSource="selva.png" BackgroundColor="LightGray"/>
   </Grid>
  </DataTemplate>
  <local:MessageDataTemplateSelector x:Key="messageDataTemplateSelector"
                                     BotTemplate="{StaticResource botTemplate}"
                                     UserTemplate="{StaticResource userTemplate}" />
 </ContentPage.Resources>


 <Grid RowDefinitions="40,*,Auto" WidthRequest="300" Background="White">

  <Grid BackgroundColor="#00CA50">
   <Label Text="AI Chatbot (OpenAI)" Margin="20,0,0,0" FontSize="14" TextColor="White" FontAttributes="Bold" HorizontalOptions="Start" VerticalOptions="Center"/>
  </Grid>

  <listView:SfListView Grid.Row="1" x:Name="listView"  AutoFitMode="DynamicHeight" ItemsSource="{Binding Messages}" ItemTemplate="{StaticResource  messageDataTemplateSelector}" />

   <Grid  ColumnDefinitions="*,50" Padding="0,10" Grid.Row="2">
    <Editor x:Name="queryView" BackgroundColor="#CCFFFFFF" Margin="10,0,0,0"/>
    <core:SfBusyIndicator Grid.Column="1"  x:Name="busyIndicator" AnimationType="DoubleCircle" IndicatorColor="#00CA49" SizeFactor="0.4">
     <Image x:Name="sendImage" Source="send.png" WidthRequest="40" HeightRequest="40">
      <Image.GestureRecognizers>
       <TapGestureRecognizer Tapped="TapGestureRecognizer_Tapped_1"/>
      </Image.GestureRecognizers>
     </Image>
    </core:SfBusyIndicator>
   </Grid>

 </Grid>
</ContentPage>Creating a data template selector
Follow these steps to create the MessageDataTemplateSelector class.
Step 1: Define the class and properties
In the following code, the MessageDataTemplateSelector class is defined as a public class and inherits from the DataTemplateSelector class. It allows you to select different data templates based on the provided logic.
public class MessageDataTemplateSelector : DataTemplateSelector
{
    public DataTemplate BotTemplate { get; set; }
    public DataTemplate UserTemplate { get; set; }

}
This class has two public properties: BotTemplate and UserTemplate. These properties hold the DataTemplate objects for the bot and user messages, respectively. These templates will be used to define the appearance of the chat messages.
Step 2: Override the method
In the next code example, the MessageDataTemplateSelector class overrides the OnSelectTemplate method from the base DataTemplateSelector class. This method selects the appropriate DataTemplate based on the provided logic.
Inside the OnSelectTemplate method, it checks the IsBot property of the item object (assumed to be of type MessageObject). If it’s true, indicating a bot message, the BotTemplate will be returned. Otherwise, the UserTemplate is returned, assuming it’s a user message.
The returned DataTemplate will be used by the SfListView control (or any other control that utilizes this template selector) to display the corresponding message type with the appropriate UI template.
As mentioned before, the MessageDataTemplateSelector class allows you to dynamically select the appropriate DataTemplate based on the message type. It enables you to customize the appearance of bot and user messages within the SfListView control or any other control that utilizes it.
public class MessageDataTemplateSelector : DataTemplateSelector
{
    public DataTemplate BotTemplate { get; set; }
    public DataTemplate UserTemplate { get; set; }

    protected override DataTemplate OnSelectTemplate(object item, BindableObject container)
    {
        return (item as MessageObject).IsBot ? BotTemplate : UserTemplate;
    }
}
Creating a model object for messages
Now, let’s implement a MessageObject class that serves as a model or data structure to represent a message in the app. It encapsulates the text content and identifies whether the message is from a bot or a user.
Refer to the following code example.
public class MessageObject
{
    public String Text { get; set; }

    public bool IsBot { get; set; }
}
Creating the chat backend logic
Follow these steps to implement the logic to process the input through ChatGPTEngine and display the output on the UI for the user.
Step 1: Declare the class with BindableProperty for messages
The following code defines a partial class named MainPage inherited from the ContentPage. This class represents the main page of the app.
Declare a BindableProperty named MessagesProperty. It will define a bindable property that can bind a collection of MessageObject objects to the Messages property of the MainPage class. This property will be used for data-binding purposes.
The Messages property is of type ObservableCollection<MessageObject>. It gets and sets the value of the Messages property using the GetValue and SetValue methods.
public partial class MainPage : ContentPage
{

    public ObservableCollection<MessageObject> Messages
    {
        get { return (ObservableCollection<MessageObject>)GetValue(MessagesProperty); }
        set { SetValue(MessagesProperty, value); }
    }

    public static readonly BindableProperty MessagesProperty =
        BindableProperty.Create("Messages", typeof(ObservableCollection<MessageObject>), typeof(MainPage), null);


}
Step 2: ChatGPTEngine class initialization
Create an instance of the ChatGPTEngine class to handle the AI chatbot’s communication and process the user inputs.
public partial class MainPage : ContentPage
{

    public ObservableCollection<MessageObject> Messages
    {
        get { return (ObservableCollection<MessageObject>)GetValue(MessagesProperty); }
        set { SetValue(MessagesProperty, value); }
    }

    public static readonly BindableProperty MessagesProperty =
        BindableProperty.Create("Messages", typeof(ObservableCollection<MessageObject>), typeof(MainPage), null);

    private ChatGPTEngine chatGPTEngine = new ChatGPTEngine();


}
Step 3: Declare the constructor
In the following code example, the constructor initializes the MainPage class and performs the following actions:
- Calls the InitializeComponent() to initialize the UI components defined in the XAML file.
- Creates a new instance of the ObservableCollection<MessageObject> and assigns it to the Messages property. This collection will store the chat messages.
- Calls the GetResult method with an initial query of “You are an AI chatbot, and you are here to answer my questions.“
- Sets the BindingContext of the page to itself, allowing data binding to the properties of the MainPage class.
public partial class MainPage : ContentPage
{

    public ObservableCollection<MessageObject> Messages
    {
        get { return (ObservableCollection<MessageObject>)GetValue(MessagesProperty); }
        set { SetValue(MessagesProperty, value); }
    }

    public static readonly BindableProperty MessagesProperty =
        BindableProperty.Create("Messages", typeof(ObservableCollection<MessageObject>), typeof(MainPage), null);


    private ChatGPTEngine chatGPTEngine = new ChatGPTEngine();

    public MainPage()
    {
        InitializeComponent();


        Messages = new ObservableCollection<MessageObject>();

        this.GetResult("You are an AI chatbot and you are here to answer my questions");

        this.BindingContext = this;
    }

}
Step 4: Declare the event handler
Declare the TapGestureRecognizer event handler. It will be triggered when the user taps the screen or clicks a button to send a query or message, and it performs the following actions:
- Retrieves the user’s query from the queryView control (an editor).
- Clears the queryView by setting its text to an empty string.
- Creates a new MessageObject representing the user’s message, with the IsBot property set to false and the Text property set to the user’s query.
- Adds the user’s message to the Messages collection.
- Scroll the listView (SfListView) to make the user’s message visible.
- Calls the GetResult method with the user’s query.
Refer to the following code example.
public partial class MainPage : ContentPage
{

    public ObservableCollection<MessageObject> Messages
    {
        get { return (ObservableCollection<MessageObject>)GetValue(MessagesProperty); }
        set { SetValue(MessagesProperty, value); }
    }

    public static readonly BindableProperty MessagesProperty =
        BindableProperty.Create("Messages", typeof(ObservableCollection<MessageObject>), typeof(MainPage), null);


    private ChatGPTEngine chatGPTEngine = new ChatGPTEngine();

    public MainPage()
    {
        InitializeComponent();


        Messages = new ObservableCollection<MessageObject>();

        this.GetResult("You are an AI chatbot and you are here to answer my questions");

        this.BindingContext = this;
    }

    private void TapGestureRecognizer_Tapped_1(object sender, EventArgs e)
    {

       var query = this.queryView.Text ;
        this.queryView.Text = string.Empty;
        MessageObject userMessage = new MessageObject() { IsBot = false, Text = query };
        this.Messages.Add(userMessage);
        this.listView.ScrollTo(userMessage, ScrollToPosition.MakeVisible, true);
        this.GetResult(query);

    }
}
Step 5: Implement the GetResult method
Finally, we need to implement the GetResult method. It retrieves the AI chatbot’s response based on the user’s query by performing these actions:
- Sets the IsRunning property of the busyIndicator (SfBusyIndicator) to true, indicating that the app is busy processing the request.
- Disables the queryView and the sendImage properties to prevent user input during processing.
- Calls the ProcessTheUserInput method of the chatGPTEngine instance to send the user’s query and await the chatbot’s response.
- Removes any newline characters from the response for formatting purposes.
- Creates a new MessageObject representing the chatbot’s message, with the IsBot property set to true and the Text property set to the chatbot’s reply.
- Adds the chatbot’s message to the Messages collection.
- Scrolls the listView to make the chatbot’s message visible.
- Enables the sendImage and the queryView
- Finally, sets the IsRunning property of the busyIndicator to false, indicating that the processing is complete.
Refer to the following code example.
public partial class MainPage : ContentPage
{

    public ObservableCollection<MessageObject> Messages
    {
        get { return (ObservableCollection<MessageObject>)GetValue(MessagesProperty); }
        set { SetValue(MessagesProperty, value); }
    }

    public static readonly BindableProperty MessagesProperty =
        BindableProperty.Create("Messages", typeof(ObservableCollection<MessageObject>), typeof(MainPage), null);


    private ChatGPTEngine chatGPTEngine = new ChatGPTEngine();

    public MainPage()
    {
        InitializeComponent();


        Messages = new ObservableCollection<MessageObject>();

        this.GetResult("You are an AI chatbot and you are here to answer my questions");

        this.BindingContext = this;
    }


    private void TapGestureRecognizer_Tapped_1(object sender, EventArgs e)
    {

        var query = this.queryView.Text ;
        this.queryView.Text = string.Empty;
        MessageObject userMessage = new MessageObject() { IsBot = false, Text = query };
        this.Messages.Add(userMessage);
        this.listView.ScrollTo(userMessage, ScrollToPosition.MakeVisible, true);
        this.GetResult(query);

    }

    private async void GetResult(string query)
    {
        this.busyIndicator.IsRunning = true;
        this.queryView.IsEnabled = false;
        this.sendImage.IsVisible = false;
        var reply = await chatGPTEngine.ProcessTheUserInput(query);
        reply = reply.Replace("\n", "");
        MessageObject botMessage = new MessageObject() { IsBot = true, Text = reply };
        this.Messages.Add(botMessage);
        this.listView.ScrollTo(botMessage, ScrollToPosition.MakeVisible, true);
        this.sendImage.IsVisible = true;
        this.queryView.IsEnabled = true;
        this.busyIndicator.IsRunning = false;
    }

}
In summary, the MainPage class manages the UI and interaction of the chat application. It initializes the necessary components, handles user input events, and communicates with the ChatGPTEngine class to process user queries and display the chatbot’s responses. The Messages property binds the chat messages to the SfListView for displaying the conversation history.
Refer to the following output GIF image.
Conclusion
We hope you enjoyed reading this blog and finding it both informative and engaging. By following the outlined steps, you can successfully develop a .NET MAUI application that leverages the OpenAI ChatGPT API to deliver a chat-like experience. For different suggestions and responses, feel free to experiment with different GPT models and leave your feedback in the comments section!
Moreover, we highly recommend exploring Syncfusion’s extensive collection of .NET MAUI controls, which provides developers with comprehensive tools. These controls offer a wide range of customization options and intuitive APIs, seamlessly integrating into the .NET MAUI framework. By utilizing Syncfusion controls, you can create visually stunning, cross-platform apps enriched with enhanced functionality.
If you’re not yet a Syncfusion customer, we invite you to take advantage of our 30-day free trial.
For questions, you can contact us through our support forum, support portal, or feedback portal. Our dedicated team is always ready to provide you with the help you need.
Disclaimer: You will need to use professional skill and judgment when doing any implementation. This provides only a sample. Syncfusion is not affiliated with ChatGPT and is not responsible for any results.


 No spam, just valuable updates.
Comments (2)
Do you a link to this code example? Thx
Hello i tryed this solution and me dosnt works 🙁
””
Severity Code Description Project File Line Suppression status
Error (active) CS0053 Inconsistent Availability: The ObservableCollection property type is less accessible than the MainPage.Messages property. Chatbotak (net8.0-android), Chatbotak (net8.0-ios), Chatbotak (net8.0-maccatalyst), Chatbotak (net8.0-windows10.0.19041.0) C:\TestFolder\Chatbotak\Chatbotak\MainPage. xaml.cs 7
”’