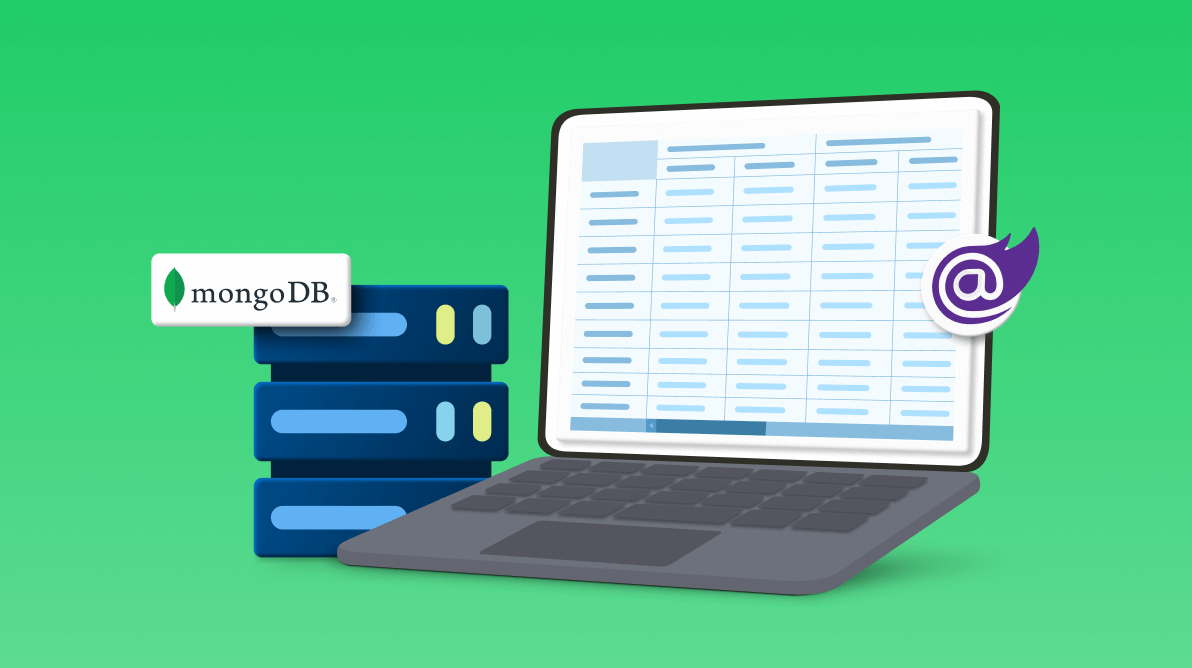
MongoDB is a popular NoSQL database system. Developers and organizations use it to store and manage large amounts of data. One of the advantages of using MongoDB is its ability to scale horizontally, making it ideal for applications requiring high availability and scalability. In this blog, we will discuss how to create a MongoDB database using MongoDB Atlas and populate the Blazor Pivot Table with data from a MongoDB Server.
First, we’ll create a MongoDB database using MongoDB Atlas.
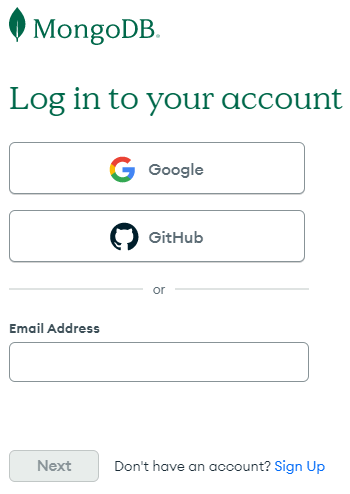
Step 1: Create a MongoDB Atlas account
MongoDB Atlas is a cloud-based service that provides a fully managed MongoDB database. To start, go to the MongoDB Atlas website and create an account.
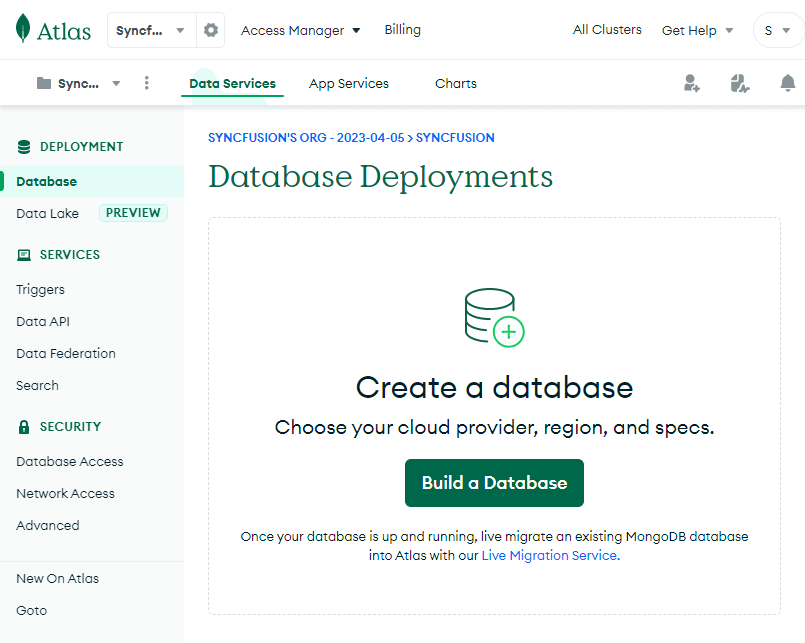
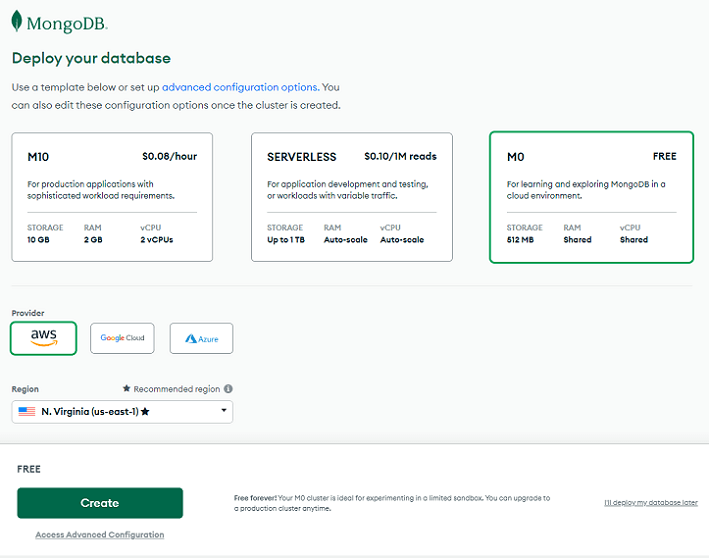
Step 2: Create a MongoDB cluster
After creating an account, build a new MongoDB cluster. Go to Deployment->Database on the MongoDB Atlas dashboard and select the Build a Database button. Select the cluster configuration that meets your requirements and click Create.
Step 3: Secure your connection with authentication protocols
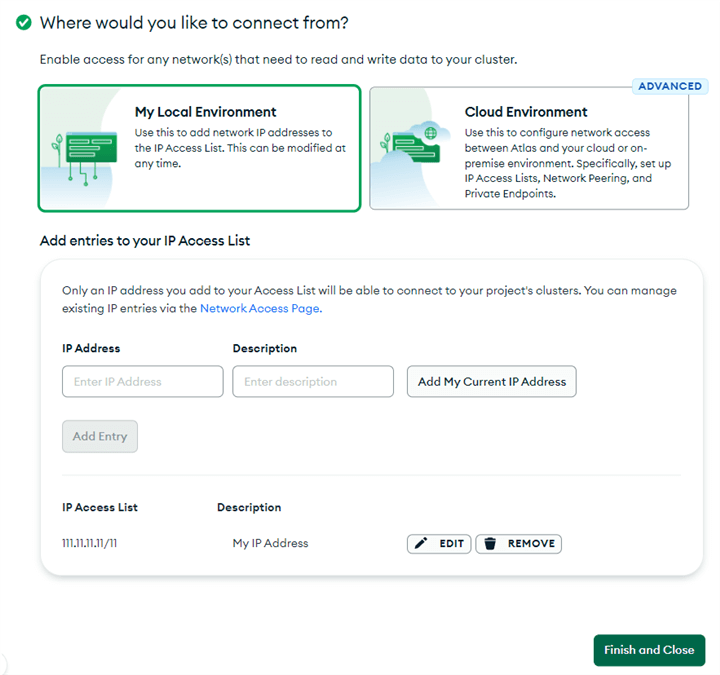
You will be directed to the Security Quickstart page while creating the database cluster, where you need to authenticate for secure access. After entering your Username and Password, select Create User.

Next, enter the IP address to access the database cluster. Only IP addresses added to the Access List will be able to connect to the database in your Blazor application. Finally, select Finish and Close. Your cluster is now available to add data collections.
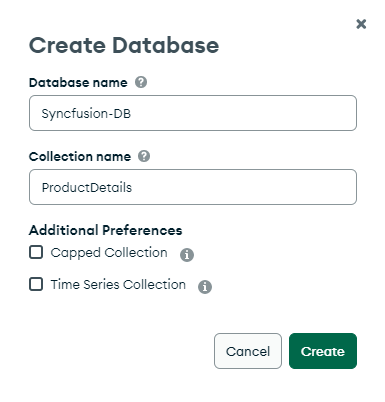
Step 4: Create a database and collection
After setting up the cluster, create a new database and collection. Go to the Browse Collections tab on the MongoDB Atlas dashboard and click Add My Own Data. Enter your database and collection name, then select Create.
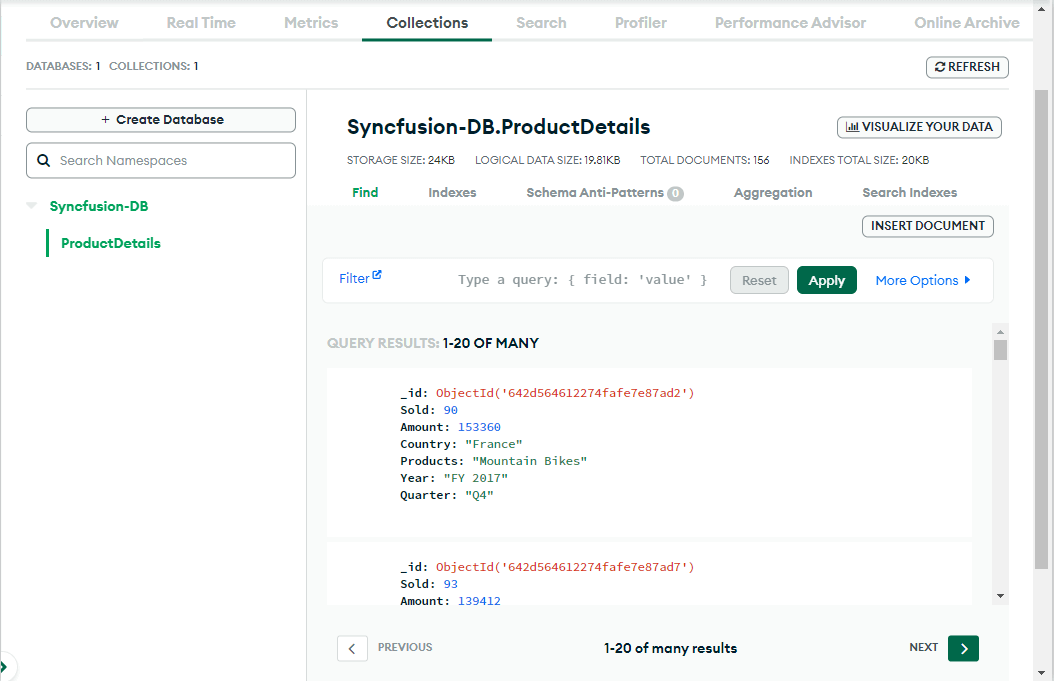
Step 5: Add data to the collection
To add data to your collection, go to the Collection tab and select Insert Document. Enter the data you wish to add, then click Insert. Your data is now ready to bind to your Blazor Pivot Table.

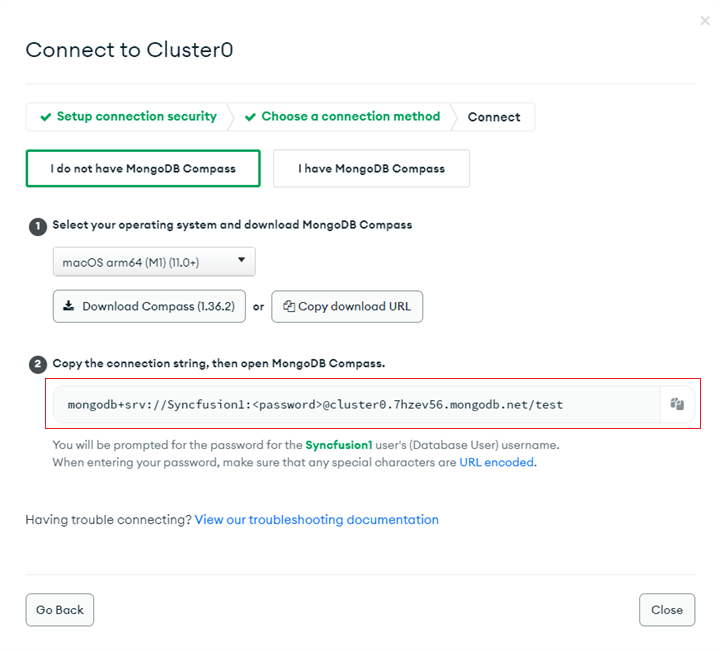
Step 6: Connect your MongoDB cluster
Connect your data-contained database. To do so, go to the MongoDB Atlas dashboard and select Overview, followed by Connect. To create your connection string, you must select one of the communication methods. In this case, we’ve selected Connect using MongoDB Compass. You can now copy and paste the following connection string into your Blazor application code to retrieve the data and bind it to the Pivot Table.
Step 7: Connect to the MongoDB Server from Blazor
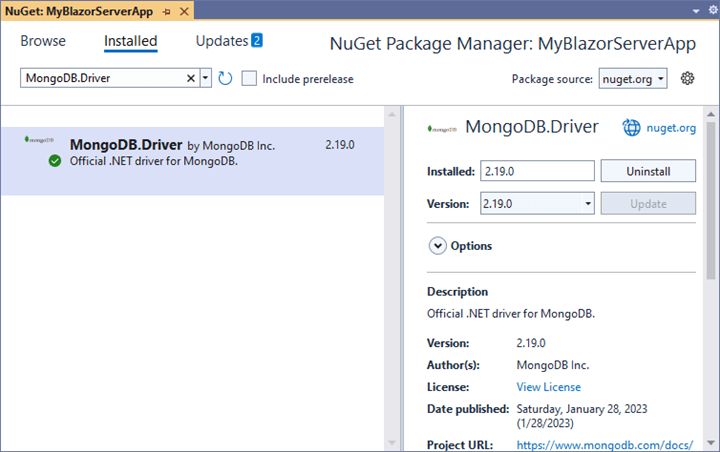
To connect to the MongoDB Server, create a Blazor application. You will need to install the MongoDB.Driver package using the NuGet Package Manager in that application.
Once the package is installed, use the connection string to connect to the MongoDB Server using the MongoClient class and bind the retrieved data to the Blazor Pivot Table, as shown in the following code.
@using Syncfusion.Blazor.PivotView
@using MongoDB.Bson;
@using MongoDB.Driver;
@using MongoDB.Driver.Core.Authentication;

<SfPivotView TValue="ProductDetails" Width="1000" Height="300" ShowFieldList="true">
    <PivotViewDataSourceSettings TValue="ProductDetails" DataSource="@dataSource" ExpandAll=false EnableSorting=true>
        <PivotViewColumns>
            <PivotViewColumn Name="Year"></PivotViewColumn>
        </PivotViewColumns>
        <PivotViewRows>
            <PivotViewRow Name="Country"></PivotViewRow>
            <PivotViewRow Name="Products"></PivotViewRow>
        </PivotViewRows>
        <PivotViewValues>
            <PivotViewValue Name="Sold" Caption="Units Sold"></PivotViewValue>
            <PivotViewValue Name="Amount" Caption="Sold Amount"></PivotViewValue>
        </PivotViewValues>
        <PivotViewFormatSettings>
            <PivotViewFormatSetting Name="Sold" Format="N2"></PivotViewFormatSetting>
            <PivotViewFormatSetting Name="Amount" Format="C"></PivotViewFormatSetting>
        </PivotViewFormatSettings>
    </PivotViewDataSourceSettings>
    <PivotViewGridSettings ColumnWidth="120"></PivotViewGridSettings>
</SfPivotView>

@code {
    private List<ProductDetails> dataSource { get; set; }

    protected override void OnInitialized()
    {
        string connectionString = @"mongodb+srv://Syncfusion1:<password>@cluster0.7hzev56.mongodb.net/test";
        MongoClient client = new MongoClient(connectionString);
        IMongoDatabase database = client.GetDatabase("sample_training");
        IMongoCollection<ProductDetails> collection = database.GetCollection<ProductDetails>("ProductDetails");
        dataSource = collection.Find(new BsonDocument()).ToList();
    }

    public class ProductDetails
    {
        public ObjectId _id { get; set; }
        public int Sold { get; set; }
        public double Amount { get; set; }
        public string Country { get; set; }
        public string Products { get; set; }
        public string Year { get; set; }
        public string Quarter { get; set; }
    }
}
Follow the documentation link to learn more about building a simple Blazor application with the Syncfusion Blazor Pivot Table to extract and bind data from your MongoDB.
Sample project on GitHub
For more details, see the sample application in this GitHub location.
Referral links
Conclusion
Thank you for taking the time to read this blog post, in which we discussed how to create a MongoDB database using MongoDB Atlas and populate the Blazor Pivot Table with data using the available tools and features. Following the steps outlined in this post which makes it easy to create a powerful web application that allows users to analyze and summarize data visually.
You can download the new version from the License and Downloads page if you’re an existing customer. If you’re not a Syncfusion customer, we invite you to try our 30-day free trial to experience all our available features. Additionally, you can explore our samples at this GitHub location.
We welcome any feedback you may have, so please feel free to share your thoughts in the comments section below or contact us through our support forum, support portal, or feedback portal. We are always here to help you!