
Dynamic tasks are vital when following the Scrum framework in developing a product. Properly managing different states of multiple tasks assigned to different members of the team might be a nightmare. To effectively handle these tasks, you need a versatile tool to effectively manage them.
Our Syncfusion Blazor Scheduler component is a fully featured event calendar that helps users manage their time and projects efficiently. It facilitates easy resource scheduling and the rescheduling of events or tasks (appointments) through editor pop-ups, drag-and-drop operations, and resizing actions.
In this blog post, I will quickly explain how to synchronize Jira calendar tasks and customizations with the Syncfusion Blazor Scheduler component for effective task management.
Let’s get started!
Project setup
First things first, create a simple Blazor server-side Scheduler application. Refer to the Getting Started with Blazor Scheduler Component documentation for an introduction to configuring the common specifications.
Initialize the Syncfusion Blazor Scheduler component
Now, add the Syncfusion Blazor Scheduler component to the Index.razor page and set the value of the TValue property as AppointmentModel. Then, define the Scheduler component’s AppointmentModel class.
Refer to the following code example.
<SfSchedule TValue="AppointmentModel">
</SfSchedule>
public class AppointmentModel
    {
        public int Id { get; set; }
        public string Subject { get; set; }
        public string Location { get; set; }
        public DateTime StartTime { get; set; }
        public DateTime EndTime { get; set; }
        public string Description { get; set; }
        public bool IsAllDay { get; set; }
        public string RecurrenceRule { get; set; }
        public string RecurrenceException { get; set; }
        public Nullable<int> RecurrenceID { get; set; }
        public string CssClass { get; set; }
}Syncfusion Blazor Scheduler helps you create intuitive booking, event, and calendar experiences with built-in views, recurring appointments, editing, rescheduling, localization, and flexible customization.
See Blazor Scheduler in ActionGenerate Jira API token
Now, generate the Jira API token. Refer to the manage API tokens for your Atlassian account documentation to generate the token from your Atlassian account.
Get tasks from Jira
Now, create an HTTP request and read the Jira tasks from the Rest API, as mentioned in the following code.
 HttpClient client = new HttpClient();
 var byteArray = new UTF8Encoding().GetBytes("mail:token");
 client.DefaultRequestHeaders.Authorization = new AuthenticationHeaderValue("Basic", Convert.ToBase64String(byteArray));
 var request = new HttpRequestMessage(HttpMethod.Get, "Rest API Url");
 var response = await client.SendAsync(request);
Synchronizing Jira Calendar tasks with the Blazor Scheduler
Next, deserialize the HTTP response and form the appointment data. Then, assign the resultant value to the DataSource property in the Blazor Scheduler.
Refer to the following code example.
<SfSchedule TValue="AppointmentModel">
        <ScheduleEventSettings DataSource="@DataSource">
    </ScheduleEventSettings>
    <ScheduleViews>
        <ScheduleView Option="View.Month"></ScheduleView>
    </ScheduleViews>
</SfSchedule>

 protected override async Task OnInitializedAsync()
    {
        HttpClient client = new HttpClient();
        var byteArray = new UTF8Encoding().GetBytes("mail:token");
        client.DefaultRequestHeaders.Authorization = new AuthenticationHeaderValue("Basic", Convert.ToBase64String(byteArray));
        var request = new HttpRequestMessage(HttpMethod.Get, "Rest api url");
        var response = await client.SendAsync(request);
        if (response.IsSuccessStatusCode && DataSource == null)
        {
            var responseStream = await response.Content.ReadAsStringAsync();
            var data = JsonConvert.DeserializeObject<JIRA>(responseStream);
            List<AppointmentModel> events = new List<AppointmentModel>();
            foreach (var issue in data.Issues)
            {
                events.Add(new AppointmentModel()
                {
                    Id = issue.Id,
                    Subject = issue.Fields.Summary,
                    Description = issue.Fields.Description,
                    StartTime = issue.Fields.Created,
                    EndTime = issue.Fields.Created.AddHours(1),
                    IsAllDay = true,
                    CssClass = GetCssClass(issue.Fields.Priority.Name)
                });
            }
            DataSource = events;
        }
        else
        {
            getTasksError = true;
        }
    }
Customize appointment cell header
You can customize a cell’s header by using the CellHeaderTemplate option in the ScheduleTemplates.
Refer to the following code example to show the total number of issues created on a specific date in each cell’s header.
<<SfSchedule TValue="AppointmentModel">>
        <<ScheduleEventSettings DataSource="@DataSource">>
    <</ScheduleEventSettings>>
    <<ScheduleViews>>
        <<ScheduleView Option="View.Month">><</ScheduleView>>
    <</ScheduleViews>>
    <<ScheduleTemplates>>
        <<CellHeaderTemplate>>
            @context.Date.Day
            @{
                var count = GetIssueCount(@context.Date);
                if (count >> 0)
                {
                    <<span>> Issues: @GetIssueCount(@context.Date)<</span>>
                }
            }
        <</CellHeaderTemplate>>
    <</ScheduleTemplates>>
<</SfSchedule>>
Customize appointment appearance
Also, you can apply custom colors to appointments based on the task’s priority. To do so, use the built-in field CssClass in which you can pass the class name to be applied to the specific appointments.
@code {
public string GetCssClass(string priority)
    {
        string css;
        if (priority == "Release-Breaker")
        {
            css = "release-breaker";
        }
        else if (priority == "Normal")
        {
            css = "normal";
        }
        else if (priority == "High")
        {
            css = "high";
        }
        else if (priority == "Critical")
        {
            css = "critical";
        }
        else if (priority == "Ultra Critical")
        {
            css = "ultra-crtical";
        }
        else
        {
            css = "low";
        }
        return css;
    }
}

<style>
    .e-schedule .e-month-view .low {
        background: #99ccff;
    }

    .e-schedule .e-month-view .normal {
        background: #66cc66;
    }

    .e-schedule .e-month-view .high {
        background: #006633;
    }

    .e-schedule .e-month-view .critical {
        background: #ff0000;
    }

    .e-schedule .e-month-view .ultra-critical {
        background: #990000;
    }

    .e-schedule .e-month-view .release-breaker {
        background: #000000;
    }
</style>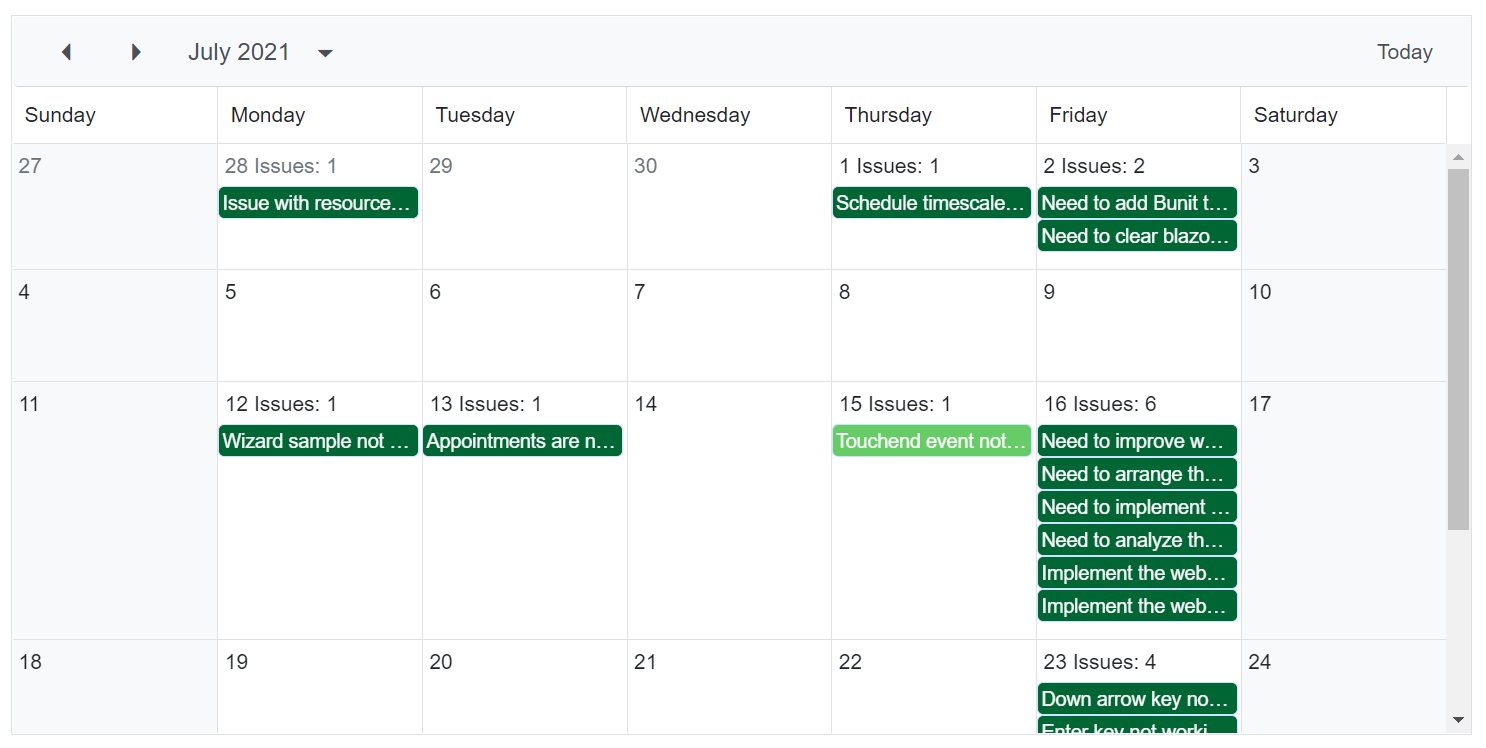
Note: For more information, refer to the appointment customization in Blazor Scheduler documentation.
Customize the appointment tooltip
You can also display the required tasks’ information on a tooltip using the TooltipTemplate option within the ScheduleEventSettings.
Refer to the following code example.
<SfSchedule TValue="AppointmentModel">
        <ScheduleEventSettings DataSource="@DataSource" EnableTooltip="true">
            <TooltipTemplate>
                @{
                var data = (context as AppointmentModel);
                <p>@data.Subject</p>
                <p>@data.Description</p>
            }
        </TooltipTemplate>
    </ScheduleEventSettings>
    <ScheduleViews>
        <ScheduleView Option="View.Month"></ScheduleView>
    </ScheduleViews>
</SfSchedule>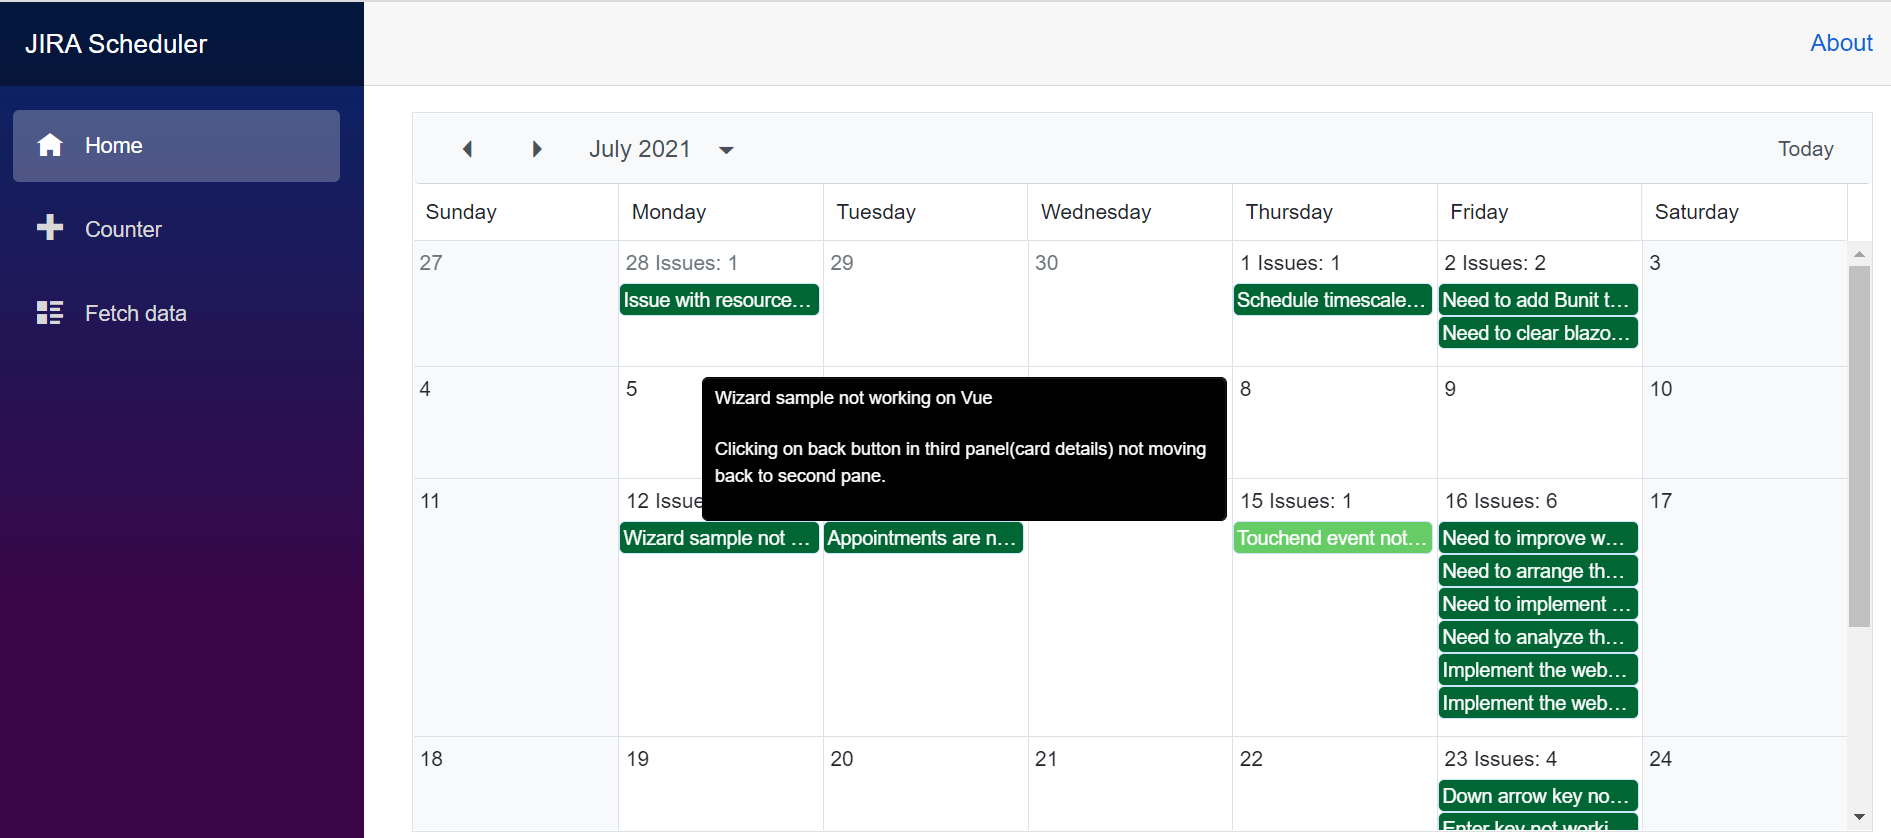
Note: Also, refer to the documentation on customizing event tooltips in a Blazor Scheduler using a template.
Resource
For more details, check out the complete working example to synchronize Jira calendar tasks with the Blazor Scheduler.
Summary
Thanks for reading! This blog explained in detail how to synchronize Jira calendar tasks and how to customize headers, appointment colors, and tooltips with the Syncfusion Blazor Scheduler component. So, try out the steps and enjoy hassle-free project and resource management.
Our Syncfusion Scheduler control is also available in our Xamarin, UWP, WinForms, WinUI, WPF, Blazor, ASP.NET (Core, MVC, and Web Forms), JavaScript, Angular, React, and Vue platforms.
For current customers, the new version is available for download from the License and Downloads page. If you are not yet a Syncfusion customer, you can start a 30-day free trial to check out these features.
Also, you can reach us through our support forums, Direct-Trac, or feedback portal. We are always happy to assist you!


 No spam, just valuable updates.