

The present and future of software development is based on cloud computing.
Microsoft Graph is a platform for integrating different applications and services with Microsoft’s cloud services, such as Azure Active Directory (AD), by providing access to the data in them. For example, we can easily create, read, update, and delete (CRUD) an Office 365 Calendar event through its APIs.
This blog explains the steps to access calendar events in Office 365 Outlook, display them in Syncfusion Blazor Scheduler using Microsoft Graph APIs and Azure AD programmatically, and then perform CRUD operations in the Scheduler.
Before getting started, make sure you have an Azure AD tenant account. If not, create an Azure AD tenant by joining the Microsoft 365 Developer Program or creating a free Azure trial account.
The following topics are going to be covered in this blog:
- Configure your Blazor application
- Configure Azure AD services
- Communicate with Azure AD resources
- Get and list events from Office 365 Outlook
- Integrate Syncfusion Blazor Scheduler with your application
- Perform CRUD operations in Office 365 Outlook calendar events
Let’s get started!

Configure your Blazor application
After choosing the Blazor server app to configure the application, follow these steps:
- Open Visual Studio and create a new project.
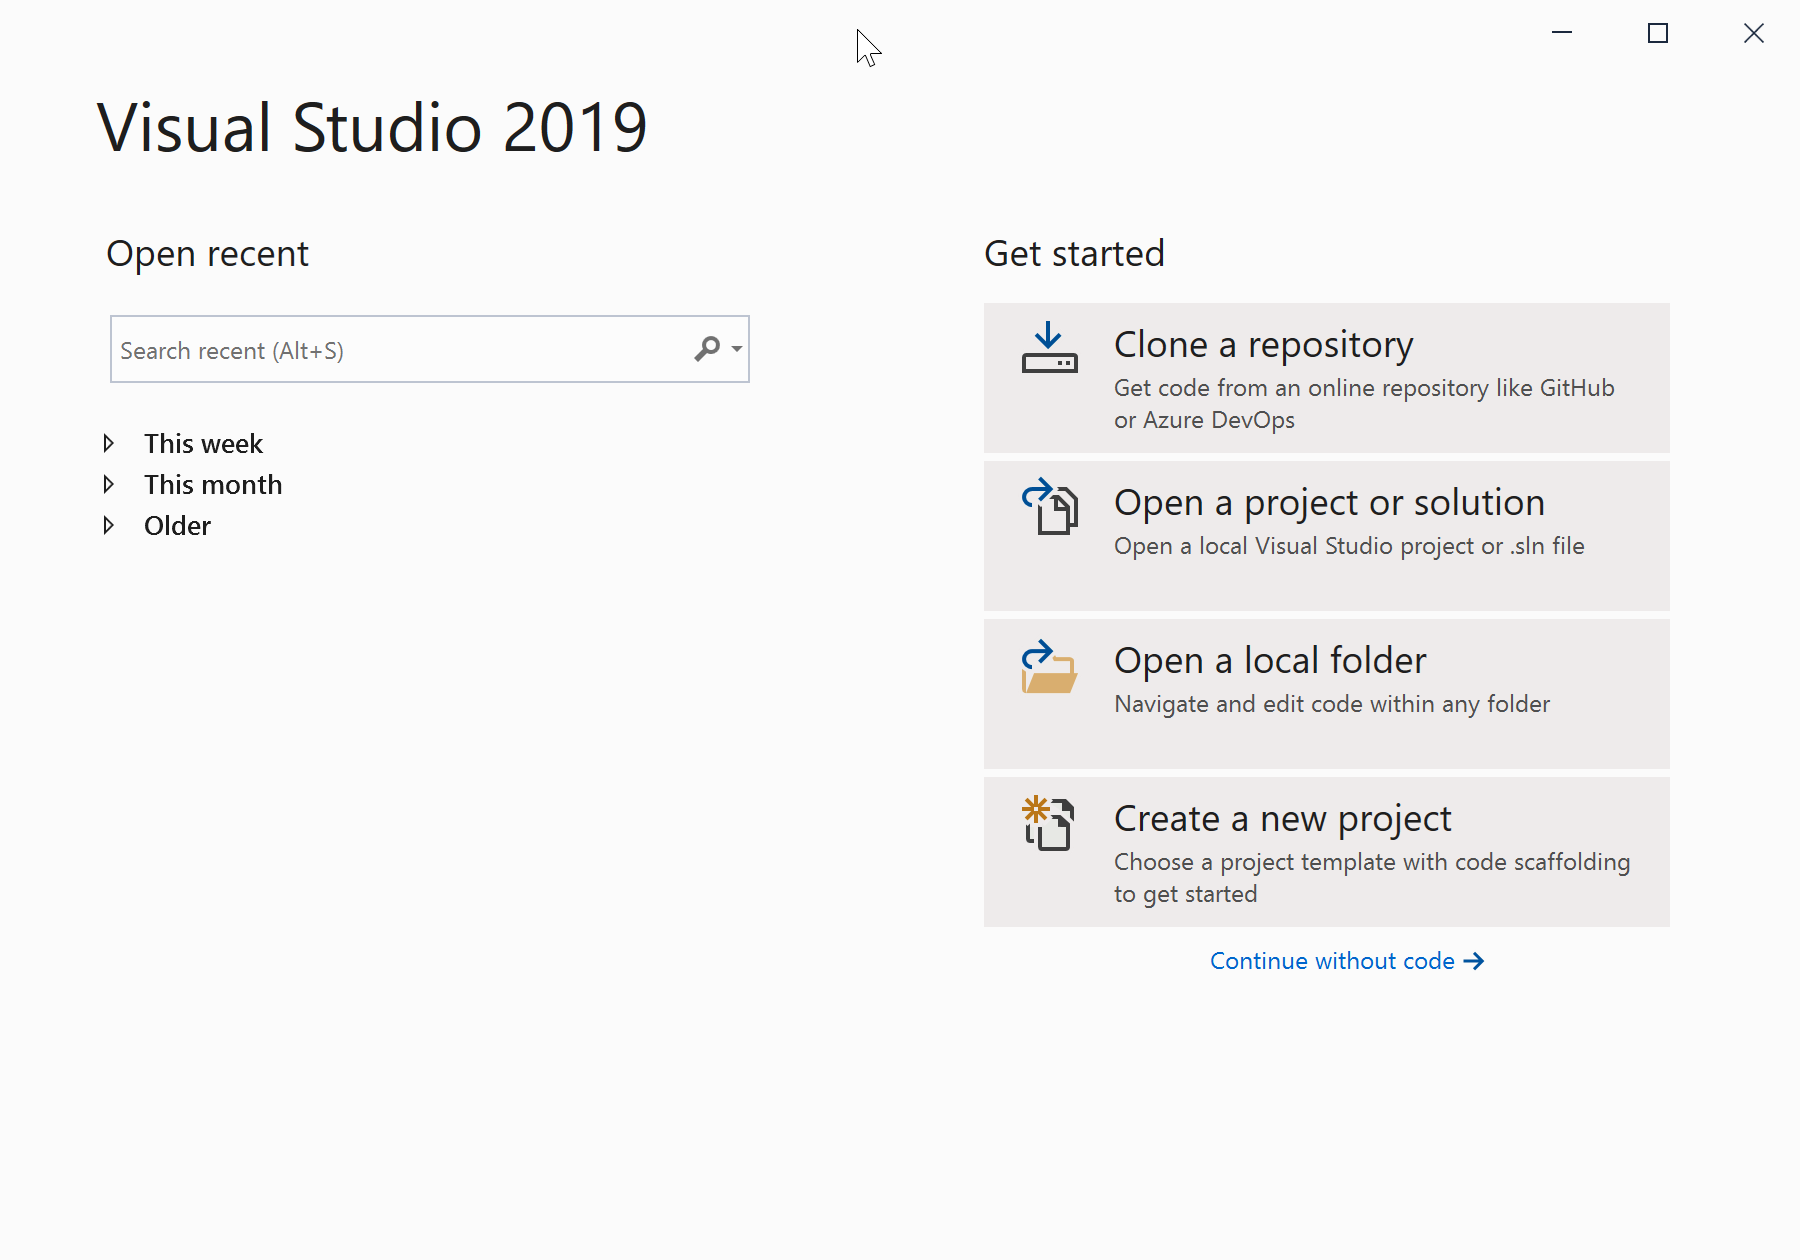
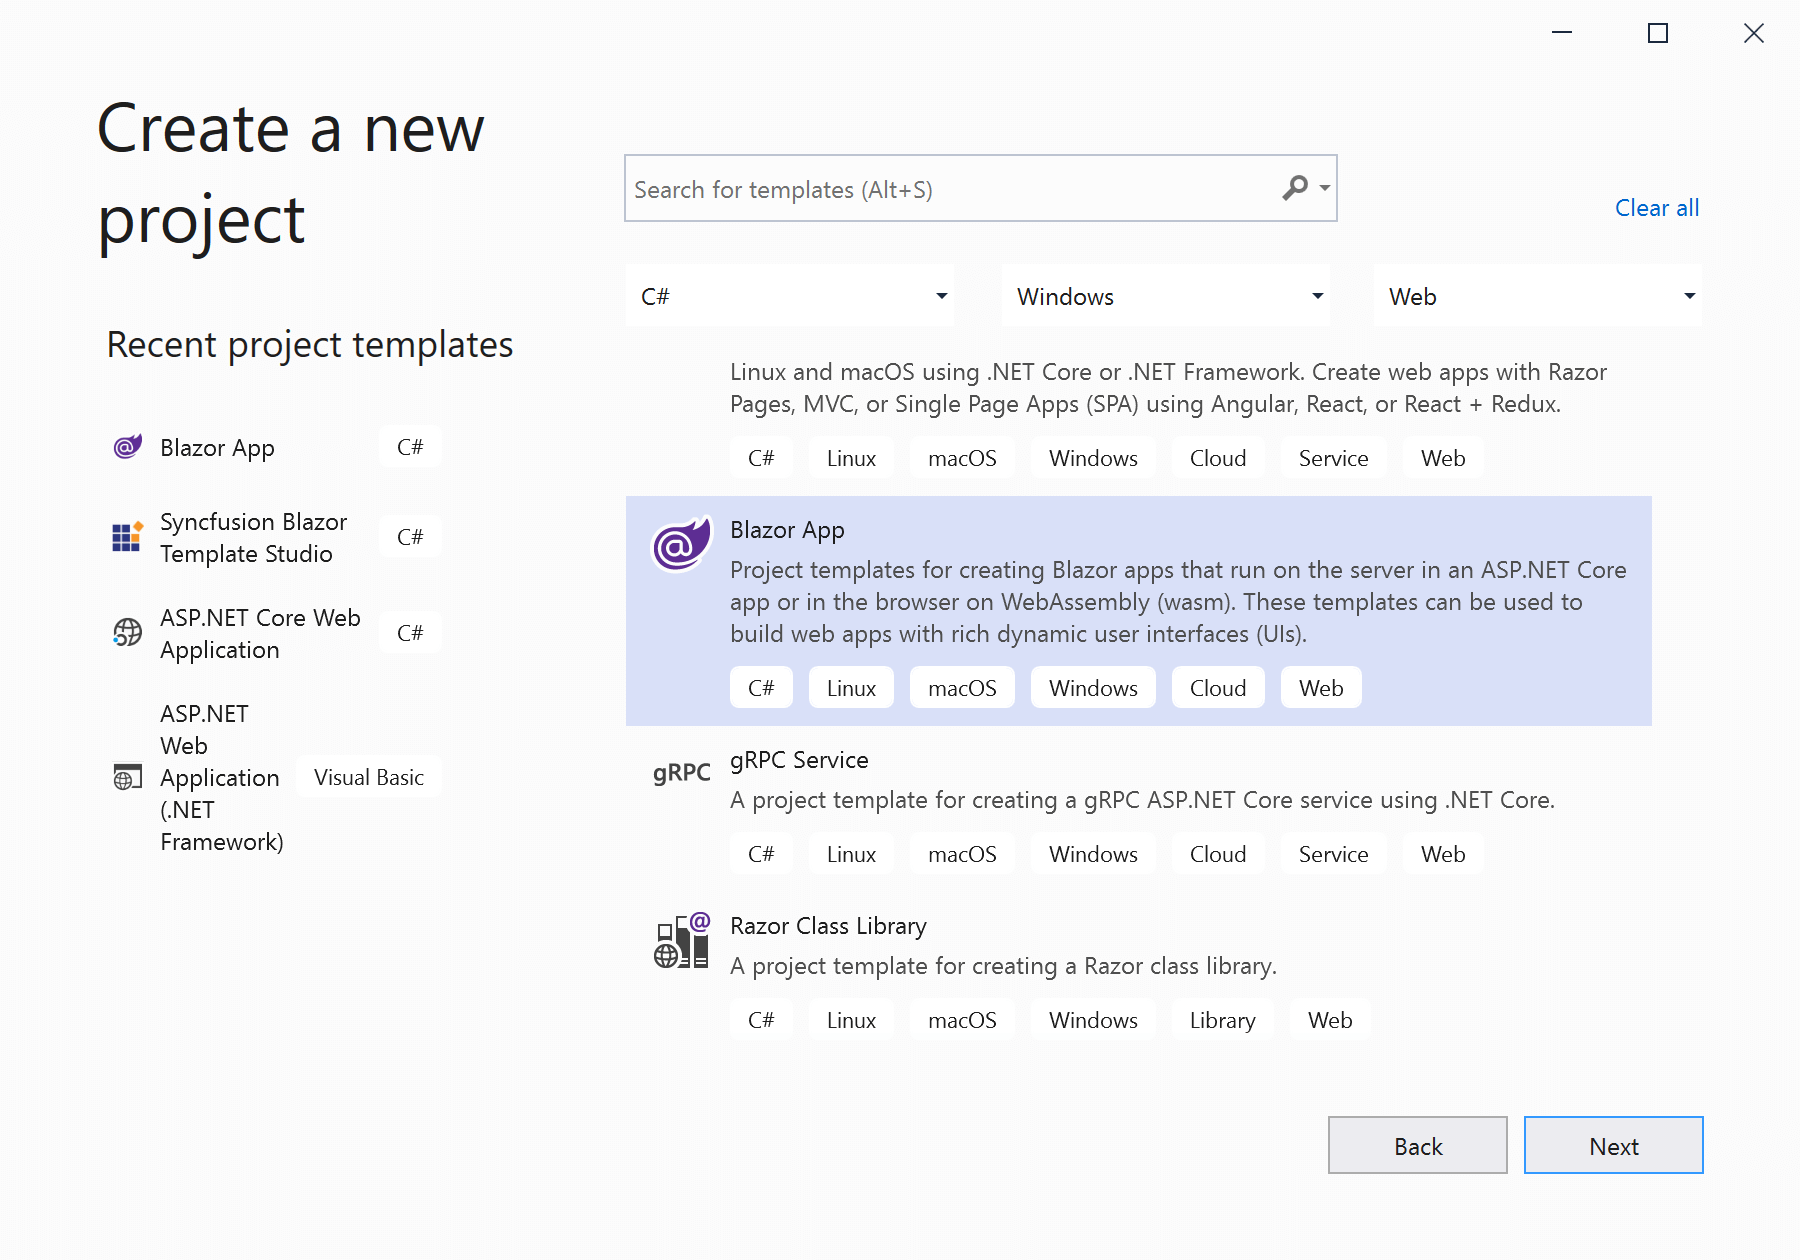
- Choose “Blazor App” from the list of templates.
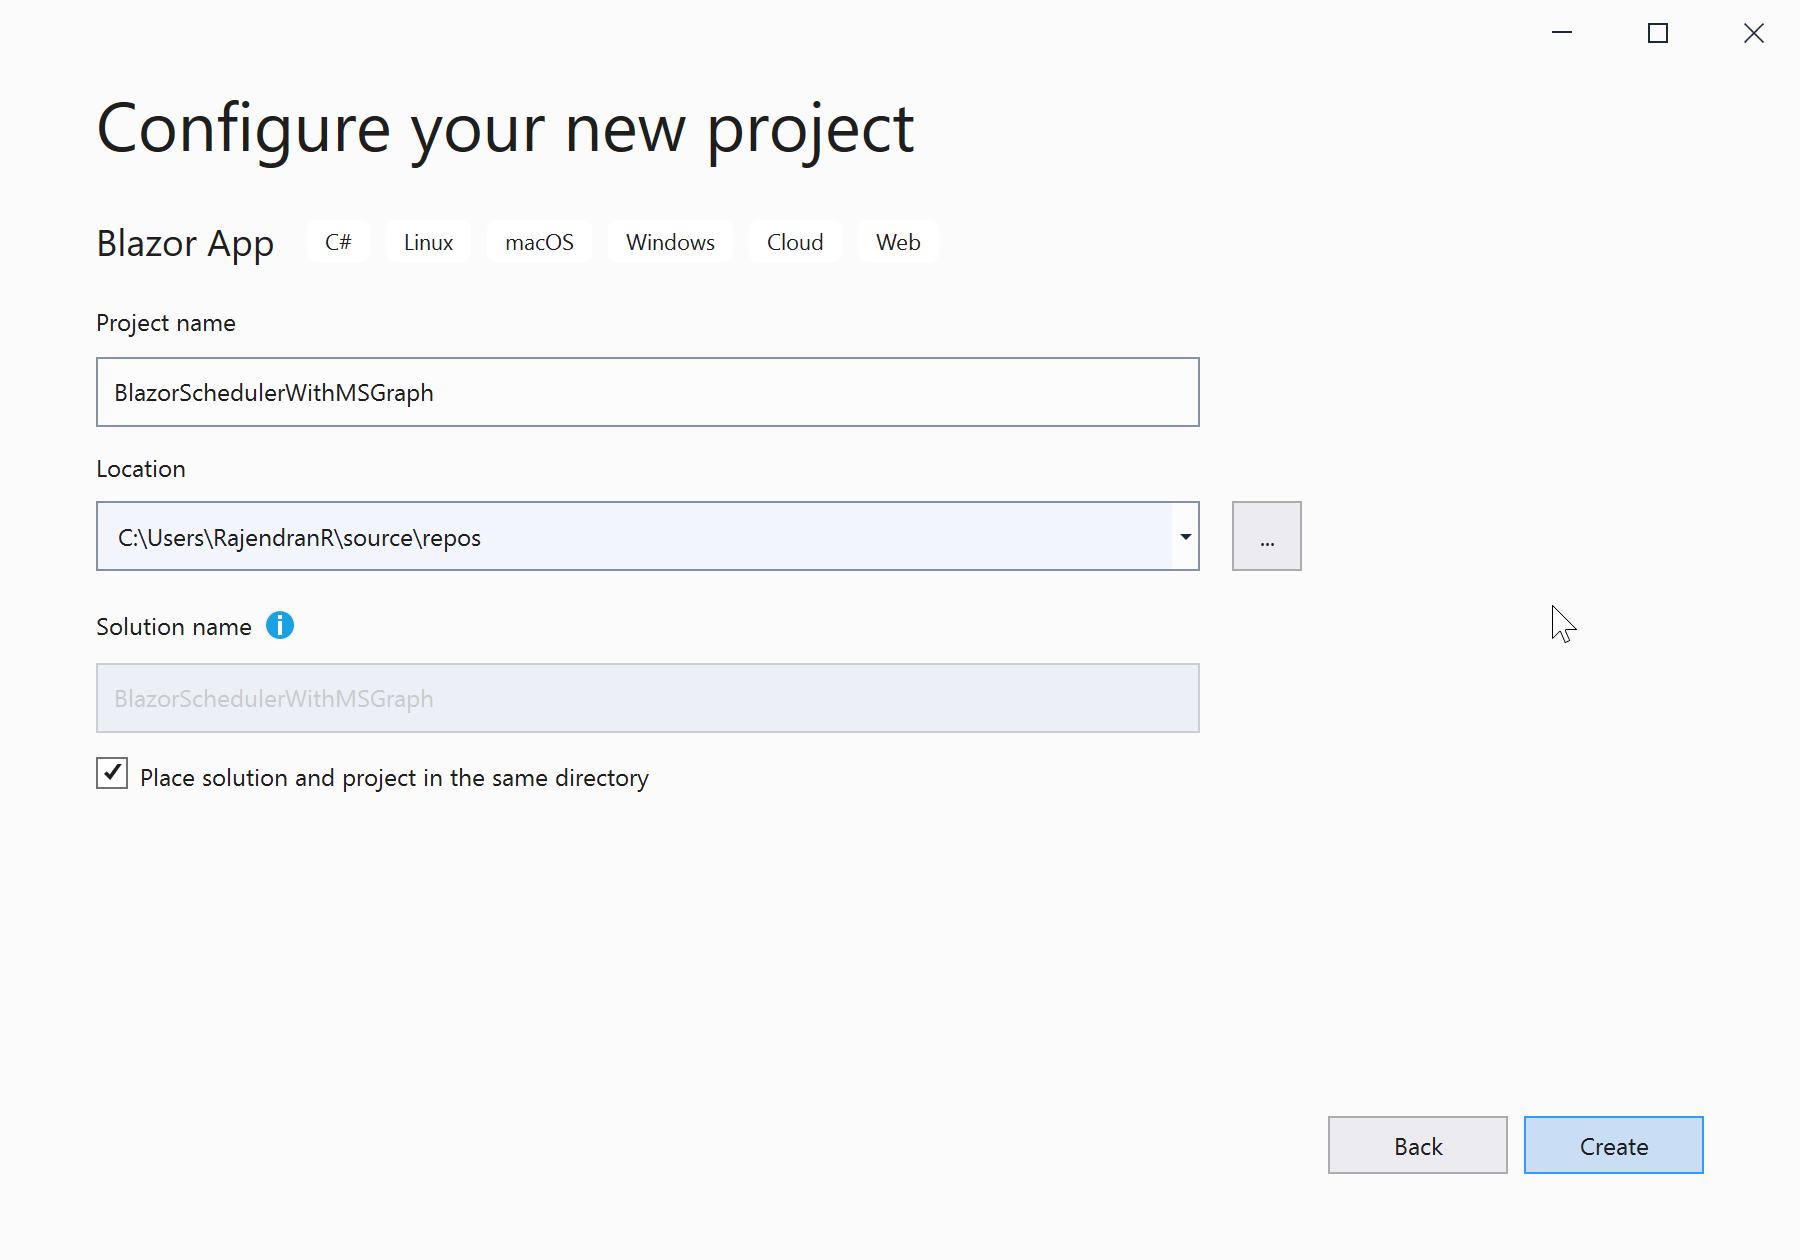
- Name the project as you wish. I have named this project BlazorSchedulerWithMSGraph.
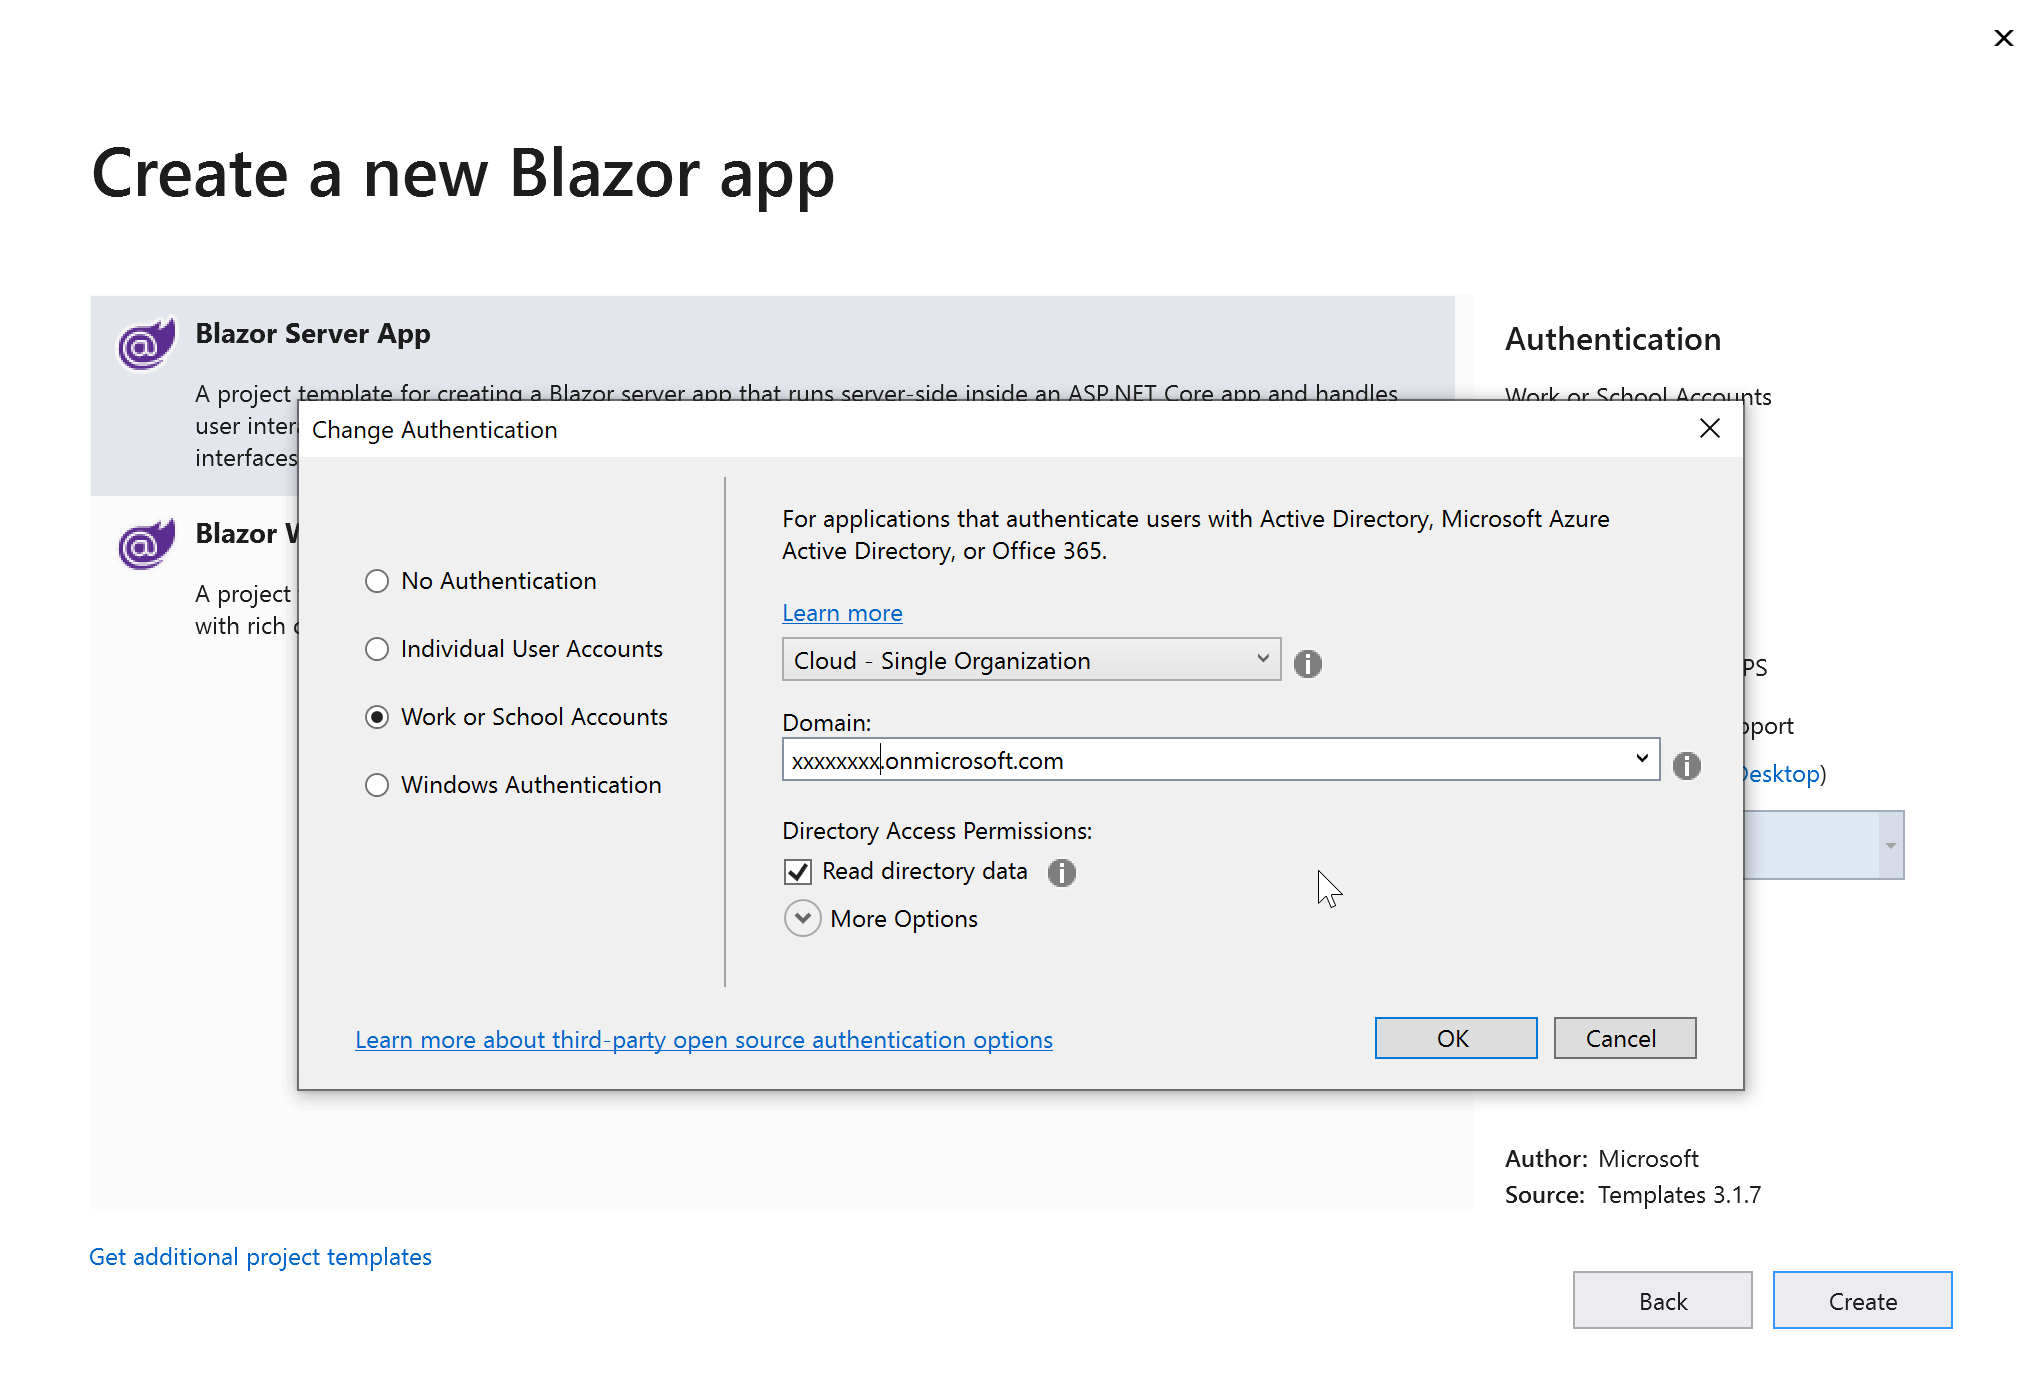
- Choose Blazor Server App and select the Change option from the Authentication section to configure the domain.

- Select the radio button Work or School Accounts authentication and specify your domain to register the application in Azure. Allow the reading of data from the directory by selecting the check box Read directory data from the Directory Access Permissions. Refer to the following screenshot.
- Now, the application is registered with the Azure AD. The registered changes will be reflected in the appsettings.json file.
- Run the application and note the URL.
Configure Azure AD services
Now, let’s look at the steps to configure the settings to read and write the calendar data of the Office 365 account. Please follow these steps:
- Select the App Registrations section from the Azure Active Directory in the Azure portal.
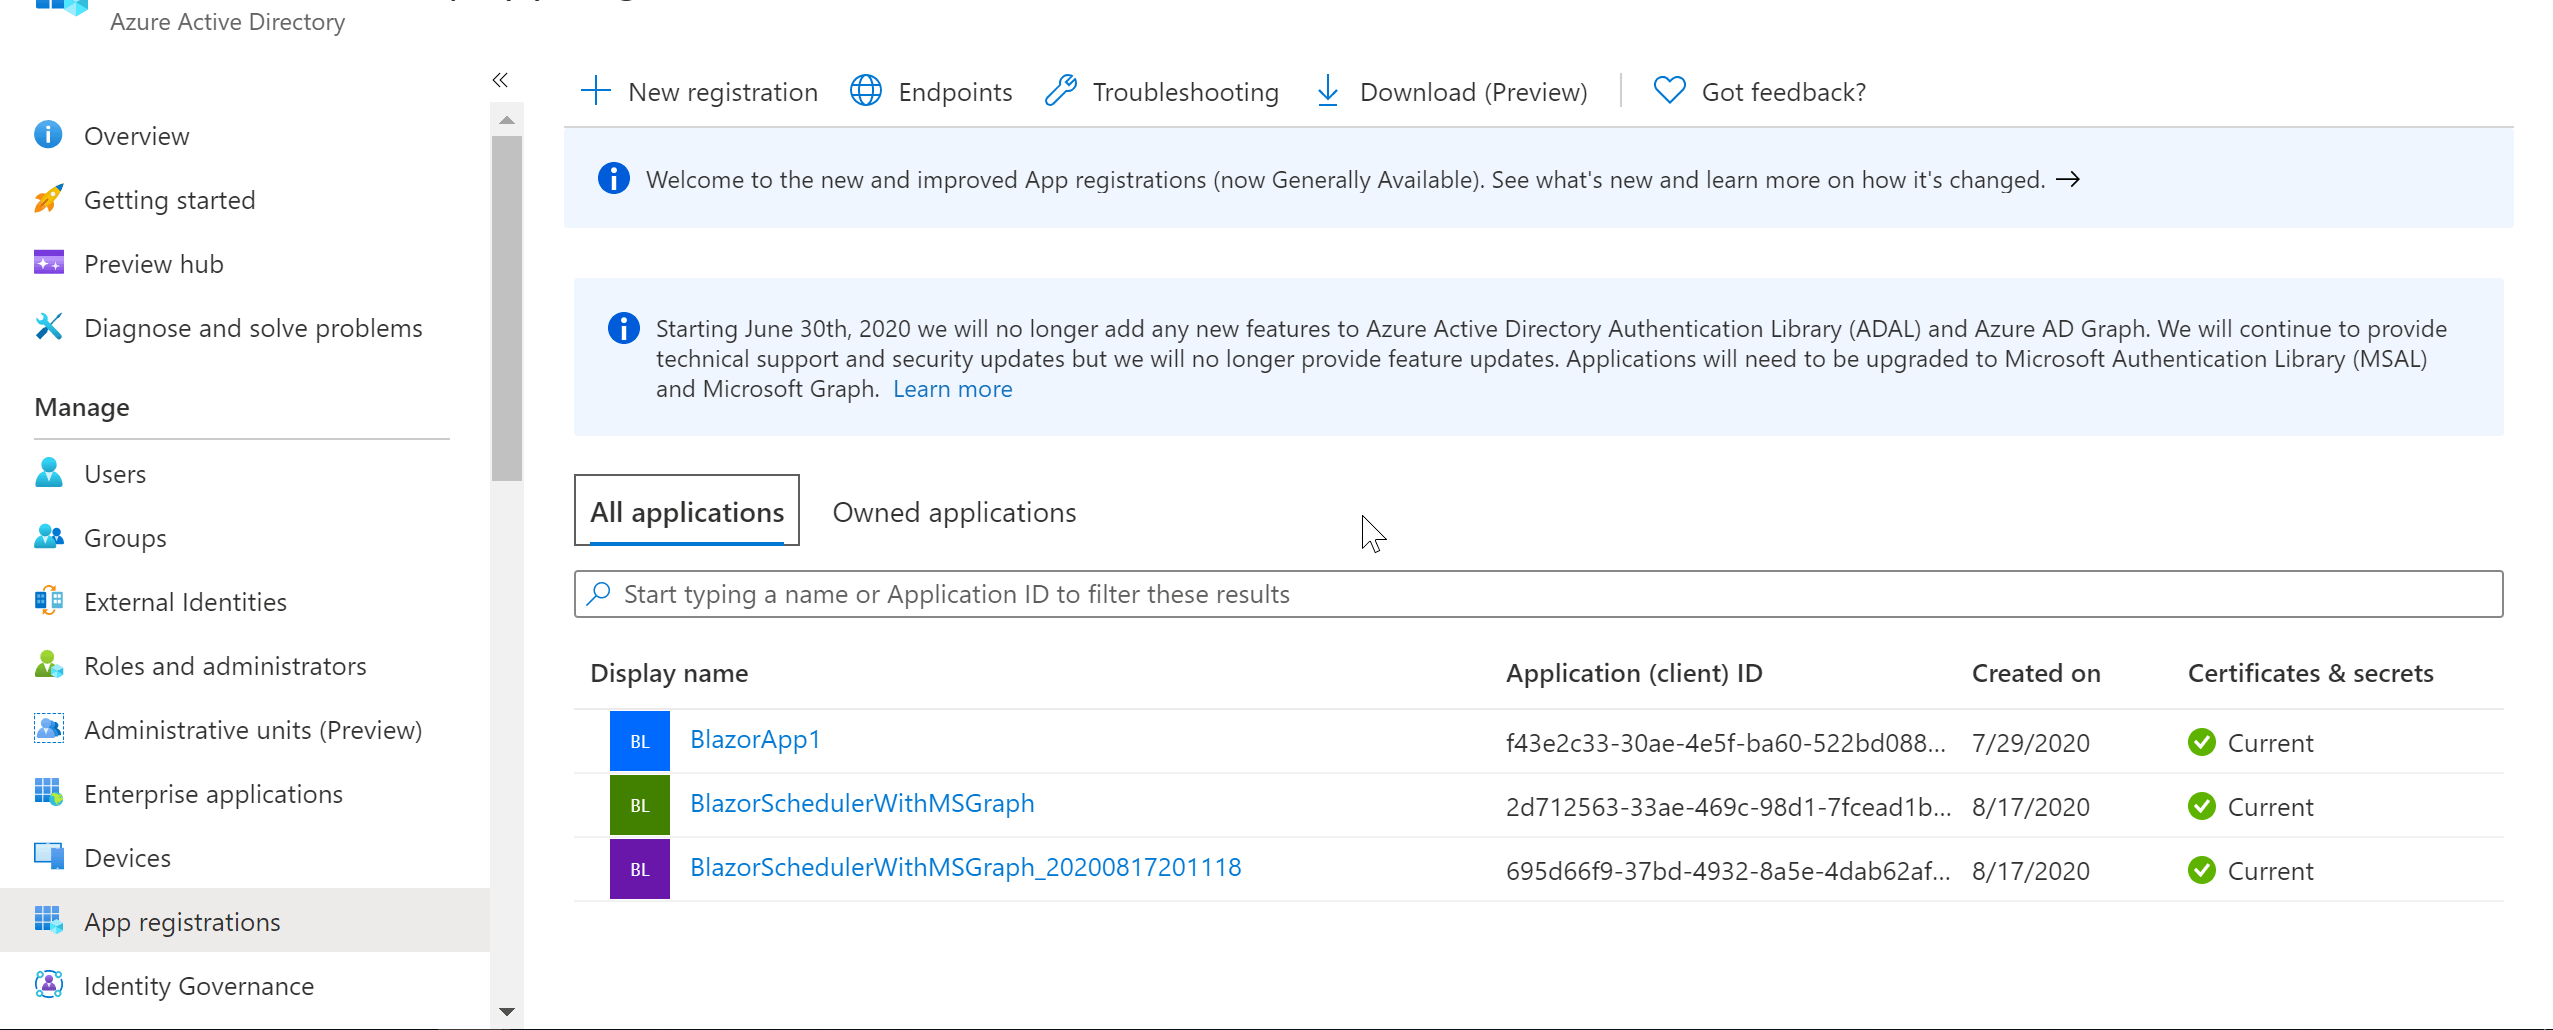
- Select your corresponding application from the listed projects and switch to the API permissions section to add an API permission to your application. Refer to the following screenshot.
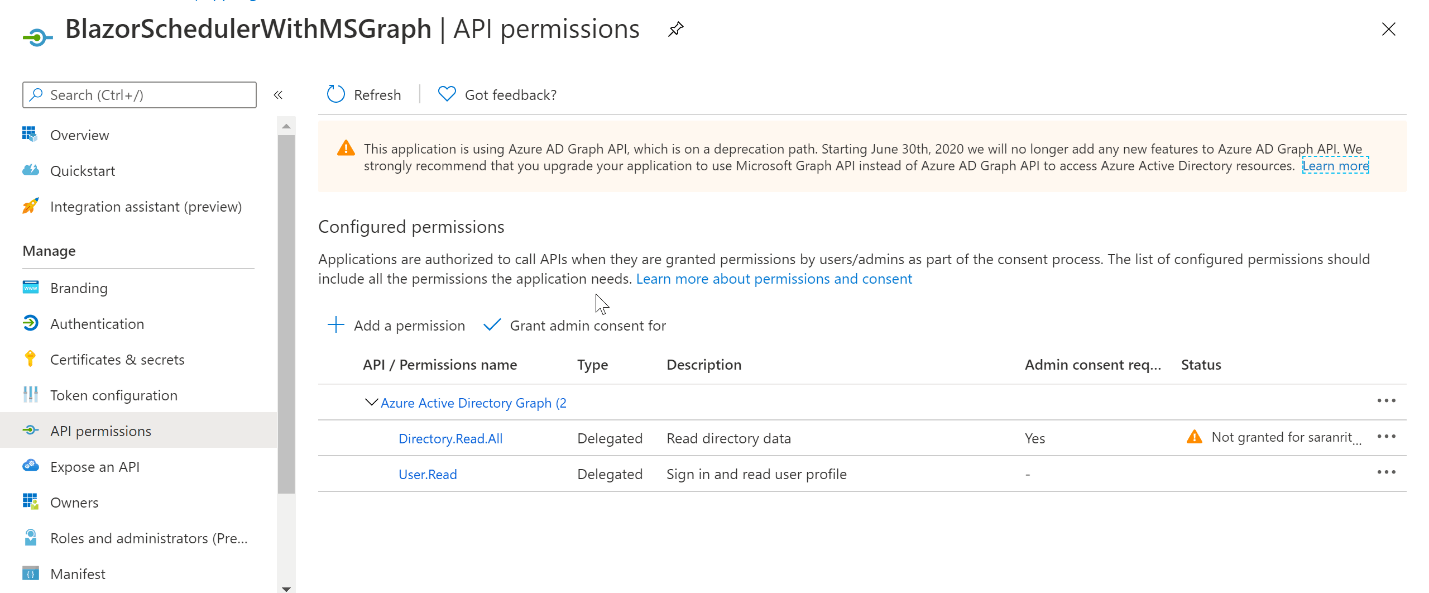
- Click Add a permission and select Microsoft Graph and Delegated Permissions options.
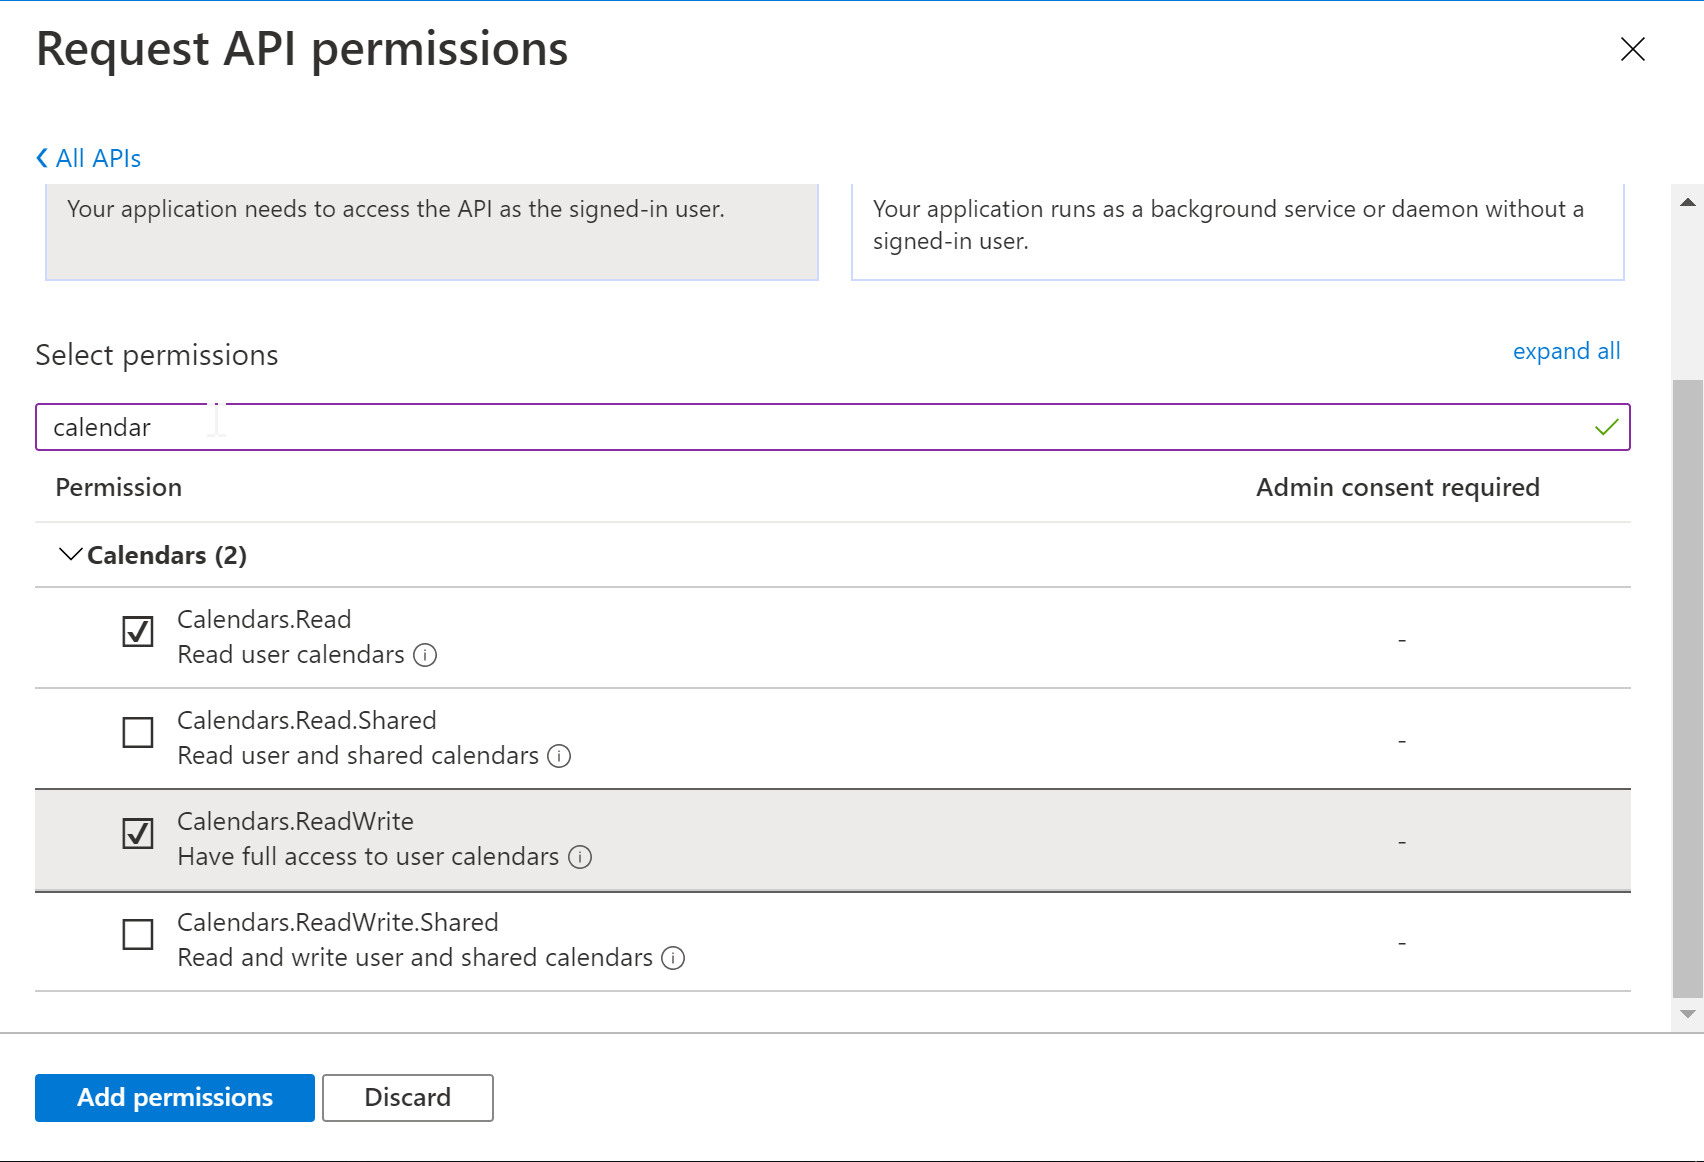
- Select the check boxes Calendars.Read and Calendar.ReadWrite and then select Add permissions like in the following screenshot.
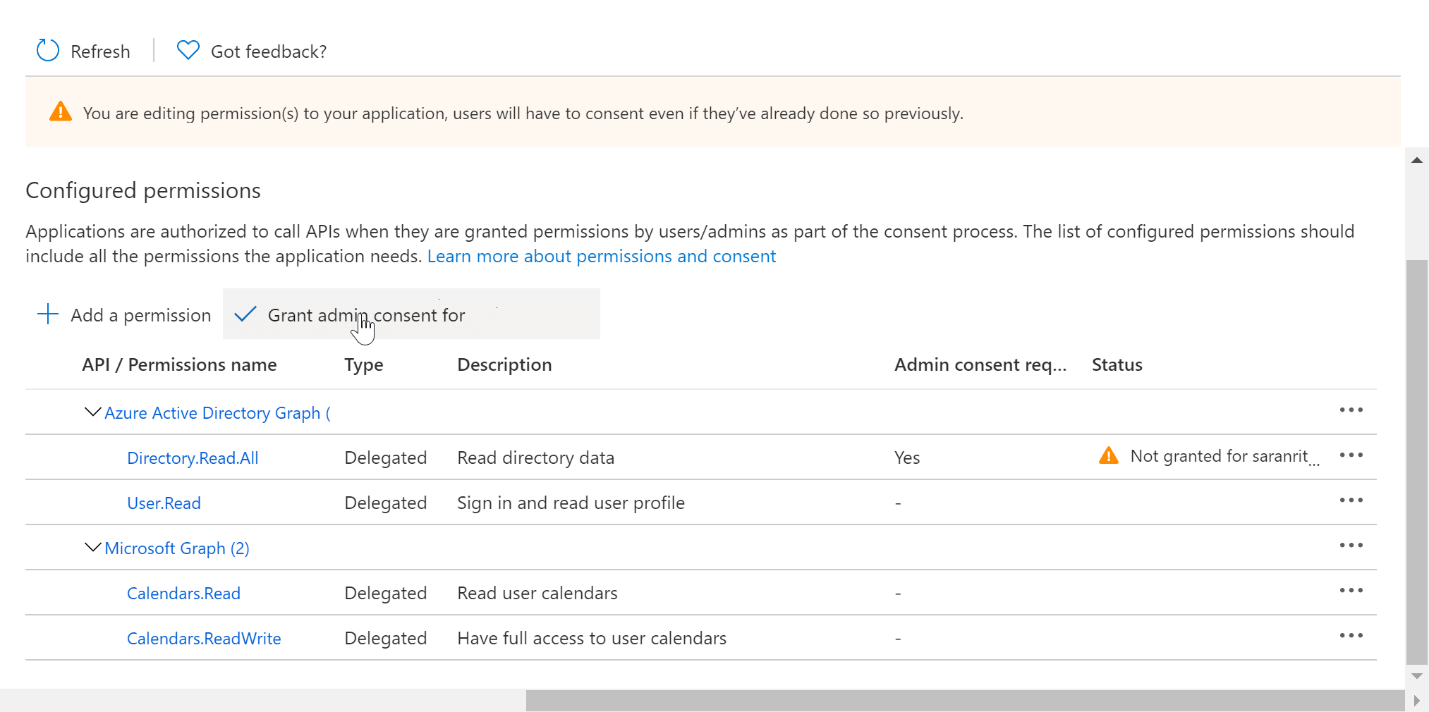
- Enable the permission by confirming Grant admin consent for XXXXXX, like in the following screenshot.
- When you navigate to the authentication services, it will list out the predefined configurations for the registered application.
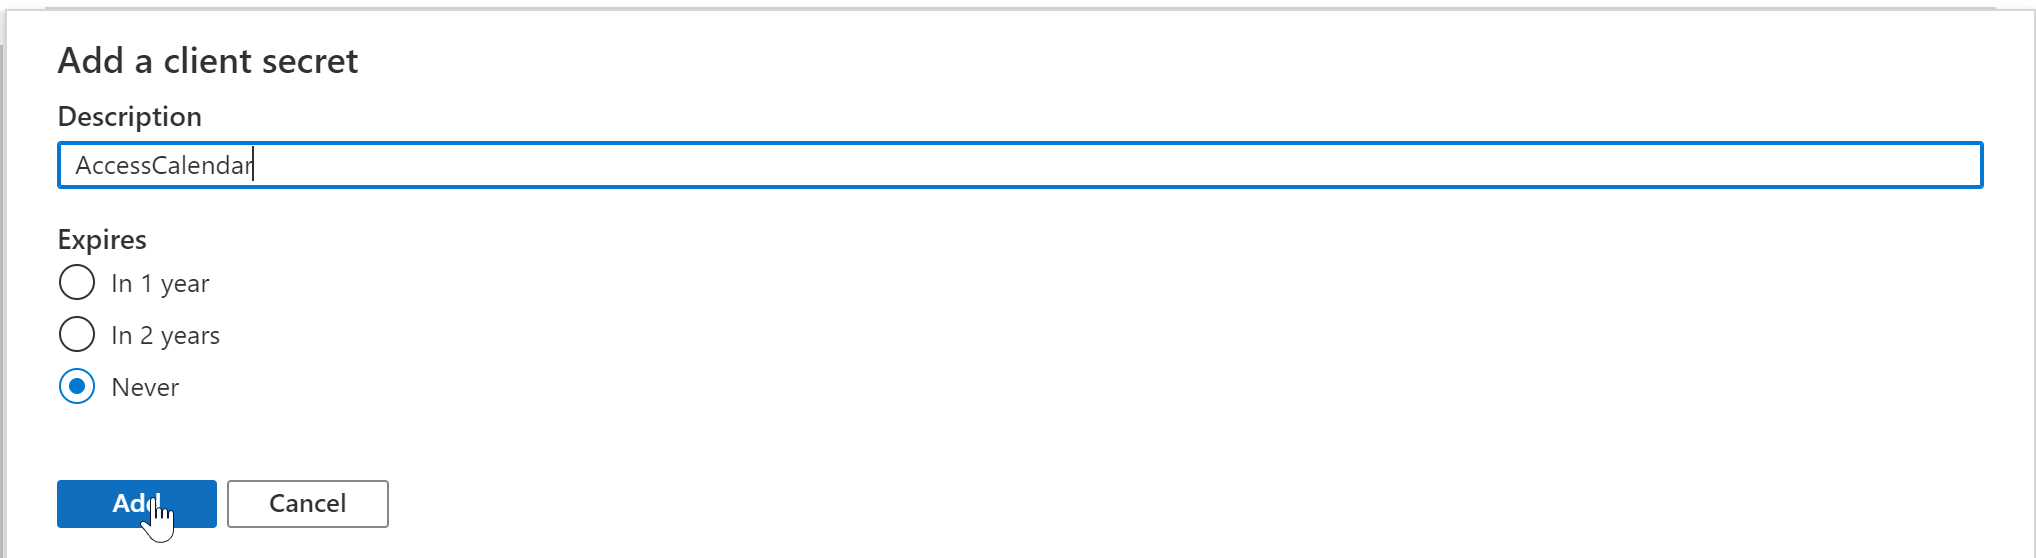
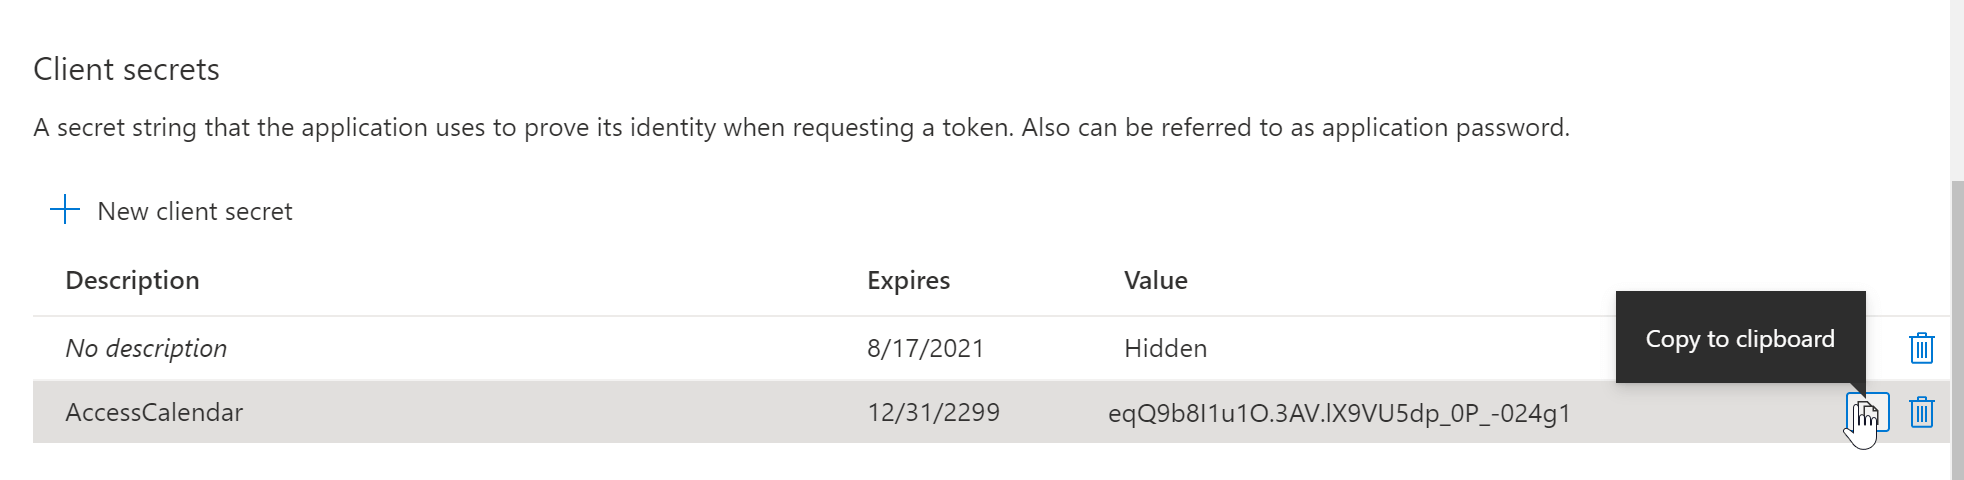
- Generate a new secret key by using the New client secret option from Certificates and Secrets services and copy the secret key. (We cannot access the client secret key if we don’t copy it. But we can remove and regenerate it.
Now, we have configured the Azure AD services.
Communicate with Azure AD resources
Follow these steps to communicate with the Azure AD resources:
- Specify the copied client secret key in the appsettings.json file, as shown in the following code example.
{ "AzureAd": { "Instance": "https://login.microsoftonline.com/", "Domain": "saranrithukrish.onmicrosoft.com", "TenantId": "66507416-b9a8-4da2-870d-87273653fb2e", "ClientId": "2d712563-33ae-469c-98d1-7fcead1b2c5a", "ClientSecret": "eqQ9b8I1u1O.3AV.lX9VU5dp_0P_-024g1", "CallbackPath": "/signin-oidc" }, "Logging": { "LogLevel": { "Default": "Information", "Microsoft": "Warning", "Microsoft.Hosting.Lifetime": "Information" } }, "AllowedHosts": "*" } - Install the following NuGet packages, which are necessary to communicate with the Azure application:
- Microsoft.Identity.Web
- Microsoft.Identity.Web.UI
- Microsoft.Graph
- Configure the Startup.cs file:Include the following namespaces at the top.
using Microsoft.Identity.Web;
using Microsoft.Identity.Web.UI;
Modify the ConfigureServices method with the following code.
public void ConfigureServices(IServiceCollection services) { //services.AddAuthentication(AzureADDefaults.AuthenticationScheme) // .AddAzureAD(options => Configuration.Bind("AzureAd", options)); //services.AddControllersWithViews(options => //{ // var policy = new AuthorizationPolicyBuilder() // .RequireAuthenticatedUser() // .Build(); // options.Filters.Add(new AuthorizeFilter(policy)); //}); services.AddMicrosoftWebAppAuthentication(Configuration) .AddMicrosoftWebAppCallsWebApi(Configuration, new string[] { "Calendars.Read", "Calendars.ReadWrite" }) .AddDistributedTokenCaches(); services.AddHttpClient(); services.AddControllersWithViews(options => { var policy = new AuthorizationPolicyBuilder() .RequireAuthenticatedUser() .Build(); options.Filters.Add(new AuthorizeFilter(policy)); }).AddMicrosoftIdentityUI(); services.AddRazorPages(); services.AddServerSideBlazor(); services.AddSingleton<WeatherForecastService>(); } - Include the following namespace in the Imports.razor file used globally in your application.
@using Microsoft.Identity.Web
@using System.Net.Http.Headers
- Include the following code in the LoginDisplay.razor page to make sure the application uses Azure AD for sign in and sign out.
<AuthorizeView> <Authorized> Hello, @context.User.Identity.Name! <a href="MicrosoftIdentity/Account/SignOut">Log out</a> </Authorized> <NotAuthorized> <a href="MicrosoftIdentity/Account/SignIn">Log in</a> </NotAuthorized> </AuthorizeView> - Create a Razor page and include the following code to get the username. Display of the correct username in this Razor page implies successful configuration of the application. Otherwise, try to sign out of the application and sign in again. If the username is still not displayed properly, make sure that the previous steps are done correctly and try once again.
@page "/getevents"
@inject IHttpClientFactory HttpClientFactory
@inject ITokenAcquisition TokenAcquisitionService

<div> @DisplayName </div>

@code
{
    private HttpClient httpClient;
    string DisplayName = string.Empty;
    protected override async Task OnInitializedAsync()
    {
        try
        {
            httpClient = HttpClientFactory.CreateClient();
            var token = await TokenAcquisitionService.GetAccessTokenForUserAsync(new string[] { "Calendars.Read", "Calendars.ReadWrite" });
            httpClient.DefaultRequestHeaders.Authorization = new AuthenticationHeaderValue("Bearer", token);
            var dataRequest = await httpClient.GetAsync("https://graph.microsoft.com/beta/me");

            if (dataRequest.IsSuccessStatusCode)
            {
                var userData = System.Text.Json.JsonDocument.Parse(await dataRequest.Content.ReadAsStreamAsync());
                DisplayName = userData.RootElement.GetProperty("displayName").GetString();
            }
        }
        catch (Exception ex)
        {
            throw ex.InnerException;
        }
    }
}
Get and list events from Office 365 Outlook
Follow these steps to display the calendar events from Office 365 Outlook:
- Get the events using the GetAsync method through the data URL.
- Create a table and display the calendar data by iterating each calendar event like in the following code.
@page "/getevents"
@inject IHttpClientFactory HttpClientFactory
@inject ITokenAcquisition TokenAcquisitionService

<table>
    @foreach (var calendar in AllCalendars)
    {
        <tr>
            <td>@calendar.AdditionalData["subject"].ToString()</td>
            <td>@JObject.Parse(calendar.AdditionalData["start"].ToString())["dateTime"]</td>
            <td>@JObject.Parse(calendar.AdditionalData["end"].ToString())["dateTime"]</td>
        </tr>
    }
</table>

<style>
    table, th, td {
        border: 1px solid black;
    }
</style>

@code
{
    private HttpClient httpClient;
    string DisplayName = string.Empty;
    List<Calendar> AllCalendars = new List<Calendar>();

    protected override async Task OnInitializedAsync()
    {
        try
        {
            httpClient = HttpClientFactory.CreateClient();
            var token = await TokenAcquisitionService.GetAccessTokenForUserAsync(new string[] { "Calendars.Read" });
            httpClient.DefaultRequestHeaders.Authorization = new AuthenticationHeaderValue("Bearer", token);

            /////////////////// Get Events ///////////////
            HttpResponseMessage getEvents = await httpClient.GetAsync("https://graph.microsoft.com/beta/me/calendar/events");
            if (getEvents.IsSuccessStatusCode)
            {
                string json = await getEvents.Content.ReadAsStringAsync();
                JObject result = JsonConvert.DeserializeObject(json) as JObject;

                foreach (JProperty child in result.Properties().Where(p => !p.Name.StartsWith("@")))
                {
                    AllCalendars = child.Value.ToObject<List<Calendar>>();
                }
            }
        }
        catch (Exception ex)
        {
            throw ex.InnerException;
        }
    }
}
Syncfusion Blazor Scheduler helps you create intuitive booking, event, and calendar experiences with built-in views, recurring appointments, editing, rescheduling, localization, and flexible customization.
See Blazor Scheduler in ActionIntegrate Syncfusion Blazor Scheduler with your application
Now, we are going to integrate our Syncfusion Blazor Scheduler component in your application to display the events:
- To get started, follow the steps listed in the Scheduler getting started documentation page.
- Follow the same steps listed in the previous Get and list events from Office 365 Outlook
- Create a DataSource using the calendar events and assign it to the Blazor Scheduler like in the following code example.
@page "/listevents"
@inject IHttpClientFactory HttpClientFactory
@inject ITokenAcquisition TokenAcquisitionService

<SfSchedule TValue="AppointmentData">
    <ScheduleEventSettings DataSource="@DataSource"></ScheduleEventSettings>
</SfSchedule>

@code
{
    private HttpClient httpClient;
    string DisplayName = string.Empty;
    List<Calendar> AllCalendars = new List<Calendar>();
    List<AppointmentData> DataSource = new List<AppointmentData>();

    protected override async Task OnInitializedAsync()
    {
        try
        {
            httpClient = HttpClientFactory.CreateClient();
            var token = await TokenAcquisitionService.GetAccessTokenForUserAsync(new string[] { "Calendars.Read" });
            httpClient.DefaultRequestHeaders.Authorization = new AuthenticationHeaderValue("Bearer", token);

            /////////////////// List Events ///////////////
            HttpResponseMessage getEvents = await httpClient.GetAsync("https://graph.microsoft.com/beta/me/calendar/events");
            if (getEvents.IsSuccessStatusCode)
            {
                string json = await getEvents.Content.ReadAsStringAsync();
                JObject result = JsonConvert.DeserializeObject(json) as JObject;

                foreach (JProperty child in result.Properties().Where(p => !p.Name.StartsWith("@")))
                {
                    AllCalendars = child.Value.ToObject<List<Calendar>>();
                    @foreach (var calendar in AllCalendars)
                    {
                        var appointment = new AppointmentData();
                        appointment.Subject = calendar.AdditionalData["subject"].ToString();
                        appointment.StartTime = (DateTime)JObject.Parse(calendar.AdditionalData["start"].ToString())["dateTime"];
                        appointment.EndTime = (DateTime)JObject.Parse(calendar.AdditionalData["end"].ToString())["dateTime"];
                        DataSource.Add(appointment);
                    }
                }
            }
        }
        catch (Exception ex)
        {
            throw ex.InnerException;
        }
    }

    public class AppointmentData
    {
        public string Subject { get; set; }
        public DateTime StartTime { get; set; }
        public DateTime EndTime { get; set; }
    }
}
Perform CRUD operations in Office 365 Outlook calendar events
The Microsoft Graph provides an API to handle CRUD actions for the calendar events. To use it, please follow these steps:
- Define the Calendars.ReadWrite scope to access the calendar events and handle CRUD actions.
- To simplify the event processing, use the Events from the Microsoft.Graph namespace. The time zone is mandatory for the start and end times of an event.
- Navigate to the List Events page to make sure the added events are included in the Scheduler.
Create a calendar event
- Use the PostAsync method to create an Outlook calendar event through the Microsoft Graph API.
- The data URL must be https://graph.microsoft.com/beta/me/calendar/events.
- To create a new event, copy the following code and paste it in the new Razor page.
@page "/addevent"
@inject IHttpClientFactory HttpClientFactory
@inject ITokenAcquisition TokenAcquisitionService

<div>
    <SfButton OnClick="OnCreateClick">Add an Event</SfButton>
</div>

<div class="schedule-wrapper">
   @EndResult
</div>

@code
{
    private HttpClient httpClient;
    string EndResult = string.Empty;

    private async void OnCreateClick(MouseEventArgs args)
    {
        httpClient = HttpClientFactory.CreateClient();
        var token = await TokenAcquisitionService.GetAccessTokenForUserAsync(new string[] { "Calendars.ReadWrite" });
        httpClient.DefaultRequestHeaders.Authorization = new AuthenticationHeaderValue("Bearer", token);

        /////////////////// Add a New Event ///////////////
        Uri addEventUri = new Uri("https://graph.microsoft.com/beta/me/calendar/events");
        Event newEvent = new Event()
        {
            Subject = "Sample Data 1",
            Start = new DateTimeTimeZone() { DateTime = new DateTime(2020, 8, 20, 3, 0, 0).ToString("o"), TimeZone= "Eastern Standard Time" },
            End = new DateTimeTimeZone() { DateTime = new DateTime(2020, 8, 20, 5, 0, 0).ToString("o"), TimeZone = "Eastern Standard Time" },
            Body = new ItemBody() { ContentType = BodyType.Text, Content = "Sample Body Content" }
        };
        HttpContent addEventContent = new StringContent(JsonConvert.SerializeObject(newEvent), Encoding.UTF8, "application/json");
        HttpResponseMessage addEventResponse = await httpClient.PostAsync(addEventUri, addEventContent);
        if (addEventResponse.IsSuccessStatusCode)
        {
            EndResult = "Event has been added successfully!";
            Console.WriteLine("Event has been added successfully!");
        }
        else
        {
            EndResult = addEventResponse.StatusCode.ToString();
            Console.WriteLine(addEventResponse.StatusCode);
        }
    }

}
Update a calendar event
Use the following code to modify an existing calendar event:
- In the code, we have used Microsoft Graph explorer to fetch the ID of the calendar event. Use the same or use get event logic to access the specific event.
- Use the PatchAsync method to handle the update event.
- To update an event, use the following code after token authorization in the new Razor page.
            /////////// Update an Event \\\\\\\\\\\\\\\\\\
            var editEventID = "<< ID of calendar event which needs to be modify >>";
            Uri editEventUri = new Uri($"https://graph.microsoft.com/beta/me/events/{editEventID}");
            HttpContent editEventContent = new StringContent(JsonConvert.SerializeObject(updateEvent()), Encoding.UTF8, "application/json");
            HttpResponseMessage editEventResponse = await _httpClient.PatchAsync(editEventUri, editEventContent);
            if (editEventResponse.IsSuccessStatusCode)
                Console.WriteLine("Event has been updated successfully!");
            else
                Console.WriteLine(editEventResponse.StatusCode);
Delete a calendar event
You can remove an event from the Outlook calendar by following these steps:
- Use the DeleteAsync method to handle the delete event.
- To delete an event, use the following code after token authorization in the new Razor page.
            ///////////////////// Delete an event ///////////////
            var removeEventID = "AAMkADA5ZDUzMzViLTUxNzYtNDZiNC04NDIwLWZlZWUwYzhjODdhMQBGAAAAAACl9gLwypLoS5T81IRZ0DyMBwDgDqaz5BqCTpQrlWQPXUpOAAAAAAENAADgDqaz5BqCTpQrlWQPXUpOAAACjnoUAAA=";
            Uri removeEventUri = new Uri($"https://graph.microsoft.com/beta/me/events/{removeEventID}");

            HttpResponseMessage deleteResponse = await _httpClient.DeleteAsync(removeEventUri);

            if (deleteResponse.IsSuccessStatusCode)
                Console.WriteLine("Event has been deleted successfully!");
            else
                Console.WriteLine(deleteResponse.StatusCode);
References
We have referenced the following sites to achieve this outcome:
GitHub reference: You can check out the complete working example of this Blazor server application on this GitHub repository.
Summary
This blog explained in detail how to access calendar events from Outlook Office 365 and display them in Syncfusion Blazor Scheduler using Microsoft Graph and Azure AD. This will help you integrate your application with the cloud services offered by Microsoft and avail its benefits. So, try out them and leave your feedback in the comments section below.
You can also achieve these functionalities using the Microsoft Graph SDK instead of Azure AD Graph APIs. We plan to publish another blog covering the Microsoft Graph SDK to serve your needs.
Syncfusion Essential Studio® for Blazor offers over 65 high-performance, lightweight, and responsive UI components for the web, including file-format libraries, in a single package. Use them to enhance your app’s look!
For existing customers, the newest version is available for download from the License and Downloads page. If you are not yet a Syncfusion customer, you can try our 30-day free trial to check out our available features.
You can also contact us through our support forum, support portal, or feedback portal. We are always happy to assist you!


 No spam, just valuable updates.
Comments (1)
good morning, is it possible to have an updated version of this guide for Blazor 9 ? Thank you very much.