
Azure AI Services Succinctly®

CHAPTER 3
Azure AI Search
The Microsoft Azure AI Search is a cloud-based search service with built-in AI capabilities that enrich the information retrieval experience. AI Search goes beyond traditional keyword-based search by integrating cognitive skills, such as natural language processing, image recognition, and machine learning, to provide more intelligent and context-aware search results. This chapter discusses AI Search in a way that makes it easier to understand its purpose.
Introducing Azure AI Search
Microsoft Azure AI Search is a cloud-based search service that integrates AI capabilities to offer advanced search features. It provides an enriched search experience by combining traditional full-text searching with advanced natural language processing (NLP), cognitive skills, and machine learning models. Azure AI Search can be used to develop custom search solutions that offer users accurate, fast, and meaningful search results across various data types such as structured data, unstructured text, and media files.
Azure AI Search is particularly useful for organizations that need to search large datasets efficiently. It can be employed in scenarios such as enterprise search, e-commerce, catalog search, document discovery, and knowledge management. It is built on the foundation of modern search technology, powered by Elasticsearch, and enhanced with Microsoft's proprietary AI services to make sense of complex datasets.
Azure AI Search is a fully managed service, which means it abstracts the complexities of setting up, maintaining, and scaling search infrastructure. The core functionality of Azure AI Search revolves around indexing, querying, and refining data to make it searchable in a way that aligns with user intent. Key features include:
· Search indexing: Indexes can be created from multiple data sources such as Azure SQL Database, Cosmos DB, Blob Storage, and custom data sources. During the indexing process, data is transformed and enriched using AI capabilities, such as language detection, image analysis, and entity recognition.
· Search queries: The service supports powerful query syntax that allows for full-text search, filtering, faceting, and sorting. It also provides suggesters and autocomplete features to improve the search experience.
· Cognitive skills: Through integration with other Azure AI services, you can enrich search indexes with insights extracted from raw content, such as detecting named entities, sentiment analysis, image extraction, key phrases, and more. These are known as cognitive skills, which are applied to the data during the indexing process.
· Security and scalability: The service supports enterprise-grade security with Azure Active Directory (Azure AD) integration, role-based access control (RBAC), and encryption of data at rest and in transit. It is also highly scalable, allowing you to adjust resources based on your search workload.
Azure AI Search includes several subservices and components that work together to enable comprehensive search capabilities:
· Indexers automate the process of ingesting data from various sources into the search index. Indexers can connect to multiple Azure data sources like Azure SQL Database, Cosmos DB, and Blob Storage, or they can use a custom data source. You can schedule indexers to update the search index periodically as the underlying data changes. During the indexing process, AI enrichment can be applied via cognitive skills.
· Cognitive skills allow you to enrich your data using various AI services. These skills range from text analysis, image recognition, and entity extraction to more advanced tasks such as document translation. These skills are applied to documents or text as they are indexed, transforming raw content into searchable and insightful information.
· Synonym maps allow you to define lists of equivalent terms for search queries. For example, car and automobile can be treated as synonyms.
· Analyzers determine how data is tokenized and processed during indexing and querying. They support different languages and customizations, helping to improve search relevance.
· Search units are the scalable compute resources of Azure AI Search. Based on your workload and performance requirements, you can scale search units up or down. Search units handle query processing, indexing, and storage operations. They ensure that the service can accommodate large volumes of data and provide rapid query responses.
Each of these components works together to build a sophisticated search solution that can handle complex search scenarios with ease.
Creating a sample application
You will now create a Windows Presentation Foundation (WPF) application that allows users to search a dataset using Azure AI Search. The app will interact with a locally created dataset (a JSON file) that simulates an e-commerce product catalog. The purpose of this example is to demonstrate how to query the Azure AI Search service, retrieve results, and display them in the app. You will also see how to implement faceted search, filtering, and autocomplete.
Generally speaking, creating applications that work against Azure AI services first requires generating the appropriate cloud resources in the Azure Portal. You will repeat almost the same steps through all the next chapters, just targeting different services, so it is important that you follow the next steps with particular attention.
Note: Most of the examples in this ebook are represented by WPF applications. This allows for implementing a convenient user interface that simplifies the management of data and files, making it more interactive compared to Console apps.
Creating the Azure resources
Before writing code, you need to set up the necessary Azure resources, which include an instance of the Azure AI Search service and a search index. Since this is the first time you will create an instance of an AI service, the required steps will be explained in more detail. In the next chapters, they will be summarized, and only the service name will be highlighted.
Once you’re logged into the Azure Portal, you will see the Azure dashboard, as shown in Figure 5.
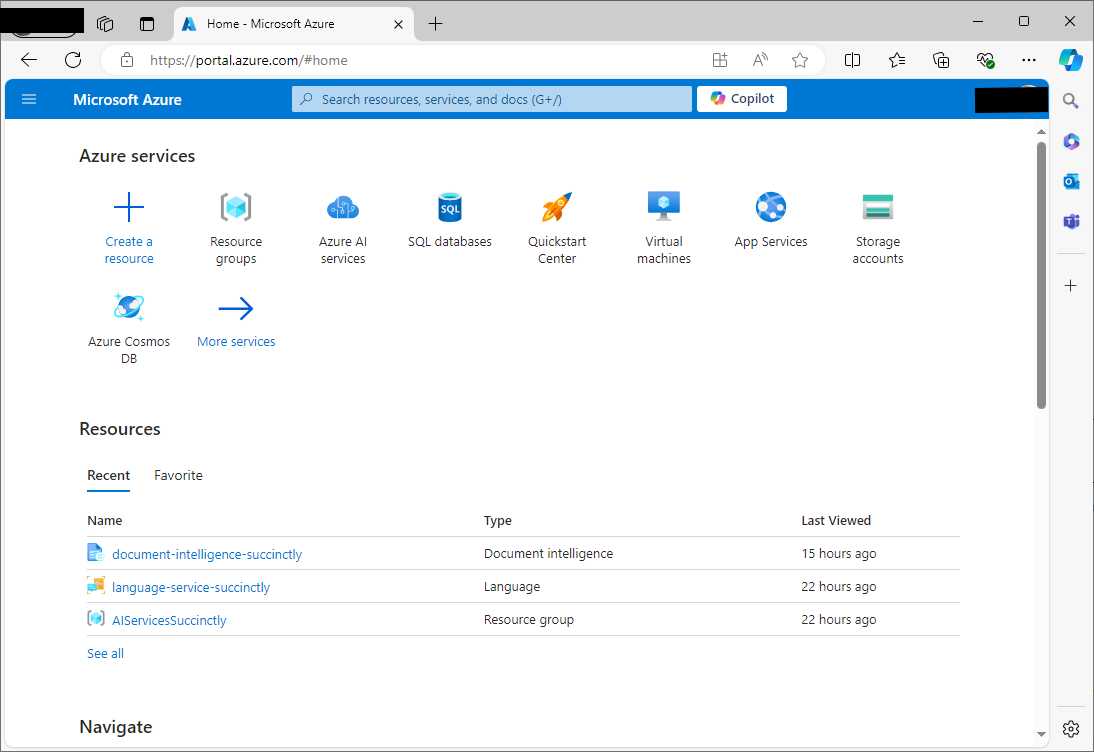
Figure 5: The dashboard of the Azure Portal
At this point, click AI Services. This will open the full list of available Azure AI services, including those not discussed in this ebook (see Figure 6).
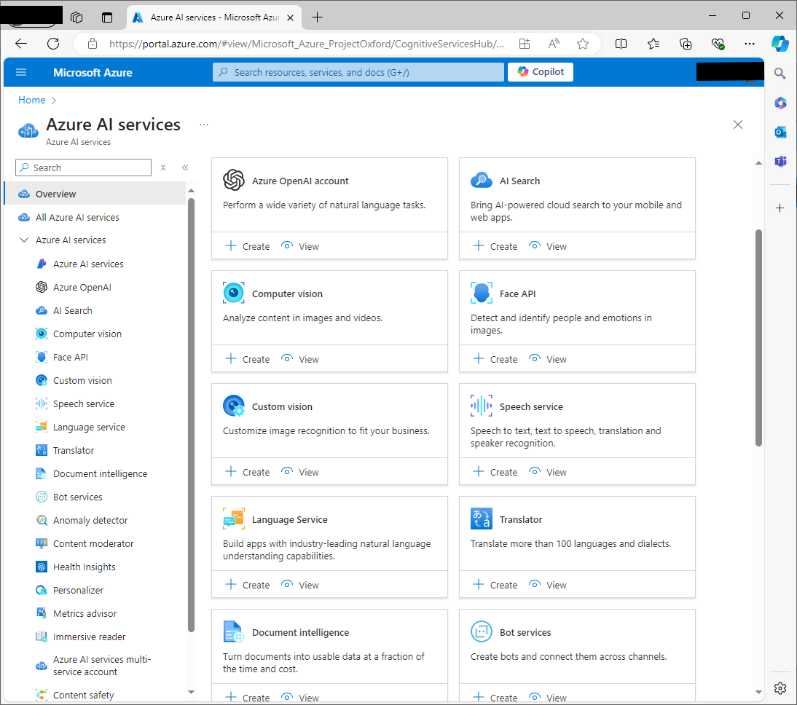
Figure 6: Accessing the list of Azure AI services
Locate the AI Search service (in Figure 6 it is at the top-right corner) and click Create inside its card. On the Create a search service page (see Figure 7), select your subscription and the resource group created previously.
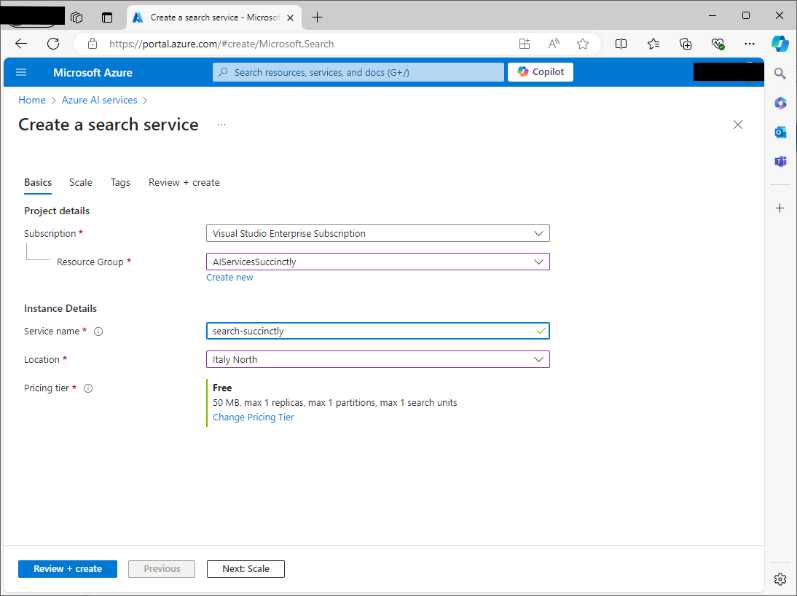
Figure 7: Creating a search service
In the Service name text box, enter a unique identifier for your service, such as search-succinctly. In the Location dropdown, select the region that is closest to you to avoid network latency. Finally, in the Pricing tier dropdown, select the Free plan (F0).
When ready, click Review + Create, and on the summary page, click Create. The service will now be created and deployed. You can adjust the service settings before creating it, but this will not be covered here. Once the deployment is complete, a confirmation page appears (see Figure 8).
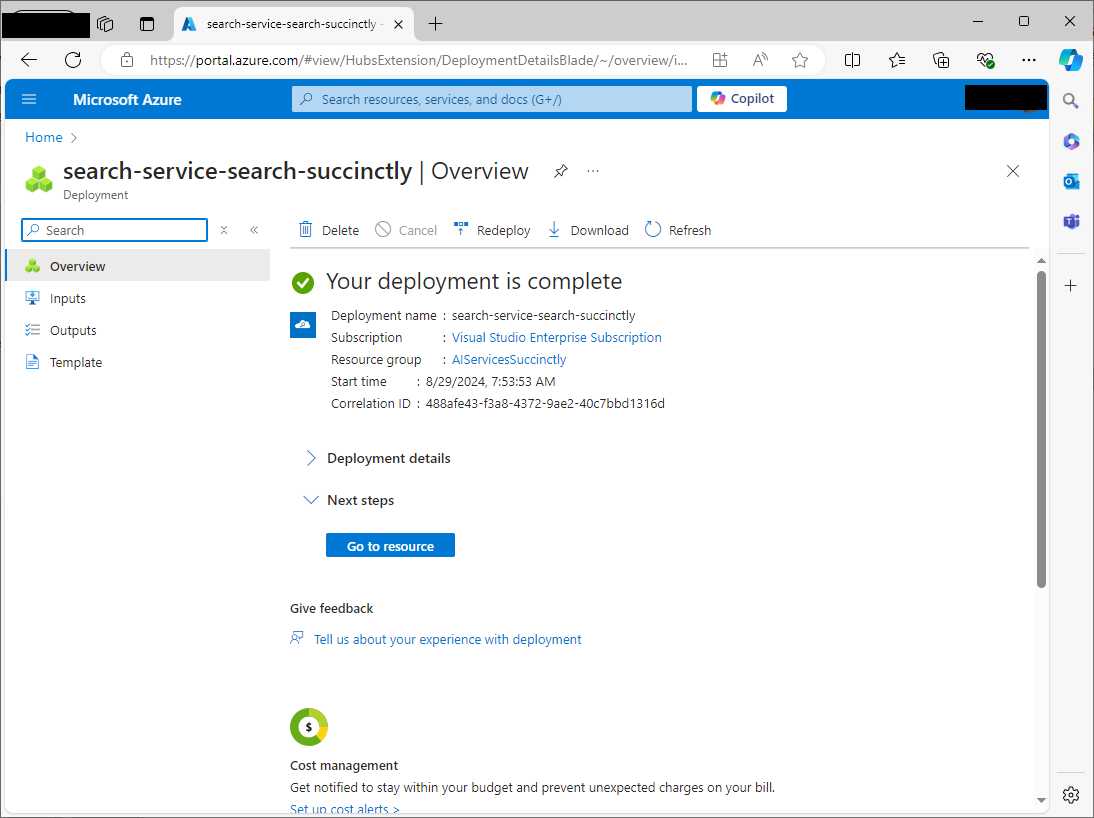
Figure 8: Deployment completion for the AI Search service
Click Go to resource. This will open the main page for the new service, as shown in Figure 9.
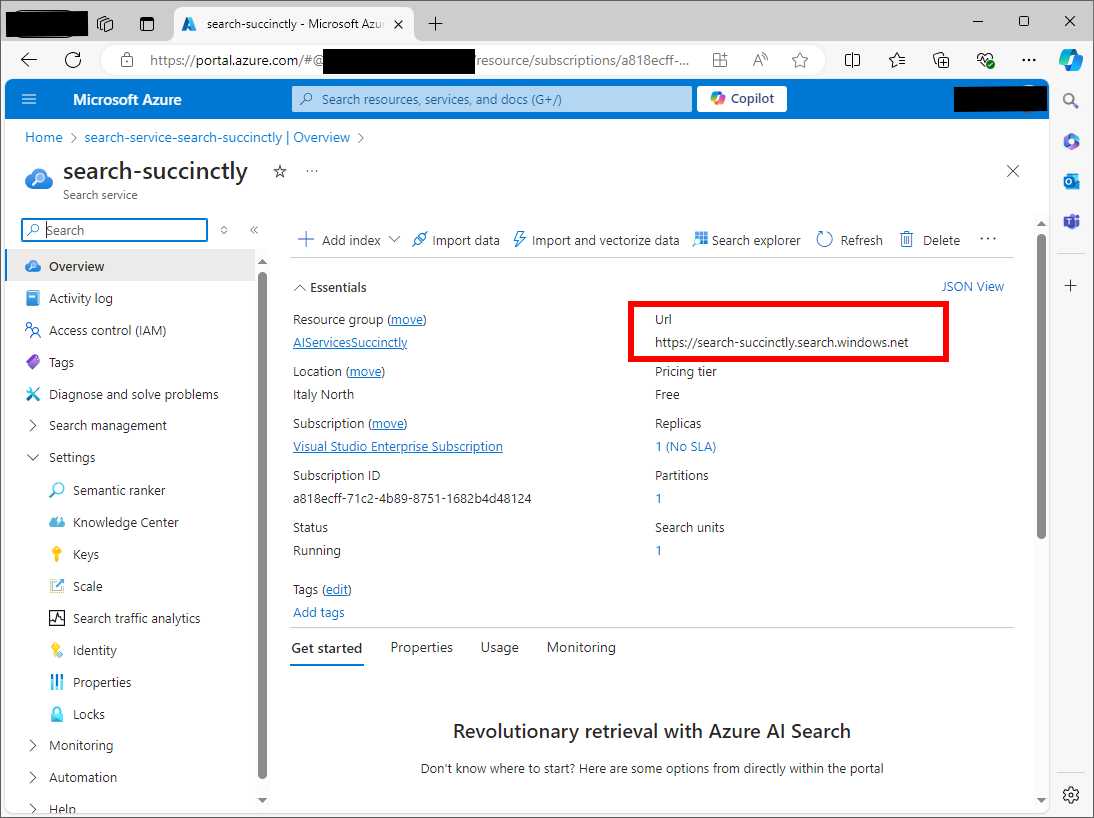
Figure 9: The main page of the AI Search service
In Figure 9, you can see that the URL has been highlighted in red. Take note of the service URL; it represents the access point to the service, and it will be required shortly in the source code. The other relevant information you need is the API key, which is required for authenticating against the service. Click the Keys menu item located at the left of the page to open the Keys page (see Figure 10).
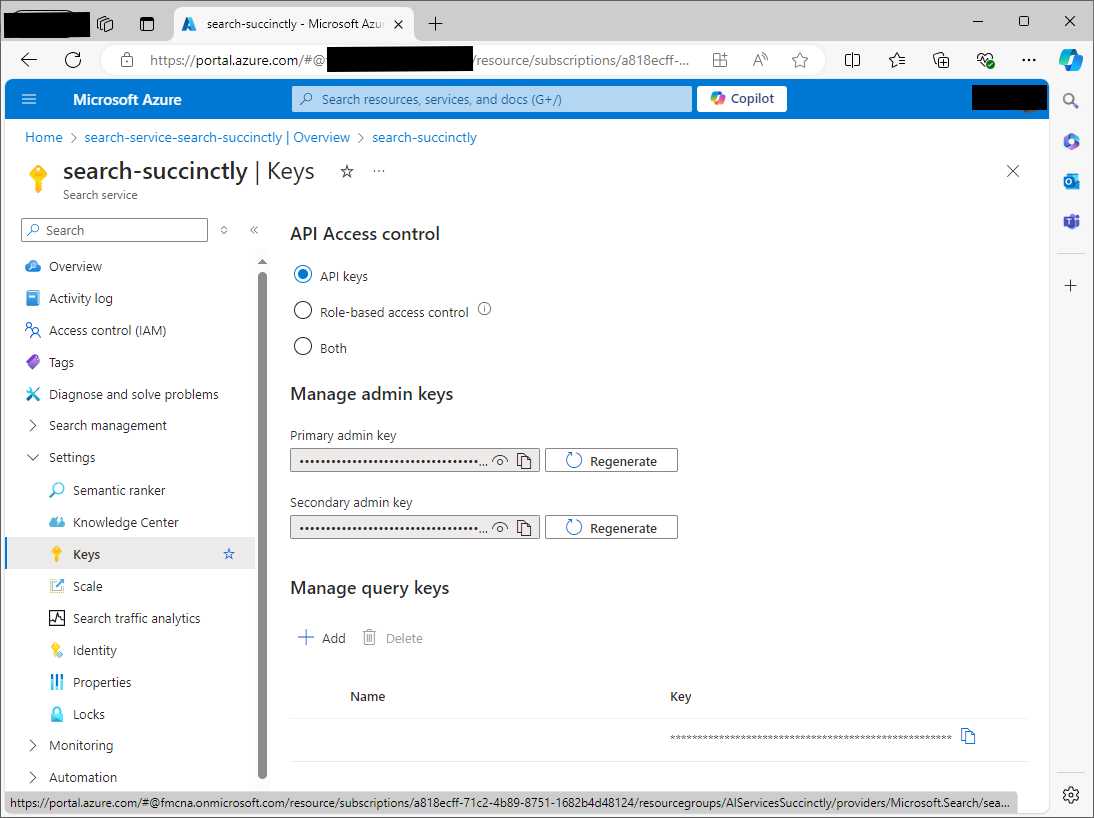
Figure 10: Managing API keys
By default, Azure generates two API keys, primary and secondary, but for development, you only need one. They are hidden by default for security reasons. Click the Copy button close to the primary API key text box and securely store the API key for later use in the source code.
Tip: For each Azure AI service discussed in the next chapters, these are the common steps that you will need to perform.
With Azure AI Search, you need to perform an additional step, which is configuring indexes.
Creating an index
Creating indexes is a crucial step in configuring Azure AI Search, as indexes determine how your data will be stored, searched, and retrieved. In Azure AI Search, an index is a collection of fields, each representing a piece of information within your searchable documents, such as titles, descriptions, or metadata. Each field has specific attributes, such as whether it is searchable, filterable, sortable, or facetable (allows users to refine a search).
The index that you will create in the next step relates to a collection of products, and each product is mapped to the following C# class:
public class Product
{
public string Id { get; set; }
public string ProductName { get; set; }
public string Category { get; set; }
public double Price { get; set; }
}
When you create an index in Azure, you will need to map every property of your data objects to a field of the index. A practical example will clarify your doubts. In the left-hand menu of your search service’s overview page, click the Indexes item, located under the Search management node. This is where you can view existing indexes or create new ones.
To create a new index, click Add Index at the top of the indexes page. Make sure you select the Add index option, since Add index (JSON) requires writing indexes in JSON format. This will open the index creation page, where you can define the structure and attributes of your index (see Figure 11).
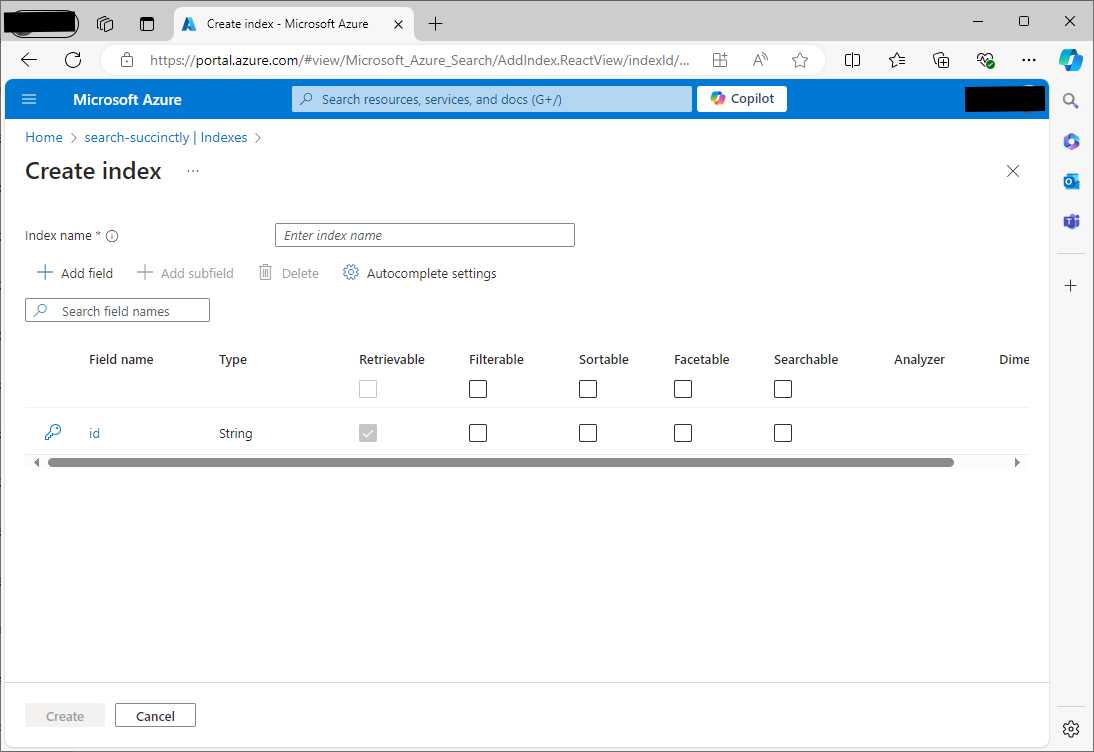
Figure 11: The index creation page
Here you have to define the index properties:
· Index Name: A unique name for your index. This name will be used to reference the index in your queries, API calls, and C# code.
· Fields: The fields you define will represent the schema of your data within the index. Each field corresponds to a specific property or piece of information in your documents (considering the Product class: ProductName, Category, Price for an e-commerce index).
Click Add field to start adding fields. At this point, you will enter into edit mode for a new field. Figure 12 shows an example based on the ProductName field.
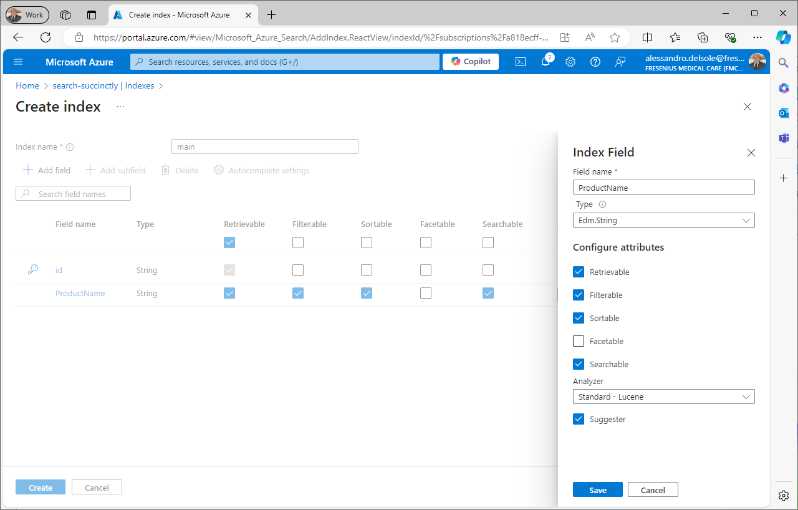
Figure 12: Editing an index field
The first detail you set is the Field Name, which represents the name of the field as it will appear in your index. Then, you set the data type (Type box): the appropriate data type for each field, such as Edm.String for text, Edm.Int32 for integers, Edm.Double for floating-point numbers, or Edm.DateTimeOffset for dates. Edm stands for entity data model.
For collections, you can select a collection type such as Collection(Edm.String). You can also assign one or more of the following attributes:
· Searchable: Determines whether the field's content can be searched. Typically, you would enable this for text fields like ProductName or Description.
· Filterable: Allows filtering on the field’s content. For example, you might want to filter products by Category or Price.
· Sortable: Allows the results to be sorted based on this field, which is useful for fields like Price.
· Facetable: Enables faceting, which is useful for generating search facets or categories based on the values in this field, such as showing the number of products by category or price range.
Notice that one field must be designated as the key field, which serves as the unique identifier for documents in your index. By default, Azure generates a field called id. Every time you add and assign a field, click the Save button. Repeat the steps to add fields for the Category and Price properties, to be set with Edm.String and Edm.Double, respectively.
When you’re finished, click Save on the index page. Indexes are very flexible and allow for implementing complex operations, which are beyond the scope of this ebook. For further information, you can read the official Azure documentation about indexes.
Now you are ready to write code.
Creating a WPF application
To create a WPF application, open Visual Studio Code and open an instance of the Terminal by selecting Terminal > New Terminal. When the Terminal is ready, type the following commands:
> md c:\AIServices\AppSearchWpfApp
> cd c:\AIServices\AppSearchWpfApp
> dotnet new wpf
> dotnet add package Azure.Search.Documents
> dotnet add package Newtonsoft.Json
The following is a description of the aforementioned commands:
· The md command creates a new subfolder for a new app called AppSearchWpfApp inside the AIServices folder created in Chapter 2.
· The cd command sets the new folder as the current folder.
· The dotnet new wpf command creates a new WPF project, whose name is the same as the containing folder.
· The first dotnet add package command installs the Azure.Search.Documents NuGet package, a library from the Azure SDK that allows for interacting with the AI Search service from .NET code. The command line installs the Newtonsoft.Json library, probably the most popular for JSON manipulation, required to manage sample JSON data.
When you’re ready, open the project in Visual Studio Code. Remember that VS Code is folder-based, not project-based, so you have to select File > Open Folder and open the AppSearchWpfApp folder created previously.
In the Explorer view, you will see the full project structure, as shown in Figure 13.
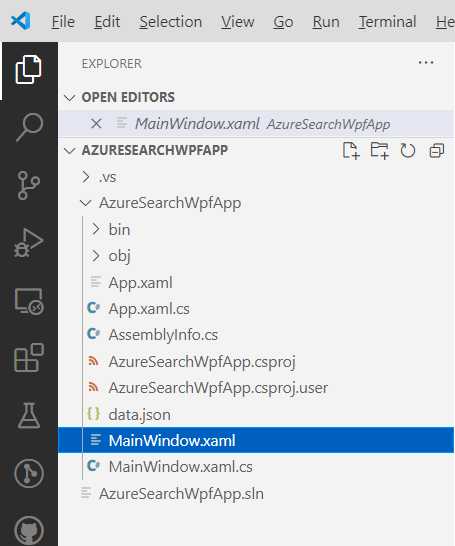
Figure 13: The new project opened in VS Code
Click the New File button on the toolbar available on the line of the project name. A new file is added, so rename it data.json.
In real-world scenarios, the data you process is originated from a database or from an API service, but for demonstration purposes, you will create a JSON file containing a list of products that matches the Product class shown previously. The following is the content of the JSON file that you need to add:
[
{
"Id": "1",
"ProductName": "Laptop",
"Category": "Electronics",
"Price": 999.99
},
{
"Id": "2",
"ProductName": "Smartphone",
"Category": "Electronics",
"Price": 699.99
},
{
"Id": "3",
"ProductName": "Desk Chair",
"Category": "Furniture",
"Price": 149.99
}
]
It is also a good idea to work with a small JSON file, because the data must be sent to the Azure AI Search service in order to be processed, and the Free pricing tier only offers 50Mb. Now that you have a project and some data, it is time to write code.
Defining the user interface
The user interface of the sample app must include a search box, a button that launches searches, and a ListView that displays the search result in the form of a collection of products. In the MainPage.xaml file, add the code shown in Code Listing 1.
Code Listing 1
<Window x:Class="AzureSearchWpfApp.MainWindow" xmlns="http://schemas.microsoft.com/winfx/2006/xaml/presentation" xmlns:x="http://schemas.microsoft.com/winfx/2006/xaml" xmlns:d="http://schemas.microsoft.com/expression/blend/2008" xmlns:mc="http://schemas.openxmlformats.org/markup-compatibility/2006" xmlns:local="clr-namespace:AzureSearchWpfApp" mc:Ignorable="d" Title="MainWindow" Height="450" Width="800" Loaded="Window_Loaded"> <Grid> <Grid.RowDefinitions> <RowDefinition Height="Auto" /> <RowDefinition /> </Grid.RowDefinitions> <StackPanel Orientation="Horizontal"> <TextBox x:Name="SearchBox" Width="300" Height="30" VerticalAlignment="Top" Margin="10" /> <Button x:Name="SearchButton" Content="Search" Margin="10" Click="SearchButton_Click" /> </StackPanel> <ListView x:Name="ResultsList" Margin="10,10,10,10" Grid.Row="1"> <ListView.View> <GridView> <GridViewColumn Header="Product Name" DisplayMemberBinding="{Binding ProductName}" Width="200"/> <GridViewColumn Header="Category" DisplayMemberBinding="{Binding Category}" Width="100"/> <GridViewColumn Header="Price" DisplayMemberBinding="{Binding Price}" Width="100"/> </GridView> </ListView.View> </ListView> </Grid> </Window> |
Notice how each GridViewColumn object in the ListView is bound to a property of each Product instance in the retrieved collection. Now it is time to write the C# code that performs searching and generates the search result.
Performing intelligent search in C#
The C# code needs to read the content of the data.json file, upload it to the Azure AI Search service for indexing, and query the data based on the specified search terms. This is accomplished with the code shown in Code Listing 2 (comments will follow shortly).
Code Listing 2
using Azure; using Azure.Search.Documents; using Newtonsoft.Json; using System.Collections.ObjectModel; using System.IO; using System.Windows;
namespace AzureSearchWpfApp { public partial class MainWindow : Window { private SearchClient searchClient; private ObservableCollection<Product> _products; private ObservableCollection<Product> Products { get { return _products; } set { _products = value; } }
public MainWindow() { InitializeComponent(); InitializeSearchClient(); Products = new ObservableCollection<Product>(); }
private void InitializeSearchClient() { string serviceEndpoint = "your-endpoint-here"; string indexName = "main"; string apiKey = "your-api-key";
var credential = new AzureKeyCredential(apiKey); searchClient = new SearchClient( new Uri(serviceEndpoint), indexName, credential); }
private async Task PerformSearch(string query) { try { var options = new SearchOptions { IncludeTotalCount = true }; var response = await searchClient. SearchAsync<Product>(query, options); Products.Clear(); var result = response.Value.GetResults(); foreach (var item in result) { Products.Add(item.Document); } ResultsList.ItemsSource = Products; } catch (Exception ex) { MessageBox.Show($"Error performing search: {ex.Message}"); } }
private async Task LoadDataAsync() { // Read the JSON file. string jsonData = File.ReadAllText("data.json"); var products = JsonConvert. DeserializeObject<List<Product>>(jsonData);
// Upload data to Azure AI Search index. await UploadDataToIndex(products); }
private async Task UploadDataToIndex(List<Product> products) { try { // Upload the documents to the search index. await searchClient.UploadDocumentsAsync(products); MessageBox. Show("Data successfully uploaded to Azure Search."); } catch (Exception ex) { MessageBox.Show($"Error uploading data to Azure Search: " + $"{ex.Message}"); } }
private async void Window_Loaded(object sender, RoutedEventArgs e) { await LoadDataAsync(); }
private async void SearchButton_Click(object sender, RoutedEventArgs e) { string query = SearchBox.Text; if (!string.IsNullOrWhiteSpace(query)) { await PerformSearch(query); } } } } |
The Azure SDK is central to this application, enabling interaction with the search service hosted in Azure. The following is an explanation about the .NET objects and members that are relevant for AI Search:
· The SearchClient class provides a way to interact with a specific search index in Azure AI Search. It allows performing search queries and managing documents within that index. The SearchClient object is instantiated with the service endpoint (Uri), index name (string), and AzureKeyCredential for authentication. In the code, the UploadDocumentsAsync<T> method is used to asynchronously upload a batch of documents (in this case, Product objects) to the index.
· This method returns a Response<IndexDocumentsResult> object, which contains information about the indexing operation. The SearchAsync<T> method is used to execute search queries asynchronously, returning a SearchResults<T> object containing the search results. Additionally, methods like MergeDocumentsAsync<T> and DeleteDocumentsAsync<T> allow updating and removing documents from the index, respectively, and could be useful for scenarios where you need to modify or delete indexed data.
· The SearchIndexClient class enables you to manage the structure of your search indexes. Although it is not heavily used in the code, this client is essential for creating, updating, or deleting indexes. The client is instantiated similarly to SearchClient with the service endpoint and AzureKeyCredential. The CreateIndexAsync method can be used to create a new search index programmatically, while DeleteIndexAsync allows for deleting an existing index. The GetIndexAsync method retrieves the schema of an index, which can be useful for inspecting or modifying the structure.
· The SearchOptions class configures the behavior of search queries performed with the SearchClient. In the code, SearchOptions is used to specify that the total count of results should be included in the search response (IncludeTotalCount = true). Other available properties include Filter, which can be used to apply filters to the search query, and Facets, which allows you to specify fields for faceted navigation. Additionally, OrderBy can be set to control the sort order of the search results.
· The SearchResults<T> class represents the collection of search results returned by the SearchAsync<T> method. It includes properties such as TotalCount, which gives the total number of documents that match the search query, and Results, which contains a collection of SearchResult<T> objects. The GetResults method can be used to retrieve the collection of individual search results. This class encapsulates not only the results themselves, but also metadata about the query, which can be useful for building pagination or providing more detailed insights into search performance.
· The SearchResult<T> class represents an individual document retrieved from the search index. Each SearchResult object includes properties like Score, which represents the relevance score assigned by the search engine, and Highlights, which contains the highlighted portions of the document that match the query, if highlighting is enabled. The Document property gives access to the actual document (in this case, a Product object) stored in the index. The SearchResult<T> class also exposes methods like GetDouble, GetString, and other type-specific accessors to retrieve individual fields from the result when working with dynamic schemas.
· The IndexDocumentsResult object is returned by document indexing methods like UploadDocumentsAsync<T> and MergeDocumentsAsync<T>. This object contains information about the result of the indexing operation, such as the status and number of documents successfully processed. It helps in verifying whether the documents were indexed properly, and if there were any errors.
Errors and exceptions
If a search fails, the Azure AI services can throw the following exceptions:
· IndexNotFoundException: Thrown when trying to query a non-existent or incorrect search index.
· InvalidSearchQueryException: This exception occurs when the search query syntax is malformed or includes unsupported features.
You can implement a try..catch block for exception handling and take the appropriate actions.
Running the application
Start the application by pressing F5. The main window will first upload the JSON data to the Index service of Azure AI Search, and then it will allow typing into the search box. The application will send the queries to Azure AI Search, retrieve the results, and display them in the ListView. Figure 14 shows an example.
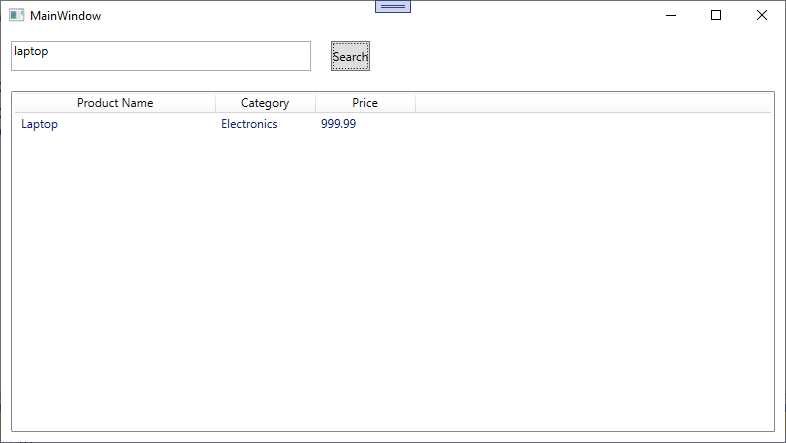
Figure 14: The application is ready to leverage Azure AI Search
This is obviously a simple example, but it should at least give you an idea of Azure AI Search’s powerful features.
Chapter summary
The Microsoft Azure AI Search service is a powerful, cloud-based search solution that combines traditional full-text search capabilities with advanced AI features, such as cognitive skills and machine learning models. Through this research, we explored how Azure AI Search can be set up and utilized to build sophisticated search applications.
The provided code example demonstrated how to query a search index from a WPF application, showcasing the integration of Azure AI Search into desktop applications. By leveraging the Azure AI Search SDK, developers can create rich search experiences with minimal infrastructure overhead.
- 1800+ high-performance UI components.
- Includes popular controls such as Grid, Chart, Scheduler, and more.
- 24x5 unlimited support by developers.