
TL;DR: Supercharge your .NET MAUI apps with Gemini AI! Learn how to add natural language filtering to DataGrid, AI-driven scheduling, and smart text editing, all in one guide.
As AI-powered applications continue to grow, running models locally offers significant advantages over cloud-based services, greater control, enhanced privacy, and faster performance. With the 2025 Vol 4 release, Syncfusion introduces Smart Components for .NET MAUI, designed to bring AI-driven functionality directly to your device.
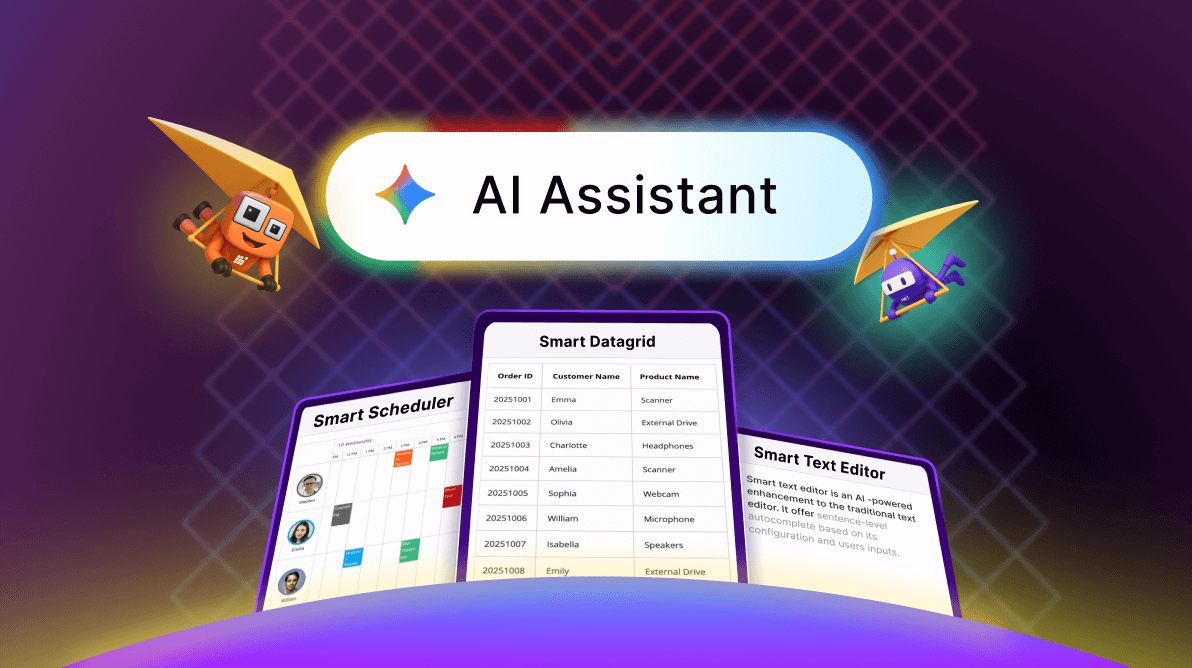
By integrating the Gemini local model with these Syncfusion Smart Components, you can unlock powerful features such as:
- Smart DataGrid: Perform sorting, filtering, and grouping using plain language commands.
- Smart Scheduler: Create and manage appointments effortlessly through natural language input.
- Smart Text Editor: Get AI-assisted text suggestions and completions as you type.
Running Gemini locally ensures instant responses and keeps your data secure by eliminating the need to send information to the cloud.
Prerequisites
Before you start, ensure the following requirements are met:
- Install the .NET 9 SDK or a later version.
- Set up a .NET MAUI development environment using Visual Studio 2022 (version 17.3 or later).
- Configure the Gemini model for integration.
Integrating .NET MAUI AI-powered components with the Gemini local model
The Smart DataGrid, Smart Scheduler, and Smart Text Editor components integrate seamlessly into a .NET MAUI application. In this guide, we’ll walk through the process of creating and implementing them step by step.
Step 1: Setting up Gemini
To begin, you need a Gemini API key. First, visit Google AI Studio, sign in with your Google account, and generate an API key. Once the key is created, copy it and store it securely because you’ll need it to authenticate API requests.
Next, review the Gemini Models documentation to understand the available models, their capabilities, and limitations. This will help you select the right model for your application.
Step 2: Create a Gemini AI service
With your API key ready, the next step is to create a service class that will handle Gemini API calls. This service should manage authentication, request/response handling, and safety settings.
Here’s how to set it up:
- First, create a Services folder in your .NET MAUI project.
- Then, add a new file named GeminiService.cs in the Services folder.
- Finally, implement the service using the following code:
public class GeminiService
{
    private readonly string _apiKey = "";
    private readonly string _modelName = "gemini-2.5-flash"; // Example model
    private readonly string _endpoint = "https://generativelanguage.googleapis.com/v1beta/models/";
    private static readonly HttpClient HttpClient = new(new SocketsHttpHandler
    {
        PooledConnectionLifetime = TimeSpan.FromMinutes(30),
        EnableMultipleHttp2Connections = true
    })
    {
        DefaultRequestVersion = HttpVersion.Version20
    };

    private static readonly JsonSerializerOptions JsonOptions = new()
    {
        PropertyNamingPolicy = JsonNamingPolicy.CamelCase
    };

    public GeminiService(IConfiguration configuration)
    {
        HttpClient.DefaultRequestHeaders.Clear();
        HttpClient.DefaultRequestHeaders.Add("x-goog-api-key", _apiKey);
    }

    public async Task<string> CompleteAsync(List<ChatMessage> chatMessages)
    {
        var requestUri = $"{_endpoint}{_modelName}:generateContent";
        var parameters = BuildGeminiChatParameters(chatMessages);
        var payload = new StringContent(JsonSerializer.Serialize(parameters, JsonOptions), Encoding.UTF8, "application/json");

        try
        {
            using var response = await HttpClient.PostAsync(requestUri, payload);
            response.EnsureSuccessStatusCode();
            var json = await response.Content.ReadAsStringAsync();
            var result = JsonSerializer.Deserialize<GeminiResponseObject>(json, JsonOptions);
            return result?.Candidates?.FirstOrDefault()?.Content?.Parts?.FirstOrDefault()?.Text ?? "No response from model.";
        }
        catch (Exception ex) when (ex is HttpRequestException or JsonException)
        {
            throw new InvalidOperationException("Gemini API error.", ex);
        }
    }

    private GeminiChatParameters BuildGeminiChatParameters(List<ChatMessage> messages)
    {
        var contents = messages.Select(m => new ResponseContent(m.Text, m.Role == ChatRole.User ? "user" : "model")).ToList();
        return new GeminiChatParameters
        {
            Contents = contents,
            GenerationConfig = new GenerationConfig
            {
                MaxOutputTokens = 2000,
                StopSequences = new List<string> { "END_INSERTION", "NEED_INFO", "END_RESPONSE" }
            },
            SafetySettings = new List<SafetySetting>
            {
                new() { Category = "HARM_CATEGORY_HARASSMENT", Threshold = "BLOCK_ONLY_HIGH" },
                new() { Category = "HARM_CATEGORY_HATE_SPEECH", Threshold = "BLOCK_ONLY_HIGH" },
                new() { Category = "HARM_CATEGORY_SEXUALLY_EXPLICIT", Threshold = "BLOCK_ONLY_HIGH" },
                new() { Category = "HARM_CATEGORY_DANGEROUS_CONTENT", Threshold = "BLOCK_ONLY_HIGH" },
                new() { Category = "HARM_CATEGORY_DANGEROUS_CONTENT", Threshold = "BLOCK_ONLY_HIGH" },
            }
        };
    }
}
Step 3: Define request and response models
After creating the service, you need to define the request and response models. To do this, create a file named GeminiModels.cs in the Services folder and add the following classes.
namespace SmartComponentsMAUI
{
    public class Part { public string Text { get; set; } }
    public class Content { public Part[] Parts { get; init; } = Array.Empty<Part>(); }
    public class Candidate { public Content Content { get; init; } = new(); }
    public class GeminiResponseObject { public Candidate[] Candidates { get; init; } = Array.Empty<Candidate>(); }

    public class ResponseContent
    {
        public List<Part> Parts { get; init; }
        public string Role { get; init; }
        public ResponseContent(string text, string role)
        {
            Parts = new List<Part> { new Part { Text = text } };
            Role = role;
        }
    }

    public class GenerationConfig
    {
        public int MaxOutputTokens { get; init; } = 2048;
        public List<string> StopSequences { get; init; } = new();
    }

    public class SafetySetting
    {
        public string Category { get; init; } = string.Empty;
        public string Threshold { get; init; } = string.Empty;
    }

    public class GeminiChatParameters
    {
        public List<ResponseContent> Contents { get; init; } = new();
        public GenerationConfig GenerationConfig { get; init; } = new();
        public List<SafetySetting> SafetySettings { get; init; } = new();
    }
}
Next, create GeminiInferenceService.cs to connect the Gemini service with your inference logic, refer to the code below.
public class GeminiInferenceService : IChatInferenceService
{
    private readonly GeminiService _geminiService;

    public GeminiInferenceService(GeminiService geminiService)
    {
        _geminiService = geminiService;
    }

    public async Task<string> GenerateResponseAsync(List<ChatMessage> chatMessages)
    {
        return await _geminiService.CompleteAsync(chatMessages);
    }
}
Step 4: Register Services in .NET MAUI
Finally, register the Syncfusion components and Gemini services in the MauiProgram.cs refer to the code example below for details.
using Syncfusion.Maui.Core.Hosting;
using Syncfusion.Maui.SmartComponents;

var builder = MauiApp.CreateBuilder();
builder
    .UseMauiApp<App>()
    .ConfigureSyncfusionCore();

builder.Services.AddSingleton<GeminiService>();
builder.Services.AddSingleton<IChatInferenceService, GeminiInferenceService>();
Smart DataGrid
The Syncfusion .NET MAUI Smart DataGrid allows you to use plain language commands for sorting, filtering, and grouping data. This makes managing complex datasets more intuitive and user-friendly.
To add the Syncfusion .NET MAUI Smart DataGrid component, include the following in MainPage.xaml. In this example, the Smart DataGrid is used to manage product orders, payment status, and identify which product has the highest freight cost.
<ContentPage xmlns="http://schemas.microsoft.com/dotnet/2021/maui"
             xmlns:x="http://schemas.microsoft.com/winfx/2009/xaml"
             xmlns:smartComponents="clr-namespace:Syncfusion.Maui.SmartComponents;assembly=Syncfusion.Maui.SmartComponents"
             xmlns:syncfusion="clr-namespace:Syncfusion.Maui.DataGrid;assembly=Syncfusion.Maui.DataGrid"
             xmlns:local="clr-namespace:SmartComponentsMAUI"
             x:Class="SmartComponentsMAUI.MainPage">

    <smartComponents:SfSmartDataGrid Grid.Row="1"
                                     x:Name="dataGrid"
                                     ItemsSource="{Binding OrderInfoCollection}">

        <smartComponents:SfSmartDataGrid.AssistViewSettings>
            <smartComponents:DataGridAssistViewSettings SuggestedPrompts="{Binding Suggestions}" ShowAssistViewBanner="True"/>
        </smartComponents:SfSmartDataGrid.AssistViewSettings>

        <smartComponents:SfSmartDataGrid.Columns>
            <syncfusion:DataGridNumericColumn MappingName="OrderID" HeaderText="Order ID" Format="0" Width="100"/>
            <syncfusion:DataGridTextColumn MappingName="CustomerName" HeaderText="Customer Name" Width="150"/>
            <syncfusion:DataGridTextColumn MappingName="ProductName" HeaderText="Product Name" Width="145"/>
            <syncfusion:DataGridDateColumn  MappingName="OrderDate" Width="140" HeaderText="Order Date"  Format="dd/MM/yyyy"/>
            <syncfusion:DataGridNumericColumn  MappingName="Quantity" Width="120" Format="N0"/>
            <syncfusion:DataGridNumericColumn MappingName="Freight" Width="120" Format="C"/>
            <syncfusion:DataGridTextColumn MappingName="ShipCity" HeaderText="Ship City" Width="150"/>
            <syncfusion:DataGridTextColumn MappingName="ShipCountry" HeaderText="Ship Country" Width="150"/>
            <syncfusion:DataGridTextColumn MappingName="PaymentStatus" HeaderText="Payment Status" Width="130"/>
        </smartComponents:SfSmartDataGrid.Columns>
    </smartComponents:SfSmartDataGrid>
</ContentPage>
SuggestedPrompts defined in ViewModel as like below,
public class ViewModel
 {
        public ObservableCollection Suggestions { get; set; } = new ObservableCollection
        {
            new AssistSuggestion() {Text = "Which orders have a payment status of Not Paid?"},
            new AssistSuggestion() {Text ="What are the top 10 orders with the highest freight cost?"},
            new AssistSuggestion() {Text = "Which customers have placed the most orders?"},
            new AssistSuggestion() {Text = "What are the orders shipped to Brazil?"},
            new AssistSuggestion() {Text = "What is the total quantity of products ordered across all orders?"},
        };
}
Run the sample to see the output. When you click a suggestion, the AI processes your request and returns a tailored response.
You can use natural language prompts to apply sorting, grouping, and filtering.
Example:
- Sort order ID
- Group products
- Filter products where the payment status is UPS
Refer to the following images.
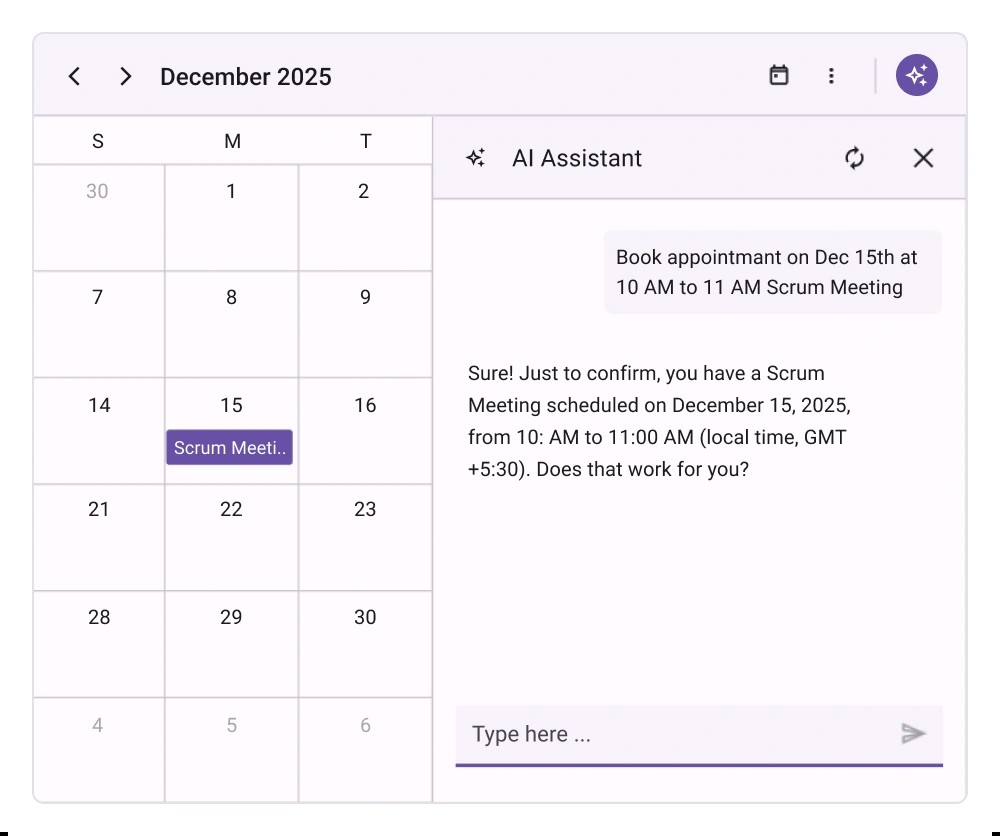
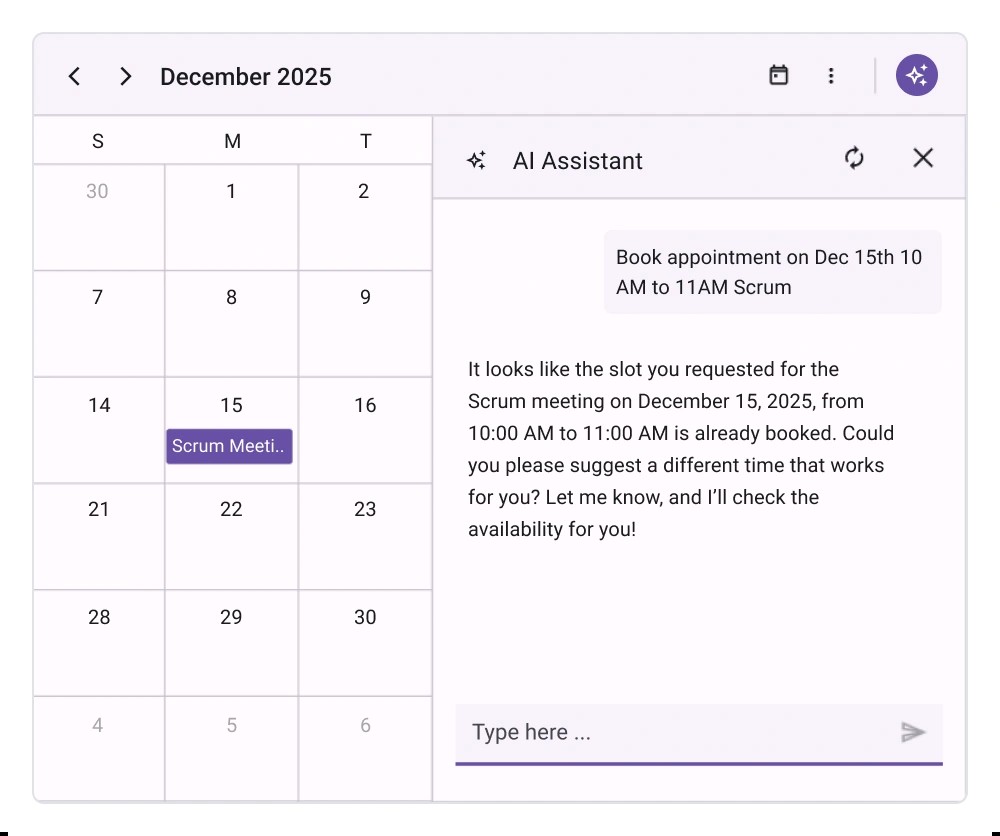
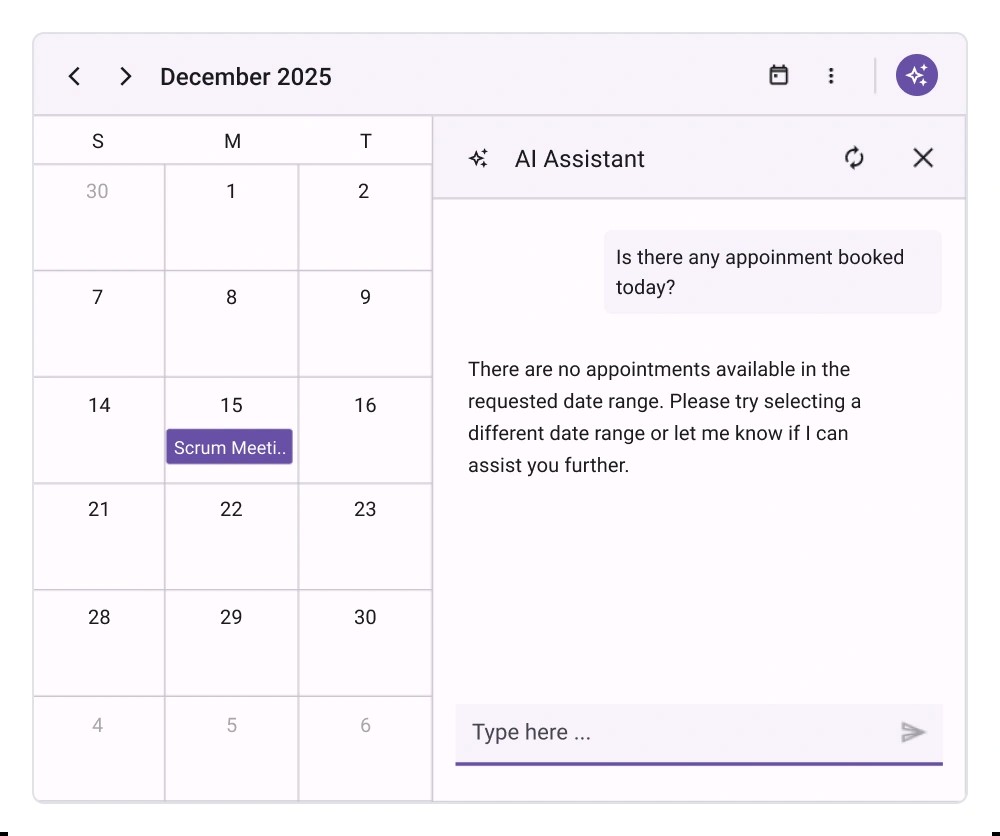
Smart Scheduler
The Syncfusion .NET MAUI Smart Scheduler helps manage events intelligently. Add the Syncfusion MAUI Smart Scheduler component to MainPage.Xaml. In this example, it manages events, summarizes them, detects conflicts, and finds free time slots.
<ContentPage xmlns="http://schemas.microsoft.com/dotnet/2021/maui"
             xmlns:x="http://schemas.microsoft.com/winfx/2009/xaml"
             xmlns:smartComponents="clr-namespace:Syncfusion.Maui.SmartComponents;assembly=Syncfusion.Maui.SmartComponents"
             xmlns:syncfusion="clr-namespace:Syncfusion.Maui.DataGrid;assembly=Syncfusion.Maui.DataGrid"
             xmlns:local="clr-namespace:SmartComponentsMAUI"
             x:Class="SmartComponentsMAUI.MainPage">
    <smartComponents:SfSmartScheduler Grid.Row="2"
                                      EnableAssistButton="True"
                                      View="Month">
        <smartComponents:SfSmartScheduler.AssistViewSettings>
            <smartComponents:SchedulerAssistViewSettings SuggestedPrompts="{Binding SuggestedPrompts}" ShowAssistViewBanner="True"/>
        </smartComponents:SfSmartScheduler.AssistViewSettings>
    </smartComponents:SfSmartScheduler>
</ContentPage>
SuggestedPrompts defined in ViewModel.
public class ViewModel
{
        public ObservableCollection? SuggestedPrompts { get; set; } = new ObservableCollection
        {
            "Summarize today's appointments",
            "Find today's free timeslots",
            "Conflict detection"
        };
}
You can run the following outputs.
Smart Text Editor
The Syncfusion .NET MAUI Smart Text Editor provides AI-assisted text completion and suggestions.
Now, add the Syncfusion .NET MAUI Smart TextEditor component to MainPage.Xaml. In this example, the Smart Text Editor is used to get the response when the user role is Support engineer responding to customer tickets.
<ContentPage xmlns="http://schemas.microsoft.com/dotnet/2021/maui"
             xmlns:x="http://schemas.microsoft.com/winfx/2009/xaml"
             xmlns:smartComponents="clr-namespace:Syncfusion.Maui.SmartComponents;assembly=Syncfusion.Maui.SmartComponents"
             xmlns:syncfusion="clr-namespace:Syncfusion.Maui.DataGrid;assembly=Syncfusion.Maui.DataGrid"
             xmlns:local="clr-namespace:SmartComponentsMAUI"
             x:Class="SmartComponentsMAUI.MainPage">

    <smartComponents:SfSmartTextEditor UserRole="Support engineer responding to customer tickets"/>

</ContentPage>
Key attributes:
- UserRole: This attribute is required to define the context of the autocompletion based on the role of the person typing.
- UserPhrases: This attribute is optional to provide predefined expressions that align with the user’s/application’s tone and frequently used content.

Conclusion
Thank you for reading! With the 2025 Vol 4 release, Syncfusion introduces Smart Components for .NET MAUI, bringing AI-driven functionality directly to your device.
Gemini AI brings intelligent features to .NET MAUI apps with Smart Components like DataGrid, Scheduler, and Text Editor. From natural language filtering to AI-driven scheduling and smart text suggestions, these integrations make your apps smarter and more user-friendly. Start building AI-powered experiences today!
Check out our Release Notes and What’s New pages to see the other updates in this release, and leave your feedback in the comments section below.
If you’re a Syncfusion user, you can download the setup from the license and downloads page. Otherwise, you can download a free 30-day trial.
You can also contact us through our support forum, support portal, or feedback portal for queries. We are always happy to assist you!


 No spam, just valuable updates.