

TL;DR: Google Maps is not natively supported in .NET MAUI for Windows, iOS, macOS, but you can integrate it using the Google Maps Tile API. This guide explains how to implement map tiles, manage session tokens, and optimize caching for cross-platform apps.
Mapping is an essential feature in modern mobile and desktop applications, enabling location-based services and interactive experiences. In .NET MAUI, developers often aim to integrate Google Maps for rich mapping functionality. However, the built-in .NET MAUI Maps control has platform-specific behavior:
- Android: Google Maps
- iOS/macOS: Apple Maps
- Windows: Bing Maps via CommunityToolkit.Maui.Maps
The challenge? Google Maps API officially supports only Android and iOS, leaving Windows and macOS without direct integration. This blog explores these limitations and demonstrates how Syncfusion® .NET MAUI Maps help to overcome them using the Google Maps Tile API with a session token for a consistent cross-platform experience.
Case Studies: Platform restrictions in .NET MAUI map integration
Case Study 1: Google Maps API (Android and iOS only)
Scenario
A mobile application needed mapping functionality across Android, iOS, Windows, and macOS.
Implementation
The team integrated the Google Maps API for Android and iOS to deliver a robust mobile experience.
Limitation
Windows and macOS were excluded because the Google Maps API does not support these platforms.
Resolution
The solution provided a rich mapping experience for mobile users but highlighted the need for a cross-platform approach for future desktop expansion.
Case Study 2: Cross-platform App using .NET MAUI Map control
Scenario
A single application targeting Android, iOS, Windows, and macOS.
Implementation
Used the built-in .NET MAUI Map control with platform-specific providers:
- Android: Google Maps
- iOS/macOS: Apple Maps
- Windows: Bing Maps via WebView
Limitation
The user interface and feature set varied significantly across platforms, and implementing custom tile overlays proved to be challenging.
Resolution
Developers began exploring solutions that offer consistent map rendering and advanced features across all platforms.
What is Syncfusion SfMaps?
Syncfusion SfMaps is a mapping control for .NET MAUI that enables developers to visualize and interact with geographic data in mobile and desktop applications. It supports two rendering options to deliver rich, customizable map experiences:
- Tile layer: Fetches map tiles from providers such as Google Maps, OpenStreetMap, Azure Map, Mapbox, or custom tile servers for detailed map rendering.
- Shape layer: Displays maps using shape files or GeoJSON data, ideal for visualizing regions, boundaries, and custom shapes.
Key features
Explore these features to build interactive and visually compelling map experiences tailored to your application’s needs.
- Zooming and panning: Smooth navigation and adjustable map views.
- Markers: Highlight locations with built-in shapes or custom content.
- Tooltips: Display additional information on interaction.
- Selection: Enable region-specific interaction.
- Legends: Explain color mappings or data categories.
- Data labels: Show names or identifiers for map regions.
- Color mapping: Apply colors based on data ranges.
- Bubbles: Visualize data with varying sizes and colors.
Note: For detailed implementation, refer to the official documentation.
What is the Google Maps Tile API?
Google Maps provides a Map Tiles API that allows developers to fetch 2D or 3D map tiles for custom rendering instead of embedding Google Maps directly. This approach is particularly useful for cross-platform applications where native Google Maps support is limited, ensuring flexibility and control over the map display.
Requirements
To use the Google Maps Tile API, you need the following:
- An API Key with billing enabled
- A Session Token created via the
createSessionendpoint
These prerequisites ensure secure and authorized access to the tile data.
Steps to fetch Google Maps Tiles
Once the requirements are in place, developers can proceed to request map tiles using the API endpoints. This process enables custom map rendering tailored to the app’s design and functionality.
Step 1: Create a Google Maps API key
- Start by navigating to Google Cloud Console. Create a new project or select an existing one.
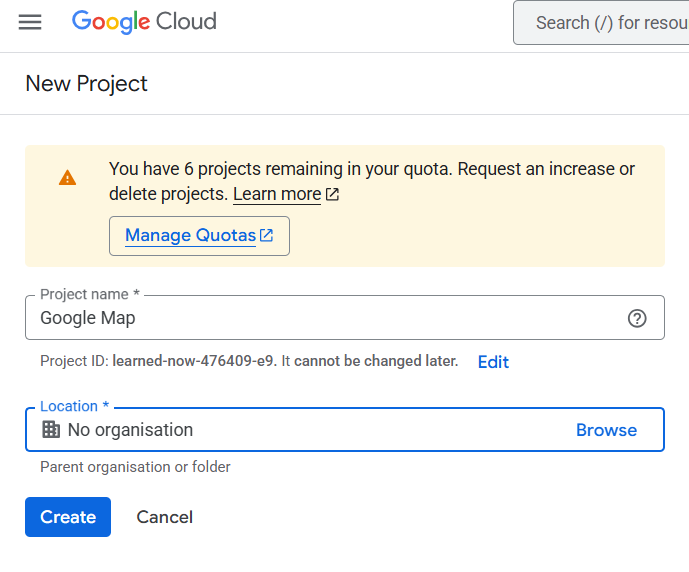
- Next, ensure billing is enabled for your project, this is mandatory for using Google
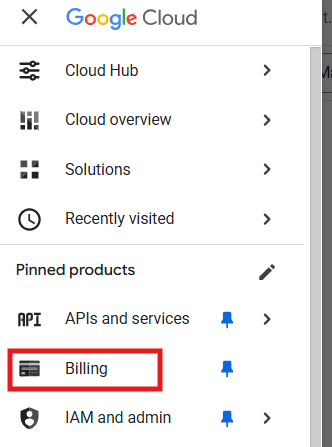
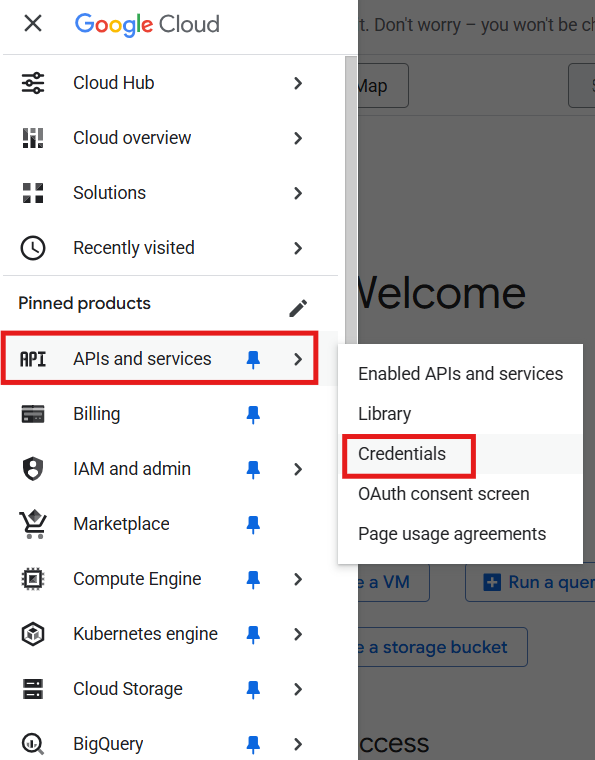
- From the Navigation Menu, go to APIs and services → Credentials.
- Click Create Credentials, configure restrictions (HTTP referrer or IP), and enable the Map Tiles API.
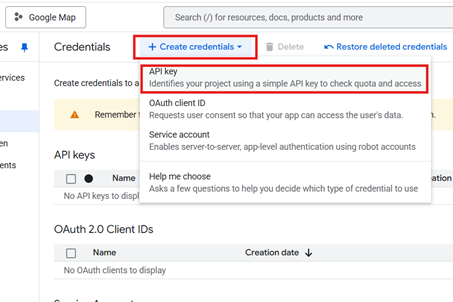
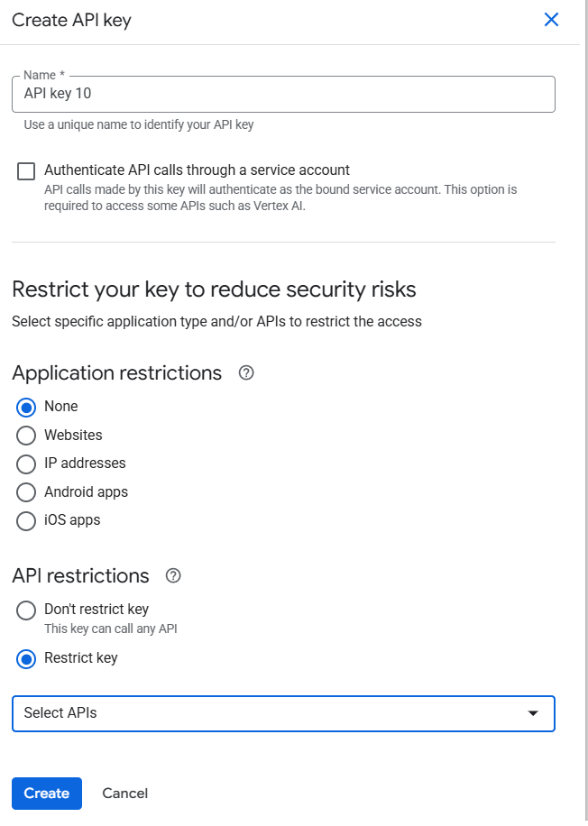
- Once created, click Show Key to view and copy your API key.
Step 2: Generate a session token
To fetch map tiles from Google Maps Tile API, you must create a session token. This token includes required fields and a session token response to generate the session.
Configuration parameters for a tile session
To configure a tile session, define parameters such as map type, language, region, overlays, and rendering options. The MapTileSessionRequest class specifies the parameters required to create a session with the Google Maps Tile API. These fields are based on the
| Required fields | Description |
| maptype |
|
| language | Sets the language for map labels such as, en-US. |
| region | Defines the region bias for map rendering such as, US. |
| Optional fields | Description |
| layertypes | An array of additional layers to overlay on the map (e.g., traffic, transit). |
| overlay | Boolean to enable or disable overlays. |
| imageformat | Image format for tiles. Supported values: png, jpeg. |
| scale | Scale factor for tiles. Options: scaleFactor1x, 2x, 4x. |
| highdpi | Boolean to enable high-DPI tiles for better clarity on high-resolution screens. |
Refer to the following code example to declare the required fields for creating a session request.
public sealed class MapTileSessionRequest
{
    [JsonPropertyName("mapType")]
    public string MapType { get; set; } = "roadmap"; // roadmap|satellite|terrain|streetview

    [JsonPropertyName("language")]
    public string Language { get; set; } = "en-US";

    [JsonPropertyName("region")]
    public string Region { get; set; } = "US";

    // Optional
    [JsonPropertyName("layerTypes")]
    public string[]? LayerTypes { get; set; }

    [JsonPropertyName("overlay")]
    public bool? Overlay { get; set; }

    [JsonPropertyName("imageFormat")]
    public string? ImageFormat { get; set; } // png|jpeg

    [JsonPropertyName("scale")]
    public string? Scale { get; set; } // scaleFactor1x|2x|4x

    [JsonPropertyName("highDpi")]
    public bool? HighDpi { get; set; }
}
After defining the request parameters, the next step is to create the session and handle the API response.
Creating a tile session response
The MapTileSessionResponse class defines the response fields from the Google Maps Tile API when a session token is requested for fetching map tiles. The response contains metadata fields including:
| Field | Description |
| session | Unique session token used to identify and group tile requests and must be included in all tile requests during the session. |
| expiry | Expiration time of the session token in epoch seconds. Indicates when the session becomes invalid. |
| tileWidth | Width of each map tile in pixels. Used to calculate tile layout and rendering. |
| tileHeight | Height of each map tile in pixels. Used to calculate tile layout and rendering. |
| imageFormat | Format of the image tiles returned. Determines how tiles are rendered and displayed. |
Refer to the following code to declare the session token response fields.
public sealed class MapTileSessionResponse
{
    [JsonPropertyName("session")]
    public string Session { get; set; } = string.Empty;

    [JsonPropertyName("expiry")]
    public string Expiry { get; set; } = string.Empty; // epoch seconds as string

    [JsonPropertyName("tileWidth")]
    public int TileWidth { get; set; }

    [JsonPropertyName("tileHeight")]
    public int TileHeight { get; set; }

    [JsonPropertyName("imageFormat")]
    public string ImageFormat { get; set; } = string.Empty;
}
Declare and initialize HttpClient
Create an HttpClient instance to handle HTTP requests to the Google Maps API when creating sessions or fetching map tiles.
private readonly HttpClient _httpClient;
_httpClient = new HttpClient();
Creating a new tile session with Google Maps Tile API
This code example demonstrates how to initiate a tile session with the Google Maps Tile API using HttpClient.
Step 1: Create the request object
Instantiate MapTileSessionRequest and populate parameters like mapType, language, region, etc. This object will be serialized into JSON and sent to the API.
MapTileSessionRequest sessionRequest = new MapTileSessionRequest(); Step 2: Prepare a cancellation token
A cancellation token allows you to cancel the request if needed, such as during a timeout or user action.
CancellationToken cancellationToken = default;Note: default means no cancellation is currently requested.
Step 3: Build the API endpoint
Constructs the full URL for the createSession endpoint and includes your API key (_googleMapsApiKey) for authentication.
private readonly string _googleMapsApiKey = "";
var url = $"https://tile.googleapis.com/v1/createSession?key={_googleMapsApiKey }";
Step 4: Send the POST request
Use PostAsJsonAsync to send the MapTileSessionRequest object as JSON to the API. This method handles serialization automatically.
Additionally, use ConfigureAwait(false) to avoid capturing the current context and ensure the API call succeeds before proceeding.
using var response = await _httpClient.PostAsJsonAsync(url, sessionRequest, cancellationToken).ConfigureAwait(false);

response.EnsureSuccessStatusCode();
Step 5: Deserialize the response
Read and deserialize the JSON response into a MapTileSessionResponse object using System.Text.Json. This maps the JSON fields to C# properties.
If the response is unexpectedly empty, throw an exception to handle the error gracefully.
var created = await response.Content.ReadFromJsonAsync<MapTileSessionResponse>(cancellationToken: cancellationToken).ConfigureAwait(false)
               ?? throw new InvalidOperationException("Empty createSession response");
Caching and reusing the Google Maps tile session token
To avoid unnecessary API calls and improve performance, cache the session token locally and reuse it until it’s close to expiry.
Session token caching – Key steps explained
| Step | Purpose |
| Preferences.Set(…) | Stores the session token and expiry time locally using key-value pairs. This allows reuse without repeated API calls. |
| Preferences.Get(…) | Retrieves the cached token and expiry time from local storage. |
| DateTimeOffset.UtcNow < expiry.AddMinutes(-5) | Ensures the token is still valid with a 5-minute buffer. Prevents failures during API calls if the token expires mid-request. |
The following code example demonstrates how to store the session token and expiry time using Preferences, and how to validate and reuse it safely.
// Preference keys
private const string SessionTokenKey = "GoogleMapTiles_SessionToken";
private const string SessionExpiryKey = "GoogleMapTiles_SessionExpiry";

// Store session and expiry
Preferences.Set(SessionTokenKey, created.Session);
Preferences.Set(SessionExpiryKey, created.Expiry);


// Try cache first
var cachedToken = Preferences.Get(SessionTokenKey, null);
var cachedExpiryStr = Preferences.Get(SessionExpiryKey, null);
if (!string.IsNullOrWhiteSpace(cachedToken) && long.TryParse(cachedExpiryStr, out var expiryEpoch))
{
    var expiry = DateTimeOffset.FromUnixTimeSeconds(expiryEpoch);
    // Check if the current UTC is earlier than the token's expiry time minus 5 minutes.
    // This means the token is still valid for more than 5 minutes.
    // Adding a 5-minute buffer ensures we refresh the token well before it expires,
    // preventing failures during API calls that might occur if the token expires mid-request.
    if (DateTimeOffset.UtcNow < expiry.AddMinutes(-5))
    {
        return cachedToken; // Token is still valid, so reuse it.
    }
}
Step 3: Include session token and API key in tile URL
To render Google Maps tile, we will need to construct the correct URL format. The template is:
https://tile.googleapis.com/v1/2dtiles/{z}/{x}/{y}?session=SESSION_TOKEN&key=API_KEY
Replace the placeholders as follows:
{z}= Zoom level{x}and{y}= Tile coordinatesSESSION_TOKEN= Token generated in Step 2API_KEY= Your Google Maps API key from Step 1
Step 4: Initialize SfMaps in .NET MAUI
Once the URL is ready, we will add the Syncfusion .NET MAUI Maps control to your XAML and configure the MapTileLayer with the Google Maps URL This layer will use the session token and API key for rendering.
xmlns:maps="clr-namespace:Syncfusion.Maui.Maps;assembly=Syncfusion.Maui.Maps"

<maps:SfMaps x:Name="maps">
    <maps:SfMaps.Layer>
        <maps:MapTileLayer x:Name="layer"
      CanCacheTiles="True"
            <maps:MapTileLayer.Center>
                <maps:MapLatLng x:Name="mapLatLng"
                           Latitude="37.0902"
                           Longitude="-95.7129">
                </maps:MapLatLng>
            </maps:MapTileLayer.Center>
            <maps:MapTileLayer.ZoomPanBehavior>
                <maps:MapZoomPanBehavior x:Name="zoomPanBehavior"
                    ZoomLevel="4"
                    MinZoomLevel="4"
                    MaxZoomLevel="18"
                    EnableDoubleTapZooming="True" />
            </maps:MapTileLayer.ZoomPanBehavior>
        </maps:MapTileLayer>
    </maps:SfMaps.Layer>
</maps:SfMaps>
Step 5: Set Google Maps API URL
Next, configure the layer.UrlTemplate with the Google API key and session URL to ensure consistent rendering across all .NET MAUI platforms.
public MainPage()
{
    InitializeComponent();
    this.CreateGoogleMapsAPI();
}
protected async void CreateGoogleMapsAPI()
{
    GoogleMapsTilesSessionToken _tilesSessionService = new GoogleMapsTilesSessionToken();
    try
    {
        var token = await _tilesSessionService.GetOrCreateSessionAsync();
          this.layer.UrlTemplate = _tilesSessionService.BuildTileUrlTemplate(token);
     }
     catch (Exception ex)
     {
         Debug.WriteLine($"[MapTiles] Failed to create session: {ex.Message}");
     }
}
/// <summary>
/// Builds the Google 2D tiles URL template.
/// </summary>
public string BuildTileUrlTemplate(string sessionToken)
=> $"https://tile.googleapis.com/v1/2dtiles/{{z}}/{{x}}/{{y}}?session={sessionToken}&key={_googleMapsApiKey}";Integrate OpenAI with Google Maps for AI-powered smart location search
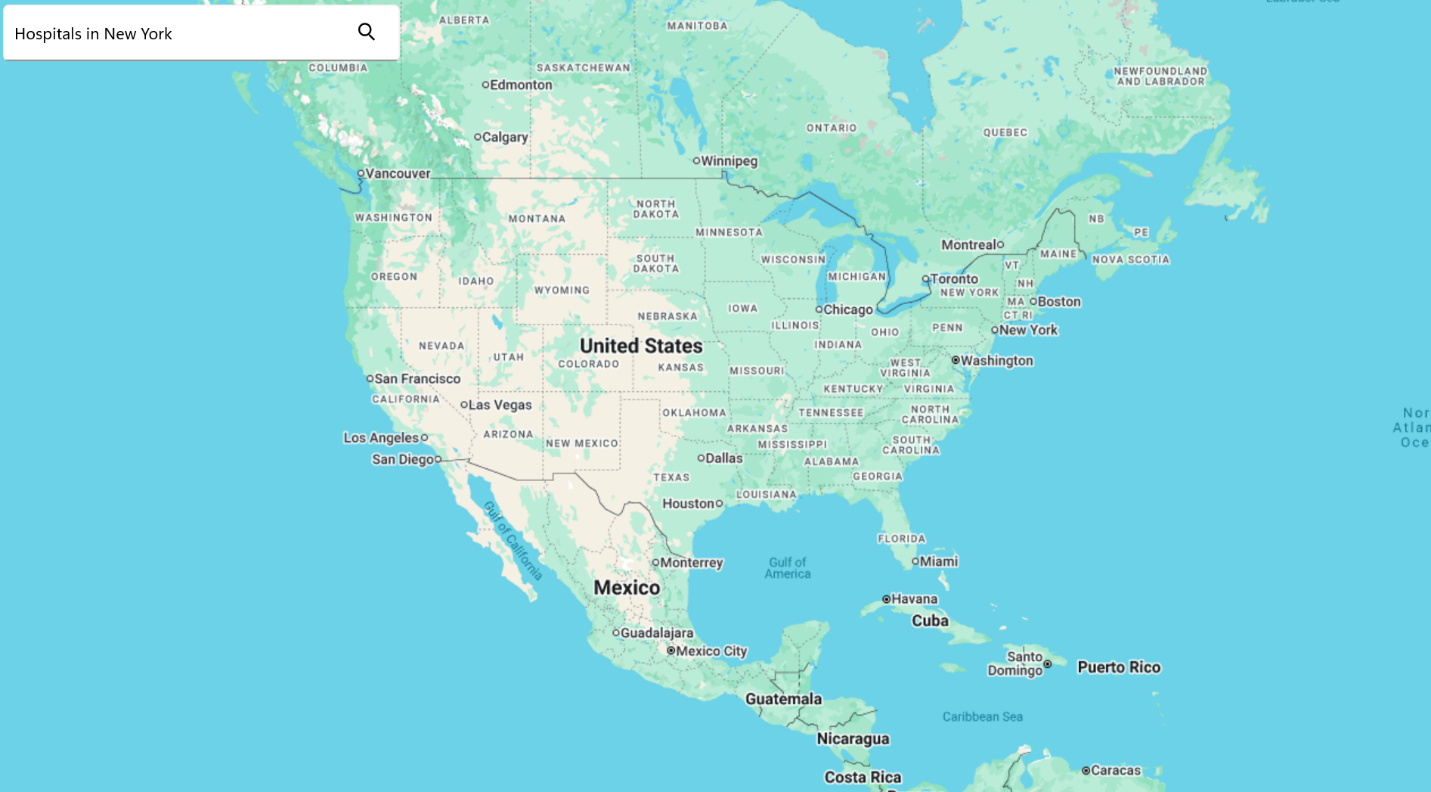
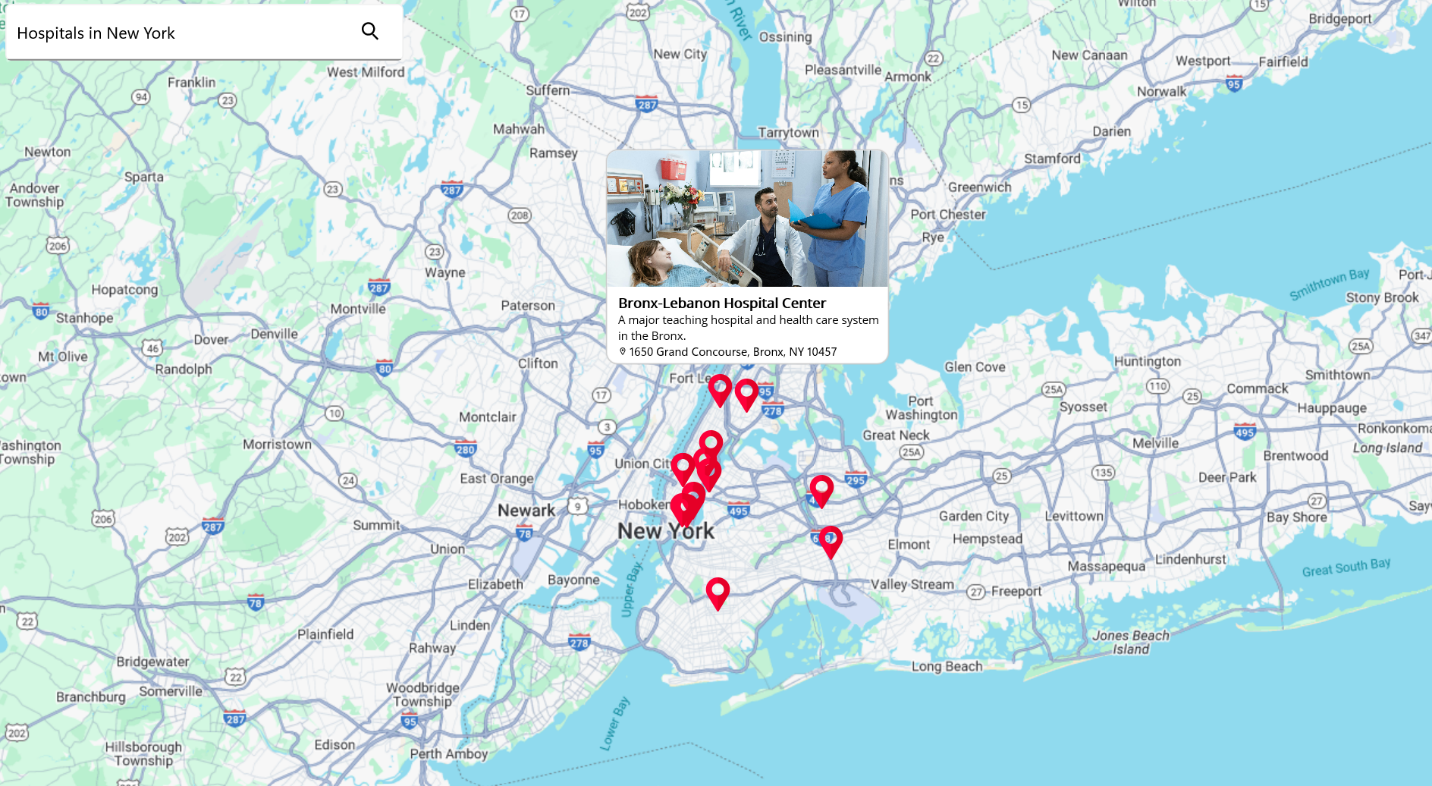
Want to make your maps smarter? You can integrate OpenAI with Google Maps in your .NET MAUI application to enable AI-driven location search. This approach allows users to find places using natural language queries, making your app more intuitive and powerful.
Additionally, you can enhance the experience by using markers and tooltips to display search results directly on the map. For a detailed walkthrough on adding OpenAI integration and configuring maps, check out our blog.
GitHub reference
For more details on Integrating Google Maps API with AI-driven smart location search, refer to the GitHub repo.

Conclusion
Thanks for reading! In this blog, we have seen how to integrate Google Maps in the Syncfusion .NET MAUI Maps control. Try out this feature and share your feedback in the comments below.
Explore the other features in the .NET MAUI Maps user guide and GitHub demos for more details. Additionally, you can check out our .NET MAUI demo apps on Google Play and Microsoft Store.
Syncfusion Maps control is also available for WinForms, WPF, Angular, React, Vue, ASP.NET MVC, ASP.NET Core, Blazor, JavaScript, and Flutter. Download from the license and downloads or start a free 30-day trial. For assistance, visit our support forum, support portal, or feedback portal. We are happy to help


 No spam, just valuable updates.