Spreadsheets are the heart of data analysis and storage. Almost everyone uses spreadsheets at some point, for personal use or for business.
Our Syncfusion WPF Spreadsheet is an Excel-inspired control that allows you to create, view, edit, and format Microsoft Excel files without having Microsoft Excel installed. It provides an integrated ribbon to cover any possible business scenario. In addition, this control supports a built-in calculation engine with more than 400 widely used formulas. It was built with the .NET Excel Library (Essential XlsIO), which features a full-fledged object model similar to the Microsoft Office automation libraries.

Enjoy a smooth experience with Syncfusion’s Excel Library! Get started with a few lines of code and without Microsoft or interop dependencies.
In this blog, I will explain how to create, read, and edit an Excel file using our Syncfusion WPF Spreadsheet control.
Note: If you are new to our Spreadsheet control, then please read the Getting Started with WPF Spreadsheet documentation before proceeding.
Create a simple Spreadsheet project
The following steps illustrate how to create a simple Spreadsheet project in WPF:
- First, open Visual Studio and select Create a New Project.
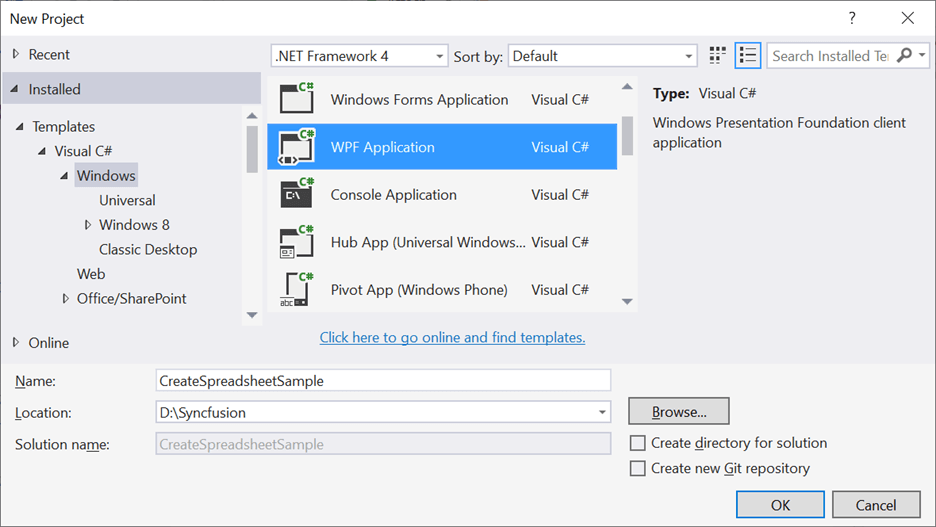
- Then, the New Project dialog will open. Choose WPF Application from the dropdown list and provide a name for your application. Refer to the following screenshot.
Create a New WPF Project - Now, install the Syncfusion.SfSpreadsheet.WPF NuGet package as a reference to your .NET Framework app from Nuget.org.
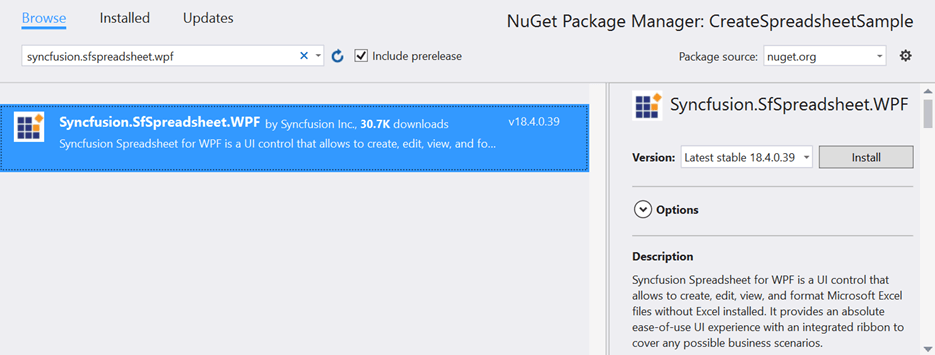
Install the Syncfusion.SfSpreadsheet.WPF NuGet Package The spreadsheet is available in the namespace Syncfusion.UI.Xaml.Spreadsheet and you can create it programmatically either by using the XAML or C# code.
- Next, add the SpreadsheetRibbon and bind the Spreadsheet as the DataContext to the SpreadsheetRibbon to make an interaction between the ribbon items and Spreadsheet.
- To add the SpreadsheetRibbon to your application, use the RibbonWindow since the backstage of the ribbon will open only when the ribbon is loaded under the RibbonWindow.
Refer to the following code.<syncfusion:RibbonWindow x:Class="SpreadsheetDemo.MainWindow" xmlns="http://schemas.microsoft.com/winfx/2006/xaml/presentation" xmlns:x="http://schemas.microsoft.com/winfx/2006/xaml" xmlns:d="http://schemas.microsoft.com/expression/blend/2008" xmlns:mc="http://schemas.openxmlformats.org/markup- compatibility/2006" xmlns:syncfusion="http://schemas.syncfusion.com/wpf" mc:Ignorable="d"> <syncfusion:SfSpreadsheetRibbon DataContext= "{Binding ElementName=spreadsheet}" /> <syncfusion:SfSpreadsheet x:Name="spreadsheet"/> </ syncfusion:RibbonWindow >
Now, we have created a simple WPF Spreadsheet project.
Create a new Excel workbook
You can create a new workbook by using the Create method. By default, a workbook will be created with a single worksheet. Use the following code to load the Spreadsheet workbook with a specified number of worksheets.
spreadsheetControl.Create(2);
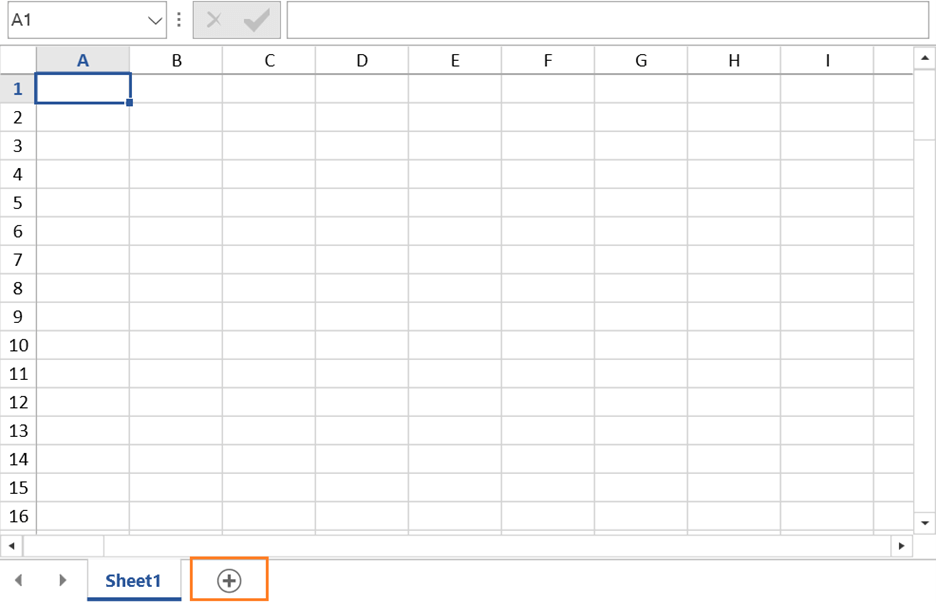
Also, you can add new worksheets on-demand in the WPF Spreadsheet control by clicking the AddNew button. Refer to the following screenshot.
View the existing Excel sheet
The following code snippet illustrates how to view Excel files using the WPF Spreadsheet control.
/// View the Excel file.
spreadsheetControl.Open (@"..\..\Data\GettingStarted.xlsx");
                   (or)
ExcelEngine excelEngine = new ExcelEngine();
IWorkbook workbook = excelEngine.Excel.Workbooks.Open(@"..\..\Data\GettingStarted.xlsx");
spreadsheetControl.Open(workbook);
                   (or)
using (FileStream fileStream = new FileStream(@"..\..\Data\ GettingStarted.xlsx”, FileMode.Open))
{
     spreadsheetControl.Open(fileStream);
}
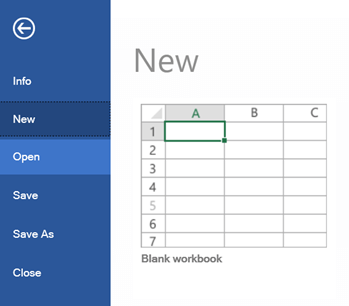
Also, you can open the existing Excel files by clicking Open in the SpreadsheetRibbon backstage, like in the following screenshot.
Edit the values in an Excel file
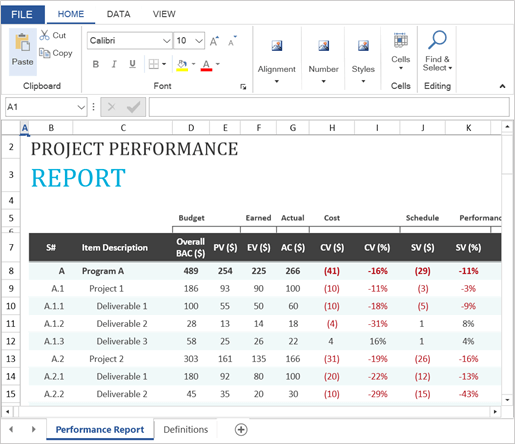
The Spreadsheet provides support for editing, so you can modify and commit the cell values in a workbook. The following code snippet illustrates how to edit data in an Excel file using the WPF Spreadsheet control.
/// Editing a specific cell value.
var range = spreadsheetControl.ActiveSheet.Range[2,2];
spreadsheetControl.ActiveGrid.SetCellValue(range, "Syncfusion");
spreadsheetControl.ActiveGrid.InvalidateCell(2,2);
Refer to the following screenshot.
Saving an Excel sheet
You can save Excel workbooks using the Save() method. If the workbook already exists in the system drive, then it will be saved in the same location. Otherwise, the Save dialog box will open to let you save the workbook in a specified location.
Refer to the following code snippet.
/// Save the changes made in the file. If the file is not created yet, then it prompts to enter the filename to save.
spreadsheetControl.Save();

/// Save the changes made in the file using the SaveFileDialog.
spreadsheetControl.SaveAs();
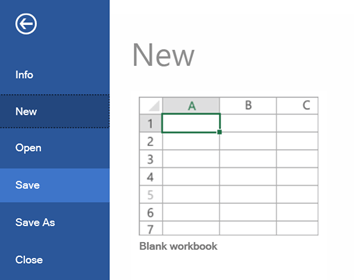
Also, you can save the Excel files using Save or SaveAs in the ribbon backstage.
GitHub reference
You can download the complete sample from Create, View, Edit, and Save Excel Files Using WPF Spreadsheet demo.
Conclusion
Thanks for reading! In this blog post, we gave a quick overview of how to create, view, edit, and save Excel files using the Syncfusion WPF Spreadsheet control. This control also supports hyperlinks, bookmarks, encryption, localization, cell formatting, and more. Try out these versatile features and share your feedback in the comments section of this blog post!
The Spreadsheet control is also available in our ASP.NET (Core, MVC, Web Forms), JavaScript, Angular, React, Vue, UWP, WinForms, and WPF platforms.
If you are an existing Syncfusion user, please download the latest version from the License and Downloads page and try the new features for yourself. Also, our NuGet packages are available on NuGet.org.
If you aren’t a customer yet, you can try our 30-day free trial to check out these features. Also, try our other demos from this GitHub repository.
You can also contact us through our support forums, Direct-Trac, or feedback portal. We are always happy to assist you!
Related blogs
- How to Interact with the WPF Scheduler Using a Keyboard
- Enjoy 30+ New, Elegant Palettes in WPF Theme Studio
- Add, Edit, and Delete Cloud Shapes in PDF Files with Ease in WPF
- Simple Steps to Design a Temperature Monitor Using WPF Radial Gauge
