
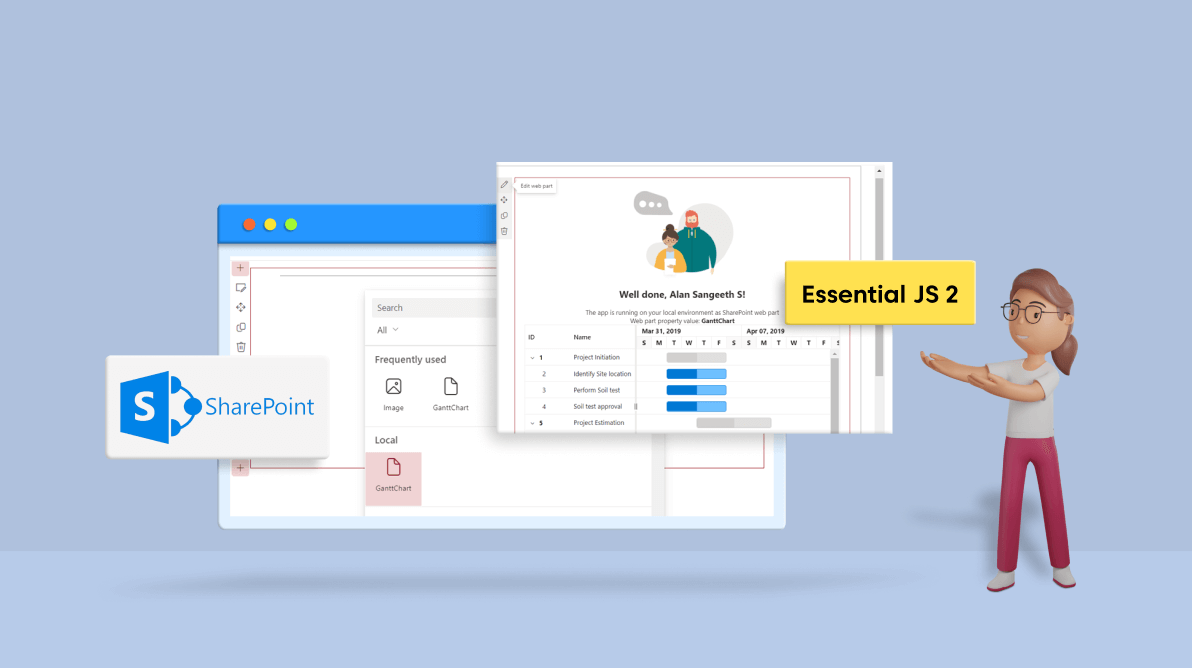
In this blog, we’ll see how to add the Syncfusion JavaScript Gantt Chart to SharePoint web parts and customize its functionalities with its properties pane.
SharePoint is a web-based platform that helps people in a team or organization work collaboratively. Through SharePoint, we can create websites to document team tasks or goals and securely manage files. It enhances an organization’s productivity by improving the workflow of people’s tasks toward the organization’s goals.
There are some built-in components in the web parts of the SharePoint Framework that help in building a webpage with a rich UI and functionalities. In addition to the built-in components, we can add any custom component to the SharePoint web parts.
Syncfusion’s JavaScript Gantt Chart is a project management tool that provides a Microsoft Project-like interface for scheduling and managing projects. Its intuitive user interface allows you to visually manage tasks, task relationships, and resources in a project.
Agenda:
- Prerequisites
- Creating a simple SharePoint project
- Manual configurations in SharePoint project
- Integrating Syncfusion JS 2 Gantt Chart
- Customization of Gantt Chart using properties pane
Prerequisites
- Node.JS–Use the most recent version (v16.15.0 is used in this blog).
- IDE–Any editor. We prefer to use Visual Studio Code.
Creating a simple SharePoint Framework project
First, let’s create a simple SharePoint Framework project.
The SharePoint Online SPFx Yeoman Generator helps us quickly create a SharePoint client-side solution project with the correct toolchain and project structure. To use this project generator, install the following NPM package dependencies globally:
You can install these dependencies and the generator with the following command.
npm install gulp-cli yo @microsoft/generator-SharePoint --global
Then, create the SharePoint project using the following Yeoman command.
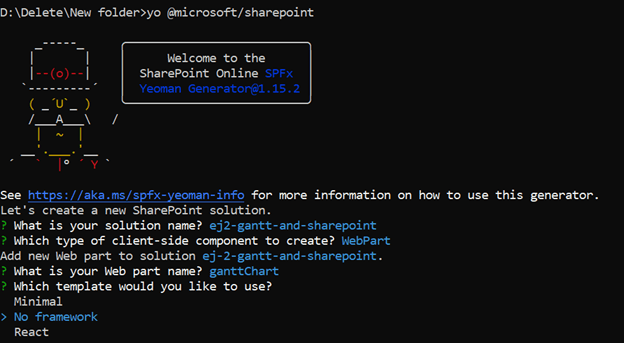
yo @microsoft/SharePoint
This command will ask you the following questions, and you can give corresponding answers:
- What is your solution name?
- Give any project name. For example: ej2-gant-and-SharePoint.
- Which type of client-side component to create?
- Choose WebPart.
- What is your Web part name?
- Give any name for your web part. For example: ganttChart.
- Which template would you like to use?
- Choose No framework using the arrow keys.
Refer to the following image.
 Now, we have created a simple SharePoint project.
Manual configurations in the SharePoint project
Next, do the following two manual configurations in the created SharePoint project.
- Trust SSL certificate to launch local webserver that uses HTTPS.
Create an SSL certificate and configure the development environment to trust the certificate by simply executing the following command.
gulp trust-dev-cert
- Update the project’s hosted workbench URL.
The default URL for the hosted workbench in a new project always points to an invalid URL. Change the URL to the URL of your SharePoint tenant site:
- Locate and open the file ./config/serve.json in your project.
- Then, locate the initialPage property in it. Change the URL to your SharePoint tenant site page’s URL. For example: https://yourtenant.SharePoint.com/_layouts/15/workbench.aspx.

The project is created and configured. Now, you can run it in the browser using the following command. The SharePoint tenant site page will be launched in the browser.
gulp serve
Integrating Syncfusion JavaScript Gantt Chart
Run the SharePoint tenant site in your local development environment. Follow these steps to integrate the Syncfusion JavaScript Gantt Chart in a web part of the SharePoint project:
Step 1: Install the @syncfusion/ej2 NPM package in your project using the following command.
npm install @syncfusion/ej2 --save
Step 2: Open the SharePoint app in Visual Studio Code or any IDE of your choice. Then, open the ~/src/webparts/ganttChart/GanttChartWebPart.ts file.
Step 3: Add the Syncfusion JavaScript Gantt Chart component stylesheet reference and import the Gantt module at the top of the GanttChartWebPart.ts file.
// import JavaScriptGantt
import { Gantt} from ‘@syncfusion/ej2-gantt’;

// add Syncfusion JavaScriptstyle reference from node_modules
require(‘../../../node_modules/@syncfusion/ej2/fluent.css’);
Step 4: Now, add the div element in the this.domElement.innerHTML file and initialize the Syncfusion JavaScript Gantt Chart in the render() method of the GanttChartWebPart class. Refer to the following code example.
Public render(): void {
this.domElement.innerHTML = `
<section class=”${styles.ganttChart}
${!!this.context.sdks.microsoftTeams ? styles.teams : ‘’}”>
…
<div id=”Gantt-${this.instanceId}”> </div>
</section>`;
let data: Object[] = [
{
TaskID: 1,
TaskName: ‘Project Initiation’,
StartDate: new Date(‘04/02/2019’),
EndDate: new Date(‘04/21/2019’),
subtasks: [
{ TaskID: 2, TaskName: ‘Identify Site location’, StartDate: new
Date(‘04/02/2019’), Duration: 4, Progress: 50 },
{ TaskID: 3, TaskName: ‘Perform Soil test’, StartDate: new Date(‘04/02/2019’), Duration: 4, Progress: 50 },
{ TaskID: 4, TaskName: ‘Soil test approval’, StartDate: new Date(‘04/02/2019’), Duration: 4 , Progress: 50 },
]
},
…
},
];
let gantt: Gantt = new Gantt({
dataSource: data,
taskFields: {
id: ‘TaskID’,
name: ‘TaskName’,
startDate: ‘StartDate’,
duration: ‘Duration’,
dependency: ‘Predecessor’,
progress: ‘Progress’,
child: ‘subtasks’,
},
});
gantt.appendTo(‘#Gantt-‘+this.instanceId);
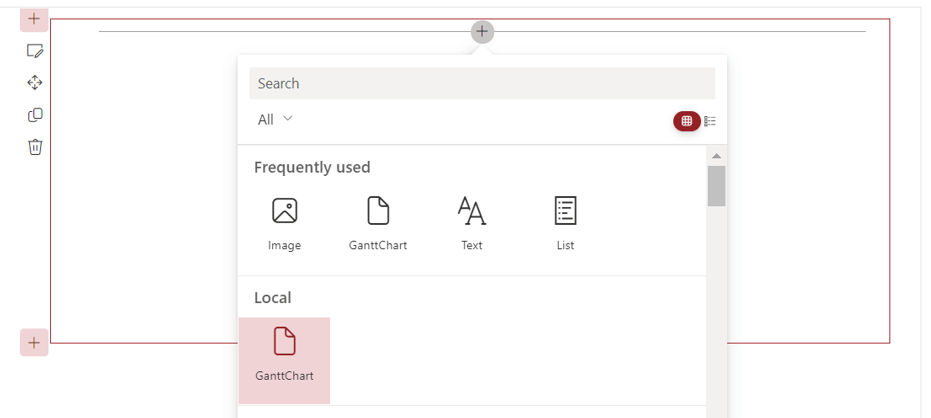
}Step 5: Then, run the app using the gulp serve command and click Add a new Web Part. It will open a pop-up.
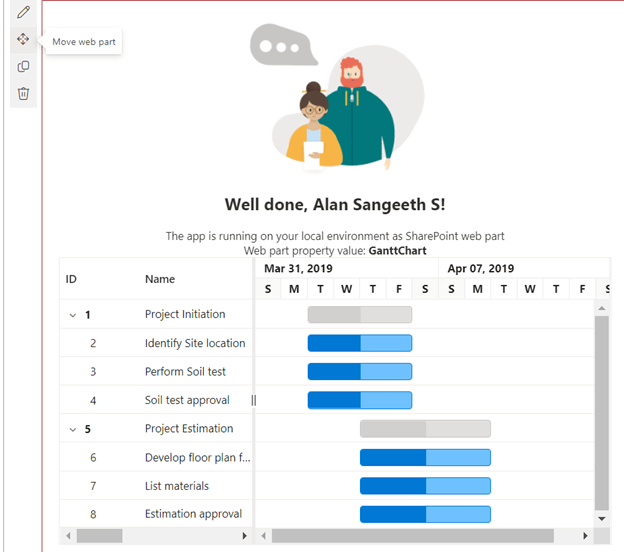
Step 6: In the pop-up, you can see the Gantt Chart integrated into the web part. Select GanttChart to use it in the SharePoint project. Refer to the following image.
 Finally, we have rendered the Syncfusion JavaScript Gantt Chart in the SharePoint framework client-side web part.
Customization of Gantt Chart using the properties pane
We have seen how to integrate the JavaScript Gantt Chart in the SharePoint project. Now, let’s see how to enable functionalities of the Gantt Chart using the SharePoint properties pane.
For example, consider the sorting functionality of the component. To enable the sorting feature, we need to add the allowSorting API and inject the Sort module.
Step 1: First, import the Sort module and inject it into the Gantt Chart before initializing the component in the render method of the GanttChartWebPart file.
// import JavaScriptGantt
import { Gantt, Sort } from ‘@syncfusion/ej2-gantt’;
…
Gantt.Inject(Sort);
Step 2: Now, add the allowSorting property to the IganttChartWebPartProps interface in the GanttChartWebPart file.
Export interface IganttChartWebPartProps {
  description: string;
  allowSorting: boolean;
}
Step 3: Then, add a checkbox field for sorting under the getPropertyPaneConfiguration() method in the pages collection. Refer to the following code example.
protected getPropertyPaneConfiguration(): IPropertyPaneConfiguration {
 return {
  pages: [
  {
     header: {
     description: strings.PropertyPaneDescription
  },
  groups: [
  {
    groupName: strings.BasicGroupName,
    groupFields: [
       …
       PropertyPaneCheckbox('allowSorting', {
       checked: this.properties.allowSorting,
       text: "Sorting in Gantt"
       }),
     ]
   }
   ]
   }
   ]
 };
}
Step 4: Finally, add the sorting API in the Gantt Chart initializing code.
Gantt.Inject(Sort);
let gantt: Gantt = new Gantt({
dataSource: data,
allowSorting: this.properties.allowSorting,
…
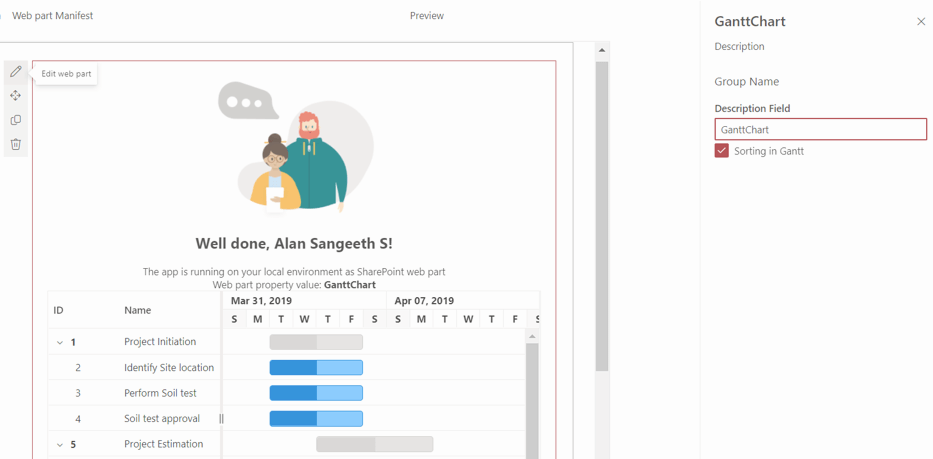
}Now, you can run the project and click the Edit Web Part icon to see the properties pane. You can dynamically enable and disable the sorting functionality in the Gantt Chart from the properties pane.
Refer to the following image.
Like this, you can customize the other functionalities of the JavaScript Gantt Chart with the SharePoint web parts properties pane.
GitHub reference
Check out the complete source code for Integrating JavaScript Gantt Chart with SharePoint in the GitHub repository.

Conclusion
Thanks for reading! Gantt Chart helps us to manage our projects effectively. Integrating Syncfusion’s JavaScript Gantt Chart into SharePoint web parts helps in further smoothing the workflow of your team or organization.
In upcoming blogs, we will see how to connect a data source from SharePoint lists to the Gantt Chart.
If you want to try the Gantt Chart component, you can download our free trial. You can also check our online demos and documentation for detailed explanations and the facts you need to proceed further.
Feel free to share your feedback or questions in the comments section. Also, you can contact us through our support forums, support portal, or feedback portal. We are always happy to assist you!
 No spam, just valuable updates.