

Cloud-based platforms are the present and future of app development. Microsoft SharePoint is one of the cloud-based, collaborative web platforms commonly used to create a firm’s website, manage and transfer files, secure files from being edited by unauthorized users, etc. These features enhance an organization’s productivity, reduce the workforce, improve the workflow, and save time.
In this blog post, we are going to learn step by step how to create a SharePoint Framework (SPFx) application with the Syncfusion JavaScript (Essential JS 2) library in it using VS Code.
Prerequisites
Set up development environment
First, create a client-side web part in the SharePoint Framework. To do so, please follow these steps:
Step 1: Create a new directory called ej2-sharepoint, open the command prompt from that directory, and install the required SharePoint client-side development tools with a global flag.
On Windows:
npm install -g yo gulp @microsoft/generator-sharepoint |
On OSX/LINUX:
sudo npm install -g yo gulp @microsoft/generator-sharepoint |
Note:The Yeoman SharePoint web part generator @microsoft/generator-sharepoint helps to create a SharePoint client-side project.
Step 2: Then, create a new client-side web part by running the following Yeoman SharePoint Generator command line.
yo @microsoft/sharepoint |
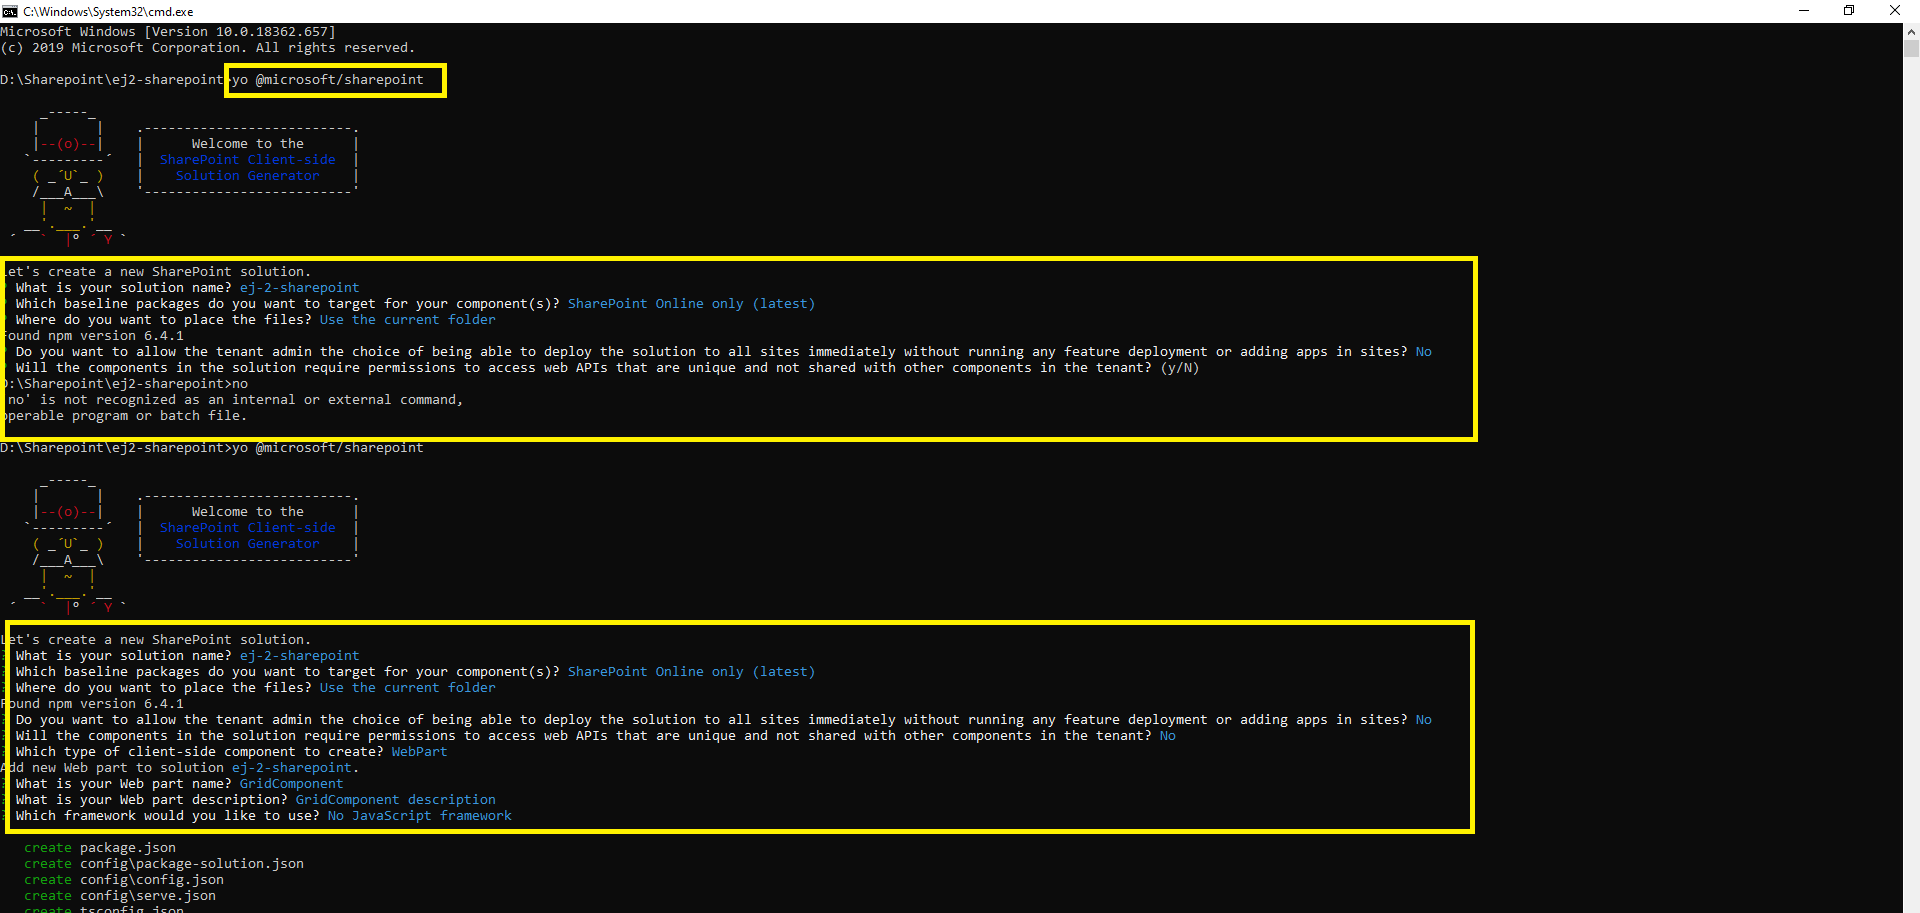
Step 3: Set up the following options after the previous command is executed:
- Accept the default ej-2-sharepointas your solution name and then select the Enter key.
- Choose SharePoint Online only (latest) and select Enter.
- ChooseUse the current folder to place the files in the current location and select Enter.
- You’ll be asked: Do you want to allow the tenant admin the choice of being able to deploy the solution to all sites immediately without running any feature deployment or adding apps in sites? (Y/N). Choose No.
- You’ll be asked: Will the components in the solution require permissions to access web APIs that are unique and not shared with other components in the tenant? (Y/N). Choose No.
- Choose WebPartas the client-side component type to be created.
Step 4: Next, it will ask for the specific information about the web part:
- Accept the GridComponent as your web part name, and then press the Enter key.
- Accept the default GridComponent descriptionas your web part description and select Enter.
- Accept the default No javascript frameworkas the framework and select Enter.
Please refer to the following screenshot for clear information.
 After configuring this setup, the Yeoman generator will create the SharePoint client-side web part in the ej2-sharepoint folder and install the required default dependencies.
Configure Syncfusion JavaScript UI control in application
Step 1: Install the @syncfusion/ej2 npm package in the application using the following command line.
npm install @syncfusion/ej2 --save |
Step 2: Open the SharePoint application in Visual Studio Code and add the Syncfusion JavaScript Grid control script and styles in the ~/src/webparts/gridComponent/GridComponentWebPart.ts file.
- Import the Grid source and add the Syncfusion JavaScript style reference at the top of the file.
- Add the DIV element in this.domElement.innerHTML and initialize the Syncfusion JavaScript Grid in the render() method of the GridComponentWebPart class like in the following code example.
....
....


import styles from './GridComponentWebPart.module.scss';
import * as strings from 'GridComponentWebPartStrings';

// import Essential JS 2 Grid
import { Grid } from '@syncfusion/ej2-grids;

// add Syncfusion Essential JS 2 style reference from node_modules
require('../../../node_modules/@syncfusion/ej2/fabric.css');

....
....

export default class GridComponentWebPart extends BaseClientSideWebPart <IGridComponentWebPartProps> {

  public render(): void {
    this.domElement.innerHTML = `
      <div class="${ styles.gridComponent }">
            ....
            ....

        <!--HTML DIV element, which is going to render as Essential JS 2 Grid-->
        <div id="Grid"> </div>
        </div>`;

        // initialize data for grid
let data: Object[] = [
    {
        OrderID: 10248, ShipName: 'Vins et alcools Chevalier', ShipCity: 'Reims'
    },
    {
        OrderID: 10249, ShipName: 'Toms Spezialitäten', ShipCity: 'Münster'
    },
    {
        OrderID: 10250, ShipName: 'Hanari Carnes', ShipCity: 'Rio de Janeiro'
    }]

    // initialize grid control
    let grid: Grid = new Grid({
    dataSource: data});
    // render initialized grid
    grid.appendTo('#Grid');
    }

    ....
    ....

}
Step 3: Run the application using the following command line, and then the Syncfusion JavaScript Grid control will render in your web browser.
gulp serve |
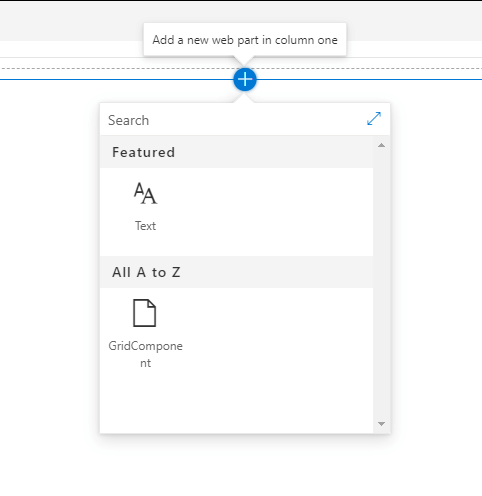
Step 4: Click the Add a new web part in column one button like in the following screenshot.
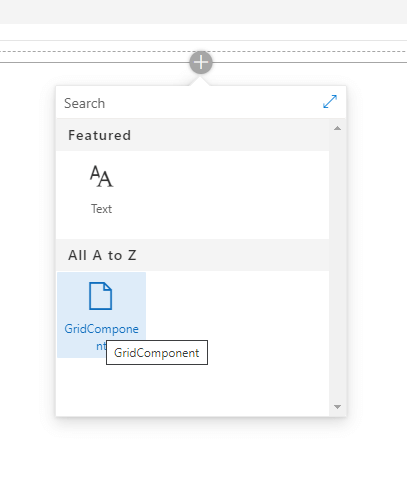
Step 5: Select the GridComponent web part as shown in the following screenshot.
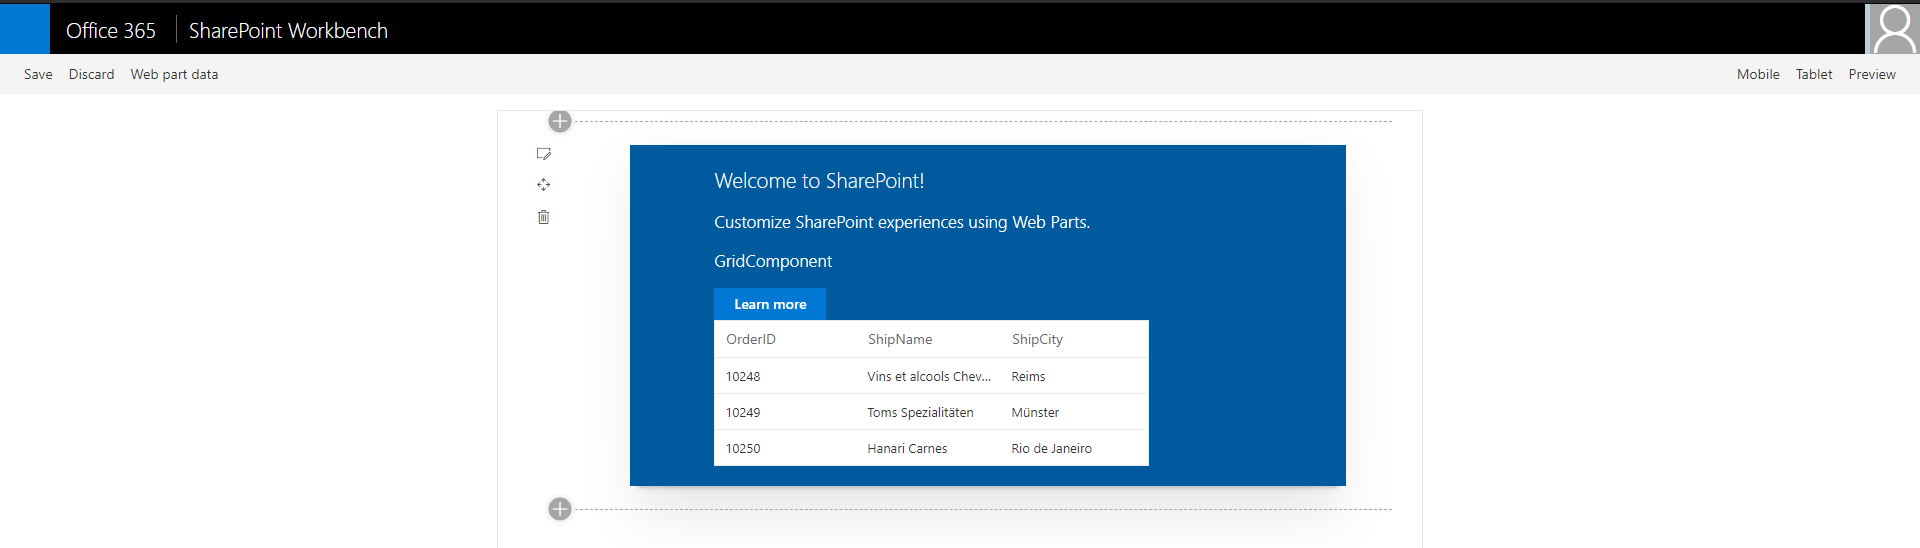
Finally, the Syncfusion JavaScript Grid control is rendered in your SharePoint Framework client-side web part.
 You can easily access the Essential JS 2 library through the custom SharePoint ButtonComponent.
You can also download this complete project from this GitHub repository.
Conclusion
In this blog, we learned the steps to configure Essential JS 2 in your SharePoint Framework application. For more information, you can also refer to this documentation page. The same procedure can be followed to include any other Essential JS 2 control in an SPFx application.
Syncfusion has over 65 high-performance, lightweight, modular, and responsive UI components in a single package for JavaScript. All these components are available in other frameworks:
If you’re already a Syncfusion user, you can download the product setup from our website. Otherwise, you can download a free, 30-day trial here.
If you wish to send us feedback, please use the comments section below. If you would like to submit any questions, please feel free to contact us through our support forum, Direct-Trac, or feedback portal. We are always happy to assist you!
 No spam, just valuable updates.
Comments (1)
How to connect SharePoint list data, Can you add example as well?