
“A man who does not think and plan long ahead will find trouble at his door.”
― Confucius, Chinese philosopher
To plan for a project perfectly, we should know the availability of the employees needed to implement it. The Syncfusion Scheduler control provides all the functionalities we need, helping us develop a WPF application to create a roster scheduler view.
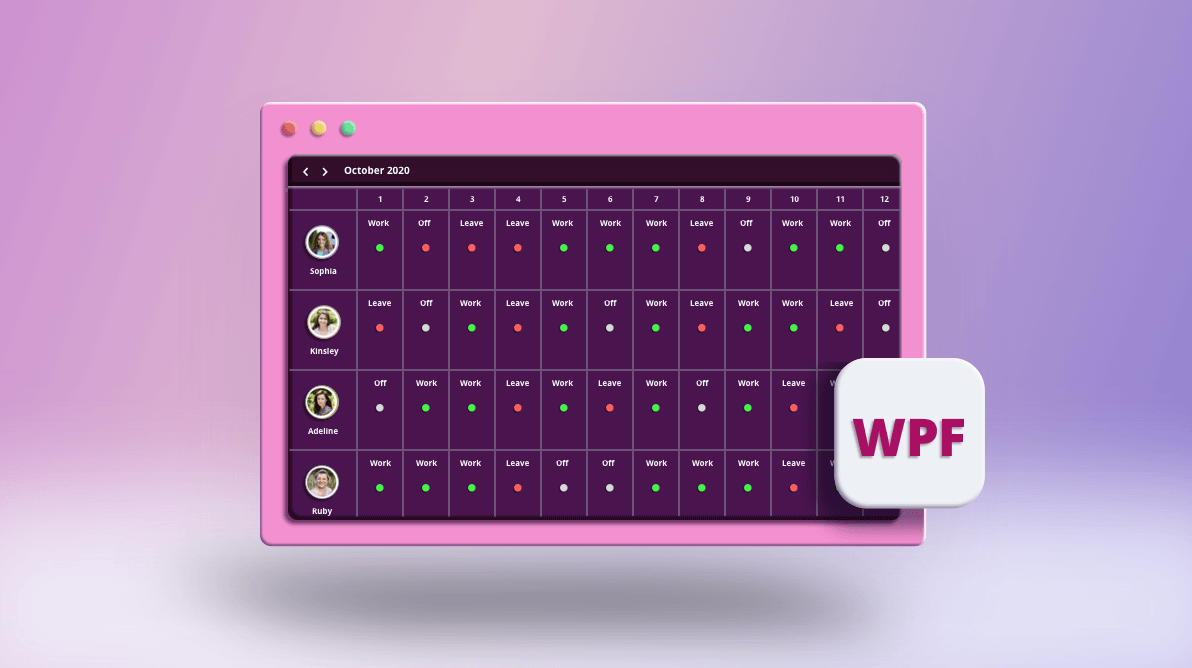
In this blog, we are going to learn how to quickly create a roster scheduler view using the WPF Scheduler control. It will allow you to track the availability of employees in any given time period. The following screenshot shows the output of the application we are going to develop.
Creating a roster scheduler
Follow these steps to create a roster scheduler view in your WPF application:
Step 1: Follow the getting started documentation to create a WPF application and add the SfScheduler control to it.
Step 2: Make the following property changes in the add instance of SfScheduler:
- Set the Scheduler ViewType property as TimelineMonth.
- Add the resource data and bind it to the Scheduler using the ResourceCollection property.
- Enable the resource view by setting the ResourceGroupType property as Resource.
Refer to the following code example.
<syncfusion:SfScheduler
    ViewType="TimelineMonth"
    ResourceGroupType="Resource"
    ItemsSource="{Binding Events}"
    ResourceCollection="{Binding Employees}">
Step 3: Customize the appearance of the appointments by using AppointmentTemplate, as explained in the following code example.
<syncfusion:SfScheduler.TimelineViewSettings>
   <syncfusion:TimelineViewSettings>
        <syncfusion:TimelineViewSettings.AppointmentTemplate>
            <DataTemplate>
                 <Grid>
                     <Label Foreground="Black" FontWeight="Bold" Content="{Binding Subject}" Grid.Row="0" HorizontalContentAlignment="Center" VerticalContentAlignment="Top"/>
                     <Border Background="{Binding AppointmentBackground}" CornerRadius="5" Height="10" Width="10" HorizontalAlignment="Center" VerticalAlignment="Center" />
                 </Grid>
            </DataTemplate>
        </syncfusion:TimelineViewSettings.AppointmentTemplate>
   </syncfusion:TimelineViewSettings>
 </syncfusion:SfScheduler.TimelineViewSettings>
Step 4: Make the following property changes in TimelineViewSettings:
- Using the ViewHeaderDateFormat property, customize the view header date format as required.
- The default visible resource count is 3, but you can customize it by using the VisibleResourceCount property.
Refer to the following code example.
scheduler.TimelineViewSettings.ViewHeaderDateFormat = "dd";
scheduler.TimelineViewSettings.VisibleResourceCount = 5;
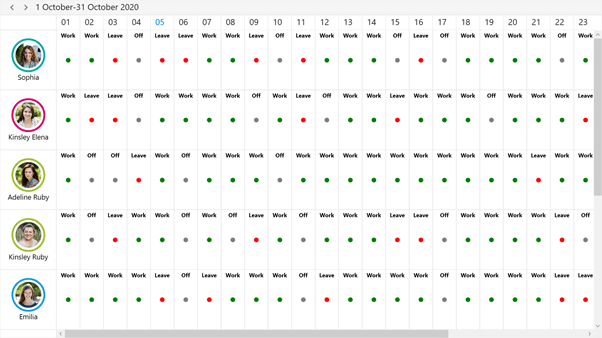
Output

GitHub Reference: The sample can be downloaded from this GitHub location.
Conclusion
I hope you now have a clear idea of how to create a roster scheduler view using Syncfusion’s WPF Scheduler control. The features in this control help you to reduce your workload and save time while allocating employees for a particular task. This control is also available in our Xamarin, UWP, WinForms, Blazor, ASP.NET (Core, MVC, and Web Forms), JavaScript, Angular, React, and Vue platforms.
If you are currently a Syncfusion user, please download the latest version from the License and Downloads page and try the new features for yourself. Also, our NuGet packages are available on NuGet.org.
If you aren’t a customer yet, you can try our 30-day free trial to check out these features. Also, try our other samples from this GitHub location.
Feel free to share your feedback or questions in the comments section below. You can also contact us through our support forums, Direct-Trac, or feedback portal. We are always happy to assist you.


 No spam, just valuable updates.