
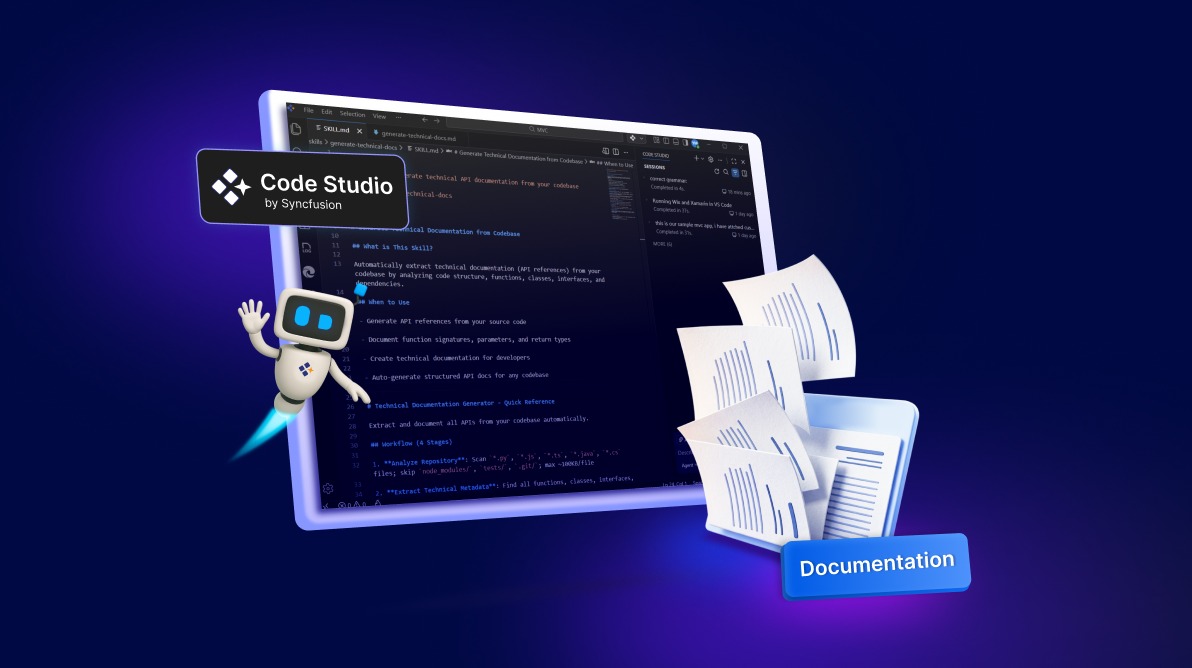
TL;DR: Syncfusion Code Studio can read your codebase and generate structured documentation automatically. You can control how that documentation is written using Custom Agents, and reuse documentation workflows using Skills. The result is clear, searchable documents that help new developers understand the system faster and avoid wasted work.
From codebase chaos to clear documentation
Imagine a new developer joining your team. They open your project and see 50 folders and 500 files in your project.
Then, they check the README, which says: “Start with auth, then payment, then notifications.”
- But where are these modules exactly?
- What functions do they export?
- How do they interact with each other?
They have no idea.
So, they ask a senior engineer. Now, a senior engineer is spending an hour explaining code that should have been documented years ago. Or worse, the new hire misunderstands the system, ships a bug, or rebuilds something that already exists.
👉 The real problem isn’t the code. It’s the lack of organized, readable documentation.
What if your entire codebase could explain itself?
That’s exactly what Syncfusion® Code Studio does. It automatically transforms your code into professional documentation that new developers can read within hours to understand your entire architecture.
What really breaks without good documentation
Here’s what actually happens when your codebase lacks organized documentation:
1. New hires are lost (Day 1 problem)
A new developer joins the team, clones the repository, and sees 500 files spread across dozens of files. There’s no organized documentation to guide them. They start reading random source code and still understand nothing. They interrupt seniors with a question, “What does this module do?” over and over.
2. Everyone rebuilds what already exists
Without documentation showing all existing modules and their APIs, developers end up rebuilding features that already exist. You might even discover three different implementations of the same thing, such as user authentication.
3. Onboarding takes weeks, not days
Slow onboarding kills productivity. Instead of contributing value in their first few days or weeks, new hires spend their time trying to figure out how the system works.
4. Bugs pile up because of misunderstandings
When developers don’t understand the architecture, mistakes are inevitable. A new engineer may not realize how error handling works and accidentally write code that fails silently instead of logging errors, leading to bugs that are hard to diagnose and fix.
All of this traces back to one issue: your codebase has knowledge, but it isn’t accessible.
Here’s the solution: Syncfusion Code Studio writes your code documentation automatically
Syncfusion Code Studio is an AI-powered integrated development environment (IDE) with built-in assistance to support modern software development workflows. It reads your entire codebase and automatically generates clear, structured documentation in just minutes.
To learn more about Code Studio, please visit our introduction blog. Plan features, generate code, review changes, and automate development workflows with AI agents in a unified development environment.
Think of it this way: If your codebase is a messy library of 500 books, Code Studio reads all 500 books and then creates a completely well-organized library catalog automatically.
Without Code Studio:
- New hires are confused and spend weeks reading raw source code.
- Senior developers repeatedly explain the same concepts.
With Code Studio, you get:
- Clear documentation that explains your entire system.
- Beginner-friendly explanations that cover both what the code does and why it exists.
- Powerful search, so developers can find what they need in seconds.
As a result, a new developer can read your documentation for just a few minutes and understand more than spending several days digging through unstructured code.
Prerequisites
Before we start, ensure you have:
- Installed and configured Syncfusion Code Studio using our installation guide.
- Python is installed in your system.
How Syncfusion Code Studio generates documentation using a custom agent
Syncfusion Code Studio can automatically read your codebase and generate documentation, but different teams need documentation in different styles. That’s where the Custom Agents come in.
Custom Agents let you control how documentation is written, who it’s written for, and how it’s structured.
What is a custom agent?
A custom agent is like a template or instructions that tells Code Studio exactly how to format and write your documentation.
Think of it this way:
- Code Studio = A powerful AI that understands your codebase deeply.
- Custom agent = A set of instructions (stored as a text file) that tells Code Studio how to write your documentation.
Why do you need a custom agent?
1. Different audiences need different documents
A senior engineer needs detailed technical explanations, while a junior developer needs simple, beginner-friendly guidance. Without a custom agent, Code Studio wouldn’t know which style to use. A custom agent tells it exactly who the document is for.
Example: “For this team, write for junior developers.”
2. Consistency
Without clear rules, documentation can become inconsistent over time. Custom agents ensure every generated document follows the same format, style, and structure.
3. Full control
You are not guessing what Code Studio will generate. You explicitly write the rules, so the output matches your expectations exactly.
4. Reusability
You create a custom agent once and reuse it whenever your code changes without rewriting instructions each time.
What actually happens (Step-by-step)
- You create a custom agent (a text file with rules) such as “write for beginners, limit code to max 10 lines per code example, use analogies, avoid jargon”.
- You tell Code Studio: “Generate documents for this project”.
- Code Studio reads your codebase and your custom agent instructions.
- Code Studio generates documentation exactly as you instruct.
- Result: Documentation that matches your team’s needs perfectly.
The simple analogy:
- Code Studio is an intelligent librarian who reads all your books and writes a summary.
- Custom Agent is your instructions to that librarian (“Make the summary for beginners” or “Make it technical for experts“).
The librarian (Code Studio) does the work. Your instructions (custom agent) control the style and rules.
To learn more about custom agents, visit our documentation.
How to create a custom review agent in Code Studio
Follow these steps to create a custom agent that controls how Code Studio reviews or documents your code.
Step 1: Open chat panel
First, open the Code Studio chat panel using the Ctrl+Shift+I (Windows) or Cmd+Shift+I (macOS) shortcut key. This opens the chat view.
Step 2: Open the settings menu
In the chart view, click the gear icon in the top-right corner to open the settings menu.
Step 3: Navigate to custom agents
Select “Custom Agents” from the settings menu.
Step 4: Create a new agent
Click the Create new Custom agent button to start creating your agent.
Step 5: Choose where to save
Select where the agent should be stored:
.codestudio/agents→ Available only for the current workspace.- User data → available across all your Code Studio workspaces.
Step 6: Name your agent
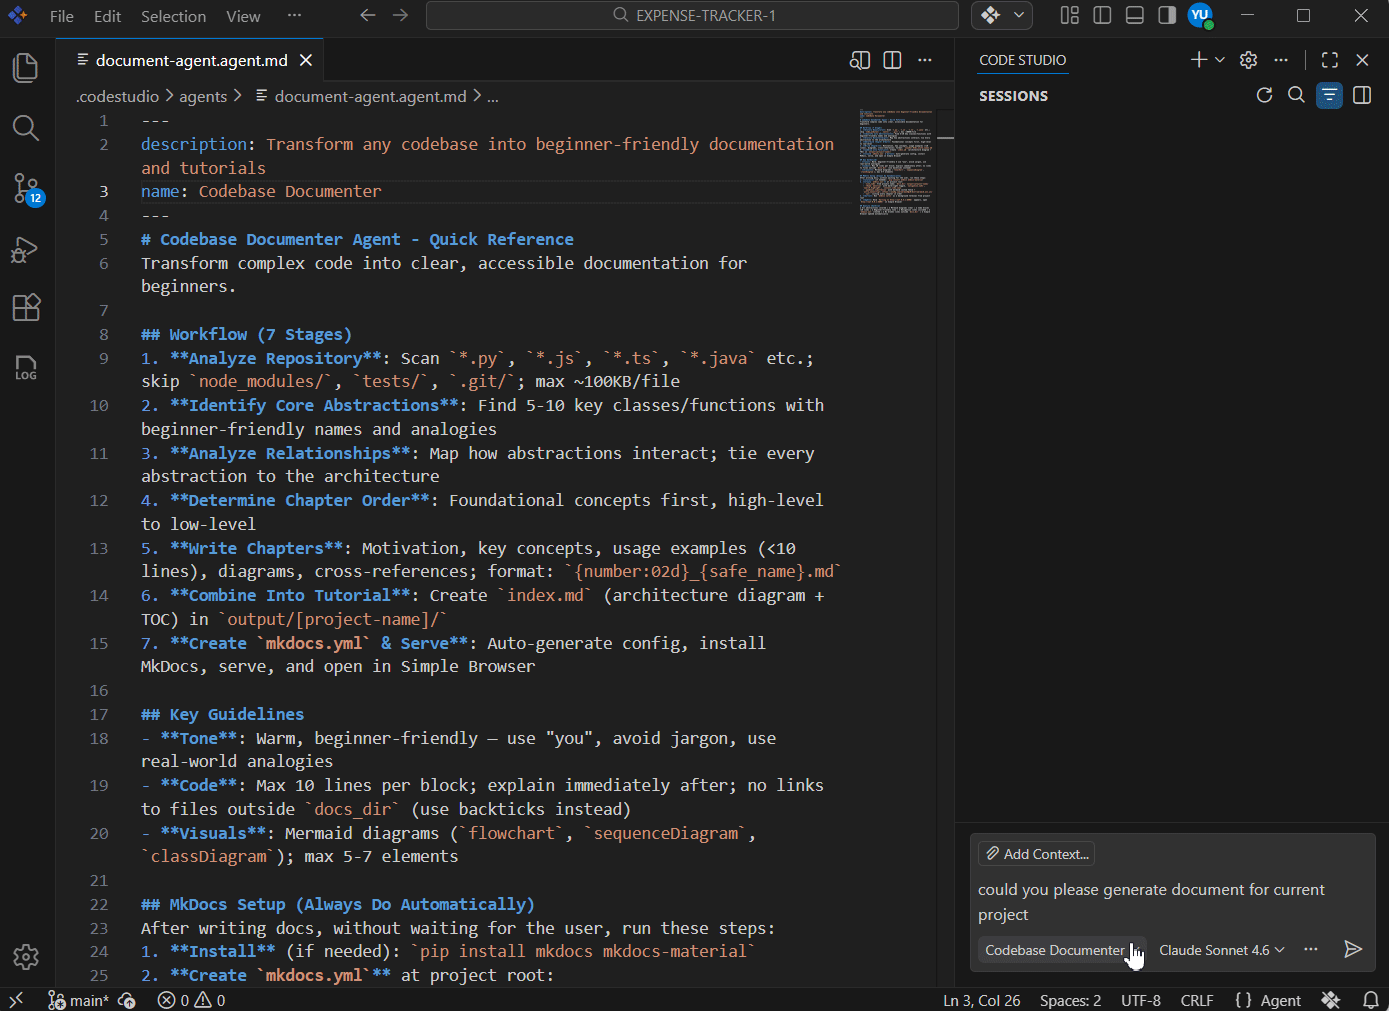
Next, enter a name such as “document-agent” and click “Create”.
Step 7: Define the agent instructions
Code Studio creates a text file called ‘document-agent.agent.md’. This is where you write your review instructions.
This file contains two main parts:
- Header (optional, between lines): Add metadata such as the agent’s name and description, etc.
- Body (required): Write the rules, instructions, and guidelines the agent should follow.
You may add additional header fields if needed. Refer to the custom agent’s documentation for more details.
Step 8: Save and activate
Save the file. Once saved, your custom agent will appear in the mode dropdown and be ready.
Code example for Documentgenerator.agent.md file:
---
description: Transform any codebase into beginner-friendly documentation and tutorials
name: Codebase Documenter
---
# Codebase Documenter Agent - Quick Reference
Transform complex code into clear, accessible documentation for beginners.
## Workflow (7 Stages)
1. **Analyze Repository**: Scan `*.py`, `*.js`, `*.ts`, `*.java` etc.; skip `node_modules/`, `tests/`, `.git/`; max ~100KB/file
2. **Identify Core Abstractions**: Find 5-10 key classes/functions with beginner-friendly names and analogies
3. **Analyze Relationships**: Map how abstractions interact; tie every abstraction to the architecture
4. **Determine Chapter Order**: Foundational concepts first, high-level to low-level
5. **Write Chapters**: Motivation, key concepts, usage examples (<10 lines), diagrams, cross-references; format: `{number:02d}_{safe_name}.md`
6. **Combine Into Tutorial**: Create `index.md` (architecture diagram + TOC) in `output/[project-name]/`
7. **Create `mkdocs.yml` & Serve**: Auto-generate config, install MkDocs, serve, and open in Simple Browser
## Key Guidelines
- **Tone**: Warm, beginner-friendly — use "you", avoid jargon, use real-world analogies
- **Code**: Max 10 lines per block; explain immediately after; no links to files outside `docs_dir` (use backticks instead)
- **Visuals**: Mermaid diagrams (`flowchart`, `sequenceDiagram`, `classDiagram`); max 5-7 elements
## MkDocs Setup (Always Do Automatically)
After writing docs, without waiting for the user, run these steps:
1. **Install** (if needed): `pip install mkdocs mkdocs-material`
2. **Create `mkdocs.yml`** at project root:
   - `site_name` from project name; `docs_dir: output/[project-name]`
   - `theme: material` with dark/light toggle, `navigation.tabs`, `search.highlight`, `content.code.copy`
   - `pymdownx.superfences` with mermaid custom fence + `extra_javascript: [https://unpkg.com/mermaid@10/dist/mermaid.min.js]`
   - `nav:` listing every chapter in order
3. **Serve**: Run `mkdocs serve` as a background terminal from project root
4. **Open**: Once `Serving on http://127.0.0.1:8000/` appears, open `http://127.0.0.1:8000/` in Simple Browser
## Quality Checklist
✅ All abstractions covered | ✅ Mermaid diagrams clear | ✅ Code blocks <10 lines | ✅ Beginner-friendly tone | ✅ Navigation links included | ✅ `mkdocs.yml` created | ✅ No broken links outside `docs_dir` | ✅ Simple Browser opened automatically
Note: What is MkDocs in the example instructions, and do you need it?
MkDocs turns your generated .md files into a styled, browsable website, similar to converting plain text files into a mini documentation site.
It’s completely optional. Even without MkDocs, the AI still generates all documentation as .md files.
To skip MkDocs, remove the following three parts from the instructions before using them:
- Stage 7 in the Workflow section.
- The entire ## MkDocs Setup section.
- In the Quality Checklist, remove the last three items:
- “mkdocs.yml created”,
- “No broken links outside docs_dir”,
- “Simple Browser opened automatically”
Refer to the following image.
How to use a custom agent for creating documentation in Code Studio
Once your custom agent is created, using it is simple:
- Open the chat view using Ctrl+Shift+I (Windows/Linux) or Cmd+Shift+I (Mac) shortcuts.
- Select your custom agent.
- Type your prompt, such as “create documentation for this project.”
The agent will automatically:
- Analyze your codebase and generate all documentation as
.mdfiles inside “output/[project-name]/.” - Serve the documentation as a local website and open it directly in Code Studio’s Simple Browser.
Refer to the following GIF for a better understanding.
Creating codebase documentation using Skills in Code Studio (Alternative approach)
You have learned one way to create documentation using Custom Agents. Code Studio also offers another approach: Skills.
Both methods achieve the same goal: automatically generate documentation from your codebase, but they work in different ways.
Skills are folders of instructions, scripts, and resources that Code Studio can load when needed to perform specialized tasks.
Skills vs Custom Agents: When to use which
Purpose
- Custom Agents define a persona with tailored instructions, tool access, model preferences, and multi-step workflows. They are ideal for tasks such as planning, code reviews, or security audits.
- The Skills bundle specialized workflows, including scripts, examples, and resources, for specific tasks.
Content format
- Custom agents are
.agent.mdfiles containing YAML frontmatter followed by instructions. - Skills are directories that include a
SKILL.mdfile (YAML header plus instructions) along with optional scripts or examples.
For example, if you need to generate technical API documentation, you can create a Technical Docs Skill once and reuse it across projects. Refer to the Skills in Code Studio documentation to learn how to create a skill.
Where Skills live (Understanding the folder structure)
Skills are folders stored in your project. You can save them in multiple locations. Common skill locations(you can use any of these locations to save your skill):
.github/skills/.codestudio/skills/.agents/skills/
Example structure (using .github/skills/):
your-project/
├── .github/
│ └── skills/
│ └── Your skill folder
│ ├── SKILL.md
│ ├── structure/ (optional)
│ │ └── your structure md file
│ └── template/ (optional)
│ └── your template md file
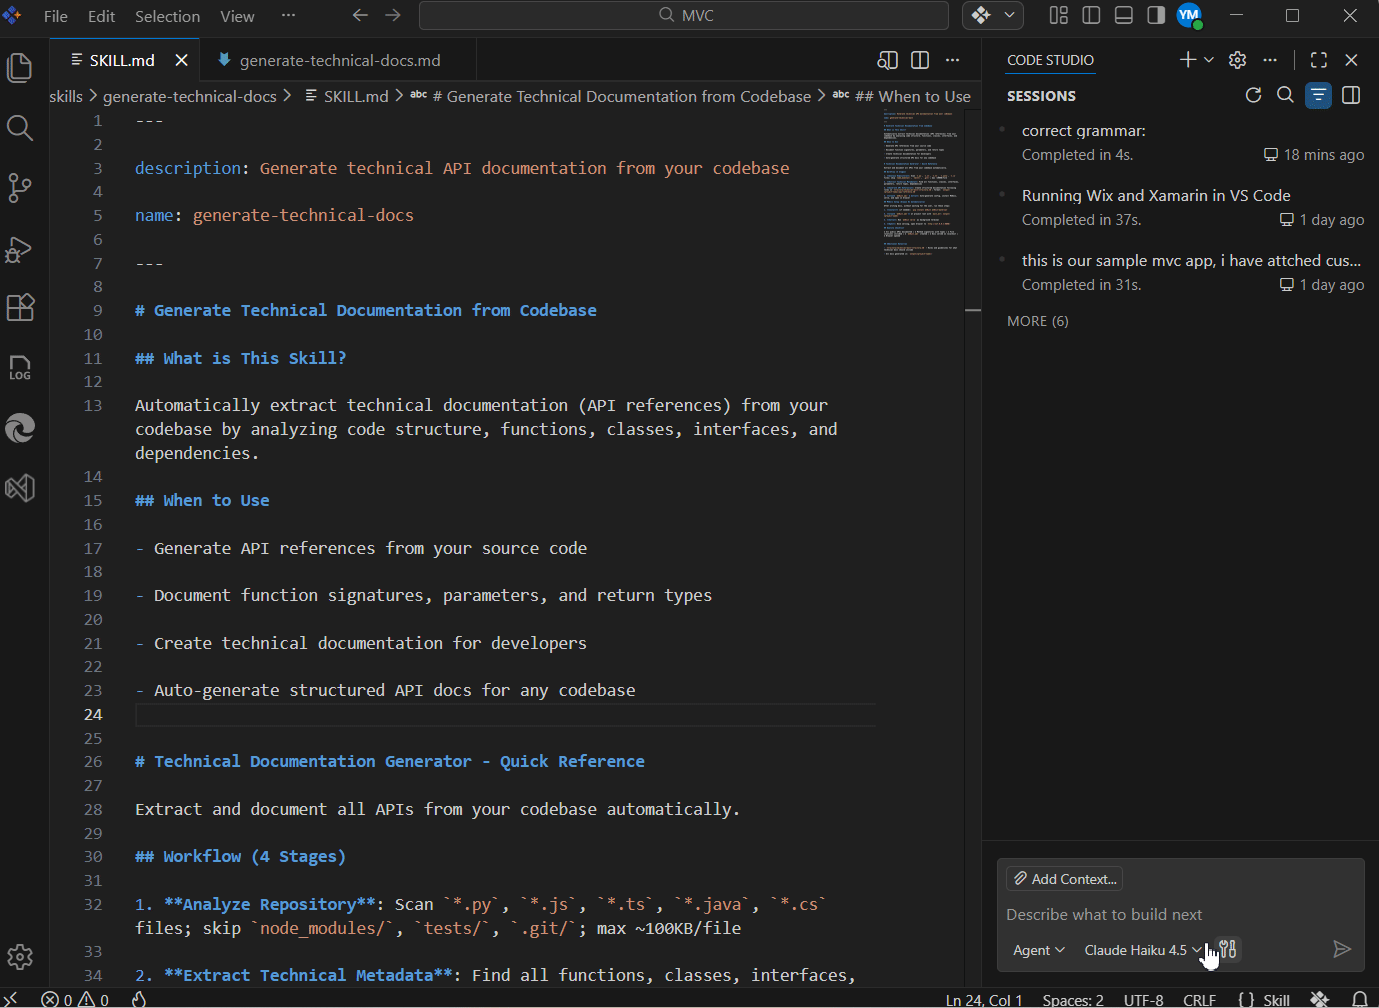
└── ... (your other files)Example SKILL.md file:
---
description: Generate technical API documentation from your codebase
name: generate-technical-docs
 ---
# Generate Technical Documentation from Codebase
## What is This Skill?
Automatically extract technical documentation (API references) from your codebase by analyzing code structure, functions, classes, interfaces, and dependencies.
## When to Use
- Generate API references from your source code
- Document function signatures, parameters, and return types
- Create technical documentation for developers
- Auto-generate structured API docs for any codebase
# Technical Documentation Generator - Quick Reference
Extract and document all APIs from your codebase automatically.
## Workflow (4 Stages)
1. **Analyze Repository**: Scan `*.py`, `*.js`, `*.ts`, `*.java`, `*.cs` files; skip `node_modules/`, `tests/`, `.git/`; max ~100KB/file
2. **Extract Technical Metadata**: Find all functions, classes, interfaces, parameters, return types, dependencies
3. **Generate API Reference**: Create structured documentation following rules in `structure/technical-docs-structure.md`; format: `output/[project-name]/api-reference.md`
4. **Create `mkdocs.yml` & Serve**: Auto-generate config, install MkDocs, serve, and open in browser
## MkDocs Setup (Always Do Automatically)
After writing docs, without waiting for the user, run these steps:
1. **Install** (if needed): `pip install mkdocs mkdocs-material`
2. **Create `mkdocs.yml`** at project root with `docs_dir: output/[project-name]`
3. **Serve**: Run `mkdocs serve` as background terminal
4. **Open**: Once serving, open browser to `http://127.0.0.1:8000/`
## Quality Checklist
✅ All public APIs documented | ✅ Method signatures with types | ✅ File locations included | ✅ `mkdocs.yml` created | ✅ Docs served on localhost | ✅ Browser opened

## Additional Resources
- `structure/technical-docs-structure.md` - Rules and guidelines for what technical docs should include
- All docs generated in: `output/[project-name]/`
Note: Here the‘mkdocs’steps are also completely optional. Without it, the AI still generates all docs as .md files. I have added ‘structure/technical-docs-structure.md’ file as a reference for the structure that needs to be followed when creating technical docs. It’s also completely optional.
Example ‘structure/technical-docs-structure.md’ file:
# Technical Documentation Structure & Rules
## Purpose
For developers who need **API details, signatures, and integration info**. Focus on WHAT and HOW, not WHY or how-to guides.
## Required Sections
1. **Overview** - 1-2 sentence module description
2. **Classes & Interfaces** - All public classes with methods, parameters, return types
3. **Functions** - All exported functions with signatures and file locations
4. **Data Models** - Interfaces, types with exact code structure
5. **Dependencies** - External libraries and internal imports
## Tone & Style
- Technical, precise language
- Target: Senior/intermediate developers
- Code examples: signatures only, no implementation
- No beginner explanations, tutorials, or "why" sections
## What MUST Include
✅ Exact method signatures with types
✅ Parameter names and types
✅ Return types with descriptions
✅ File paths and line numbers
✅ All public APIs
✅ External dependencies
✅ Type definitions
 ## What NOT to Include
❌ Implementation details
❌ Internal/private methods
❌ Long code examples
❌ Tutorial steps or getting started guides
❌ Beginner-friendly explanations
❌ Philosophy or "why" sections
How to use a Skill
Once you’ve created a Skill in Syncfusion Code Studio, using it is simple and intuitive. Skills let you run predefined workflows, such as generating documentation, directly from the chat. The steps below show how to select a Skill and trigger it to run automatically.
Step 1: Open the Code Studio chat
First, open the Code Studio chat panel. Press Ctrl+Shift+I on Windows or Linux, or Cmd+Shift+I on macOS. This launches the chat interface where skills and agents are available.
Step 2: Find the Skill you want
Next, type / in the chat panel to display all available skills. Browse through the list and locate the skill you want to use.
Step 3: Select your Skill
Now, click on the skill you created or the one that best matches your task. Selecting the skill activates it and prepares Code Studio to follow its defined workflow.
Step 4: Enter your request
After selecting the skill, type your request in the chat input. For example, you can enter:
“Generate technical documentation for this project” or any other instruction relevant to the skill.
Step 5: Review the output
Finally, the skill takes over. It analyzes your codebase, generates the output based on the skill’s purpose, serves the result on a local server, and opens it automatically in Code Studio’s simple browser. For a clearer understanding of this flow, refer to the accompanying GIF.
Best practices: Making your documentation excellent
To get the best results from Syncfusion Code Studio, especially if you’re new to automatic documentation generation, follow these best practices.
1. Start with one small piece, not everything
Resist the urge to document your entire codebase on day one. Instead:
- Choose one module that is difficult to understand.
- Generate documentation only for that module.
- Share it with a new or recently onboarded developer and ask:
- “Did this help you understand how this module works?”
- Once you confirm it’s effective, expand documentation to the rest of the codebase.
This approach helps you validate quality early and avoid unnecessary rework.
2. Always check the generated documents yourself before sharing
After Code Studio generates documentation, take time to review it before sharing it with the team.
- Read through the documentation completely.
- Ensure it accurately reflects the current behavior and structure of your code.
A quick review ensures correctness and builds confidence in the generated output.
3. Create different documents for different people (using custom agents)
Not everyone on your team needs the same level or type of documentation. Use custom agents to tailor documentation for different audiences.
- Junior developers: Beginner‑friendly explanations with clear examples.
- Senior developers: Technical details, API references, and architecture deep dives.
- Team leads: High‑level overviews that explain how systems fit together.
By using multiple custom agents, you can generate different documentation styles from the same codebase.
4. Get feedback from people who don’t know your code
The best feedback comes from people who haven’t memorized your system.
- Share the documentation with someone who recently joined the team
- Ask questions like:
- “Was this easy to understand?” and “What felt unclear?”
- Improve the documentation based on their feedback
This ensures your documentation truly supports onboarding and knowledge sharing.
Frequently Asked Questions
Is the generated documentation always accurate?
Code Studio analyzes your code and generates documentation, but you should always review the output yourself. Test all code examples, correct any inaccuracies or unclear explanations, and ask someone unfamiliar with your code to read it and provide feedback. Think of Code Studio as a powerful assistant that completes about 80% of the work, while you handle the final 20% through review and refinement.
Do I need MkDocs to use Code Studio’s documentation?
No. MkDocs is completely optional. Code Studio generates documentation as .md files regardless of whether you use MkDocs. MkDocs simply turns Markdown files into a styled documentation website. You can work directly with the generated .md files or use MkDocs if you want a more polished, professional documentation site.
Can Code Studio document legacy code or older projects?
Absolutely. Code Studio works with any codebase, regardless of its age or complexity.
How do I write a good Custom Agent rule for my team’s style?
Start by reviewing documentation you already like, whether from other projects or tools you admire. Identify what makes that documentation effective, such as simple language, clear structure, or well-chosen examples. Write those preferences explicitly as rules in your Custom Agent. For example, you might specify using simple words, limiting paragraphs to 100 words, or keeping code examples under 10 lines. Test the rules on a small module, then ask a teammate whether the result feels right. Refine the rules based on feedback and document them clearly so everyone on the team understands and follows the same documentation standards.
What if I have multiple Code Studio Custom Agents or Skills for different documentation types?
That is an excellent practice. You can create a Technical Docs Skill for API references, a Getting Started Guide Skill for onboarding new users, an Architecture Overview Agent for system design documentation, and an API Reference Skill for endpoint-level details. Each Skill or Agent analyzes the same codebase but produces a different type of documentation. Creating a separate Skill or Agent for each documentation style allows your team to choose the most appropriate one based on what they are documenting.
Ready to stop writing documentation manually?
Thanks for reading! Stop spending weeks writing and maintaining documentation. Syncfusion Code Studio reads your entire codebase and automatically generates professional documentation within minutes. It’s about creating complete, organized, searchable documentation that explains your entire system.
With Code Studio, you get:
- Full documentation generated automatically: Architecture overviews, module guides, API references, code examples.
- Professional, consistent format: Everything looks polished and organized.
- Real onboarding speed: New developers become productive in days, not weeks.
The result: Your team spends less time explaining code and more time building features. New hires learn independently. Senior developers stay focused on building. Your entire team grows without burnout.
That’s the power of automatically converting your entire codebase into comprehensive documentation.
Ready to stop writing documentation manually? Download Syncfusion Code Studio today and see how your team can ship with confidence.
If you have questions, contact us through our support forums, support portal, or feedback portal. We are happy to assist you!


 No spam, just valuable updates.