
TL;DR: Turn the Syncfusion Blazor File Manager into a smart file assistant. This guide shows two AI search strategies:
- Semantic Search: Find files even with vague or incomplete keywords using embeddings.
- Tag-Based Search: Auto-generate AI tags, save them, and search later.
You’ll learn setup, wiring (Program.cs, events), and the core search logic, step by step.
From guessing filenames to intelligent discovery
Let’s be honest, searching for files usually means guessing filenames, scrolling endlessly, and hoping you named things well months ago.
In this post, we’ll fix that.
You’ll see how to turn the Syncfusion® Blazor File Manager into an AI-powered search experience that understands what you mean, not just what you type. On top of that, we’ll add AI-generated smart tags so files stay easy to find long after you’ve forgotten where you saved them.
What you’ll build
By the end, your Blazor File Manager will:
- Understand natural language search.
- Match files using semantic similarity.
- Generate AI‑suggested tags for any file.
- Save and reuse tags for future searches.
- Work entirely inside your Blazor app.
No external search engine required.
Prerequisites
Before getting started, ensure you have the following:
- Visual Studio 2022 with ASP.NET and a web development environment.
- .NET 8 / .NET 9.0 SDK.
- An OpenAI or Azure OpenAI account to access AI models.
Create an Azure AI service
First, we need to create a new Azure OpenAI Service resource and generate an API key by following the instructions in the Microsoft documentation.
Create a Blazor app and configure AI
Now, we are going to create a Blazor web app and configure the AI services in it!
Step 1: Create a Blazor web app
Follow the instructions in the .NET Blazor tutorial or refer to the Syncfusion Blazor documentation to create a new Blazor Web app.
Step 2: Install Syncfusion Blazor File Manager and AI packages
Once the project is created, install the required Syncfusion and AI dependencies using the NuGet Package Manager. These packages are essential for building the File Manager and enabling AI-powered functionalities.
Step 3: Import the namespaces
Now, open the _Imports.razor file and import the necessary Syncfusion.Blazor namespaces so the components are accessible throughout the app.
@using Syncfusion.Blazor
@using Syncfusion.Blazor.FileManager
Step 4: Configure the Program.cs file
Now, register the Syncfusion Blazor service and AI service in the Program.cs file. For apps with WebAssembly or Auto (Server and WebAssembly) interactive render mode, ensure the Syncfusion Blazor is registered in both Program.cs files.
Register the API key as a singleton and configure it for both Syncfusion AI and Azure AI services, as shown below.
using FileManagerAI.Services;
using Microsoft.Extensions.AI;
using OpenAI;
using SmartComponents.LocalEmbeddings;
using Syncfusion.Blazor;
using Syncfusion.Blazor.AI;

var builder = WebApplication.CreateBuilder(args);
…
builder.Services. AddSyncfusionBlazor();

// Local Embeddings
builder.Services.AddSingleton<LocalEmbedder>();

// Open AI Service
string apiKey = "Api Key";
string deploymentName = "model-name";

OpenAIClient openAIClient = new OpenAIClient(apiKey);
IChatClient openAiChatClient = openAIClient.GetChatClient(deploymentName).AsIChatClient();
builder.Services.AddChatClient(openAiChatClient);

builder.Services.AddSingleton<SyncfusionAIService>();
builder.Services.AddSingleton<AzureAIService>();
#endregion

var app = builder.Build();

// Configure the HTTP request pipeline.
if (!app.Environment.IsDevelopment())
{
    app.UseExceptionHandler("/Error", createScopeForErrors: true);

    // The default HSTS value is 30 days. You may want to change this for production scenarios, see https://aka.ms/aspnetcore-hsts.
    app.UseHsts();
}
app.UseHttpsRedirection();
app.MapStaticAssets();
app.UseAntiforgery();
app.MapRazorComponents<App>()
    .AddInteractiveServerRenderMode();
app.Run();
Step 5: Add stylesheet and script resources
The Syncfusion theme stylesheets and scripts are delivered through NuGet packages using Static Web Assets.
To ensure proper rendering of the Blazor File Manager component, include the required references as follows:
- Add the theme stylesheet in the
<head>section. - Add the File Manager script at the end of the
<body>section in the_Layout.cshtmlfile for Blazor Server apps orApp.razorfile for Blazor WebAssembly apps.
<head>
      ....
      <link href="_content/Syncfusion.Blazor.Themes/bootstrap5.css" rel="stylesheet" />
</head>
....
<body>
      ....
      <script src="_content/Syncfusion.Blazor.FileManager/scripts/sf-filemanager.min.js" type="text/javascript"></script>
</body>
Creating the AI-powered Blazor File Manager
With the app and services configured, you can now add the Syncfusion Blazor File Manager component to your project.
Add the File Manager to a Razor file (for example, SmartFileManager.razor). Ensure that an appropriate interactive render mode, such as, InteractiveAuto is specified at the top of the file.
<SfFileManager TValue="FileManagerDirectoryContent" ID="@FileManagerId" @ref="FileManager" Height="500px">
        <FileManagerSearchSettings AllowSearchOnTyping=false></FileManagerSearchSettings>
        <FileManagerEvents TValue="FileManagerDirectoryContent" OnRead="OnReadAsync"  Searching="SearchingAsync"></FileManagerEvents>
 </SfFileManager>
Initialize File Manager services
In the razor.cs file named as SmartFileManager.razor.cs, initialize the File Manager service with the OnReadAsync function to handle AI functionalities.
protected override async Task OnInitializedAsync()
{
        await base.OnInitializedAsync();
        _ = Task.Run(() => FileManagerService.EmbedInitialFiles());
}

public async Task OnReadAsync(ReadEventArgs<FileManagerDirectoryContent> args)
{
        if (!Directory.Exists(Path.Combine(FileManagerService.DemoBaseDirectory, FileManagerId)))
        {
            FileManagerService.RootFolder(FileManagerId);
        }
        args.Response = await FileManagerService.GetFiles(args.Path, false, args.Folder.ToArray());
}
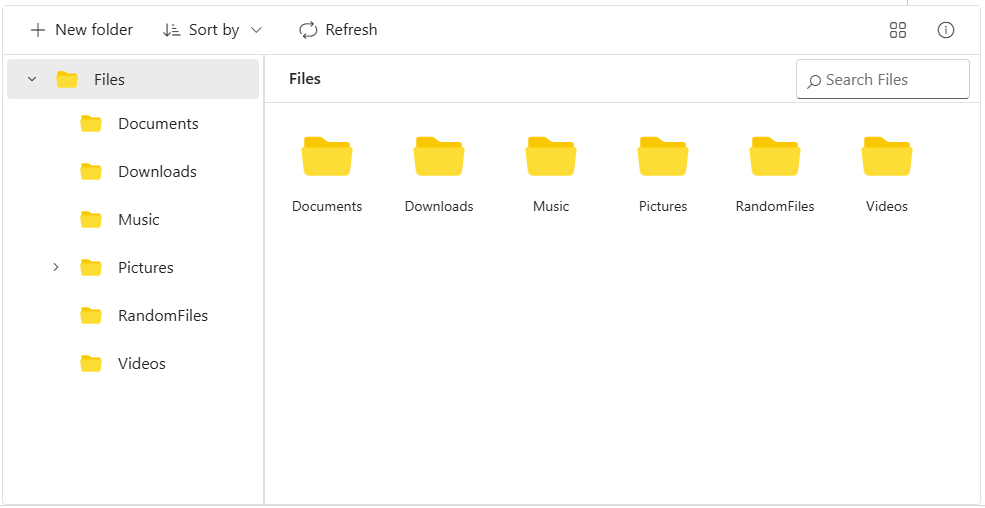
With the above configuration, the File Manager will be rendered with the loaded files and folders as shown below.
Adding AI search functionality to the Blazor File Manager
The Blazor File Manager provides two powerful AI-driven search options that enhance file discovery:
- Smart Search: Finds files even with incomplete or unclear keywords by understanding the context.
- Tag Search: Locates files based on tags added, making it easier to locate related items.
AI-powered smart search in Blazor File Manager
Smart search enables users to find files based on meaning rather than just exact file name matches. For example, users can type keywords in the Blazor File Manager’s search bar, and the system uses AI to match files that are semantically similar to the search query, even when the terms do not match exactly.
This process leverages local embeddings to compare the search query with file metadata and content, returning the most relevant results.
To improve similarity matching, refer to an updated local embeddings model URL in the project file, as shown below.
<ItemGroup>
	<PackageReference Include="SmartComponents.LocalEmbeddings" Version="0.1.0-preview10148" />
	<PackageReference Include="Microsoft.Extensions.AI.OpenAI" Version="9.8.0-preview.1.25412.6" />
	<PackageReference Include="Microsoft.Extensions.AI" Version="9.8.0" />
</ItemGroup>
Map the searching event
Now, enable the smart search feature by mapping the File Manager’s Searching event and integrating the AI search logic within this event.
<!-- SmartFileManager.razor -->
    <SfFileManager TValue="FileManagerDirectoryContent" ID="@FileManagerId" @ref="FileManager" Height="500px">
        <FileManagerSearchSettings AllowSearchOnTyping=false></FileManagerSearchSettings>
        <FileManagerEvents TValue="FileManagerDirectoryContent" Searching="SearchingAsync"></FileManagerEvents>
    </SfFileManager>
Then, define the SearchingAsync in the SmartFileManager.razor.cs file.
// SmartFileManager.razor.cs
public async Task SearchingAsync(SearchEventArgs<FileManagerDirectoryContent> args)
   {
      args.Response = await FileManagerService.Search(args.Path, args.SearchText, false, false);
    }
Implement smart search in the FileManagerService.cs file
Smart search functionality uses a local embedder to evaluate semantic similarity between files and the user’s search input. The embedder analyzes the entered search string to determine the file relevance and returns the most relevant matches as the search response. This approach eliminates the need for exact file name for character matches.
public async Task<FileManagerResponse<FileManagerDirectoryContent>> Search(string path, string searchString, bool showHiddenItems = false, bool caseSensitive = false, bool isTagSearch = false, params FileManagerDirectoryContent[] data)
{
// ... (existing code for path validation and initial setup) ...
if (!string.IsNullOrEmpty(searchString))
{
if (isTagSearch)
{
// ... (tag search logic) ...
}
else // Semantic search using embeddings
{
using var embedder = new LocalEmbedder();
foreach (var category in foundedFiles)
{
string key = category.FilterPath + category.Name;
try
{
if (!FileEmbeddings.ContainsKey(key))
{
FileEmbeddings.Add(key, embedder.Embed($"{category.Name}"));
}
}
catch
{
continue;
}
}
using var targetEmbedder = new LocalEmbedder();
var queryVector = targetEmbedder.Embed(searchString);
List<FileManagerDirectoryContent> filteredCategories = new List<FileManagerDirectoryContent>();
foreach (FileManagerDirectoryContent item in foundedFiles)
{
double similarity = LocalEmbedder.Similarity(FileEmbeddings[item.FilterPath + item.Name], queryVector);
if (similarity > 0.35)
{
filteredCategories.Add(item);
}
}
searchResponse.Files = filteredCategories;
}
}
else // No search string, return all founded files
{
searchResponse.Files = foundedFiles;
}
return await Task.FromResult(searchResponse);
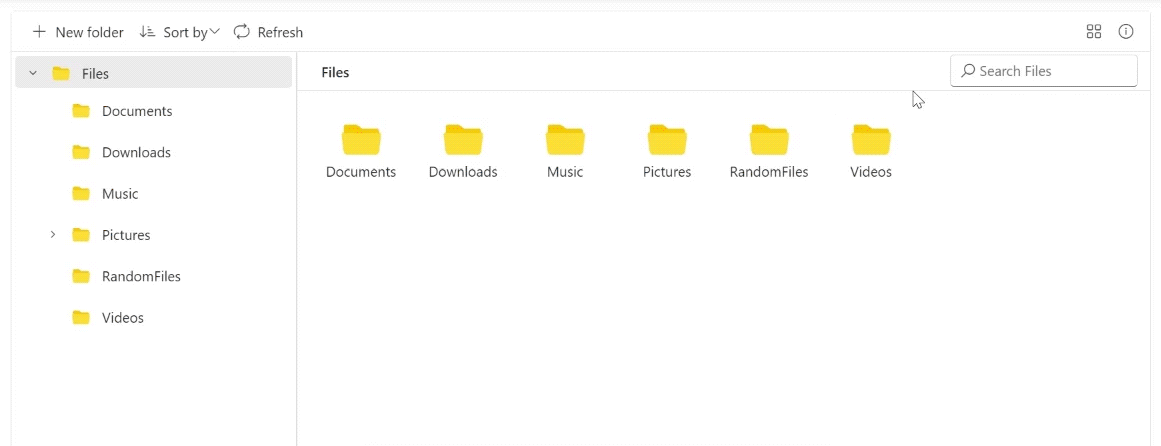
}Once a search term is entered in the Blazor File Manager’s search bar, files with higher semantic similarities are displayed as search results, as shown below.
AI-powered smart tag search in Blazor File Manager
Smart tag search allows users to quickly find files based on AI-generated tags, improving file organization and retrieval.
The FileManagerTagSearch.razor component includes the UI elements for displaying existing tags and AI-suggested tags using the SfChip component, along with buttons to generate and save AI tags.
<!-- FileManagerTagSearch.razor - Tags UI snippet -->
@if (isTag)
{
    <div id="tags" class="tags">
        <div id="tagContainer">
            <div class="title-container">
                <strong>Existing File Tags:</strong>
                <SfButton IconCss="e-icons e-close" CssClass="e-small" OnClick="CloseTagContainer"></SfButton>
            </div>
            <br />
            @if (fileTags.Length == 0)
            {
                <p>No tags available</p>
            }
            else
            {
                <div class="scrollable-container">
                    <SfChip EnableDelete="true" @ref="Chip">
                        <ChipEvents Deleted="@Deleted"></ChipEvents>
                        <ChipItems>
                            @foreach (var tag in fileTags)
                            {
                                <ChipItem Text="@tag"></ChipItem>
                            }
                        </ChipItems>
                    </SfChip>
                </div>
            }
            <br />
            <strong style="margin-bottom: 10px;">AI suggested File Tags:</strong>
            @if (aiTags.Length == 0)
            {
                <p>Click <strong>"Generate AI Tags"</strong> button to get suggested tags from AI.</p>
            }
            else
            {
                <div class="scrollable-container">
                    <SfChip EnableDelete="true" @ref="AIChip">
                        <ChipEvents Deleted="@AIDeleted"></ChipEvents>
                        <ChipItems>
                            @foreach (var tag in aiTags)
                            {
                                <ChipItem Text="@tag"></ChipItem>
                            }
                        </ChipItems>
                    </SfChip>
                </div>
            }
            <div class="button-container">
                <SfButton CssClass="e-btn e-outline e-primary" OnClick="SaveTags" Disabled=@isSave>Save AI Tags</SfButton>
                <SfButton CssClass="e-btn e-outline e-primary" OnClick="AddTags">Generate AI Tags</SfButton>
            </div>
        </div>
    </div>
}
The AddTags method in the FileManagerTagSearch.razor.cs file sends file content to the AI service to GetTagsFromAI, which then returns a list of suggested tags for the selected file. These tags are then stored via the FileManagerService.UpdateTagsToFile.
We can save these tags using the SaveTags method, which can be later utilized to search the files.
// FileManagerTagSearch.razor.cs - AddTags snippet
private async Task AddTags()
{
    var data = FileManager?.GetSelectedFiles();
    string filePath = FileManagerService.contentRootPath + data?.FirstOrDefault()?.FilterPath + data?.FirstOrDefault()?.Name;
    string fileContent = "File Named as " + data?.FirstOrDefault()?.Name;
    string tagsString = await GetTagsFromAI(fileContent);
    try
    {
        var tagsArray = Regex.Split(tagsString, @"\r\n|\n\n|\n")
        .Where(tag => !string.IsNullOrWhiteSpace(tag))
        .Select(tag => tag.Substring(tag.IndexOf(' ') + 1).Trim())
        .ToList();
        aiTags = tagsArray.Select(tag => new ChipItem { Text = tag }).ToList();
        isSave = aiTags.Count == 0 ? true : false;
    }
    catch (Exception e)
    {
        ErrorDetails er = new ErrorDetails();
        er.Message = e.Message.ToString();
        er.Code = "401";
        er.Message = "Need to clean the AI result";
    }
}

// save Tags

private void SaveTags()
{
    var data = FileManager?.GetSelectedFiles();
    List<string> tagsList = new List<string>();
    foreach (var item in AIChip?.Chips)
    {
        tagsList.Add(item.Text);
    }
    aiTags = tagsList.Select(tag => new ChipItem { Text = tag }).ToList();
    string filePath = FileManagerService.contentRootPath + data?.FirstOrDefault()?.FilterPath + data?.FirstOrDefault()?.Name;
    string fileContent = "File Named as " + data?.FirstOrDefault()?.Name;
    FileManagerService.UpdateTagsToFile(filePath, aiTags);
    fileTags = FileManagerService.GetTagsFromFile(filePath).Select(tag => new ChipItem { Text = tag }).ToList();
    aiTags = null;
    isSave = true;
}

// FileManagerService.cs - UpdateTagsToFile

public void UpdateTagsToFile(string filePath, string[] newTags)
{
    string adsPath = filePath + ":tags";
    string[] existingTags = GetTagsFromFile(filePath);
    var combinedTags = existingTags.Union(newTags).ToArray();
    using (FileStream fs = new FileStream(adsPath, FileMode.OpenOrCreate, FileAccess.Write))
    using (StreamWriter writer = new StreamWriter(fs))
    {
        string tagsString = string.Join(";", combinedTags);
        writer.Write(tagsString);
    }
}
// FileManagerService.cs - UpdateTagsToFile

public string[] GetTagsFromFile(string filePath)
{
    string adsPath = filePath + ":tags";
    if (File.Exists(adsPath))
    {
        using (FileStream fs = new FileStream(adsPath, FileMode.Open, FileAccess.Read))
        using (StreamReader reader = new StreamReader(fs))
        {
            string tagsString = reader.ReadToEnd();
            return tagsString.Split(new[] { ';' }, StringSplitOptions.RemoveEmptyEntries);
        }
    }
    return new string[0];
}
The tag search is handled through the searching event of the Blazor File Manager. The search action is performed from the File Manager service, and the response will be returned to the component.
public async Task SearchingAsync(SearchEventArgs<FileManagerDirectoryContent> args)
{
args.Response = await FileManagerService.Search(args.Path, args.SearchText, false, false, true);
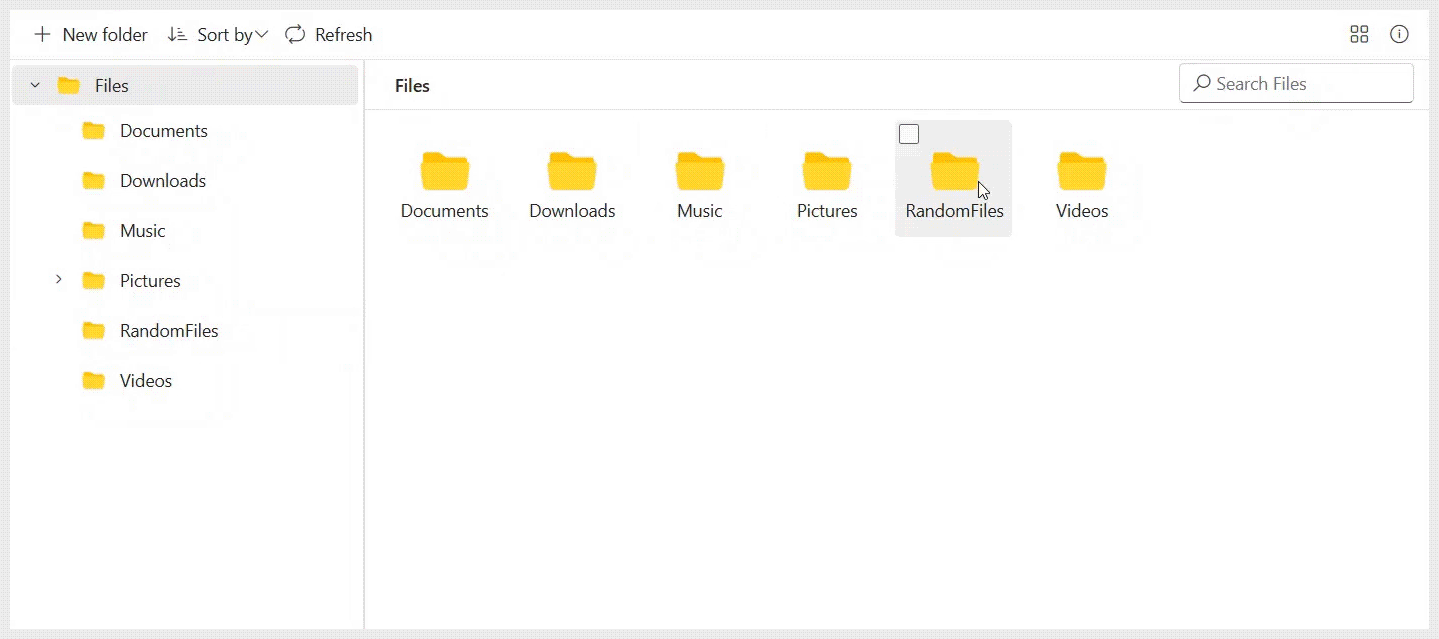
}Now, right-click on the file and choose the Manage Tags menu item; the existing tags will be listed in the right pane. If required, tags can be generated and saved for future search. Once saved, the tags can be entered in the search bar, and relevant files will be returned as a search result. This behavior is demonstrated in the GIF image below.
References
For more details, refer to the AI-powered smart search in the Blazor File Manager GitHub demo. Also, try out the live demos for tag search and smart file operations.

Frequently Asked Questions
How is AI smart search different from default file search?
AI smart search finds files by meaning, not exact filenames, returning relevant results even when keywords don’t match perfectly.
Is Azure OpenAI required for semantic search?
No. Semantic search uses local embeddings. Azure OpenAI is mainly used for generating AI‑suggested tags.
How does tag‑based search work?
AI generates tags for files, which you can save and later use as search terms to quickly locate related files.
Does AI search affect performance?
No. Embeddings are reused, so search remains fast and scalable, even with large file collections.
Can the AI search logic be customized?
Yes. You can adjust similarity thresholds, combine tag and semantic results, or extend the logic in the Searching event.
Time to switch to smart search
Thanks for reading! You’ve seen how easily AI can upgrade traditional file browsing into a modern discovery experience. If you’re building productivity apps with Blazor, this AI‑powered smart Blazor File Manager UI is a game‑changer.
👉 Try it out, explore the demo, and let your users stop guessing filenames forever.
And don’t forget to share your thoughts in the comments. We always love hearing from you.
If you’re already a Syncfusion user, you can download the latest setup from the license and downloads page. New to Syncfusion? Feel free to try it out with a free 30-day trial.
For any questions or assistance, reach out through our support forum, support portal, or feedback portal. We’re always happy to help!


 No spam, just valuable updates.