
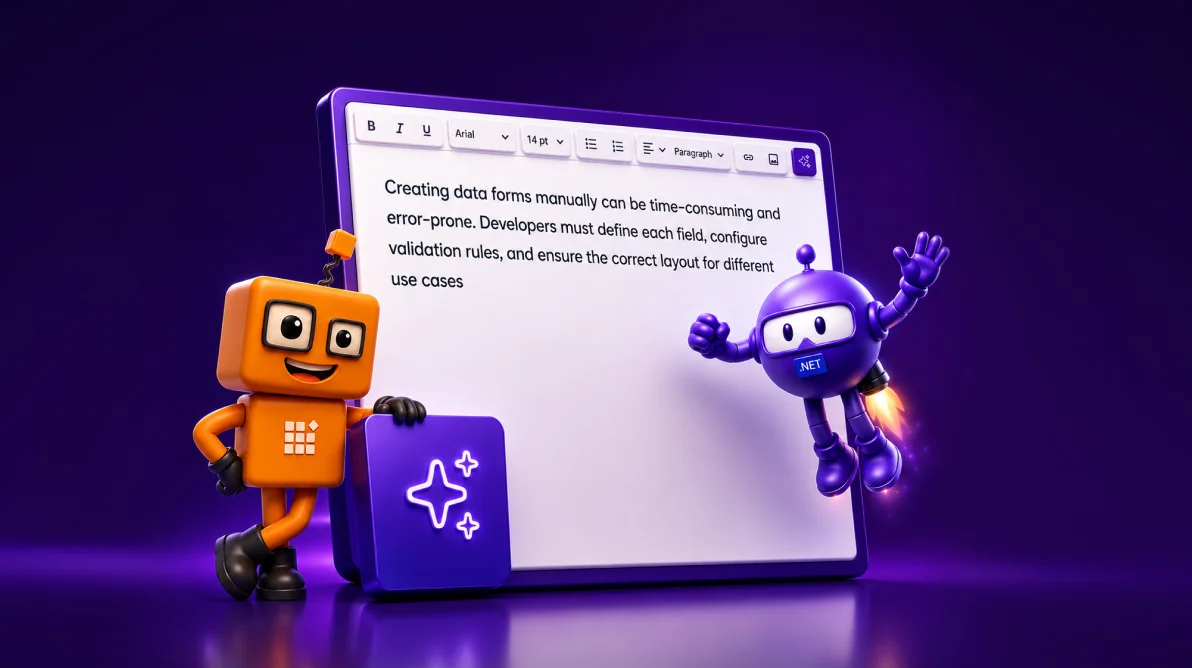
TL;DR: Discover how to build a smart Rich Text Editor using .NET MAUI AI AssistView. Empower your writing experience with built‑in AI capabilities such as paraphrasing, tone refinement, grammar correction, content expansion, and content shortening, all seamlessly integrated to help you write smarter and faster.
Enterprise applications generate large volumes of text, including incident reports, audit logs, customer communications, internal documentation, and policy content. As this volume grows, users increasingly expect smart writing assistance directly within their editing experience, such as grammar correction, paraphrasing, tone refinement, and content summarization.
Integrating AI into a rich text editor, however, is not just about calling a large language model (LLM). The real challenge is designing an experience that feels native, predictable, and maintainable without breaking content flow or architectural boundaries.
In this article, you’ll learn how to build a production‑ready, AI‑assisted rich text editor using .NET MAUI, Syncfusion® Rich Text Editor, and Syncfusion MAUI AI AssistView powered by Azure OpenAI. The solution keeps the editor as the single source of truth while using AssistView as a guided, action‑driven AI layer.
Why use AI AssistView instead of a custom chat UI?
Calling an LLM API is relatively straightforward. Delivering a reliable in‑app AI workflow is not.
Syncfusion AI AssistView is purpose‑built for contextual assistance inside applications rather than mimicking a generic chat interface. It provides:
- Seamless integration with Syncfusion controls, keeping editor content and AI state synchronized.
- A structured
action → response → applyworkflow, instead of free‑form chat. - Suggestion‑driven interactions, presenting AI results as product features rather than raw responses.
- Customizable templates for headers, actions, and suggestion items.
- Built‑in handling of real‑world scenarios, such as retries, errors, and transformation history.
This model works particularly well for enterprise editors where content ownership, traceability, and UX consistency matter.
How it works (end-to-end flow)
At a high level, the interaction model looks like this sequence:
- The user writes or edits content in
SfRichTextEditor. - The user selects an action in
AI AssistView(e.g., Shorten or Paraphraser). - The
ViewModelbuilds an AI prompt using the selected action and editor HTML. - The app calls Azure OpenAI through an application service layer.
- The AI response appears in
AI AssistView. - The user applies the result back to the editor with a single click.
This approach ensures that:
- The editor remains authoritative
- AI responses are explicit, reviewable, and reversible
- The user’s writing flow is never interrupted
Building an AI-powered Rich Text Editor
This section outlines how a rich text editor is extended with built‑in AI assistance.
Step 1: Set up the Rich Text Editor
Start by creating a new .NET MAUI project and configuring the Rich Text Editor control following the official setup documentation.
Add the SfRichTextEditor as the primary editing surface and bind its HTML content to your ViewModel:
<rte:SfRichTextEditor x:Name="richTextEditor"
                      ShowToolbar="True"
                      HtmlText="{Binding EditorHtml, Mode=TwoWay}" />
Binding the editor content as HTML allows you to preserve formatting while enabling AI‑driven transformations.
Step 2: Add the AI AssistView Interface
Next, integrate the Syncfusion AI AssistView by following the official documentation.
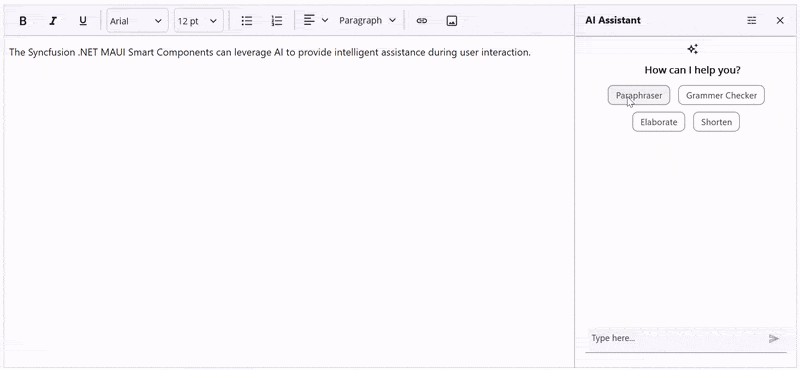
The Syncfusion AI AssistView component can be opened by clicking the button located at the top‑right corner of the Rich Text Editor. It provides intelligent suggestions, responses, and follow‑up actions to enhance user interaction.
A customizable header template featuring prompts such as “How can I help you?” further improves usability. Additionally, you can bind collections from your view model to enable dynamic, interactive AI‑driven conversations.
Here’s how you can do it in code:
<aiassistview:SfAIAssistView x:Name="AssistView"
ShowHeader="True"
IsVisible="False"
HeaderTemplate="{StaticResource headerTemplate}"
AssistItems="{Binding AssistItems}"
Suggestions="{Binding Suggestions}"
SuggestionItemSelectedCommand="{Binding SuggestionItemSelectedCommand}" >
</aiassistview:SfAIAssistView>
<DataTemplate x:Key="headerTemplate">
<StackLayout HorizontalOptions="Center"
Spacing="10"
Padding="10">
<Label Text=''
FontFamily="MauiSampleFontIcon"
FontSize="20"
HorizontalOptions="Center"
VerticalOptions="Center" />
<Label Text="How can I help you?"
FontAttributes="Bold"
FontSize="16"
VerticalOptions="Center" />
</StackLayout>
</DataTemplate> Step 3: Set up the Azure OpenAI connection
The AI layer is powered by Azure OpenAI. Initialize a secure connection using your endpoint, API key, and deployment name.
Here’s the Azure OpenAI implementation:
private const string endpoint = "YOUR_END_POINT_NAME";
internal const string deploymentName = "DEPLOYMENT_NAME";
private const string key = "API_KEY";

// Build chat client with endpoint, key, deployment
private void GetAzureOpenAIKernal()
{
    var client = new AzureOpenAIClient(
        new Uri(endpoint),
        new AzureKeyCredential(key))
        .AsChatClient(modelId: deploymentName);
    this.Client = client;
}
Once initialized and validated, the AI engine is ready to handle transformation requests. For detailed information on validation and service implementation, please refer to the AzureBaseService class available in the GitHub repository.
Step 4: Suggestion system and user interaction
Defining AI suggestions
The suggestion system exposes available AI actions that users can apply to editor content, such as:
- Paraphraser
- Grammar Checker
- Elaborate
- Shorten
Below is the code you need:
public AssistViewViewModel()
{
    _suggestions = new ObservableCollection<ISuggestion>
    {
        new AssistSuggestion { Text = "Paraphraser" },
        new AssistSuggestion { Text = "Grammer Checker" },
        new AssistSuggestion { Text = "Elaborate" },
        new AssistSuggestion { Text = "Shorten" }
    };

    this.SuggestionItemSelectedCommand = new Command(
        obj => _ = OnSuggestionTapCommandAsync(obj));
}
For paraphrasing, you can dynamically inject tone‑based options:
- Humanize: Conversational and relatable
- Professional: Business‑oriented tone
- Simple: Clear and easy to understand
- Academic: Structured and scholarly
Handling user actions
All suggestion interactions flow through a single command handler in the ViewModel. When a user selects a suggestion, the handler identifies the requested transformation and routes it through the appropriate processing pipeline.
Add this to your project:
private async Task OnSuggestionTapCommandAsync(object obj)
{
    var args = obj as SuggestionItemSelectedEventArgs;
    if (args == null || args.SelectedItem is not ISuggestion s)
        return;
    await InputProcessingAsync(s.Text).ConfigureAwait(true);
}- Paraphrasing actions return both a transformed response and follow‑up suggestions.
- Other actions return transformed content only.
This keeps interaction handling centralized and predictable.
Step 5: Applying AI results to the editor
When an AI request is triggered, the system:
- Builds a prompt using the editor’s content
- Calls Azure OpenAI through a dedicated service
- Formats the response
- Displays it as an
AssistViewwith an Apply action
private async Task GetResult(object inputQuery)
{
    await Task.Delay(1000).ConfigureAwait(true);
    AssistItem request = (AssistItem)inputQuery;
    if (request != null)
    {
        var userAIPrompt = GetUserAIPrompt(request.Text, EditorHtml);
        var response = await azureAIService!
            .GetResultsFromAI(userAIPrompt)
            .ConfigureAwait(true);
        response = response.Replace("\n", "<br>");
        AssistItem responseItem = new AssistItem()
        {
            Text = response,
            Suggestion = GetAcceptSuggestion()
            responseItem.RequestItem = inputQuery
        };
        this.AssistItems.Add(responseItem);
    }
}
Nothing is committed to the editor automatically. Users explicitly apply the result, ensuring full control and transparency over content changes.
Enterprise considerations
When moving this pattern into production, keep the following in mind:
- Performance: Send selected text instead of full documents when possible.
- Scalability: Add throttling and cancellation for rapid successive requests.
- Maintainability: Isolate AI calls in a dedicated service layer.
- Reliability: Handle empty responses and transient errors gracefully.
- Cost control: Reset prompt history and limit maximum output length.
GitHub reference
Explore the complete .NET MAUI AI‑assisted Rich Text Editor sample implementation on GitHub.
Frequently Asked Questions
Yes. You can show or hide commands using toolbar settings or build a fully custom toolbar that triggers editor commands programmatically.Can I customize the RichTextEditor toolbar?
The rich text editor supports basic offline editing. AI features require an active internet connection to access Azure OpenAI.Does this solution work offline?
Costs depend on Azure OpenAI usage (token‑based) and licensing. Usage varies by model and request volume.What are the cost considerations?
Yes. The architecture is provider‑agnostic. You can replace the Azure AI service with OpenAI, Claude, Gemini, or another compatible API.Can I use a different AI provider?
While there’s no hard limit, performance degrades with very large documents (What's the maximum content length the Rich Text Editor can handle?
<10,000 words). Consider pagination, lazy loading, or chunking for lengthy content.
By default, it renders plain text and HTML. To display Markdown, parse it to HTML using libraries like Can the AI AssistView display markdown-formatted responses?
Markdig before adding it to the AssistItem.Text.
Voice input isn’t built-in. Integrate platform-specific speech recognition APIs to convert voice to text, then send the text as a request to the AI AssistView.Does AI AssistView support voice input?

Conclusion
Thank you for reading! This article demonstrated how AI can be seamlessly integrated into a Syncfusion Rich Text Editor without disrupting the authoring experience. By combining a Syncfusion MAUI AI AssistView with a robust editor and a clean service architecture, you can deliver intelligent writing assistance that feels native, reliable, and enterprise‑ready.
Whether you’re building a documentation platform, content management system, or collaborative editor, this approach provides a solid foundation for AI‑powered authoring workflows.
If you’re a Syncfusion user, you can download the setup from the license and downloads page. Otherwise, you can download a free 30-day trial.
You can also contact us through our support forum, support portal, or feedback portal for queries. We are always happy to assist you!


 No spam, just valuable updates.