

TL;DR: Stop vibe‑coding and the refactor loop that follows. Spec‑Driven Development replaces vague prompting with clear specs, structured plans, and task‑based execution that AI can follow. With SpecKit and Syncfusion Code Studio working together, you get a reliable, spec‑first workflow that keeps development on track. The result: fewer surprises, faster reviews, cleaner architecture, and predictable, scalable output across teams.
Why AI‑assisted coding fails without specs and how Spec‑Driven Development (SSD) fixes it
AI tools are becoming a big part of how we build software. They can write code quickly, but they still depend on clear instructions. If we don’t explain what we want in a simple, structured way, the AI may generate pieces of code that work individually but don’t fit together well. Over time, this leads to projects that are harder to maintain, update, or debug.
Many teams also start coding too early. When you begin writing code before understanding the requirements, the design becomes fixed too soon. Any change later becomes slow and expensive, and sometimes entire sections need to be rewritten. That’s why it’s important to understand what you’re building and why before coding anything.
This is where SpecKit and Syncfusion® Code Studio come in. SpecKit guides you step‑by‑step to write your project rules, describe your feature clearly, plan how it should work, break it into tasks, and then let AI implement it safely. Whereas Syncfusion Code Studio brings all of this together in one place using its built‑in AI chat, making the whole process easier.
In this blog, we’ll show you how Spec‑Driven Development with AI replaces “vibe coding” with a structured spec‑first workflow, and we’ll demonstrate it using a nested subtasks Todo feature as a practical example.
The trap of vibe coding
Many teams fall into what we call “vibe coding“, relying on conversational interactions with AI that feel productive at first, but it often leads to messy, inconsistent results.
Vibe coding happens when developers ask an AI to write code based only on quick, casual chat messages instead of clear instructions or rules. The AI guesses what you want based on the “vibe” of the conversation, not on an actual plan, specification, or project standards.
For example: A developer might ask, “Build me a todo app.” The AI will generate something, but it may ignore your coding standards, architecture, naming conventions, or design choices. The developer then spends hours fixing it, rewriting parts, or refactoring to match the real requirements.
The root problem
Chat conversations don’t persist as real engineering processes do. Each new message feels disconnected because there are no documented rules, no shared understanding, and no consistent context for the AI to follow. So even a great AI model will eventually drift away from what your team wants.
Due to this, developers may often have questions like:
- “Why did it ignore our standards?”
- “Why did it rewrite unrelated code?”
- “Why did it forget what we agreed earlier?”
Without clear specs, plans, and rules, AI fills the gaps on its own. That’s why results often feel random or off‑track.

Use AI agents to create implementation plans, generate production-ready code, automate repetitive tasks, and improve code quality across your projects.
Discover Code StudioWhy specs are the backbone of AI‑driven projects
Instead of jumping straight into code and writing documentation later, spec‑driven development turns the process around: you start by writing a specification.
A spec is simply a clear explanation of what you want to build and how it should behave. It becomes a shared agreement for the AI tools you use.
The spec acts as your source of truth. When AI generates, tests, or updates code, it follows this spec, so the results stay consistent and match what you want.
Benefits you’ll feel immediately:
- Less guesswork, fewer surprises.
- Cleaner code and simpler reviews.
- Faster iteration because decisions are made once and reused everywhere.
A spec isn’t something you write once and forget. It becomes a living guide that helps you catch problems early and collaborate better.
Meet SpecKit: The toolkit that makes spec‑driven development practical
SpecKit is an open‑source toolkit that helps you build software by starting with a clear specification.
Instead of guessing in code, you first describe what you want and how it should behave. SpecKit then turns that into a plan and step‑by‑step tasks the AI can follow. This keeps the work predictable and easier to review.
Why this matters
You make your intent explicit first. SpecKit’s commands create files like spec.md, plan.md, and tasks.md that your AI assistant can follow, so results are consistent and on‑spec.
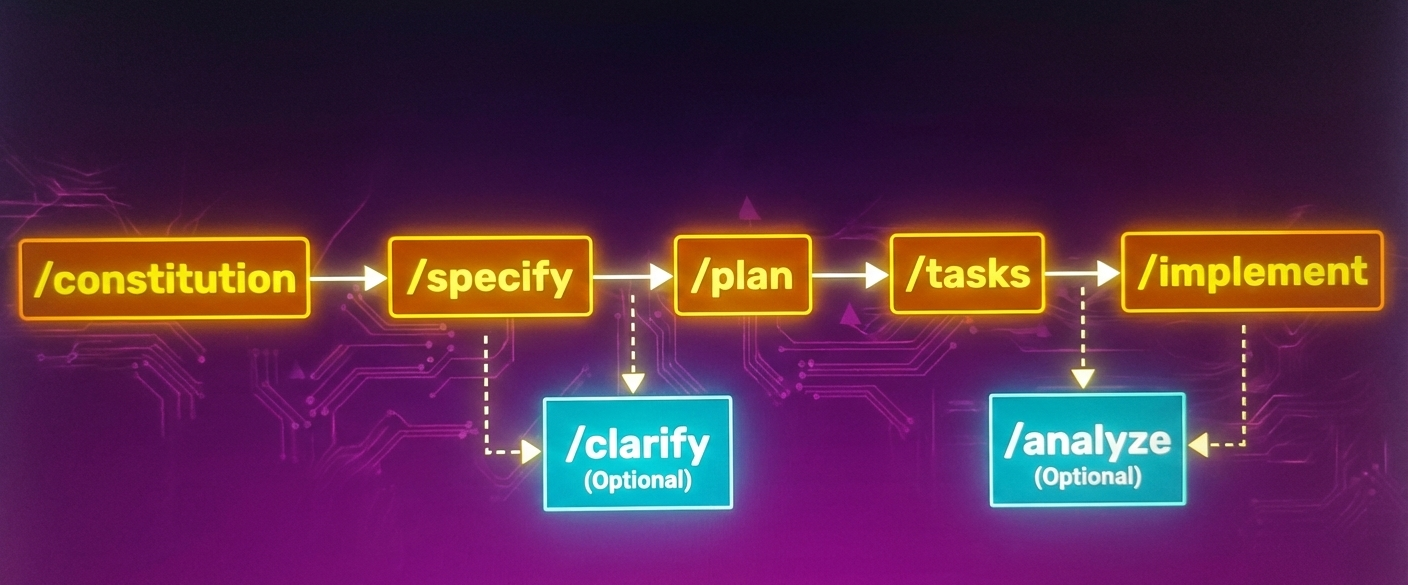
SpecKit working principle
Here’s how the process breaks down in the SpecKit:
- Constitution: The AI agent creates a “project constitution” for you, a short set of core principles like architecture choices, coding style, and general standards.
- Specify: You describe what you’re building from a user perspective, their needs, journeys, and desired outcomes, and the AI agent generates detailed specifications. This focuses on the why and what.
- Clarify (Optional): If something in the specification is unclear, you can run a clarification step. This helps identify missing details, edge cases, or areas where the spec needs more explanation before planning begins.
- Plan: The AI agent creates a comprehensive technical plan that respects your architecture.
- Tasks: The agent takes the spec and plan. Then, it breaks them down into actual work. Each task solves a specific problem and can be implemented and tested independently. This is crucial because it gives the agent a way to validate its work and stay on track.
- Analyze (optional): Before implementing, you can run an analysis step. This checks whether your spec, plan, and tasks match each other and finds contradictions, missing steps, or unclear requirements.
- Implement: Your AI agent executes tasks one by one with focused changes. Because the spec defines what to build, the plan defines how, and tasks define exactly what to do, reviews become straightforward and manageable instead of overwhelming.
Here’s a simple visual that shows how all the SpecKit steps connect. This helps you understand the overall flow.
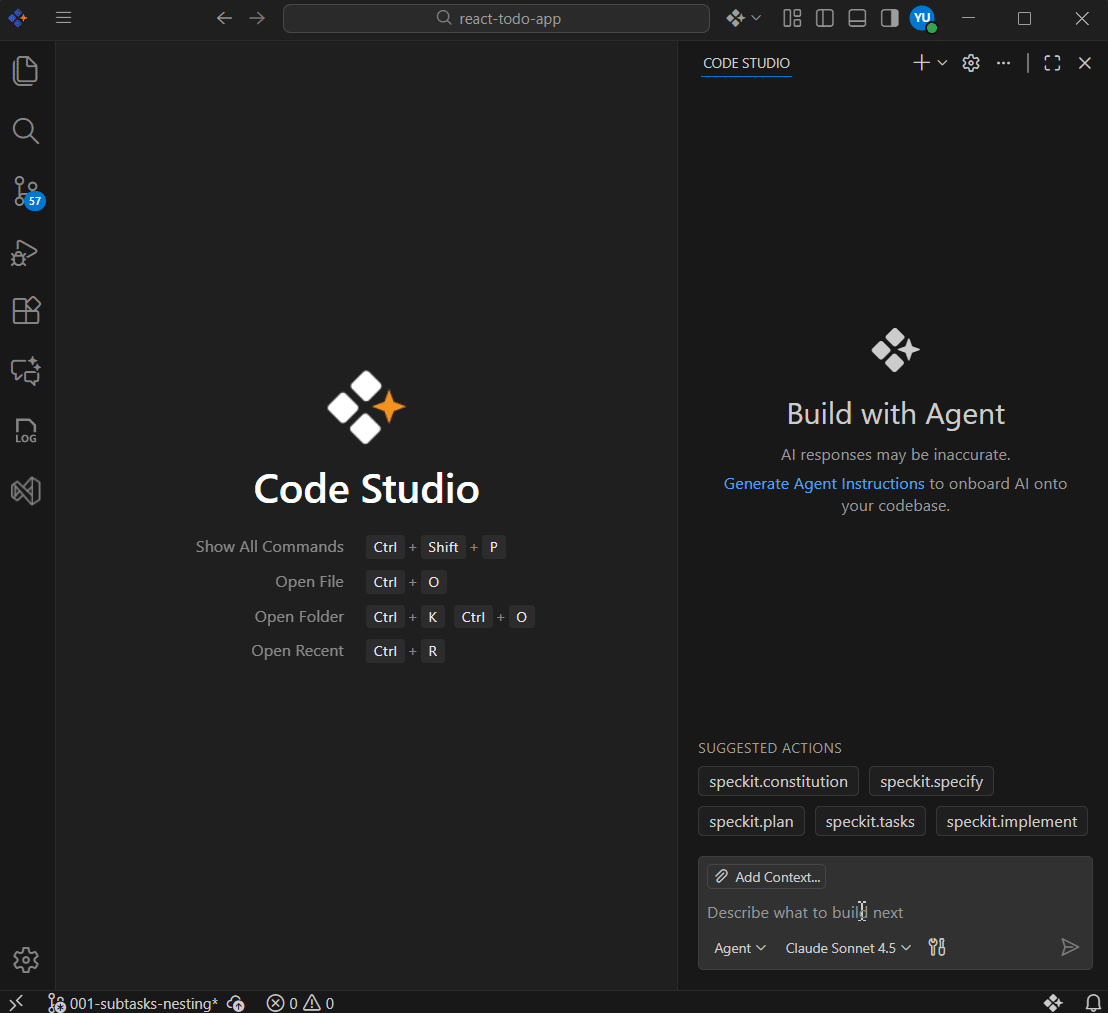
Syncfusion Code Studio: Your AI-assisted IDE
Syncfusion Code Studio is an AI-powered integrated development environment (IDE) with built-in assistance to support modern software development workflows. It’s like an extension of your development brain. With five powerful modes, it helps you brainstorm, refactor, or build features faster and smarter.
To learn more about Code Studio, visit our Introduction blog.
Prerequisites
Before we start, ensure you have:
- Syncfusion Code Studio
- Python
- uv (If not installed, install ‘uv’ by running the pip install uv command globally).
How SpecKit works inside Syncfusion Code Studio: From setup to implementation
With the concepts clear, it’s time to get hands-on. Let’s see how to set up SpecKit and build a To-Do list feature demo app using Syncfusion Code Studio.
Step 1: Set up your project with the specified tool
Specify is a tool that sets up our project for SpecKit. If we run a single command, SpecKit automatically creates all the setup files and folders our project needs.
We can install the Specify tool directly using the following command:
uvx --from git+https://github.com/github/spec-kit.git specify init <PROJECT_NAME>This command installs the tool and creates the initial project structure that is needed for spec-driven development.
- AI assistant selection: During installation, you will be asked to choose an AI assistant. Select Copilot.
- Why choose Copilot:
- Right now, the installer doesn’t include a “Code Studio” choice.
- Selecting Copilot ensures SpecKit can communicate with an AI assistant supported by Code Studio, so all SpecKit commands (specify/plan/tasks/analyze/implement) run without issues.
- You can still use Code Studio as normal.
- Why choose Copilot:
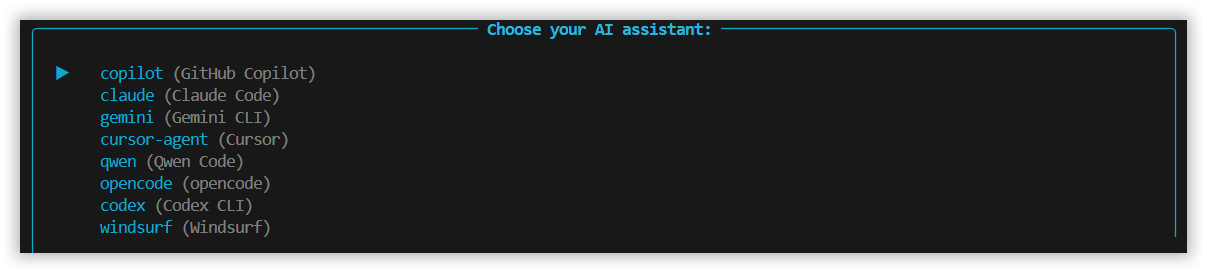
- Choose script type: The installer will also ask you to pick a script type. Choose the one based on your operating system:
- Select ‘sh’ for macOS
- Select ‘ps’ for Windows (PowerShell)

- Move the generated folders into the Code Studio structure: Once the installation finishes, SpecKit creates two folders inside your project’s ‘.github’ folder:
- prompts
- Agents
Code Studio expects these folders to be placed inside the .codestudio folder. To do so,
- Create the
.codestudiofolder in your project root:mkdir .codestudio
- Then, move both the prompts and agents folders into
.codestudio:mv .github/prompts .codestudio/ mv .github/agents .codestudio/
Why does this matters?
Code Studio only reads SpecKit configuration from the .codestudio file. If you skip this step, later commands may not work.
Step 2: Create the project constitution
The project constitution is a short set of project rules (architecture, coding style, testing, performance, workflow). It becomes the source of truth your AI will follow in every later step, so it doesn’t “freestyle” or drift from team standards.
The goal is to give the AI clear rules to follow before any specs, plans, tasks, or code are generated. This prevents off‑standard decisions later.
What you do:
- Open Syncfusion Code Studio.
- Then, open the chat panel in the Code Studio (Ctrl+Shift+I (Windows) or Cmd+Shift+I (macOS)).
- Once the chat panel is open, run this SpecKit constitution command:
/speckit.constitution Create a clear project constitution with core principles that define how this project should be built.

Include standards for:

  • Architecture structure
  • Coding style and naming rules
  • Testing expectations
  • Accessibility requirements
  • Performance guidelines
  • Documentation and code quality
  • User‑experience consistency
  • Workflow and review process

Write the principles in simple, beginner‑friendly language.

Each section should include a short rationale explaining why the rule matters.
What you get:
- Code Studio creates the project constitution file (e.g.,
constitution.md) with architecture, coding style, documentation, testing, performance, and workflow. - These rules become the governing layer that every next step must respect.
Refer to the following image.
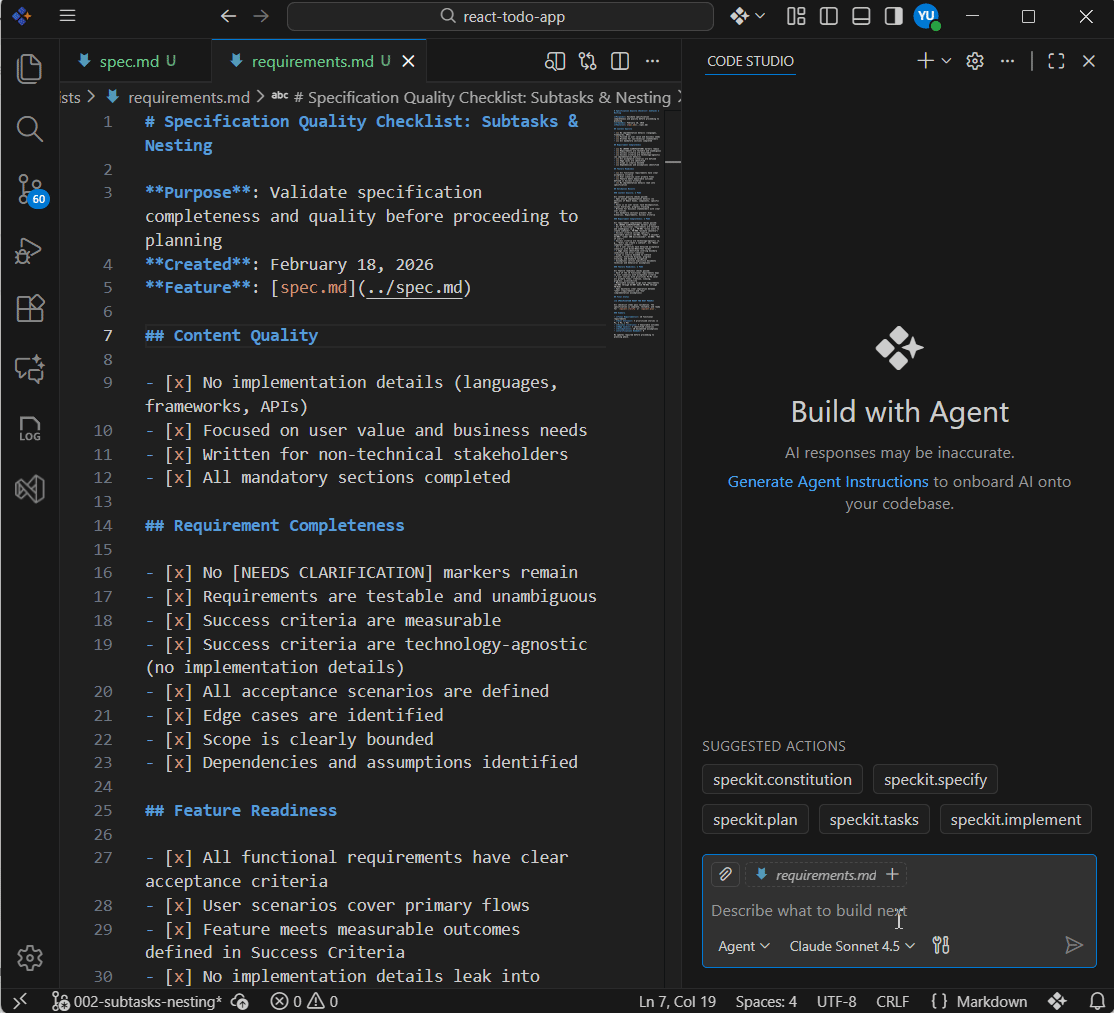
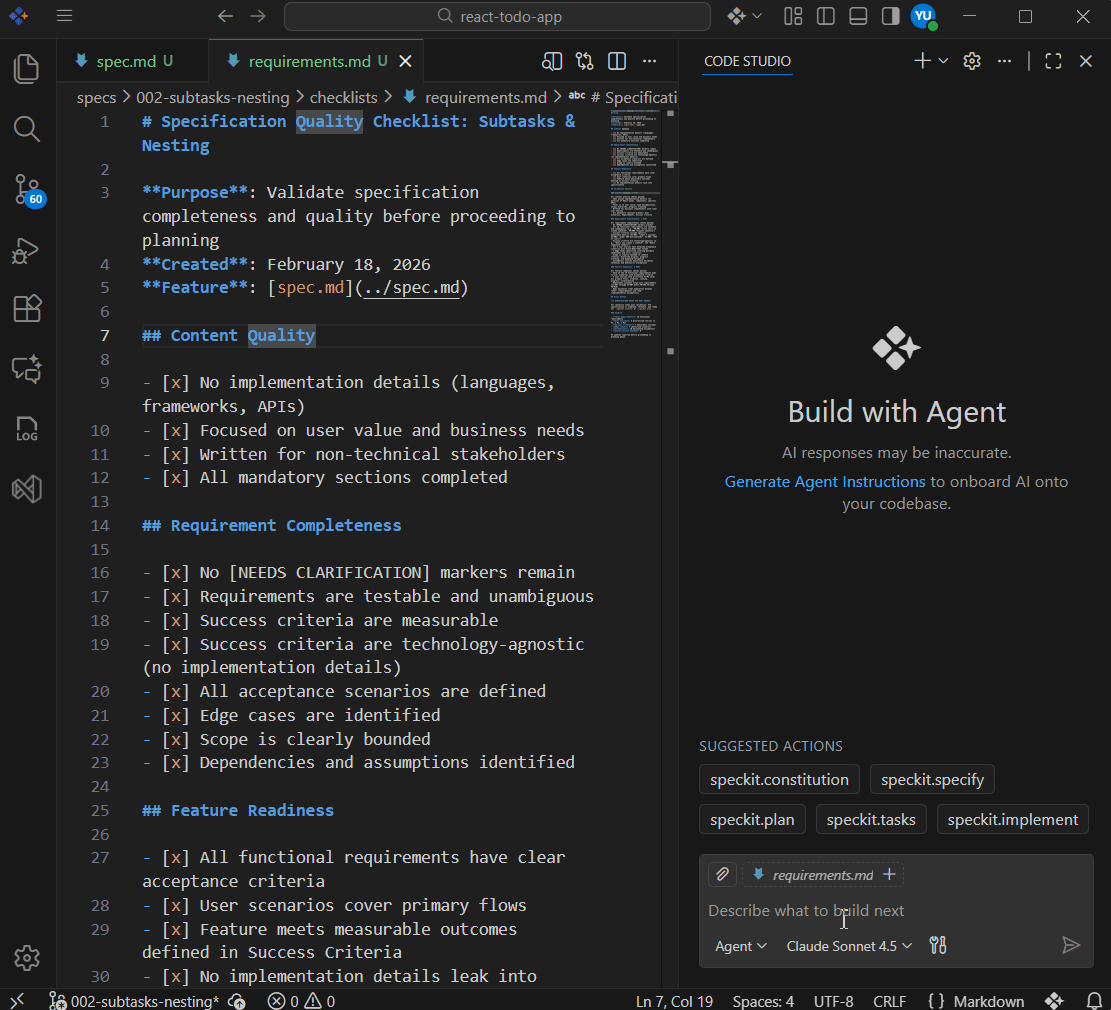
Step 3: Create the feature specification
The specification step turns your feature idea into a clear, written specification. You describe the feature from the user’s point of view (what they need and why), and the Code Studio generates organized spec files based on your description. This step focuses on what to build and why, not how.
What do you do?
Run this command in the Code Studio chat panel:
/speckit.specify You are a full-stack todo app developer. Implement a subtasks & nesting feature for a todo application.

Requirements:

  • Allow users to create subtasks within parent tasks
  • Display subtasks with collapsible/expandable toggle icons
  • Indent subtasks visually to show hierarchy
  • Add "Add Subtask" button within each task
  • Show subtask count on parent tasks
  • Display progress (e.g., "2 of 3 subtasks complete")
  • Support unlimited nesting levels

Implementation should include:

  1. Data structure to support nested tasks
  2. React component for task items with expand/collapse toggle
  3. UI state management for expanded/collapsed visibility
  4. Smooth animations for toggling
  5. Keyboard accessibility

Keep the code clean, modular, and performant. Use React hooks for state management.
What do you get?
- Code Studio turns your description into structured spec artifacts (e.g.,
spec.md,requirements.md) with user needs, behavior, outcomes, and acceptance criteria, so the work is clear before any technical planning begins. - These specs become the source of truth that later steps will use.
See the following image for clear visuals.
Clarify requirements (Optional)
The clarify option is used when your feature specification isn’t fully clear. You don’t have to figure out what’s missing; the AI reads your spec and finds unclear or incomplete parts for you.
In the Code Studio Chat panel, run the following command:
/speckit.clarifyNote: You don’t need to add anything else (like a description) with the command. This command scans your spec, finds unclear parts, and asks you simple questions to fix them.
Code Studio checks things like:
- Feature behavior
- User flow
- Edge cases
- Performance expectations
- Missing decisions
It then asks you questions with clear options (A, B, C, D, etc.), so you can quickly choose the correct behavior.
This helps make your spec complete and unambiguous before moving on to planning or implementation. Kindly refer to the following GIF for a better understanding.
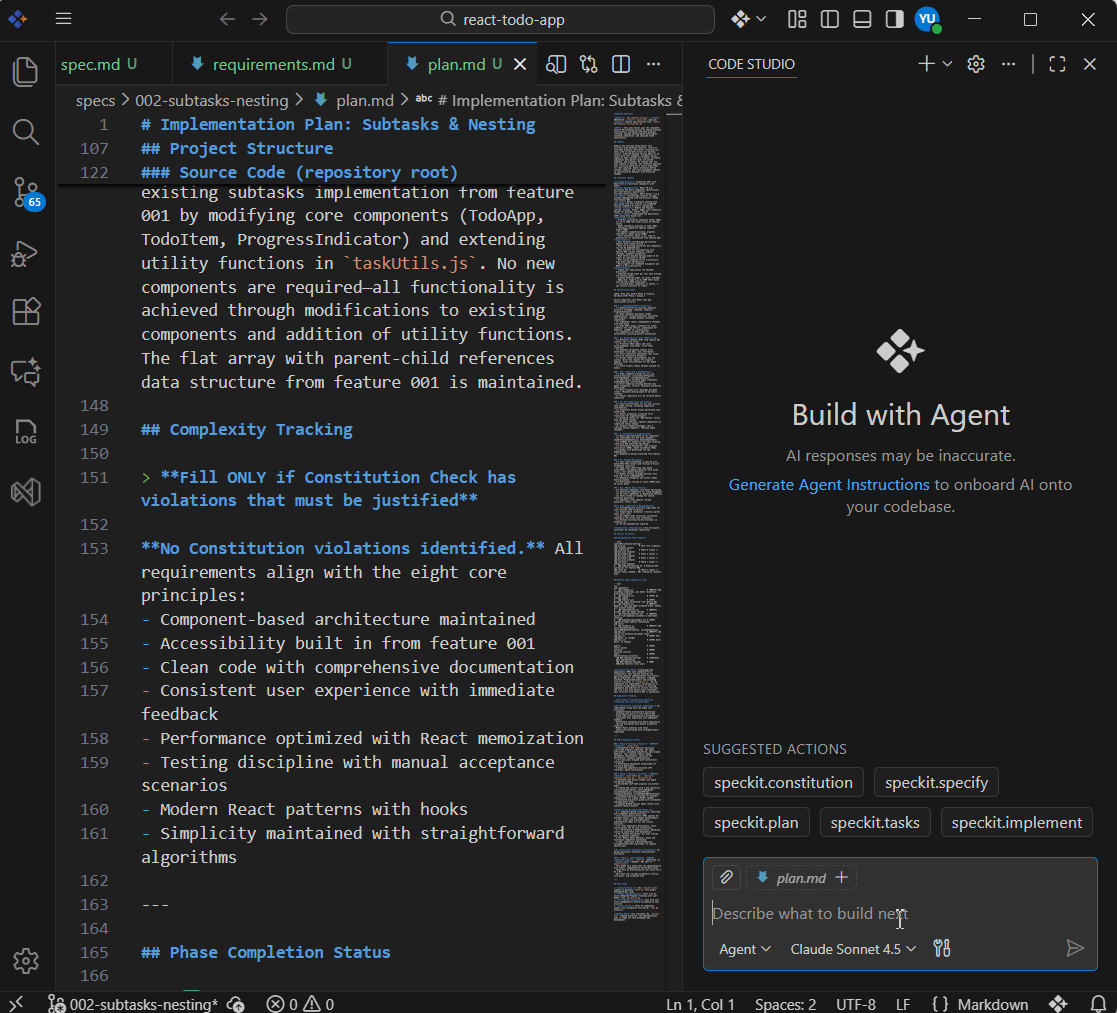
Step 4: Create a technical implementation plan
The plan step takes your feature specification and turns it into a technical blueprint. Here, the AI decides how the feature should be built, based on the rules from your constitution and the details in your Spec.
What you do:
Run this plan command in Code Studio chat:
/speckit.plan
Create a technical plan for this feature based on the current specification and constitution. Include:

  • The architectural approach
  • Required components, modules, and file structure
  • The data model and how information should be stored
  • UI/UX flow and important interactions
  • State management decisions
  • Performance and accessibility considerations
  • Any external tools or libraries needed

Keep explanations simple and beginner-friendly.

If any technology choices or assumptions are missing, highlight them clearly so I can decide.
What you get:
- Code Studio reads your specification and your constitution.
- It generates a complete technical plan (e.g., plan.md, research.md) that explains how to build the features, including architecture decisions, file and folder structure, modules/components, data model, and performance & accessibility considerations.
- These act as the “technical map” for building the feature.
The subsequent figure illustrates the concept.
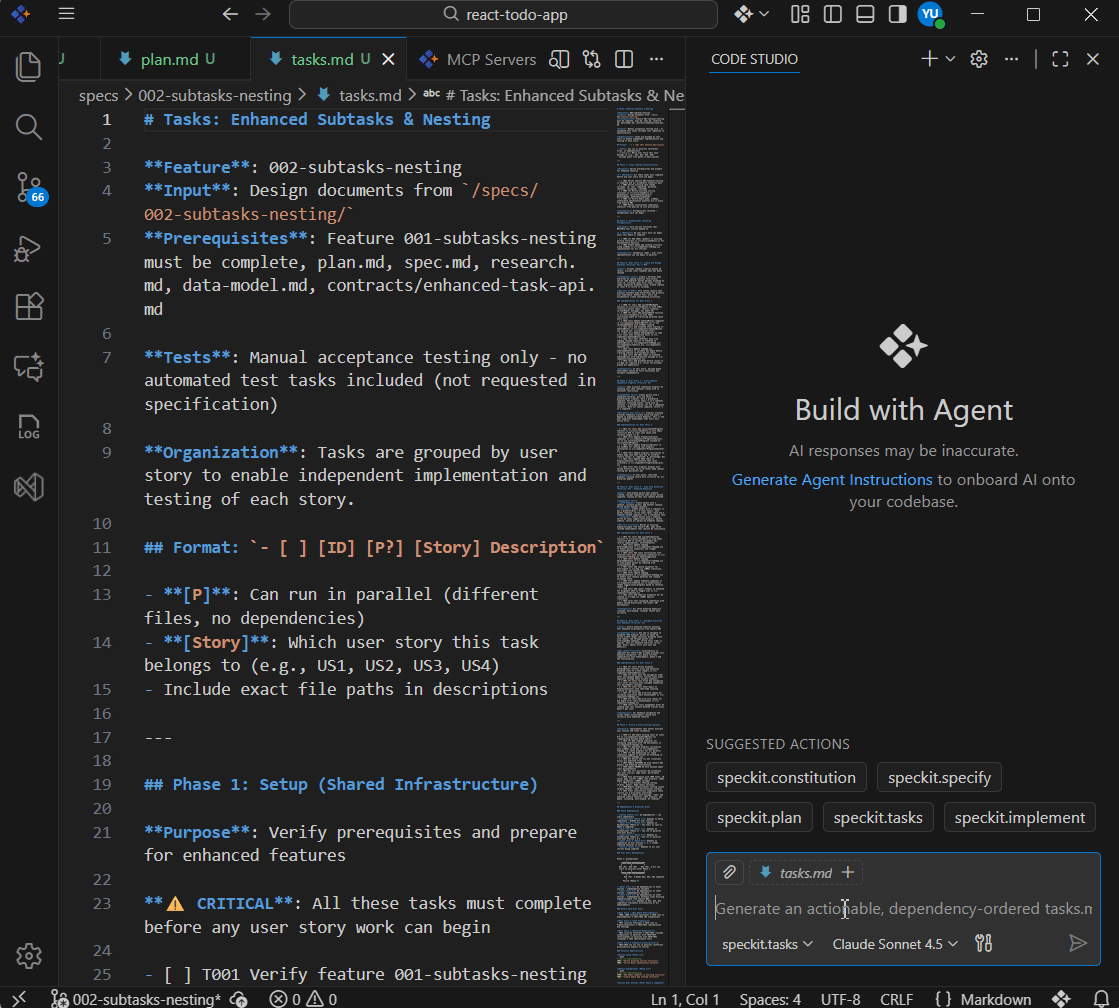
Step 5: Generate the task list
The tasks step takes your specification and technical plan and breaks them into a list of small, ordered tasks. Each task represents one clear piece of work that the Code Studio will later implement.
What you do:
Run the following tasks command in Code Studio chat:
/speckit.tasks
  • Break the technical plan into clear, ordered tasks.
  • Each task should be actionable and focused on one outcome.
  • Group related tasks into phases and make sure every task maps back to the spec and plan.
What you get:
- Code Studio analyzes both the specification and the technical plan and breaks them into an ordered list of actionable tasks.
- Tasks are grouped into phases; Each one has a clear purpose tied back to the spec and plan.
- The result is a
tasks.mdfile that acts as a step-by-step blueprint for implementation.
Consult the figure below for further details.
Analyze for consistency (Optional)
Before jumping into implementation, consider running an analysis to verify that your spec, plan, and tasks are fully aligned. This optional validation step can catch issues early, saving significant rework later.
In the Code Studio Chat panel, run:
/speckit.analyze Run a project analysis for consistency and alignment across spec, plan, and tasks.This command performs a comprehensive scan of all your artifacts, checking for:
- Contradictions between your specification and technical plan.
- Unmapped tasks that don’t correspond to documented requirements.
- Missing implementation steps for features defined in your spec.
If inconsistencies are detected, Code Studio will suggest specific fixes. This validation is particularly valuable when your specification has evolved through multiple clarification rounds or when working with complex, multi-phase projects.
See the implementation in action below.
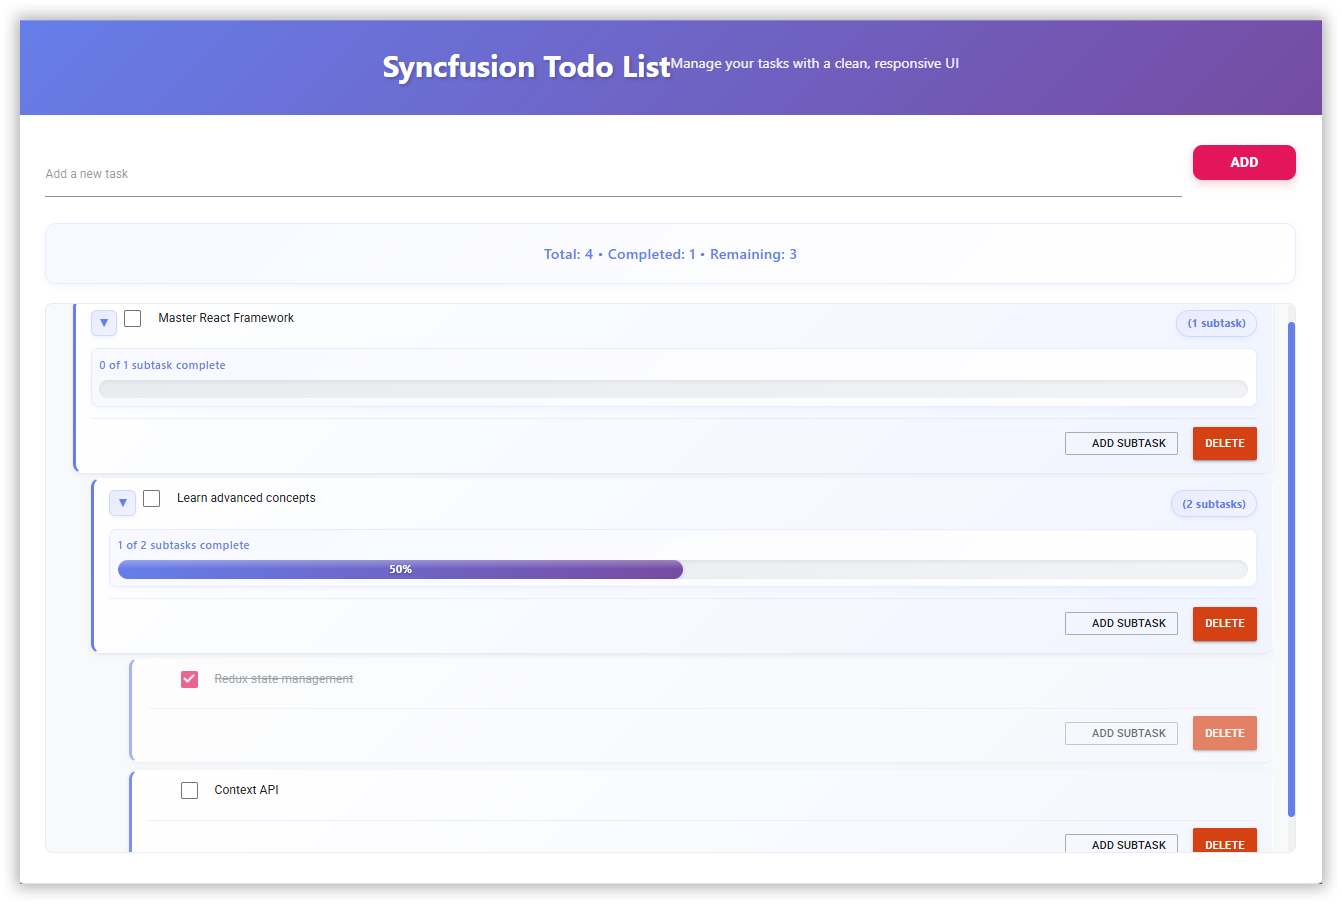
Step 6: Execute the implementation
The implementation step is where the Code Studio actually writes the code for your feature. It works through your task list, one task at a time, following your constitution (rules), specification (what to build), and plan (how to build it). This keeps changes small, focused, and easy to review.
What you do:
In the Code Studio Chat panel, run the following command:
/speckit.implementNote: You don’t need to add anything else (like an extra description) with this command.
What you get:
- Code Studio reads your tasks.md and completes the work one task at a time, making small, focused code changes. Throughout the process, it respects your constitution (rules), your specification (what to build), and your technical plan (how to build it), so changes stay on‑scope and consistent.
- The result is actual code updates in your project that are easier to review and align with your standards.
- Because implementation follows the task list in order and honors your guardrails, it avoids unrelated edits and “freestyling.”
- This keeps the workflow predictable and reviewable; each task is independently testable and tied back to the spec and plan.
Watch how the feature works in action.

Why SpecKit works so well (When prompt‑only doesn’t)
Without specs, the traditional AI-assisted workflow looks like this:
- You give a prompt with some details,
- AI starts generating code,
- Requirements become unclear,
- Constant refactoring ensues,
- Eventually, it ships something that mostly works.
SpecKit reverses this pattern entirely. Specifications become executable blueprints. Before writing a single line of code, you have a precise conversation with your future implementation. AI doesn’t guess, it executes against a contract you’ve already defined. The result: fewer iterations, clearer intent, and predictable output.
Faster development: More upfront planning = less refactoring, clearer decisions, fewer “what am I building?” moments.
Quick command reference
| Command | Purpose |
/speckit.constitution | Create the project rules the AI must follow. |
/speckit.specify | Turn your feature idea into a clear written specification. |
/speckit.clarify | Find unclear or missing details in your spec and ask questions to fix them. |
/speckit.plan | Generate a technical plan explaining how the feature will be built. |
/speckit.tasks | Break the plan into an ordered list of small, actionable tasks. |
/speckit.analyze | Check for contradictions or missing steps across spec, plan, and tasks. |
/speckit.implement | Build the feature by executing tasks step‑by‑step. |
Best practices for using Speckit (Save time, save tokens, boost quality)
Follow these best practices to work efficiently with SpecKit and save both your time and token usage.
- Start small, then scale: Pick one small feature (e.g., “add shopping cart icon”) instead of your entire app. Learn the workflow without wasting tokens on massive, unfocused specs.
- Review before you move forward: After each command (constitution, specify, plan, tasks), spend some time reviewing what was generated. Catching spec errors early prevents expensive code rewrites.
- Use new sessions for each command: New sessions prevent context overload. Long conversations accumulate tokens exponentially; each message includes all previous context. Separate sessions keep token usage to a minimum. Start a fresh Code Studio chat session for each SpecKit command. Don’t run all commands in the same chat.
- Never skip workflow steps: Skipping steps means regenerating everything later when validation fails. Follow the full sequence: Constitution → Specify → Plan → Tasks → Implement. Each step validates the previous one.
- Choose the right AI model: Code Studio lets you select different AI models. Use advanced coding models for SpecKit commands:Some recommended models: GPT-5, GPT-5.2 Codex, or Claude Sonnet 4.5.
Some models like GPT-5-mini and Claude Haiku 4.5 are lower-end models that may struggle with complex specifications, planning, and implementation work.
Advanced models understand context better, generate higher-quality specs and code, and require fewer retries.
- Use
/speckit.clarifywhen the specification does not feel proper: Vague requirements lead to vague implementations. Use the/speckit.clarifycommand when your feature specification isn’t fully clear. - Run
/speckit.analyzebefore big implementations: For complex features with many tasks, run the/speckit.analyzecommand after generating tasks but before implementation. It catches contradictions between your spec, plan, and tasks. Better to find these now than during code review. - Be specific when refining outputs: When Code Studio generates specs, plans, or code that needs changes, tell it exactly what to fix. Reference specific sections or file names. Because vague requests force AI to guess what you want, leading to multiple back-and-forth rounds that waste tokens.
Bad: “Make the spec better” or “Improve this code.”
Good: “In spec.md, add error handling requirements for API timeouts” or “Refactor the login function to use async/await instead of callbacks.”
SDD prevents teams from “vibe coding,” where AI generates code from casual chat without shared rules or a plan, leading to inconsistent results, refactors, and drift from real requirements. By starting with a written spec and governing rules, you keep AI output on spec and consistent. SpecKit is a simple open‑source tool that turns your idea into clear steps, a spec, a plan, and tasks, so AI knows exactly what to build. It creates easy files like spec.md, plan.md, and tasks.md to keep everything organized. Syncfusion Code Studio provides an AI‑powered environment and chat where you run the SpecKit steps: Constitution, Specify, Clarify, Plan, Tasks, Analyze, and Implement, so generation, validation, and implementation all happen in one place. The flow is: Constitution (project rules) → Specify (user‑focused spec) → Clarify (fix gaps) → Plan (technical blueprint) → Tasks (ordered actionable work) → Analyze (optional consistency check) → Implement (task‑by‑task coding). Yes. Start small, review outputs at each step, and use new chat sessions per command. Don’t skip steps, select stronger models for complex work, use the Frequently Asked Questions
What problem does Spec‑Driven Development (SDD) solve?
What is SpecKit, and how does it help?
How does Syncfusion Code Studio fit into this workflow?
What are the core steps in the SpecKit flow?
Any best practices to keep tokens down and quality up?
/speckit.clarify command when specs feel vague, and run the /speckit.analyze command before big implementations. Be precise when asking for refinements.
Final thoughts: Ship cleaner, faster, and with zero guessing
Thanks for reading! When we jump straight into coding, projects often drift, requirements get fuzzy, refactors pile up, and the result “mostly works” but doesn’t match what the team intended. Starting with a written spec flips this pattern: you define what you need before code is generated, so the AI follows a stable plan rather than guessing.
SpecKit + Code Studio makes that spec‑first approach practical: you set rules (Constitution), describe the feature (Specify), turn it into a plan (Plan), break it into tasks (Tasks), optionally check alignment (Analyze), and then let AI implement changes step‑by‑step (Implement). This structure reduces surprises, cuts down refactoring, and keeps output consistent with your standards.
Ready to get started? Install Syncfusion Code Studio and set up SpecKit today, and experience the difference between prompting AI and governing it.
If you have any questions, contact us through our support forum, support portal, or feedback portal. We are always happy to assist you!


 No spam, just valuable updates.