

In this article, we are going to see how to create a new Blazor server application with authentication. We will use the built-in AuthenticationStateProvider service to enable authentication. Then, we will obtain the authentication state data from the ASP.NET Core HttpContext.User property.
Let’s see about them along with code examples!
Prerequisites
Create a Blazor server application
Follow these steps to create a Blazor server-side app with authentication.
Step 1: First, open Visual Studio 2019 and click the Create a new project option as shown in the following screenshot.
Step 2: Next, choose the Blazor App option and click Next.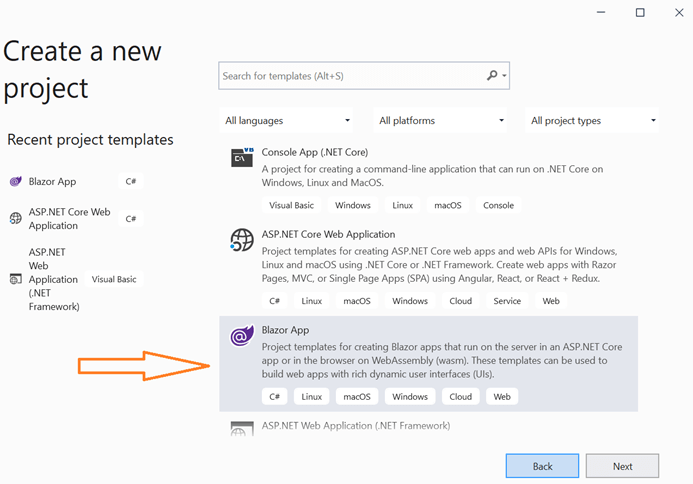
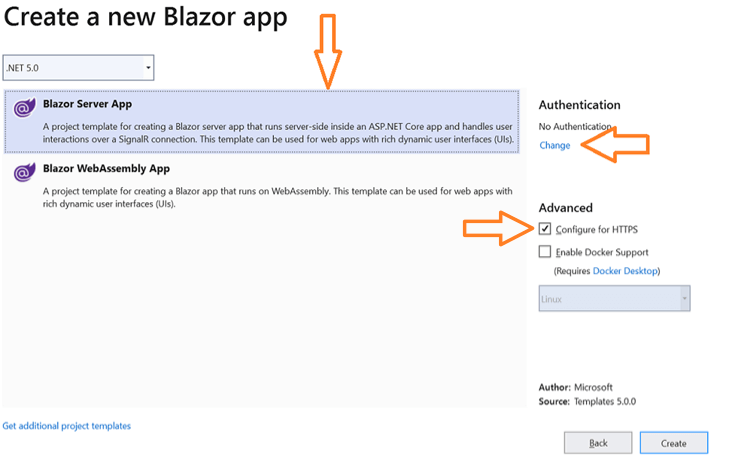
Step 3: Select Blazor Server App from the list. To enable authentication for the Blazor server-side app, select the Configure for HTTPS check box in the Advanced section. Then, click the Change link in the Authentication section.

Step 4: A new dialog will appear. In that, select the Individual User Accounts option and then click OK.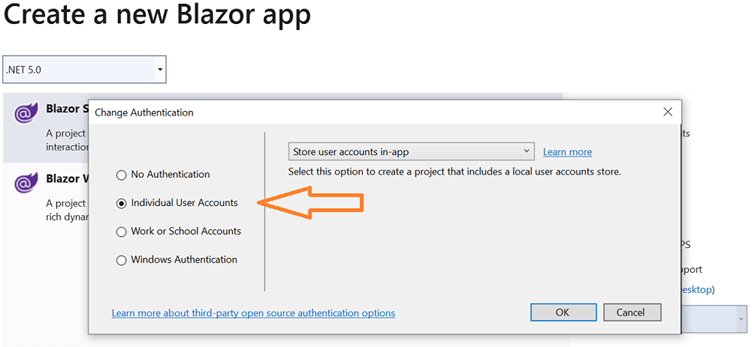
Step 5: Click the Create button to create the Blazor server-side application. Once the Blazor application is created, run the project. Now, click the Register button in the header section.
Refer to the following screenshot.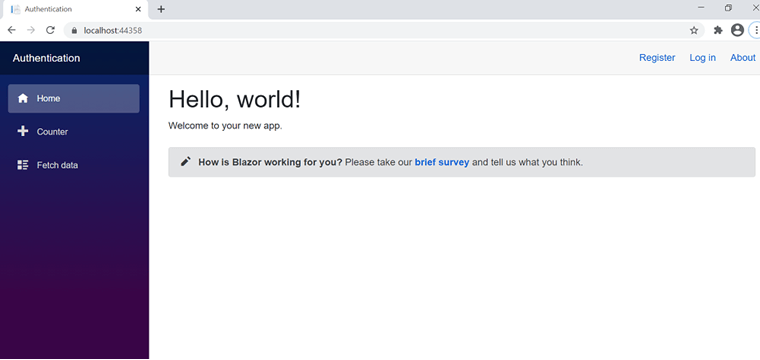
Step 6: Enter your authentication details in the appropriate fields. Then, click Register.
Step 7: After successfully registering the email ID and password, select Apply Migrations to set up the account details based on the database.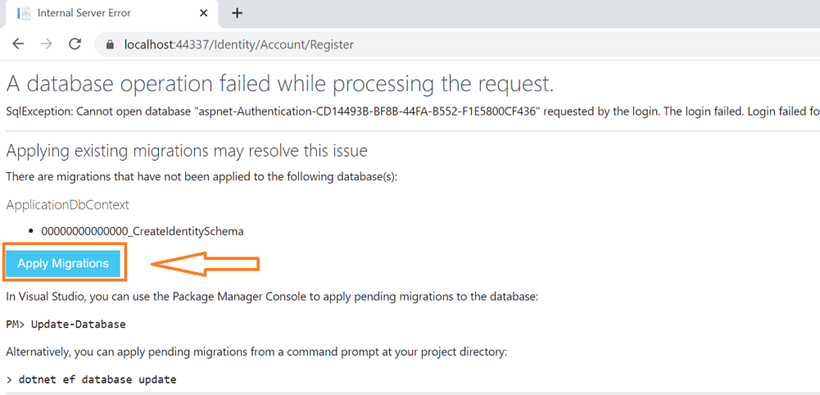
Step 8: Now, the home page will open. Refresh the page to see the home page of your application with a logged-in user’s details. The Register link will be replaced with the user’s mail ID. The Login link will be replaced with the Log out link in the header section.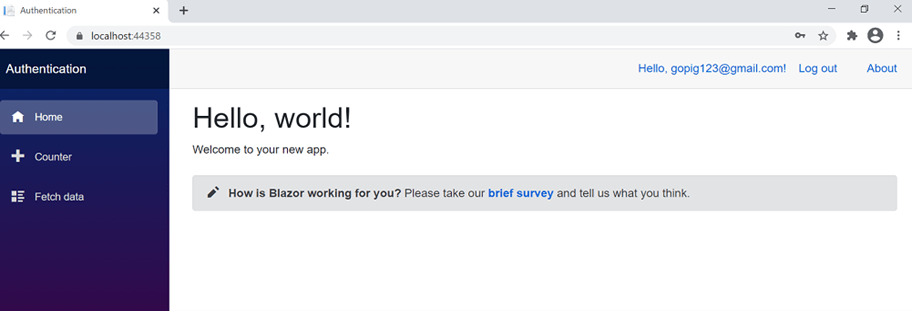
AuthorizeView component
We’ll use the built-in AuthorizeView component in the Blazor application to show the user authentication state in the UI. We can also use the AuthorizeView to get the user details.
This component provides the following two child components:
- Authorized: Denotes the user is authorized (logged in).
- NotAuthorized:Denotes the user is not authorized (logged out).
Refer to the following code.
<AuthorizeView>
<Authorized>
<span> Hello, @context.Employee.Identity.Name!</span>
<form method="post">
<button type="submit">Sign out</button>
</form>
</Authorized>
<NotAuthorized>
<span> Welcome! Please sign up below </span>
<a href="Employee/Register">Register</a>
<a href="Employee/Signin">Sign in</a>
</NotAuthorized>
</AuthorizeView>
Custom AuthenticationStateProvider
Also, Blazor provides a built-in custom AuthenticationStateProvider service. You can implement this class and override the GetAuthenticationStateAsync method to implement custom authentication.
Refer to the following code.
using System.Security.Claims;
using System.Threading.Tasks;
using Microsoft.AspNetCore.Components.Authorization;

public class CustomAuthStateProvider : AuthenticationStateProvider
{
    public override Task<AuthenticationState> GetAuthenticationStateAsync()
    {
        var identity = new ClaimsIdentity(new[]
        {
            new Claim(ClaimTypes.Name, "exampleuser"),
        }, "user authentication type");

        var user = new ClaimsPrincipal(identity);

        return Task.FromResult(new AuthenticationState(user));
    }
}
Difference between authentication and authorization
Authentication: Authentication is done before authorization. It is the process of validating that the users are who they claim to be. It determines whether the person is a registered user.
Authorization: Authorization is done after authentication. It is the process of giving permission to the user to access a resource.
References
For more details, refer to our Blazor server-side app with authentication demo and Blazor server authentication documentation.
Conclusion
Thanks for reading! In this post, we explained with a demo how to create a new Blazor server-side app with authentication using the built-in AuthenticationStateProvider service. Try out the steps provided in this blog post and leave your feedback in the comments section below!
Essential Studio® for Blazor offers the largest selection of components for the Blazor platform. It has popular components like Charts, DataGrid, Scheduler, Diagram, Document Editor, and Maps. It also includes unique file-format libraries for manipulating Excel, Word, PDF, and PowerPoint files. Use them to build world-class applications!
Try our Blazor components by downloading a free 30-day trial, or check out our NuGet package. Feel free to peruse our online examples and documentation to explore other available features.
You can also contact us through our feedback portal, support forums, or Direct-Trac. We are always happy to assist you!


 No spam, just valuable updates.
Comments (1)
Thank you for this very well explained tutorial ! It’s been very useful !