TL;DR: Syncfusion Excel Library is the perfect tool for all kinds of Excel creation, reading, editing, and viewing functionalities. Let’s learn how to create pivot tables in an Excel document using this robust library with C#.
A pivot table is an extraordinary feature in Excel that allows users to summarize and analyze large datasets quickly. It allows the users to create dynamic pivot views by grouping only required fields in the Excel data.
The Syncfusion Excel Library is also known as Essential XlsIO. It facilitates the smooth creation, reading, and editing of Excel documents using C#. It supports the creation of Excel documents from scratch, modification of existing Excel documents, data import and export, Excel formulas, conditional formats, data validations, charts, sparklines, tables, pivot tables, pivot charts, template markers, and much more.
In this blog, we’ll explore the steps to create a pivot table using Syncfusion Excel Library in C#.

Enjoy a smooth experience with Syncfusion’s Excel Library! Get started with a few lines of code and without Microsoft or interop dependencies.
Creating a pivot table in Excel using C#
Follow these steps to create a pivot table using the Syncfusion Excel Library and C#:
Note: Please refer to the .NET Excel Library’s getting started documentation before proceeding.
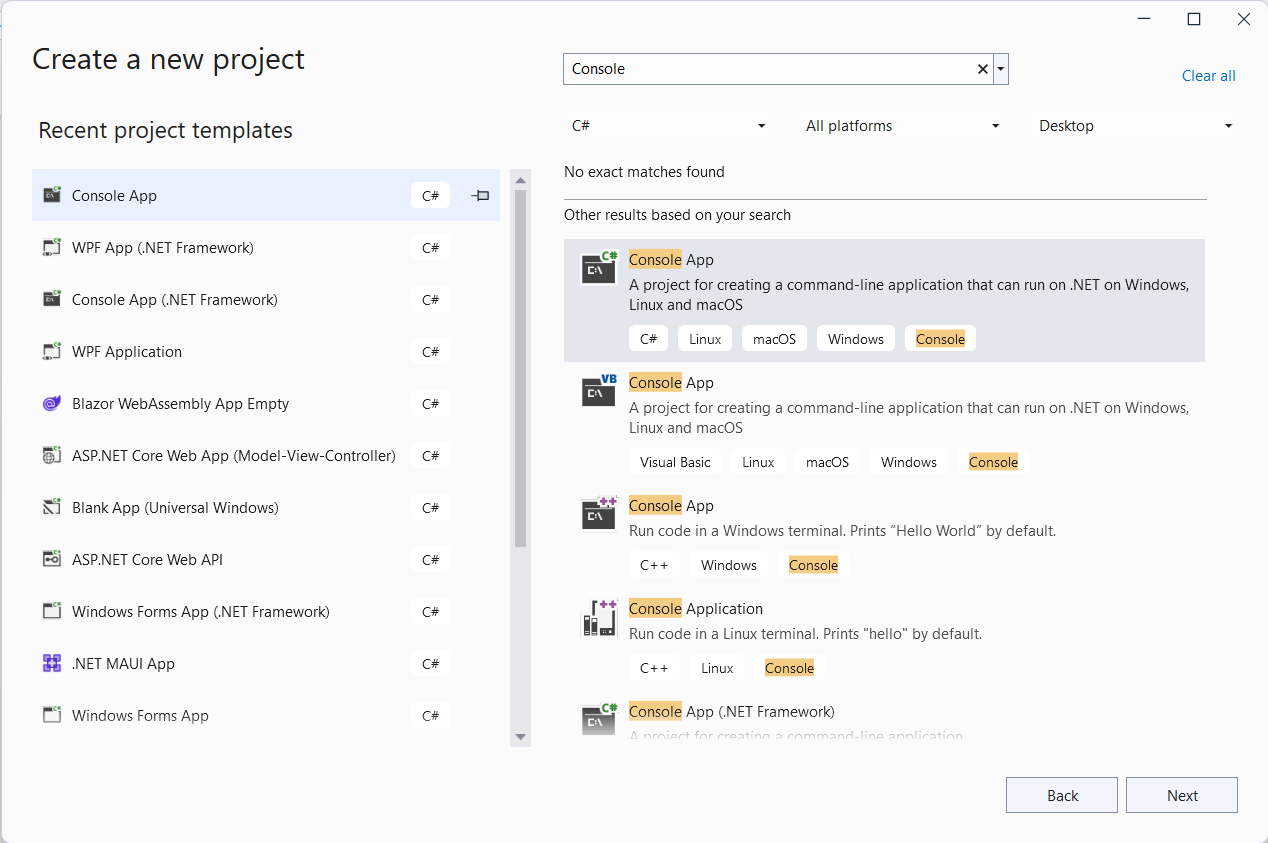
- First, create a .NET Core console application in Visual Studio.
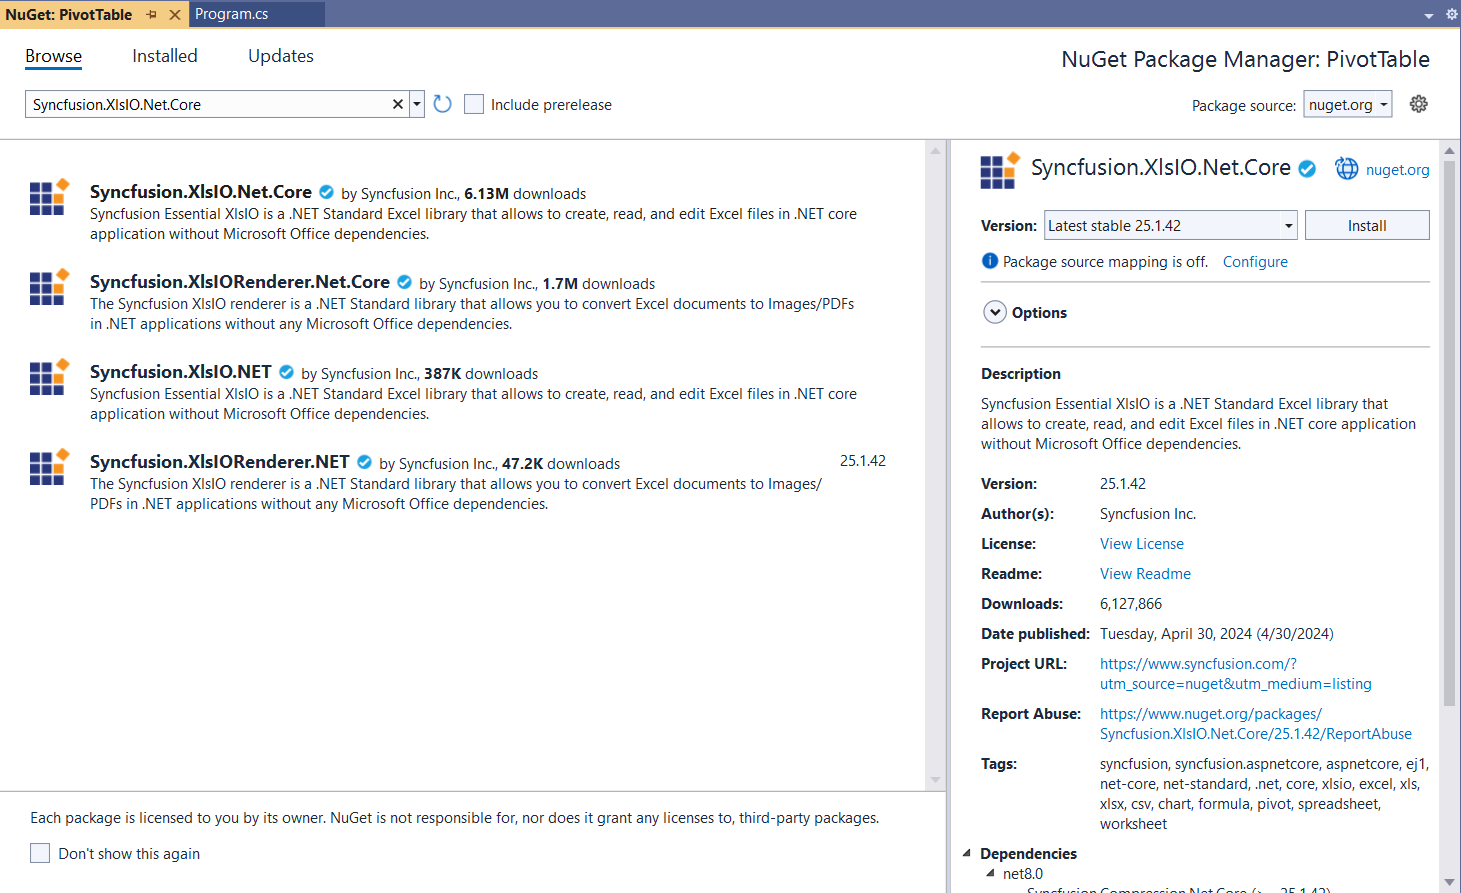
- Install the latest Syncfusion.XlsIO.Net.Core NuGet package in your app.
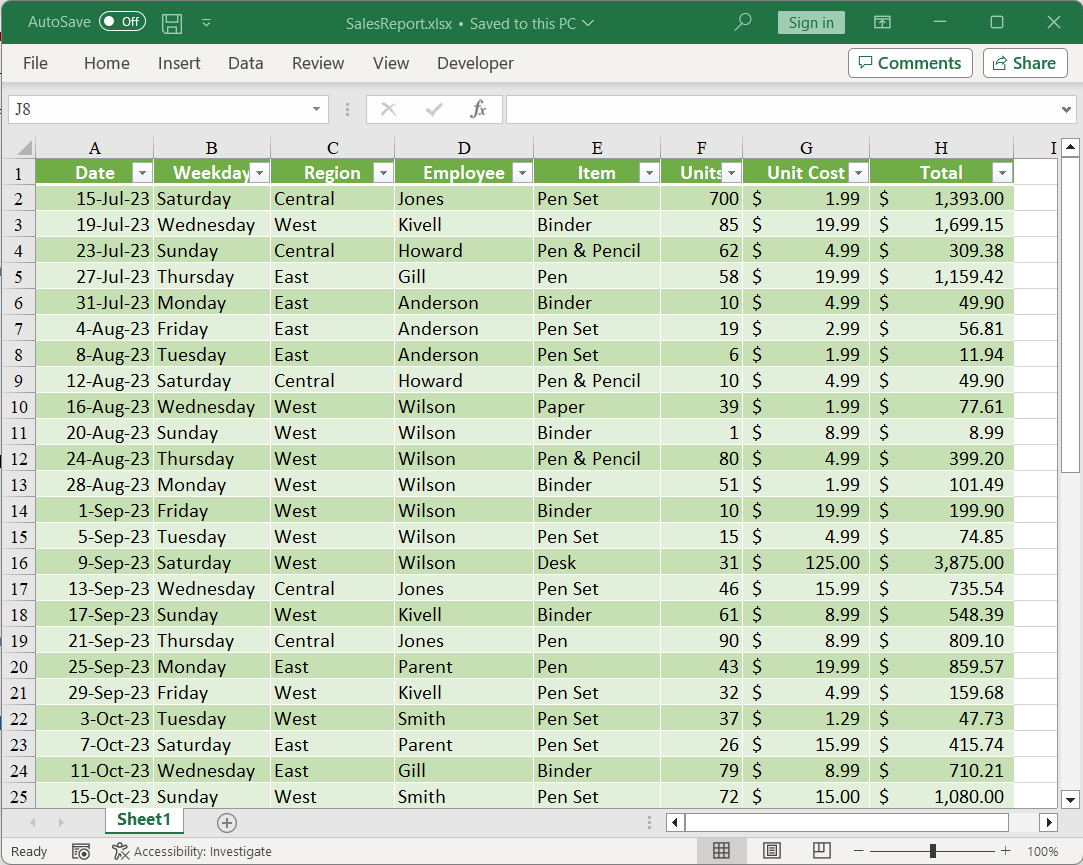
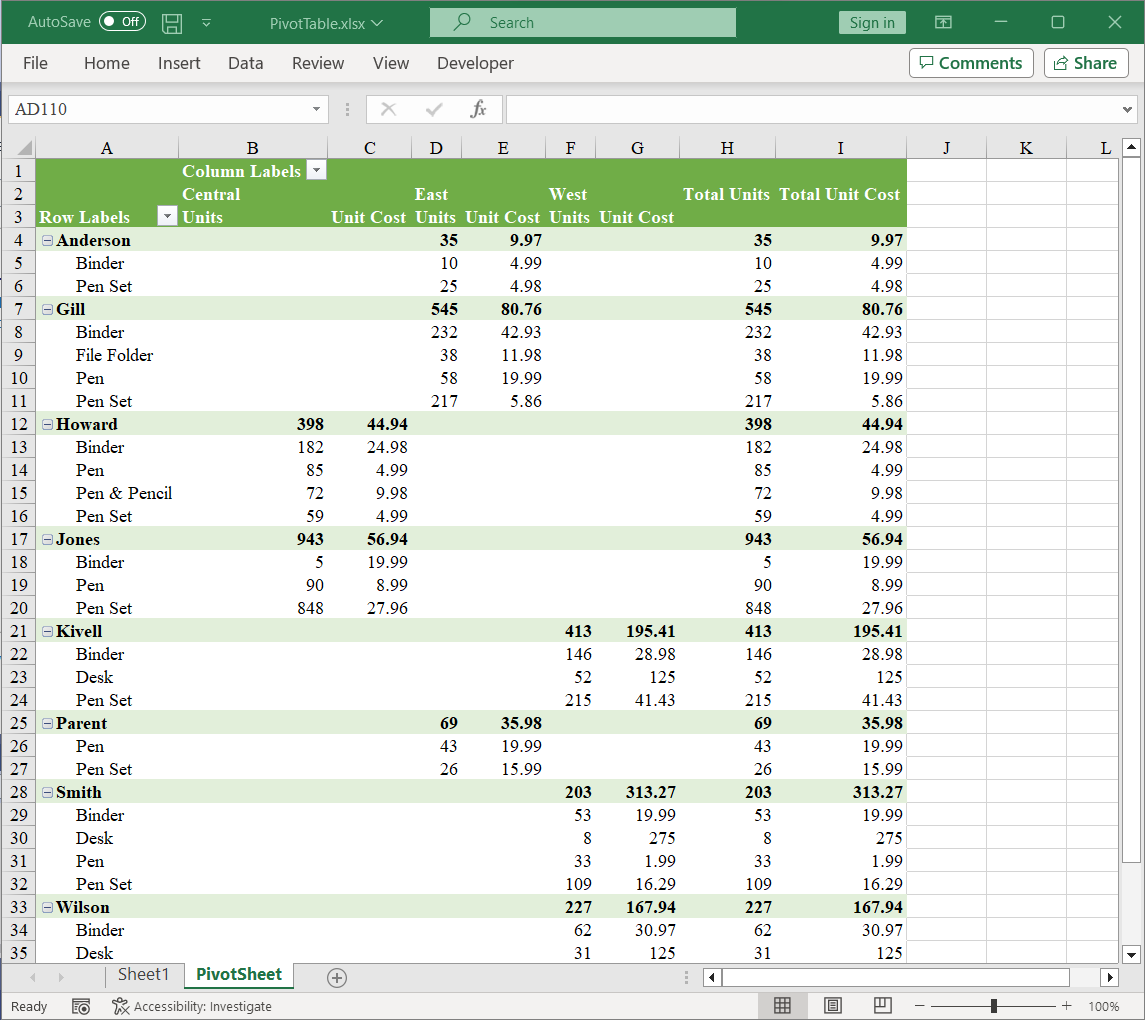
- Finally, add the following code to create a pivot table in a new worksheet(PivotSheet) in the existing Excel document.
using Syncfusion.XlsIO;

namespace PivotTable

{

    class Program

    {

        public static void Main()

        {

            using (ExcelEngine excelEngine = new ExcelEngine())

            {

                IApplication application = excelEngine.Excel;

                FileStream fileStream = new FileStream("../../../Data/SalesReport.xlsx", FileMode.Open, FileAccess.Read);

                IWorkbook workbook = application.Workbooks.Open(fileStream);

                IWorksheet worksheet = workbook.Worksheets[0];

                IWorksheet pivotSheet = workbook.Worksheets.Create("PivotSheet");

                //Create a Pivot cache with the given data range.

                IPivotCache cache = workbook.PivotCaches.Add(worksheet["A1:H50"]);

                //Create "PivotTable1" with the cache at the specified range.

                IPivotTable pivotTable = pivotSheet.PivotTables.Add("PivotTable1", pivotSheet["A1"], cache);

                //Add Pivot table row fields.

                pivotTable.Fields[3].Axis = PivotAxisTypes.Row;

                pivotTable.Fields[4].Axis = PivotAxisTypes.Row;

                //Add Pivot table column fields.

                ivotable.Fields[2].Axis = PivotAxisTypes.Column;

                //Add data fields.

                IPivotField field = pivotTable.Fields[5];

                pivotTable.DataFields.Add(field, "Units", PivotSubtotalTypes.Sum);

                field = pivotTable.Fields[6];

                pivotTable.DataFields.Add(field, "Unit Cost", PivotSubtotalTypes.Sum);

                //Pivot table style.

                pivotTable.BuiltInStyle = PivotBuiltInStyles.PivotStyleMedium14;

                string fileName = "PivotTable.xlsx";

                //Saving the workbook as a stream.

                FileStream stream = new FileStream(fileName, FileMode.Create, FileAccess.ReadWrite);

                workbook.SaveAs(stream);

                stream.Dispose();

            }

        }

    }

}
Refer to the following images
References
For more details, refer to creating pivot tables in Excel using C# documentation and GitHub demo.

Witness the possibilities in demos showcasing the robust features of Syncfusion’s C# Excel Library.
Conclusion
Thanks for reading! This blog explored creating a pivot table in an Excel document using C# and the Syncfusion Excel Library(XlsIO). The Excel Library also allows you to export Excel data to images, data tables, CSV, TSV, HTML, collections of objects, ODS, JSON, and other file formats.
Take a moment to peruse the import data documentation, where you’ll discover additional importing options and features such as data tables, collection objects, grid view, data columns, and HTML, all accompanied by code samples.
Feel free to try out these features and share your feedback in the comments section of this blog post!
For existing customers, the new version of Essential Studio® is available for download from the License and Downloads page. If you are not a Syncfusion customer, try our 30-day free trial to check out our available features.
For questions, you can contact us through our support forum, support portal, or feedback portal. We are always happy to assist you!

Don't settle for ordinary spreadsheet solutions. Switch to Syncfusion and upgrade the way you handle Excel files in your apps!
Related blogs
- Create Excel table in just 3 steps using C#
- Print Excel Documents in Just 4 Steps Using C#
- Converting XLS to XLSX Format in Just 3 Steps Using C#
- Merge Multiple Excel Files into One in Just 3 Steps Using C#
- 6 Easy Ways to Export Data to Excel in C#
- Seamlessly Import and Export CSV Data in Excel Using C#
- Easy Steps to Export HTML Tables to Excel in C#
