

TL;DR: The Angular Rich Text Editor simplifies modern document workflows with seamless Word import and PDF/Word export features. You can easily bring in existing Word documents, preserving all formatting and export edited content to Word and PDF with a single click. This boosts content consistency and reduces manual work, making it ideal for enterprise-grade applications.
Managing documents in web applications just got easier. With the latest enhancements in Syncfusion’s Angular Rich Text Editor you can now import Word documents directly into the editor, preserving rich formatting, images, and structure, and export the edited content to Word or PDF, all from within your Angular app. These features are especially useful for business apps, document workflows, report generators, and CMS tools looking to streamline content handling and boost productivity.
In this blog, we’ll explore how to:
- Import Word documents directly into the Angular Rich Text Editor.
- Export content from the Angular Rich Text Editor to Word and PDF formats.
Getting started with Angular Rich Text Editor
To start using the Syncfusion® Angular Rich Text Editor component in your app, follow the steps outlined in the documentation.
Note: Rich Text Editor features are organized into individual modules. To enable the import or export functionality, add the ImportExportService to the provider’s array.

Import Word document in Angular Rich Text Editor
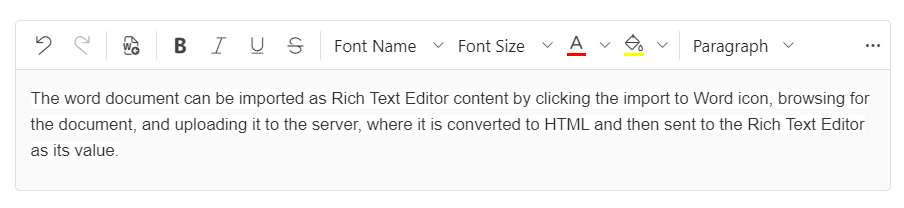
The import Word feature allows users to import Word documents directly into the Angular Rich Text Editor, preserving the original document’s formatting, styles, and content. This ensures a smooth transition from Word to the editor. Whether you’re working on complex reports, articles, or any other document type, this feature simplifies the process of bringing existing content into the Angular environment.
To integrate the importWord option into the Rich Text Editor’s toolbar, use the toolbarSettings.Items property. Additionally, you must configure serviceUrl property in the importWord. This API endpoint facilitates the file upload process and manages the server-side conversion of the document.
Refer to the API endpoint code example below.
public IActionResult ImportFromWord(IList<IFormFile> UploadFiles)
{
    string HtmlString = string.Empty;
    if (UploadFiles != null)
    {
        foreach (var file in UploadFiles)
        {
            string filename = ContentDispositionHeaderValue.Parse(file.ContentDisposition).FileName.Trim('"');
            filename = _webHostEnvironment.WebRootPath + $@"\{filename}";
            using (FileStream fs = System.IO.File.Create(filename))
            {
                file.CopyTo(fs);
                fs.Flush();
            }
            using (var mStream = new MemoryStream())
            {
                new WordDocument(file.OpenReadStream(), FormatType.Rtf).Save(mStream, FormatType.Html);
                mStream.Position = 0;
                HtmlString = new StreamReader(mStream).ReadToEnd();
            }
            HtmlString = ExtractBodyContent(HtmlString);
            HtmlString = SanitizeHtml(HtmlString);
            System.IO.File.Delete(filename);
        }
        return Ok(HtmlString);
    }
    else
    {
        Response.Clear();

        // Return an appropriate status code or message
        return BadRequest("No files were uploaded.");
    }
}

private string ExtractBodyContent(string html)
{
    if (html.Contains("<html") && html.Contains("<body"))
    {
        return html.Remove(0, html.IndexOf("<body>") + 6).Replace("</body></html>", "");
    }
    return html;
}

private string SanitizeHtml(string html)
{
    // Remove or replace non-ASCII or control characters

    // For example, you can use regular expressions to replace them with spaces

    // Regex pattern to match non-ASCII or control characters: [^\x20-\x7E]
    return Regex.Replace(html, @"[^\x20-\x7E]", " ");
}
Refer to the following code example to import a Word document in Angular Rich Text Editor.
import { Component } from '@angular/core';
import {
  ToolbarService, LinkService, ImportExportService, ImageService, HtmlEditorService,
  RichTextEditorModule, QuickToolbarService, TableService, PasteCleanupService,
  ToolbarSettingsModel, ImportWordModel
} from '@syncfusion/ej2-angular-richtexteditor';

@Component({
  selector: 'app-root',
  template: `<ejs-richtexteditor id="importEditor" [toolbarSettings]="tools"
    [importWord]="importWord" placeholder="Import the word document here..."></ejs-richtexteditor>`,
  providers: [
    ToolbarService, LinkService, ImageService, HtmlEditorService, QuickToolbarService,
    TableService, PasteCleanupService, ImportExportService
  ],
  standalone: true,
  imports: [RichTextEditorModule],
})
export class AppComponent {
  private hostUrl: string = 'https://services.syncfusion.com/angular/production/';

  public importWord: ImportWordModel = {
    serviceUrl: this.hostUrl + 'api/RichTextEditor/ImportFromWord',
  };

  public tools: ToolbarSettingsModel = {
    items: [
      'Undo', 'Redo', '|', 'ImportWord', '|', 'Bold', 'Italic', 'Underline',
      'StrikeThrough', '|', 'FontName', 'FontSize', 'FontColor', 'BackgroundColor', '|',
      'Formats', 'Alignments', 'Blockquote', '|', 'NumberFormatList', 'BulletFormatList', '|',
      'CreateLink', 'Image', 'CreateTable', '|', 'ClearFormat', 'SourceCode'
    ],
  };
}
Refer to the image below.
Note: For more details, refer to the demo sample.
Export to Word and PDF
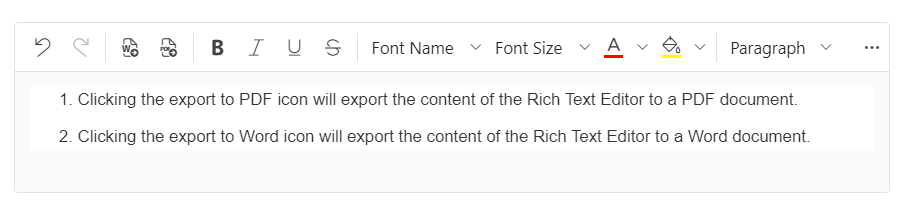
With the Export to Word and PDF feature, you can now easily export your content from the Angular Rich Text Editor to both Word and PDF formats. This dual export capability is perfect for users who need to share their content in different formats. The export process maintains the integrity of your document’s formatting and styles, ensuring that your content looks professional and polished in both Word and PDF formats.
To add ExportWord and ExportPDF tools to the Rich Text Editor toolbar, you can use the toolbarSettings.Items property. To enable these functionalities, the serviceUrl must be correctly configured within the exportWord and exportPdf. These API endpoints handle the export process and manage the server-side generation of Word and PDF files, respectively.
Additionally, the fileName and stylesheet properties within the exportWord and exportPdf allows customization of file names and stylesheets for the exported documents.
Refer to the API endpoint code example below.
public class ExportParam
{
    public string html { get; set; }
}

[AcceptVerbs("Post")]
[EnableCors("AllowAllOrigins")]
[Route("ExportToPdf")]
public ActionResult ExportToPdf([FromBody] ExportParam args)
{
    string htmlString = args.html;
    if (htmlString == null && htmlString == "")
    {
        return null;
    }
    using (WordDocument wordDocument = new WordDocument())
    {
        // This method adds a section and a paragraph in the document
        wordDocument.EnsureMinimal();
        wordDocument.HTMLImportSettings.ImageNodeVisited += OpenImage;

        // Append the HTML string to the paragraph.
        wordDocument.LastParagraph.AppendHTML(htmlString);
        DocIORenderer render = new DocIORenderer();

        // Converts Word document into PDF document
        PdfDocument pdfDocument = render.ConvertToPDF(wordDocument);
        wordDocument.HTMLImportSettings.ImageNodeVisited -= OpenImage;
        MemoryStream stream = new MemoryStream();
        pdfDocument.Save(stream);
        return File(stream.ToArray(), System.Net.Mime.MediaTypeNames.Application.Pdf, "Sample.pdf");
    }
}

[AcceptVerbs("Post")]
[EnableCors("AllowAllOrigins")]
[Route("ExportToDocx")]
public FileStreamResult ExportToDocx([FromBody] ExportParam args)
{
    string htmlString = args.html;
    if (htmlString == null && htmlString == "")
    {
        return null;
    }
    using (WordDocument document = new WordDocument())
    {
        document.EnsureMinimal();

        // Hooks the ImageNodeVisited event to open the image from a specific location
        document.HTMLImportSettings.ImageNodeVisited += OpenImage;

        // Validates the Html string
        bool isValidHtml = document.LastSection.Body.IsValidXHTML(htmlString, XHTMLValidationType.None);

        // When the Html string passes validation, it is inserted to the document
        if (isValidHtml)
        {
            // Appends the Html string to first paragraph in the document
            document.Sections[0].Body.Paragraphs[0].AppendHTML(htmlString);
        }

        // Unhooks the ImageNodeVisited event after loading HTML
        document.HTMLImportSettings.ImageNodeVisited -= OpenImage;

        // Creates file stream.
        MemoryStream stream = new MemoryStream();
        document.Save(stream, FormatType.Docx);
        stream.Position = 0;

        // Download Word document in the browser
        return File(stream, "application/msword", "Result.docx");
    }
}
Refer to the following code example to export Angular Rich Text Editor to Word and PDF formats.
import { Component } from '@angular/core';
import {
  ToolbarService, LinkService, ImageService, HtmlEditorService, RichTextEditorModule,
  QuickToolbarService, TableService, PasteCleanupService, ImportExportService, ToolbarSettingsModel,
  ExportPdfModel, ImageSettingsModel, ExportWordModel
} from '@syncfusion/ej2-angular-richtexteditor';

@Component({
  selector: 'app-root',
  template: ``,
  providers: [
    ToolbarService, LinkService, ImageService, HtmlEditorService, QuickToolbarService, ImportExportService,
    TableService, PasteCleanupService
  ],
  standalone: true,
  imports: [RichTextEditorModule],
})
export class AppComponent {
  private hostUrl: string = 'https://services.syncfusion.com/angular/production/';

  public tools: ToolbarSettingsModel = {
    items: [
      'Undo', 'Redo', '|', 'ExportWord', 'ExportPdf', '|', 'Bold', 'Italic', 'Underline',
      'StrikeThrough', '|', 'FontName', 'FontSize', 'FontColor', 'BackgroundColor', '|',
      'Formats', 'Alignments', 'Blockquote', '|', 'NumberFormatList', 'BulletFormatList', '|',
      'CreateLink', 'Image', 'CreateTable', '|', 'ClearFormat', 'SourceCode'
    ],
  };

  public insertImageSettings: ImageSettingsModel = {
    saveUrl: this.hostUrl + 'api/RichTextEditor/SaveFile',
    removeUrl: this.hostUrl + 'api/RichTextEditor/DeleteFile',
    path: this.hostUrl + 'RichTextEditor/',
  };

  public exportWord: ExportWordModel = {
    serviceUrl: this.hostUrl + 'api/RichTextEditor/ExportToDocx',
    fileName: 'RichTextEditor.docx',
    stylesheet: `.e-rte-content { font-size: 1em; font-weight: 400; margin: 0; }`,
  };

  public exportPdf: ExportPdfModel = {
    serviceUrl: this.hostUrl + 'api/RichTextEditor/ExportToPdf',
    fileName: 'RichTextEditor.pdf',
    stylesheet: `.e-rte-content { font-size: 1em; font-weight: 400; margin: 0; }`,
  };
}
Refer to the image below.
Note: For more details, refer to the demo sample.
From opening and reviewing documents to filling forms, adding signatures, searching content, and customizing the viewing experience, Syncfusion Angular PDF Viewer SDK helps you deliver powerful PDF capabilities without external dependencies.
Try Angular PDF ViewerConclusion
Thank you for reading! In this blog, we’ve discussed how the Angular Rich Text Editor enhances your workflow and document management with its import Word and export to Word and PDF features, introduced in the 2024 Volume 3 release. To explore more exciting updates, check out our Release Notes. Give these features a try, and feel free to share your feedback in the comments section!
If you’re an existing Syncfusion® user, you can download the latest version of Essential Studio® from the license and downloads page. For new users, we offer a 30-day free trial so you can explore these powerful features yourself.
If you need any help, don’t hesitate to reach out through our support forum, support portal, or feedback portal. We’re always here to assist you!


 No spam, just valuable updates.