

We are pleased to announce that Syncfusion has initiated a new support system for Essential Studio®, Bold BI, Bold Reports, and BoldSign. We have moved all your older Syncfusion tickets to the new support system. Previously, all Syncfusion product tickets were created on the Direct-Trac Incidents page. Now, we have a separate, dedicated support portal for each product. Please use the new support system to create new tickets and manage older tickets corresponding to the products listed below.
| Support portals | Use for creating tickets for | URL |
| Syncfusion Support Portal | Essential Studio®Metro Studio
Consulting projects |
https://support.syncfusion.com/ |
| Bold BI Support Portal | Bold BI | https://support.boldbi.com/ |
| Bold Reports Support Portal | Bold Reports | https://support.boldreports.com/ |
| BoldSign Support Portal | BoldSign | https://support.boldsign.com/ |
Creating a new support ticket
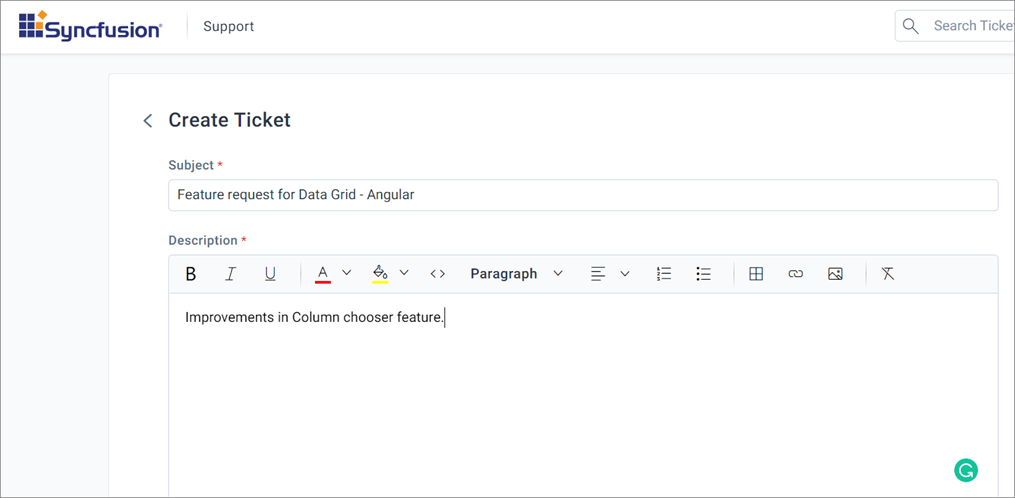
To create a new support ticket, use the Create Ticket option present on this page.
 Fill all the required fields in the Create Ticket form and submit the ticket.
 Selecting a contact group at time of ticket creation
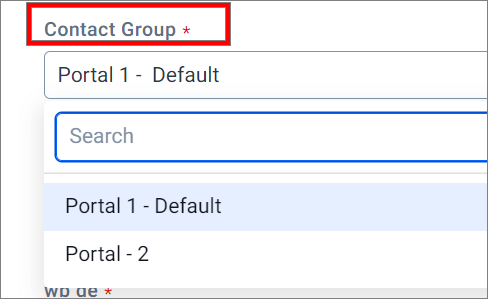
If you are an enterprise user and belong to multiple enterprise portals, an additional dropdown field named Contact Group will appear at the time of ticket creation. Use the Contact Group field to select the enterprise portal for which you are creating the ticket. By default, the support portal will select the primary enterprise portal.
Viewing tickets
To view your tickets, open the support portal page (https://support.syncfusion.com/).
Here, you will find the following tabs:
- My Tickets: Lists the tickets created by you.
- Ticket I’m CC’d On: Lists the tickets for which you are added as an additional
- My Organization Tickets: This tab will be visible only for the enterprise portal users who have permission to view all tickets under your organization. This permission must be granted by the enterprise admin. For more details on support visibility settings, refer to this article.
 A status filter is available.
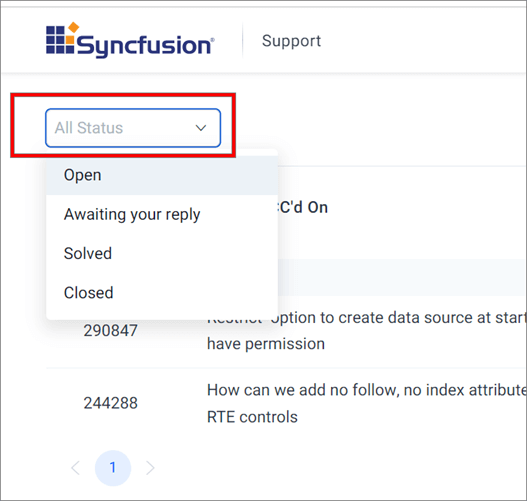 There is a Column chooser available, in case you need to add additional columns to a table.
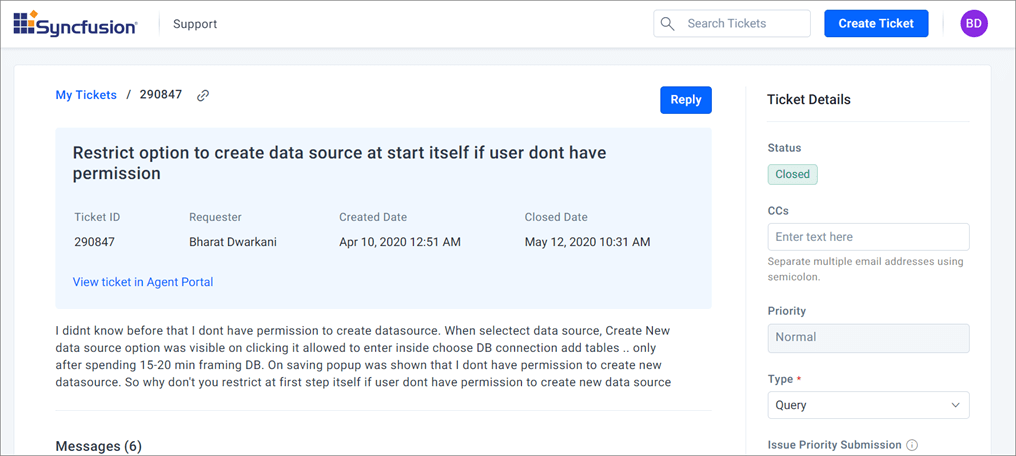
 Once you click on a particular ticket, the ticket details page will open. In the ticket details page, you can reply to tickets and edit ticket properties.
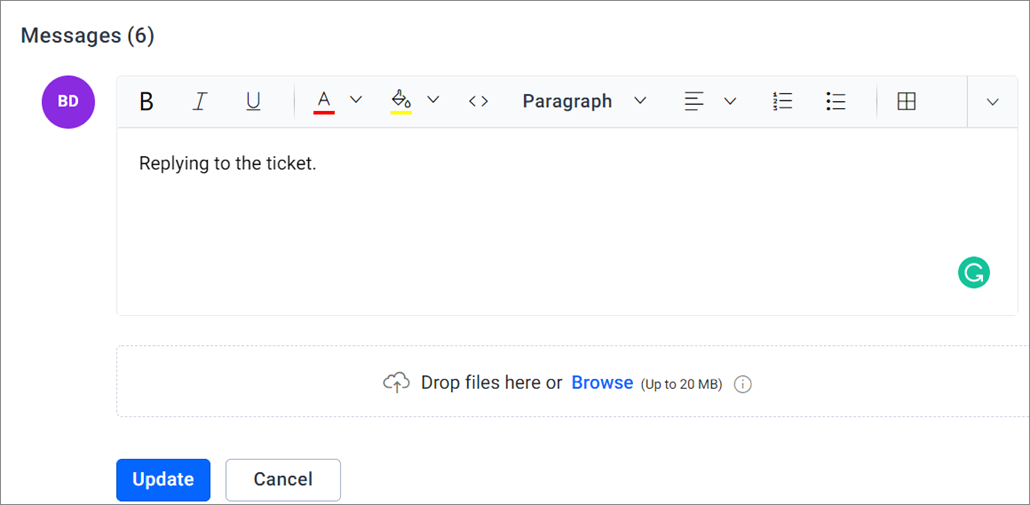
Replying to a ticket
To replying to a ticket, click Reply on the ticket details page. The reply editor will appear. The following are feature available in the reply editor:
- You can switch to the HTML editing option, available in the toolbar of the
- Directly paste screenshots from clipboards.
- Upload multiple files, up to 20 MB.
Note: To share larger files, please upload them in external file services like Dropbox, One Drive, or Google Drive and share the link.
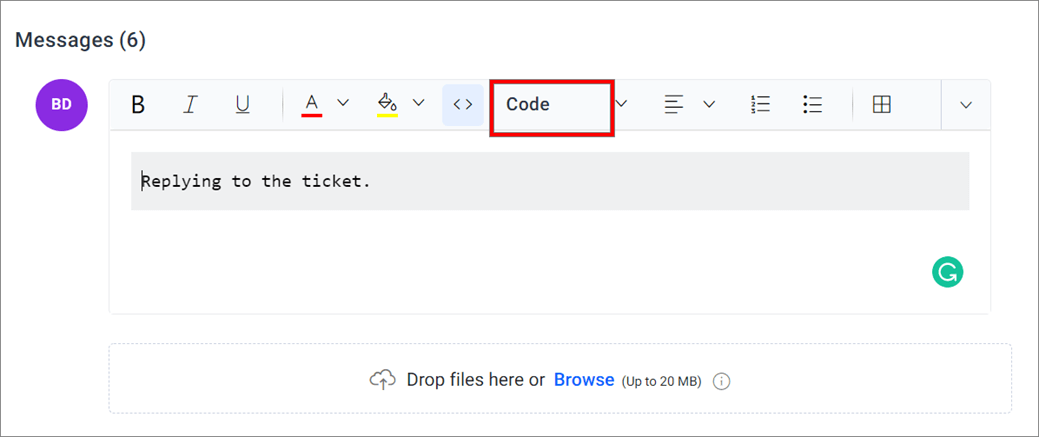
 To insert code examples, select Code in the toolbar.
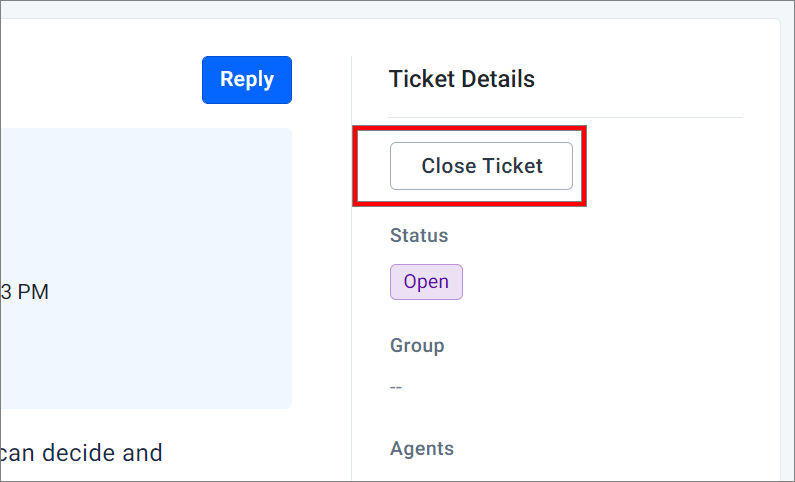
Closing a ticket
If a ticket has been solved to your satisfaction, you can click Close Ticket.
Note: Adding a reply to an already closed ticket will automatically reopen the ticket.
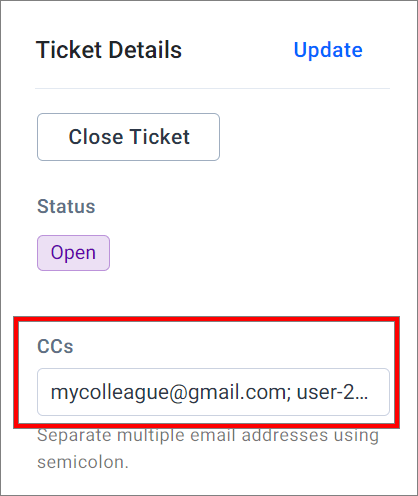
Adding additional notifications in a ticket
If you want to share a ticket with your colleagues or give them the ability to view and comment on your ticket, you can add their email IDs in the CC field. All the CC’d users will receive email alerts on any update and will have ability to reply to the ticket.
Conclusion
I hope you enjoy the user experience and easy access to your support tickets in the new portal. Please feel free to share your feedback as comments to this blog.
You can also contact us through support forums and the feedback portal. We are always happy to assist you!
 No spam, just valuable updates.