
The Blazor framework allows developers to build interactive web UI using C# instead of JavaScript. Blazor applications are built using multiple Blazor components. Each Blazor component is a Razor component consisting of an HTML and CSS template and C# code. These components are then a portion of the UI that can be shared, reused in an app, and even reused in multiple apps.
In this blog, we are going to see how to create a reusable Blazor component. We will use the standard Blazor Server application template of Visual Studio 2022.
Prerequisites
To create and run a Blazor server-side web app, we need the following:
Note:
- .NET Core SDK 3.1.8 requires Visual Studio 2019 16.7 or later.
- .NET 5.0 requires Visual Studio 2019 16.8 or later.
- .NET 6.0 requires Visual Studio 2022 17.0 Preview 4.1 or later.
Let’s see how to create a Blazor component to display the employee details of an organization.
Step #1: Create a Blazor server-side app.
First, open Visual Studio and create a Blazor server-side project.
Step #2: Create the EmployeeCard component.
Let’s create a Blazor component to display details about the employees of an organization.
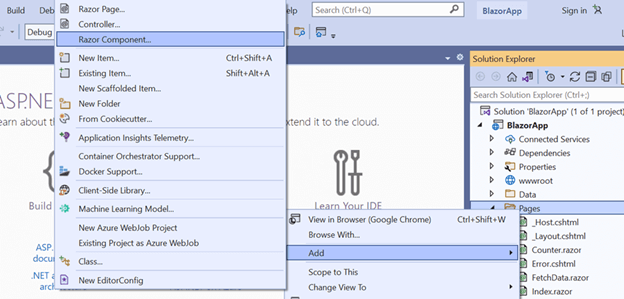
To add a component to the project, right-click on the Pages folder and choose Add -> Razor Component.
Refer to the following image.
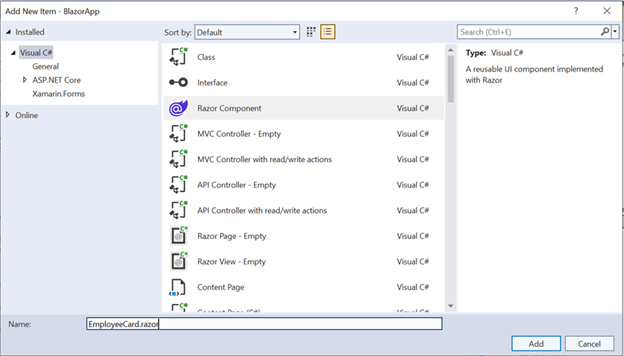
 In the Add New Item- Blazor App dialog, provide the name EmployeeCard and click Add.

Refer to the following image.
Now, our employee component is created with the following basic template.
<h3>EmployeeCard</h3>

@code {

}
Next, we replace this code with our UI code for the employee details. The markup contains div, h6, h5, and img elements. The Blazor Server app project has a Bootstrap theme, so we are going to use the Bootstrap Card to display the organized content.
Refer to the following code.
<div class="card m-2">
  <div class="card-body">
    <h6 class="card-title text-center">Digital Marketing</h6>
    <h6 class="card-subtitle mb-2 text-muted text-center">Sales Department</h6>
    <div class="card-text text-center">
        <img class="card-img-top" src="../EmployeeImage.png" alt="Card image cap">
        <h5>Margaret</h5>
    </div>
    <div>
     <h6 class="card-text"><b>ID</b>: <small>124</small></h6>
     <h6 class="card-text"><b>Joined</b>: <small>12th July 2012</small> </h6>
     <h6 class="card-text"><b>Email</b>: <small>[email protected]</small></h6>
   </div>

  </div>
</div>
Step #3: Create the parameters to reuse the Blazor component.
Our component is ready. But we have used hard-coded values for the employee details like image, ID, name, and email. A component is a piece of an app that can be used multiple times in the same app.
So, to make our component more dynamic, we replace the hard-coded values with the component parameters provided by the user. Now let’s create the parameters to get these details.
Refer to the following code.
@code {

   [Parameter]
   public string Name {get; set;}

   [Parameter]
   public string Image {get; set;}

   [Parameter]
   public int ID {get; set;}

   [Parameter]
   public string Joined {get; set;}

   [Parameter]
   public string Email {get; set;}


}
Then, in the Razor page, replace the hard-coded values with the parameters’ values by prefixing @ to them.
Refer to the following code.
<div class="card m-2">
 <div class="card-body">
    <h6 class="card-title text-center">Digital Marketing</h6>
    <h6 class="card-subtitle mb-2 text-muted text-center">Sales Department</h6>
    <div class="card-text text-center">
        <img class="card-img-top" src="@Image" alt="Card image cap">
        <h5>@Name</h5>
    </div>
    <div>
    <h6 class="card-text"><b>ID</b>  : <small>@ID</small></h6>
    <h6 class="card-text"><b>Joined</b>: <small>@Joined</small> </h6>
    <h6 class="card-text"><b>Email</b>: <small>@Email</small></h6>
    </div>

 </div>
</div>

@code {

   [Parameter]
   public string Name {get; set;}

   [Parameter]
   public string Image {get; set;}

   [Parameter]
   public int ID {get; set;}

   [Parameter]
   public string Joined {get; set;}

   [Parameter]
   public string Email {get; set;}

}
Now, move the EmployeeCard.Razor file to the Shared folder.
Step #4: Display the employee details.
Now, our Blazor component is ready to be displayed on a page. We can treat the Blazor component itself as a page using the route directives. As of now, we are using the default Index.razor page to display the component.
Use the HTML tag with the component name <EmployeeCard></EmployeeCard> within the Index page and pass the values to the component parameters.
@page "/"

<EmployeeCard Image="../EmployeeImage.png" ID="124" Joined="12th July 2012" Email="[email protected]"></EmployeeCard>
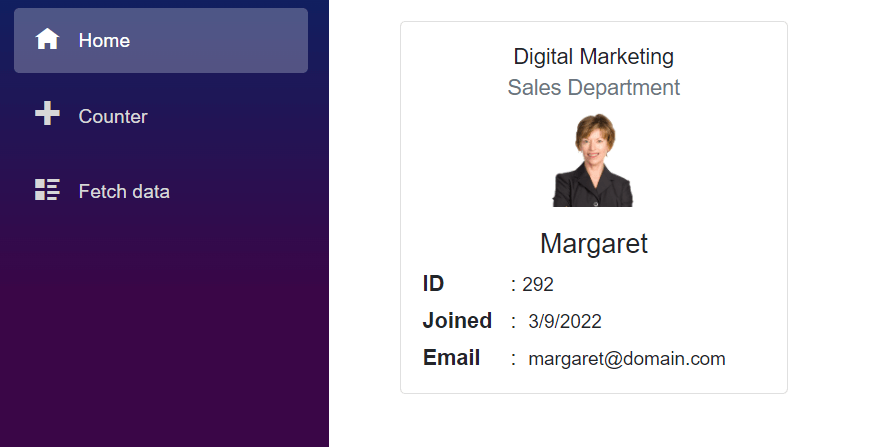
Then, run the application and you will see our Blazor component on the index page itself.
Step #5: Display multiple employees’ details in a department.
We have displayed the information of just a single employee. But we can use this EmployeeCard component to display the details of all the employees in an organization.
Let’s change this page to show the details of the employees working in the Sales Department of the organization.
First, create a Model and Service in the /Data folder of the project to generate some random data for the employees.
In the EmployeeModel, declare the fields.
EmployeeModel
public class EmployeeModel
 {
     public int ID { get; set; }
     public DateTime Joined { get; set; }
     public string Name { get; set; } = "";
     public string Image { get; set; } = "";
     public string Email { get; set; } = "";
 }
In the EmployeeService, define the method to generate data.
EmployeeService
public class EmployeeService
 {
        private static readonly string[] Name = new[]
        {
        "Nancy", "Margaret", "Michael", "Robert", "Anne"
        };
        private static readonly string[] Mail = new[]
        {
        "[email protected]", "[email protected]", "[email protected]", "[email protected]","[email protected]"
        };

        public Task<EmployeeModel[]> GetEmployeeAsync(DateTime startDate)
        {
            return Task.FromResult(Enumerable.Range(0, 5).Select(index => new EmployeeModel
            {
              Joined = startDate.AddDays(index),
              Name = Name[index],
              Email = Mail[index],
              Image = "../" + Name[index] +".PNG",
              ID = Random.Shared.Next(200, 555)

            }).ToArray());
        }
 }
Then, register the EmployeeService in the Program.cs file to make it available for all the components in the project.
Program.CS
builder.Services.AddSingleton<EmployeeService>();
Inject the EmployeeService in the index page using the @inject directive. Now, the service is available on the index page. Call the GetEmployeeAsync method to generate the array of the Employee model.
Declare the employeeDetails field to store the data from the service. The data should be loaded when the component is initialized, so use the OnInitializedAsync lifecycle method to get the values.
@using BlazorApp.Data
@inject EmployeeService EmployeeService

@code {
    private EmployeeModel[]? employeeDetails;

    protected override async Task OnInitializedAsync()
    {
        employeeDetails = await EmployeeService.GetEmployeeAsync(DateTime.Now);
    }
}
Using the employee details array, create components for each employee and assign the details from the employee service as values of the parameters.
Refer to the following code.
@page "/"

@using BlazorApp.Data
@inject EmployeeService EmployeeService

@if (employeeDetails == null)
{
    <p><em>Loading...</em></p>
}
else
{
    <div class="container">
    <div class="row">
   @foreach (var employee in employeeDetails)
   {
      <div class="col-lg-4 mb-2">
      <EmployeeCard [email protected] [email protected] [email protected] [email protected]() [email protected]></EmployeeCard>
     </div>
   }
   </div>
   </div>
}

@code {
    private EmployeeModel[]? employeeDetails;

    protected override async Task OnInitializedAsync()
    {
        employeeDetails = await EmployeeService.GetEmployeeAsync(DateTime.Now);
    }
}
Finally, run the application and you can see the details of the employees in the sales department.
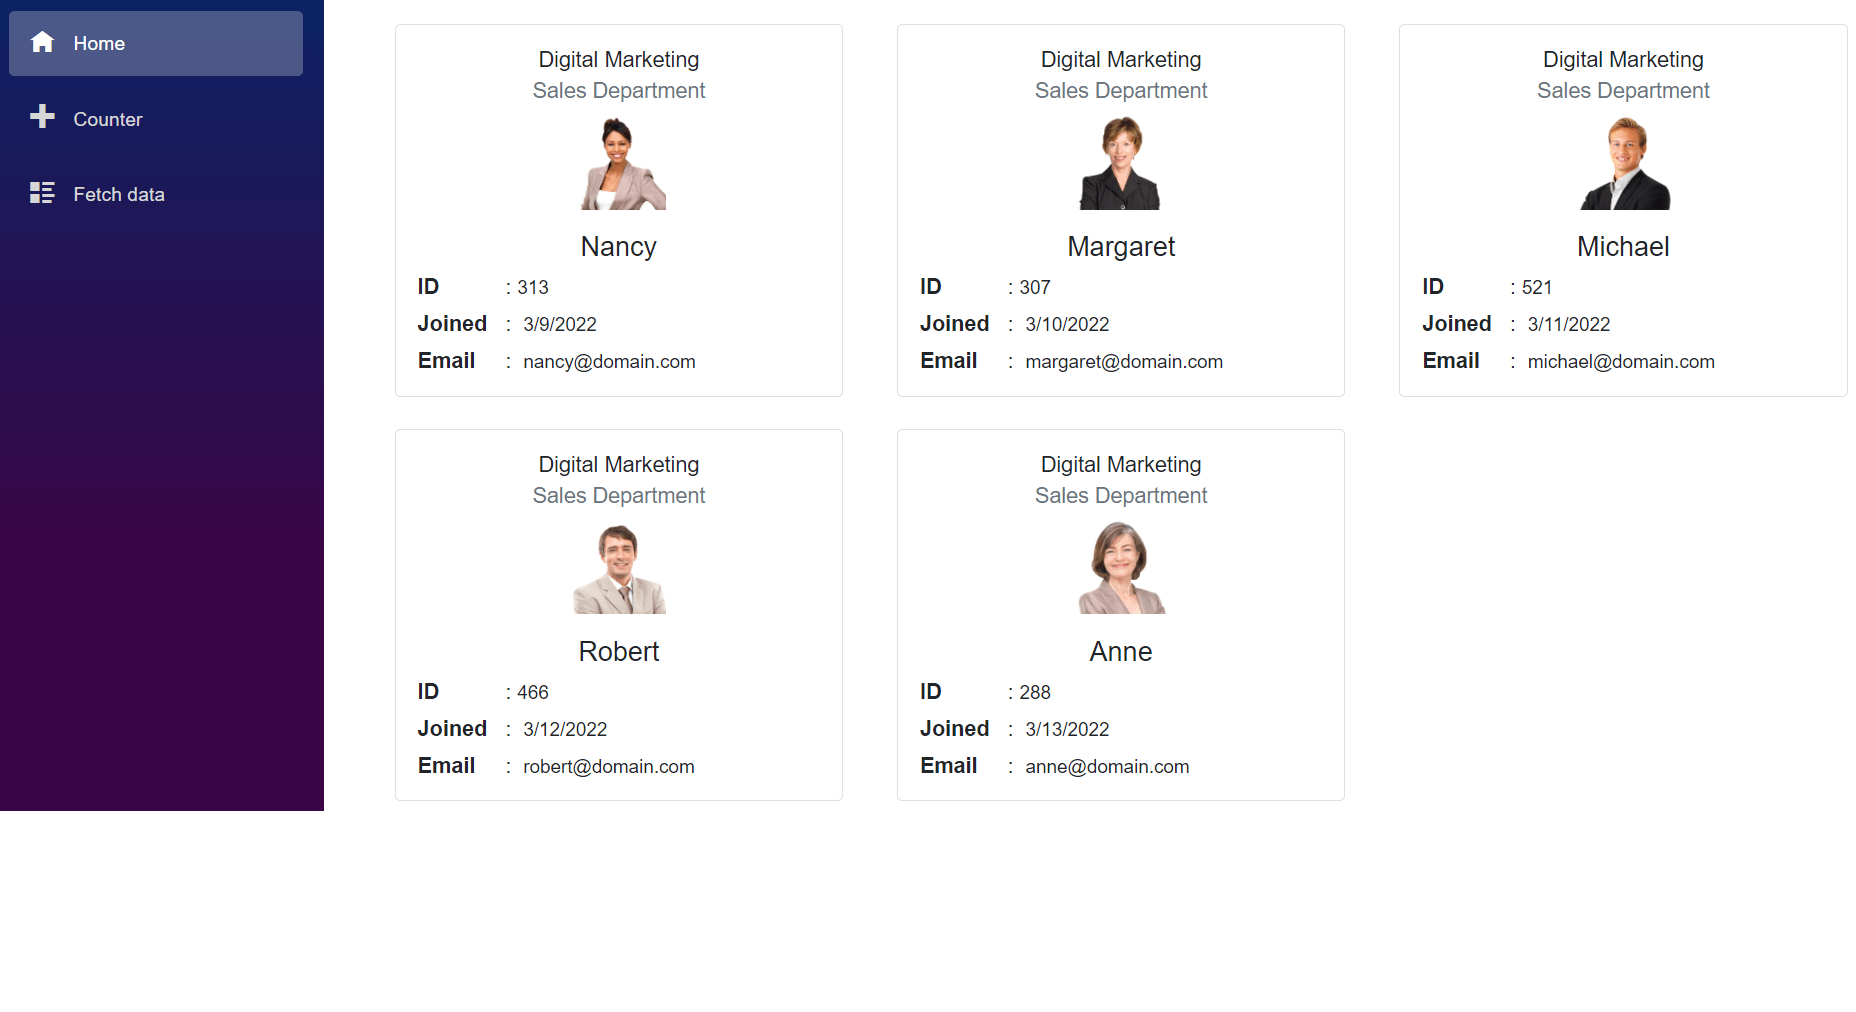 You can use this Blazor component to display all the employee details in the organization in each department.
GitHub reference
For more details, refer to the complete code example on GitHub for creating a Blazor component.
Conclusion
Thanks for reading! I hope you now have a better understanding of how to create a Blazor component. The UI components are the heart of a Blazor application, as they let us reuse the code, reduce our development time, and enhance our productivity. Use this blog post as a reference and try creating your own Blazor component. Leave your feedback in the comments section below!
The Syncfusion Blazor suite offers over 70 components that work with both Blazor server-side and client-side (Blazor WebAssembly) projects seamlessly. Use them to build astonishing applications!
For existing customers, the newest version of Essential Studio® is available for download from the License and Downloads page. If you are not yet a Syncfusion customer, you can try our 30-day free trial to check out the available features.
For questions, you can contact us through our support forum, support portal, or feedback portal. We are always happy to assist you!


Related blogs
- 7 Features of Blazor That Make It an Outstanding Framework for Web Development
- Build World-Class Blazor WebAssembly Apps with Globalization and Localization
- Create an Org Chart to Elegantly Visualize Hierarchical Data in Blazor WebAssembly
- Easily Synchronize Blazor Resource Scheduler with RESTful Services
 No spam, just valuable updates.