

TL;DR: Want your React spreadsheets to feel rock‑solid without slowing your users down? Spreadsheet protection gives you the best of both worlds: you can lock down formulas, structure, and layouts while keeping key input cells open for editing. Use sheet protection + protectSettings to decide exactly what users can and can’t do, lockCells() to open just the ranges that matter, and workbook protection to stop sheet renaming, deleting, or moving.
Handling sensitive or business-critical data in the Syncfusion® React Spreadsheet? Protecting sheets and workbooks ensures your templates, formulas, and inputs stay intact and tamper‑free.
This guide walks you through:
- When to protect a sheet vs. a workbook
- How to lock/unlock cells
- How to configure granular permissions
- How to apply read‑only mode
- Practical protection patterns for real‑world use cases
Protection features in React Spreadsheet
Syncfusion includes different layers of protection, each for different use cases:
- Workbook protection: Prevents structural changes like:
- Adding/removing sheets
- Renaming or hiding sheets
- Rearranging sheet order
- Sheet protection: Restrict editing on the current sheet.
Used when:- You want formulas protected
- You want only certain cells to be editable
- You want users to view but not modify content
- Cell locking: Lock selected cells or ranges while keeping others editable.
- Password protection: Secure sheets with a password to prevent unauthorized changes.
- Selective permissions: Control actions such as inserting/deleting cell data, formatting, resizing rows/columns, and inserting hyperlinks.
- Read-only mode: Make cells non-editable to prevent modifications.
Ready to lock it down? Explore advanced sheet-protection methods in Syncfusion React Spreadsheet to keep your data secure.
Let’s dive in and see how you can lock sheets, secure cells, protect workbooks, and manage permissions with ease! From viewing Excel files to editing data, running calculations, and exporting workbooks, Syncfusion React Spreadsheet helps you build complete spreadsheet experiences inside your applications.
Protecting a sheet
The protect sheet feature makes a sheet read-only, preventing edits unless you explicitly allow them. Enable sheet protection by setting the isProtected property to true (it is false by default).
By default, these actions are disabled:
- Selecting cells
- Editing cells
- Formatting rows, columns, or cells
- Inserting links
- Resizing, hiding rows/columns
Customizing permissions with protectSettings
The protectSettings option lets you enable specific actions even when a sheet is protected. All options are disabled by default; set to true to enable.
The available protectSettings options are,
- Select locked cells: Allow selecting locked cells for highlighting.
- Select unlocked cells: Allow selecting only unlocked cells.
- Format cells: Apply cell style like font, color, borders, number format, and conditional format.
- Format rows: Resize and hide Rows.
- Format columns: Resize and hide Columns.
- Insert link: Insert hyperlinks in unlocked cells.
For example, if formatCells: true is set in protectSettings, users can still apply styles, borders, and font or background colors even while the sheet is protected.
Applying sheet protection using the UI
You can protect a sheet directly from the Syncfusion Spreadsheet UI using:
- Ribbon toolbar
Navigate to the Data tab and select Protect Sheet.
Protect Sheet via Data tab - Context Menu
Right‑click the sheet tab and choose Protect Sheet.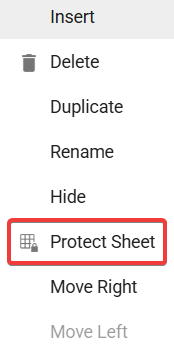
Protect Sheet via context menu
After selecting the option, a protection settings dialog appears. From here, users can:
- Choose which actions are allowed while the sheet is protected.
- Optionally set a password to prevent unauthorized change.
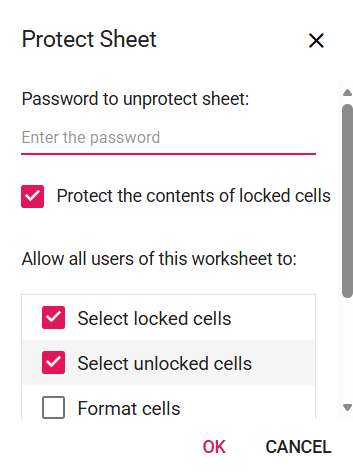
Choose user actions from the Protect Sheet dialog
Once confirmed, the sheet will be protected based on the permissions.
APIs for securing sheets in React Spreadsheet
Using the isProtected property
You can enable sheet protection through model binding during the initial load by using the isProtected property.
Here’s how you can do it in code:
const protectSettings = {
    selectCells: true,
    selectUnLockedCells: false,
    formatCells: false,
    insertLink: false,
    formatColumns: false,
    formatRows: false,
};
<SheetDirective
    name='EMI Schedule'
    isProtected={true}
    protectSettings={protectSettings} >
</SheetDirective>
In the above code example, the sheet is protected by passing isProtected as true and protectSettings to configure permissions in the SheetDirective.
Using the protectSheet() API
You can also use the protectSheet method to apply sheet protection, which lets you configure permissions using protectSettings.
Refer to the code example below to learn how to enable sheet protection in a spreadsheet.
const onCreated = () => {
    // Protect settings
    const protectSettings = {
        selectCells: true,
        selectUnLockedCells: false,
        formatCells: false,
        insertLink: false,
        formatColumns: false,
        formatRows: false
    }
    // To protect the sheet programmatically using the protect sheet method.
    spreadsheet.protectSheet('EMI Calculator', protectSettings);
}
In this code example, protection is applied in the created event, which runs after the spreadsheet initializes. By default, all cells are locked when protection is active, and you can customize what users can still do by modifying protectSettings.
Unlocking specific cells in a protected sheet
When you protect a sheet, all the cells are locked by default (i.e., isLocked property is set to true). But what if you need to edit specific cells in a protected sheet?
That’s where the lockCells() method comes in! To unlock specific cells or ranges, simply pass the cell range and set the isLocked parameter in the lockCells() method to false. This keeps those cells editable even while the sheet remains protected.
You can also use the same method to lock a particular range by setting the second parameter(isLocked) to true.
Try this in your code:
//Unlocking cells using the lockCells method in a protected sheet
spreadsheet.lockCells('C2:C9', false);
In this code example, the cell range C2:C9 becomes editable, allowing users to modify these cells while the rest of the sheet stays protected.
Unprotecting a Sheet
The Unprotect Sheet feature restores full editing access, allowing users to modify, format, insert, or delete content in the sheet. You can unprotect your sheet in two ways.
Unprotect Sheet through UI interaction
You can unprotect a sheet using:
- Ribbon
Go to the Data tab and select Unprotect Sheet.
Unprotect sheet via Data tab - Context Menu
Right-click the sheet tab and choose Unprotect Sheet.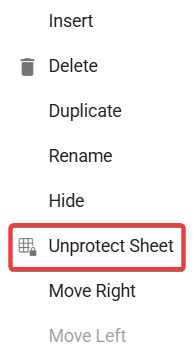
Unprotect sheet via context menu - If the sheet is protected with a password, enter it to proceed.
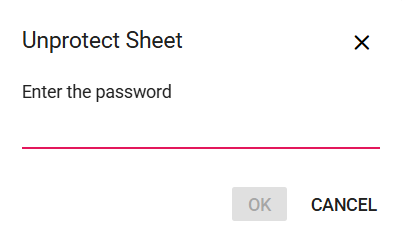
Unprotect the sheet using the password
Once completed, users regain full editing access to the sheet.
API for unprotecting sheets in React Spreadsheets
You can remove sheet protection using the unprotectSheet method, as shown below.
// To unprotect the sheet programmatically using the unprotectSheet public method.
// You can pass the index or name of the sheet to unprotect it.
spreadsheet.unprotectSheet('EMI Calculator');
In this code example, the sheet EMI Calculator is initially protected on the created event. The unprotectSheet method removes protection from the specified sheet (by name or index) and makes it editable again.
Watch how the feature works in action:
How to make cells read-only without using sheet protection
Want to lock only certain cells without protecting the entire sheet? The Read-Only feature lets you restrict editing, formatting, inserting, or deleting selected cells, rows, or columns, while still allowing users to view the data.
Note: Cells marked as read-only using the isReadOnly property will not remain protected in the saved Excel file after exporting the spreadsheet. If you want cells to stay noneditable in the exported file, use the Protect Sheet feature instead, as it ensures the protection settings are correctly preserved.
Here’s how to do it using the API:
- To make a range read-only: Use the setRangeReadOnly method and pass
trueas the first parameter, along with the desired range and sheet index. - To remove read-only status: Call the same
setRangeReadOnlymethod and passfalseas the first parameter, along with the range and sheet index.
Quick and easy, your data stays safe without locking the whole sheet!
Code block:
//To apply read-only to cells
spreadsheet.setRangeReadOnly(true, 'E1:F4', spreadsheet.activeSheetIndex);
//To apply read-only to a row
spreadsheet.setRangeReadOnly(true, '2:2', spreadsheet.activeSheetIndex);
//To apply read-only to columns
spreadsheet.setRangeReadOnly(true, 'A:C', spreadsheet.activeSheetIndex);
//To remove read-only to a range
spreadsheet.setRangeReadOnly(false, '2:2', spreadsheet.activeSheetIndex);
In this code block, the setRangeReadOnly method is used to make specific parts of the spreadsheet non-editable. You can apply read-only to a range of cells, an entire row, or a column by passing the respective range (e.g., 'E1' for a cell, '2:2' for a row, and 'A:C' for a column). This ensures users cannot modify those ranges while other cells in the sheet remain interactive.
Alternatively, you can make cells read-only using the cell data-binding approach by setting the isReadOnly property to true for specific cells, rows, or columns.
Code example for quick integration:
//To apply read-only to a row
<RowDirective index={3} isReadOnly={true}></RowDirective>
//To apply read-only to a column
<ColumnDirective isReadOnly={true} width={130}></ColumnDirective>
//To apply read-only to a cell
<CellDirective index={5} isReadOnly={true}></CellDirective>
In this code block, the isReadOnly property is applied at the row, column, and cell levels to make specific parts of the spreadsheet non-editable.
Here’s a quick demo of the read-only feature in action:
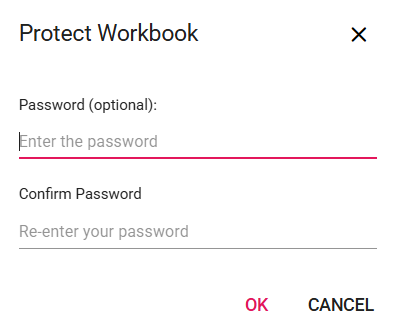
Protect workbook
Want to keep your workbook structure safe from accidental changes? The Protect Workbook feature is your go-to. Once enabled, it locks down actions like inserting, deleting, hiding, renaming, or moving sheets. Here are two easy ways to do it:
Using the Ribbon
Click Data tab → Protect Workbook.

You can set a password (optional) and confirm it.
Using the API
To protect a workbook, set the isProtected property to true. If you want to protect the sheet with a password, you can set the password property.
Below is a code example demonstrating how to protect a workbook using the spreadsheet API.
<SpreadsheetComponent isProtected={true} password='spreadsheet' >Unprotect Workbook
Need to unlock your workbook? The Unprotect Workbook feature lets you remove restrictions on inserting, deleting, renaming, hiding, or moving sheets.
Using the Ribbon
Go to the Data tab → click Unprotect Workbook. If a password is set, enter it when prompted.

Simple as that, your workbook is now open for modifications.
Here’s a preview of the feature in action:
GitHub reference
To explore these features in action, visit our GitHub repository, which contains sample implementations for sheet protection, workbook protection, and read-only cells.
Frequently Asked Questions
Protect the sheet, then unlock specific ranges using How do I keep only specific cells editable while protecting everything else?
lockCells(range, false). This keeps formulas/templates locked while allowing controlled data entry.
Use read-only ranges when full sheet protection isn’t required. Use sheet protection with locked and unlocked cells when you need stronger restrictions or when protection must persist after Excel export.Should I use read-only ranges or sheet protection?
Enable workbook protection to block structural changes like rename, delete, hide, move, and insert sheets.How do I prevent users from renaming or deleting sheets?
Conclusion
Thank you for reading! Syncfusion React Spreadsheet gives you complete control over data security with flexible protection options. Whether you need to lock entire sheets, safeguard workbook structure, allow edits only in selected cells, or set read-only access, these features make it easy to keep your spreadsheets accurate and secure.
Ready to secure your data? Try Syncfusion React Spreadsheet today and experience powerful protection features in action! Syncfusion Spreadsheet is also available for JavaScript, Angular, Vue, ASP.NET Core, and ASP.NET MVC platforms, making it easy to integrate across your tech stack.
If you’re a Syncfusion user, you can download the setup from the license and downloads page. Otherwise, you can download a free 30-day trial.
You can also contact us through our support forum, support portal, or feedback portal for queries. We are always happy to assist you!


 No spam, just valuable updates.