
React Succinctly®

CHAPTER 2
React: The Big Picture
React is defined as a JavaScript library for building user interfaces. Let’s talk about the two different parts of this definition:
React is a JavaScript "library"
It is not exactly a "framework." It is not a complete solution, and you will often need to use more libraries with React to form any solution. React does not assume anything about the other parts in any solution.
Frameworks serve a great purpose, especially for young teams and startups. When working with a framework, many smart design decisions are already made for you, which gives you a clear path to focus on writing good application-level logic. However, frameworks come with some disadvantages. For experienced developers working on large codebases, these disadvantages are sometimes deal-breakers.
Frameworks are not flexible, although some claim to be. A framework usually wants you to code everything a certain way. If you try to deviate from that way, the framework usually ends up fighting you about it. Frameworks are also usually large and full of features. If you need to use only a small piece of them, you have to include the whole thing anyway. Admittedly, this point is in the process of changing today, but it is still not ideal. Some frameworks are going modular, which I think is great, but I am a big fan of the pure Unix philosophy:
“Write programs that do one thing and do it well. Write programs to work together.”
—Doug McIlroy
React follows the Unix philosophy because it is a small library that focuses on just one thing, and on doing that thing extremely well. That "one thing" is the second part of React’s definition: building user interfaces.
Building user interfaces
A user interface (UI) is anything we put in front of users to have them interact with a machine. UIs are everywhere, from the simple buttons on a microwave to the dashboard of a space shuttle. If the device we are trying to interface with can understand JavaScript, we can use React to describe a UI for it. Since web browsers understand JavaScript, we can use React to describe web UIs.
I like to use the word describe here because that is what we basically do with React—we just tell it what we want! React will then build the actual UI on our behalf in the web browser. Without React or similar libraries, we would need to manually build UIs with native web APIs and JavaScript, and that is not as easy.
When you hear the statement, "React is declarative," that is exactly what it means. We describe UIs with React and tell it what we want (not how to do it). React will take care of the "how" and translate our declarative descriptions (which we write in the React language) to actual UIs in the browser. React shares this simple declarative power with HTML itself, but with React we get to be declarative for HTML UIs that represent dynamic data, not just static data.
When React was released, there was a lot of buzz about its performance because it introduced the smart idea of a virtual DOM that can be used to reconcile the actual DOM (we’ll talk about that in the next section). While React’s performance is still one of the most important reasons why it is extremely popular today, I don’t classify performance as the best thing about it. I think React was a game changer because it created a common language between developers and browsers that allows developers to declaratively describe UIs and manage transactions on their state, instead of transactions on their DOM elements. It’s simply the language of user interface "outcomes." Instead of coming up with steps to describe transactions on interfaces, developers just describe the interfaces in terms of a "final" state (like a function). When transactions happen to that state, React takes care of updating the UIs in the DOM based on that (and it does it efficiently, as we’ll see next).
If someone asked you to give one reason why React is worth learning, this outcomes-based UI language is the one. I call this language "the React language."
The React language
Say that we have a list of TODOs like this one:
Code Listing 1: The todos array
const todos: [ { body: 'Learn React Fundamentals', done: true }, { body: 'Build a TODOs App', done: false }, { body: 'Build a Game', done: false }, ]; |
This todos array is the starting state of your UI. You’ll need to build a UI to display them and manage them. The UI might have a form to add new TODOs, a way for you to mark a TODO as done, and a way to remove all done TODOs. These are all features in standard TODOs. For example:
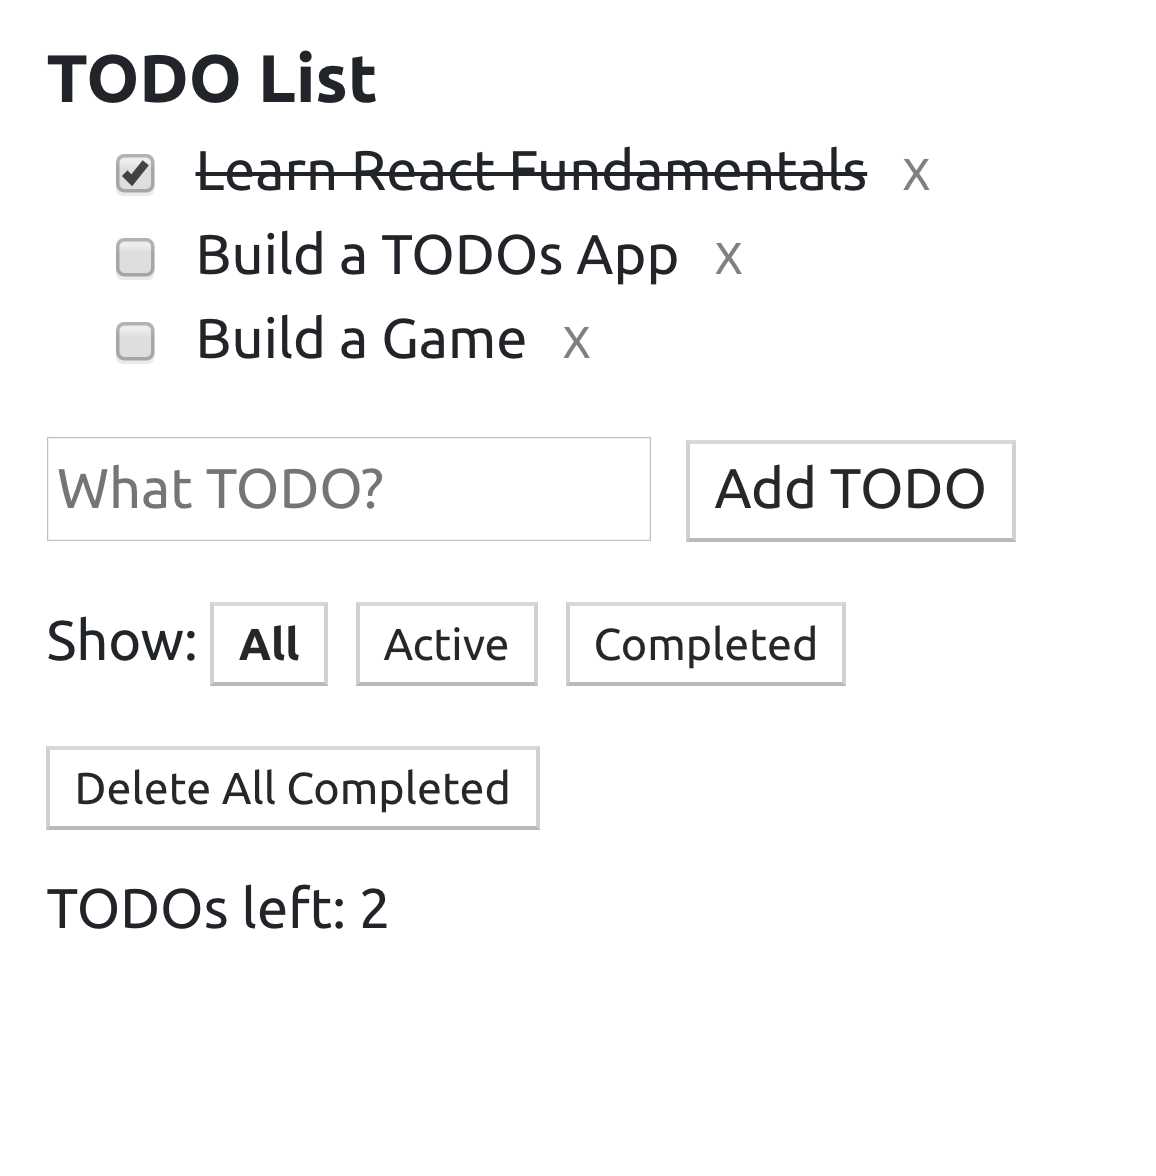
Figure 2: The UI for a TODOs example app
Each of these transactions will require the app to perform a DOM operation to create, insert, update, or delete DOM nodes. With React, you don’t worry about all of these DOM operations. You don’t worry about when they need to happen, and you don’t worry about how to efficiently perform them.
With React, you just place the todos array in the "state" of your app, and then use the React language to "command" React to display that state a certain way in the UI:
Code Listing 2: The React language (don’t worry about the syntax yet)
<header>TODO List</header> <ul> {todos.map(todo => <li>{todo.body}</li> )} </ul> // Other form elements |
Note: The callback function for the .map method in Code Listing 2 is an inline arrow function that returns a React element. We mapped an array of JavaScript objects into an array of React elements. Both arrow functions and the map method are explained in the next chapter.
After coming up with this React language text, you get to focus on just doing transactions on that todos array! You add, remove, and update the items of that array, and React will reflect the changes you make on these items to the UI description that you wrote with the React language.
This mental model about modeling the UI based on the final state is much easier to understand and work with, especially when the views have lots of data transitions. For example, consider a view that tells you how many of your friends are online. That view’s "state" will be just a single number that represents how many friends are currently online. It does not care that a moment ago three friends came online, then one of them disconnected, and then two more joined. It just knows that at this current moment, four friends are online.
React’s tree reconciliation
Before React, when we needed to work with the browser’s DOM API, we avoided traversing the DOM tree as much as possible, and there is a reason for that. Any operation on the DOM is done in the same single thread that’s responsible for everything else that’s happening in the browser, including reactions to user events like typing, scrolling, or resizing.
Any expensive operation on the DOM means a slow and janky experience for the user. It is extremely important that your applications do the absolute minimum operations and batch them where possible. React came up with a unique concept to help us do exactly that.
When we tell React to render a tree of elements in the browser, it first generates a virtual representation of that tree and keeps it around in memory for later. Then it’ll proceed to perform the DOM operations that will make the tree show up in the browser.
When we tell React to update the tree of elements it previously rendered in the browser, it generates a new virtual representation of the updated tree. Now React has two versions of the tree in memory!
To render the updated tree in the browser, React does not discard what has already been rendered. Instead, it will compare the two virtual versions of the tree that it has in memory, compute the differences between them, figure out what sub-trees in the main tree need to be updated, and only update these sub-trees in the browser.
This process is what’s known as the tree reconciliation algorithm, and it is what makes React a very efficient way to work with a browser’s DOM tree. We’ll see an example of it shortly.
Besides the declarative outcomes-based language and the efficient tree reconciliation, here are a few of the other reasons why I think React gained its massive popularity:
- Working with the DOM API is hard. React gives developers the ability to work with a "virtual" browser that is friendlier than the real browser. React basically acts like your agent who will do the communication with the DOM on your behalf.
- React is often given the "just JavaScript" label. This means it has a very small API to learn, and after that, your JavaScript skills are what make you a better React developer. This is an advantage over libraries with bigger APIs.
- Learning React pays off big-time for iOS and Android mobile applications as well. React Native allows you to use your React skills to build native mobile applications. You can even share some logic between your web, iOS, and Android applications.
- The React team at Facebook tests all improvements and new features that get introduced to React right there on facebook.com, which increases the trust in the library among the community. It’s rare to see big and serious bugs in React releases because they only get released after thorough production testing at Facebook.
Your first React example
To see the practical benefit of the tree reconciliation process and the big difference it makes, let’s work through a simple example focused on just that concept. Let’s generate and update an HTML elements tree twice: once using the native web API, and then once using the React API (and its reconciliation work).
To keep this example simple, I will not use components or JSX (the JavaScript extension that’s popularly used with React). I will also do the update operation inside a JavaScript interval timer. This is not how we write React applications, but let’s focus on one concept at a time. We’ll talk about components, JSX, and state managements in Chapter 4.
Start with this jsComplete playground session.
In that session, a simple HTML element is rendered to the display using two methods:
Code Listing 3: Method #1: Using the web DOM API directly
document.getElementById('mountNode').innerHTML = ` <div> Hello HTML </div> `; |
Code Listing 4: Method #2: Using React’s API
ReactDOM.render( React.createElement( 'div', null, 'Hello React', ), document.getElementById('mountNode2'), ); |
The ReactDOM.render and React.createElement methods are the core API methods in a React application. In fact, a React web application cannot exist without using both of these methods. Let me briefly explain them.
ReactDOM.render
This is basically the entry point for a React application into the browser’s DOM. It has two arguments:
- The first argument is WHAT to render to the browser. This is always a "React element.”
- The second argument is WHERE to render that React element in the browser. This has to be a valid DOM node that exists in the statically rendered HTML. The previous example uses a special mountNode2 element, which exists in the playground’s display area (the first mountNode is used for the native version).
What exactly is a React element? It’s a virtual element describing a DOM element. It’s what the React.createElement API method returns.
React.createElement
Instead of working with strings to represent DOM elements (as in the native DOM example), in React we represent DOM elements with objects using calls to the React.createElement function. These objects are known as React elements.
The React.createElement function has the following arguments:
- The first argument is the HTML "tag" for the DOM element to represent, which is div in this example.
- The second argument is for any attributes (like id, href, or title) we want the DOM element to have. The simple div we’re using has no attributes, so we used null in there.
- The third argument is the content of the DOM element. We’ve put a "Hello React" string in there. The third argument and all the optional arguments after it form the children list for the rendered element. An element can have 0 or more children. The div element in the example has a single text node child (so far).
Tip: React.createElement can also be used to create elements from React components. We will see examples of that in Chapter 4.
React elements are created in memory. To actually make a React element show up in the DOM, we use the ReactDOM.render method, which will do many things to figure out the most optimal way to reflect the state of a React element in the actual DOM tree in the browser.
When you execute the two methods in this code session, you’ll see a "Hello HTML" box and a "Hello React" box:
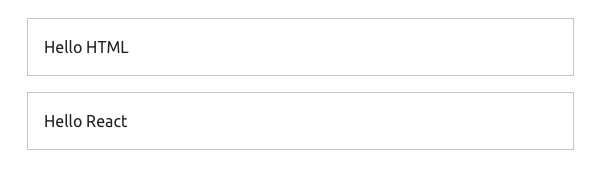
Figure 3: The UI at jscomplete.com/playground/rs1.1
Nesting React elements
We have two nodes: one being controlled with the DOM API directly, and another being controlled with the React API (which in turn uses the DOM API). The only major difference between the ways we are building these two nodes in the browser is that in the HTML version, we used a string to represent the content, while in the React version, we used pure JavaScript calls and represented the content with an object instead of a string.
No matter how complicated the HTML user interface is going to get, when using React, every HTML element will be represented with a React element.
Let’s add more HTML elements to this simple user interface. Let’s add a text box to read input from the user. For the HTML version, you can just inject the new element’s tag directly inside the template:
Code Listing 5
document.getElementById('mountNode').innerHTML = ` <div> Hello HTML <input /> </div> `; |
Tip: Throughout this book, when I make changes to code within related examples, these changes will be highlighted in a bold font in the code listing.
To do the same with React, you can add more arguments after the third argument for React.createElement. To match what’s in the native DOM example so far, we can add a fourth argument that is another React.createElement call that renders an input element:
Code Listing 6
ReactDOM.render( React.createElement( "div", null, "Hello React ", React.createElement("input") ), document.getElementById('mountNode2'), ); |
Let’s also render the current time in both versions. Let’s put it in a pre element (just to give it a monospace font in the playground). You can use new Date().toLocaleTimeString() to display a simple time string. Here’s what you need to do for the native DOM version:
Code Listing 7
document.getElementById('mountNode1').innerHTML = ` <div> Hello HTML <input /> <pre>${new Date().toLocaleTimeString()}</p> </div> `; |
To do the same in React, we add a fifth argument to the top-level div element. This new fifth argument is another React.createElement call; this time using a pre tag with the new Date().toLocaleTimeString() call for content:
Code Listing 8
ReactDOM.render( React.createElement( "div", null, "Hello React ", React.createElement("input"), React.createElement( "pre", null, new Date().toLocaleTimeString() ) ), document.getElementById('mountNode2'), ); |
Both versions will now be rendering the exact same HTML in the browser:
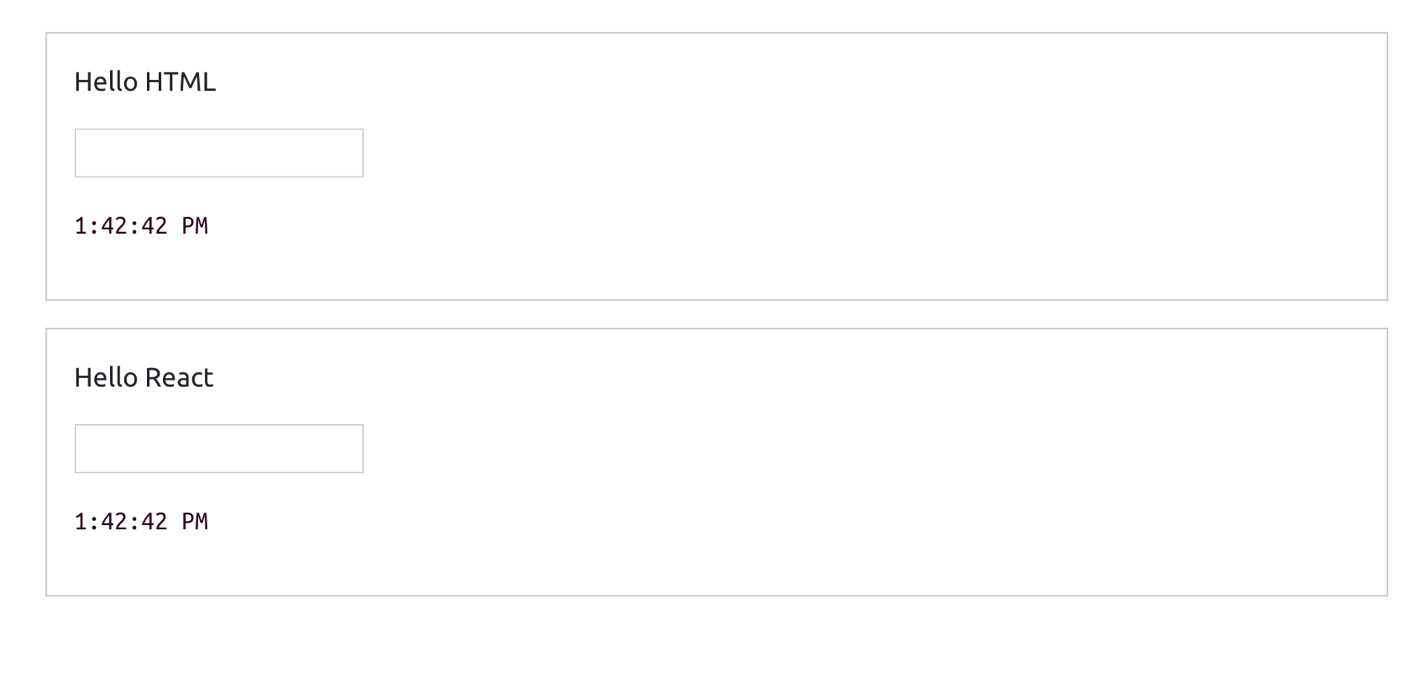
Figure 4: The UI after adding an input and a time string
As you’re probably thinking by now, using React is a lot harder than the simple and familiar native way. What is it that React does so well that is worth giving up the familiar HTML and having to learn a new API to write what can be simply written in HTML?
The answer is not about rendering the first HTML view. It is about what we need to do to update any existing view in the DOM.
Updating React elements
Let’s do an update operation on the DOM trees that we have so far. Let’s simply make the time string tick every second.
We can easily repeat a JavaScript function call in a browser using the setInterval web timer API. Let’s put all of our DOM manipulations for both versions into a function, name it render, and use it in a setInterval call to make it repeat every second.
Tip: If you’re not familiar with setInterval, the next chapter has more details and examples about it.
Here is the full final code for this example:
Code Listing 9: Code available at jscomplete.com/playground/rs1.2
const render = () => { document.getElementById('mountNode').innerHTML = ` <div> Hello HTML <input /> <pre>${new Date().toLocaleTimeString()}</pre> </div> `; ReactDOM.render( React.createElement( 'div', null, 'Hello React', React.createElement('input', null), React.createElement('pre', null, new Date().toLocaleTimeString()) ), document.getElementById('mountNode2') ); }; setInterval(render, 1000); |
Check out the result of executing this code here, and notice how the time string is ticking every second in both versions. We are now updating our user interface in the DOM.
This is the moment when React will potentially blow your mind. If you try to type something in the text box of the native DOM version, you will not be able to. This is very much expected because we are basically throwing away the whole DOM node on every tick and regenerating it. However, if you try to type something in the text box that is rendered with React, you can certainly do so!
Although all the React rendering code is within the ticking timer, React is changing only the content of the pre element, not the whole DOM tree. This is why the text input box was not regenerated and we were able to type in it.
You can see the different ways we are updating the DOM visually if you inspect the two DOM nodes in a Chrome DevTools elements panel. The Chrome DevTools elements panel highlights any DOM elements that get updated. You will see how we are regenerating the entire mountNode element (which is the native version) with every tick, while React is smartly only regenerating the pre tag in the mountNode2 element.
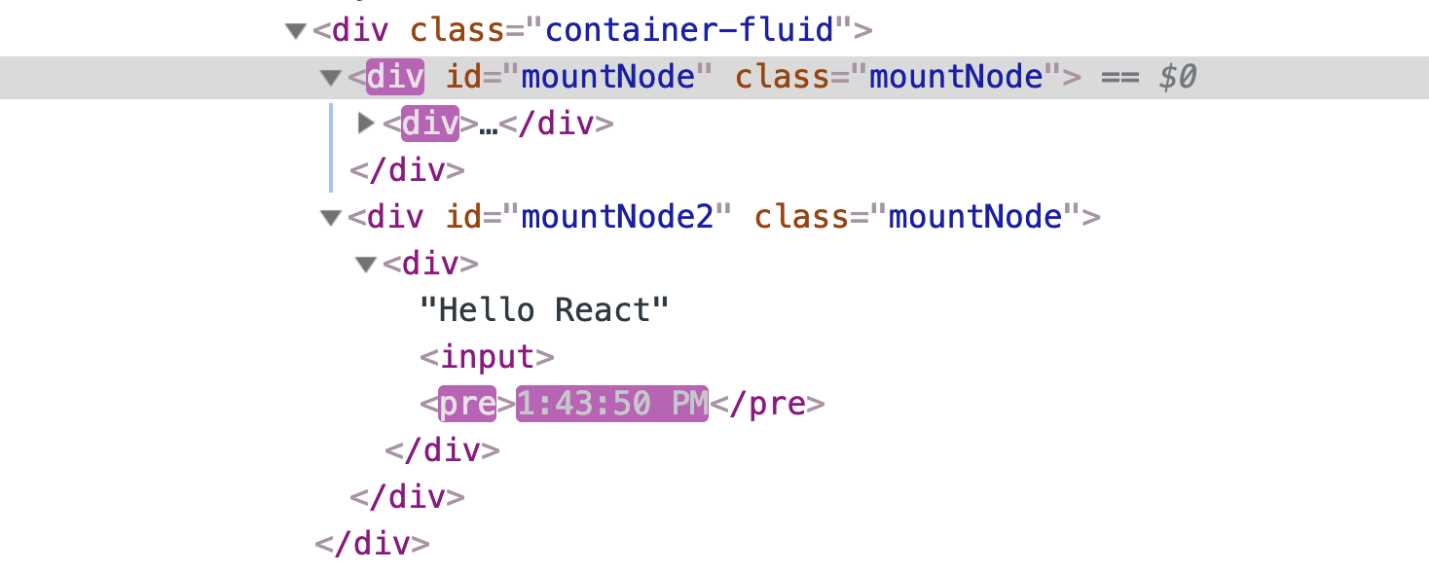
Figure 5: React updates only the pre element
This is React’s smart diffing algorithm in action. It only updates in the main DOM tree what actually needs to be updated, while it keeps everything else the same. This diffing process is possible because of React’s virtual DOM representation that it keeps around in memory. No matter how many times we regenerate our interface, React will take to the browser only the needed "partial" updates.
Not only is this method a lot more efficient, but it also removes a big layer of complexity in the way we think about updating user interfaces. Having React do all the computations about whether we should or should not update the DOM enables us to focus on thinking about our data (state) and the way to describe a user interface for it. We then manage the updates on the data state as needed, without worrying about the steps needed to reflect these updates in the actual user interface in the browser (because we know React will do exactly that, and it will do it in an efficient way).
- 80+ high-performance, modular, and responsive React UI components.
- Popular components like Data Grid, Charts, and Scheduler.
- Lightweight and user-friendly.
- Stunning built-in themes.