As the Blazor client runs in the browser, both user authorization and authentication for WebAssembly will be completely handled by the back-end API.
The back-end web API must handle the authorization on every API call, and it tells the Blazor app whether the user is authenticated and has resource access. It enables your Blazor app to show the correct context to the user.
-
Create a Blazor WebAssembly app using Visual Studio 2019 with ASP.NET Core hosting enabled.
-
Reorganize the folder names according to usage:
- Sample.Server is renamed to Sample.Api as we are going to use this as our API.
- Sample.Client is renamed to Sample.WebApp.
- Sample.Shared is renamed to Sample.Common.
-
In the Sample.Common folder, create a Models folder, and move the generated WeatherForecast class to this folder and change its namespace to Sample.Models. Add the AuthorizedUser class in the Models folder under the Sample.Shared folder.
namespace Sample.Common
 {
     public class AuthorizedUser
     {
         public string Name { get; set; }
         public string Roles { get; set; }
} -
Add a new SettingsController file in the Sample.Api folder.
using Sample.Models;
using Microsoft.AspNetCore.Mvc;

namespace Sample.Api.Controllers
 {
     [Route("api/[controller]")]
     [ApiController]
     public class SettingsController : ControllerBase
     {
         [HttpGet("user")]
         public AuthorizedUser GetUser()
         {
             return new AuthorizedUser();

             // User signed in:
             //return new AuthorizedUser { Name = "UserName" };
         }
     }
} -
Prepare your Sample.WebApp
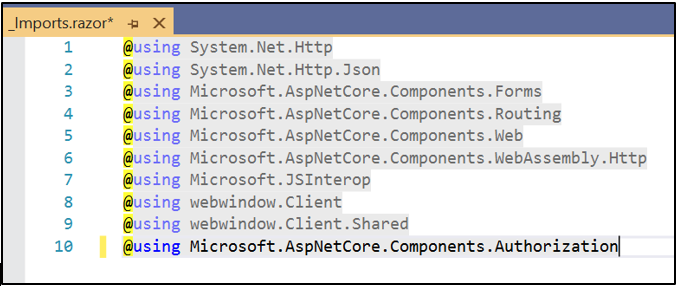
Install the NuGet package Microsoft.AspNetCore.Components.Authorization.
Add the installed package in the _Imports.razor file.
Wrap the <CascadingAuthenticationState> in the App.razor file.
Add a Service folder and add a ClientAuthorizationService class in it.
-
Add the following code in the Program.cs file.
-
Create a new Razor component SignInDisplay.razor in the shared folder.
-
In the Shared/MainLayout page, add the following code.
-
Run the app with Sample.Api as the startup file and see the output as follows.
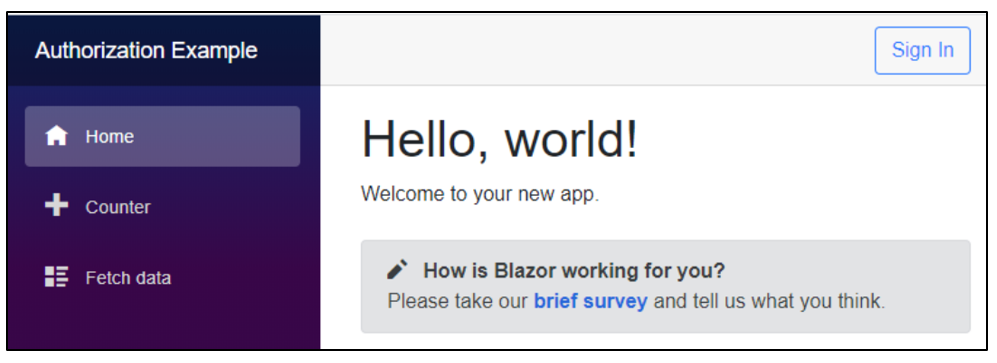
Since Windows authorization is not yet implemented in the API, If you click the Sign In button, you will be rerouted to a page stating, “Sorry, there’s nothing at this address.” When you change the code in the GetUser() method in the SettingsController to include the name of the user, the app will be shown as follows.

 <CascadingAuthenticationState>
     <Router AppAssembly="@typeof(Program).Assembly">
         ...
     </Router>
</CascadingAuthenticationState> using Sample.Models;
using Microsoft.AspNetCore.Components;
using Microsoft.AspNetCore.Components.Authorization;
using System;
using System.Collections.Generic;
using System.Net.Http;
using System.Security.Claims;
using System.Threading.Tasks;
namespace Sample.WebApp.Services
{
public class ClientAuthorizationService : AuthenticationStateProvider
{
private const string AuthenticationType = "BackEnd";
private readonly HttpClient _httpClient;
public ClientAuthorizationService(HttpClient httpClient)
{
if (httpClient == null) throw new ArgumentNullException(nameof(httpClient));
_httpClient = httpClient;
}
public string ApiUriGetAuthorizedUser { get; set; }
public string ApiUriSignIn { get; set; }
public string ApiUriSignOut { get; set; }
public AuthorizedUser AuthorizedUser { get; private set; } = new AuthorizedUser();
public override async Task<AuthenticationState> GetAuthenticationStateAsync()
{
ClaimsPrincipal user;
if (!string.IsNullOrEmpty(ApiUriGetAuthorizedUser))
AuthorizedUser = await _httpClient.GetJsonAsync<AuthorizedUser>(ApiUriGetAuthorizedUser);
if (string.IsNullOrEmpty(AuthorizedUser.Name)) {
user = new ClaimsPrincipal();
}
else {
var identity = new ClaimsIdentity(CreateClaims(AuthorizedUser), AuthenticationType);
user = new ClaimsPrincipal(identity);
}
return new AuthenticationState(user);
}
private static IEnumerable<Claim> CreateClaims(AuthorizedUser authorizedUser)
{ yield return new Claim(ClaimTypes.Name, authorizedUser.Name);
var roles = authorizedUser.Roles?.Split(',') ?? new string[0];
foreach (var role in roles)
yield return new Claim(ClaimTypes.Role,role.Trim());
}
}
} using Microsoft.AspNetCore.Components.Authorization;
using System.Net.Http;
...
public static async Task Main(string[] args)
{
var builder = WebAssemblyHostBuilder.CreateDefault(args);
builder.Services.AddAuthorizationCore();
builder.Services.AddScoped<ClientAuthorizationService>(CreateAuthorizationService);
builder.Services.AddScoped<AuthenticationStateProvider>(sp => sp.GetRequiredService<ClientAuthorizationService>());
builder.Services.AddOptions();
...
private static ClientAuthorizationService CreateAuthorizationService(IServiceProvider serviceProvider){
var httpClient = serviceProvider.GetRequiredService<HttpClient>();
var service = new ClientAuthorizationService(httpClient)
{
ApiUriGetAuthorizedUser = "api/settings/user",
ApiUriSignIn = "AzureADB2C/Account/SignIn",
ApiUriSignOut = "AzureADB2C/Account/SignOut",
};
return service;
} @using Sample.WebApp.Services
@inject ClientAuthorizationService AuthorizationService
<AuthorizeView>
<Authorized>
<div>
<span class="form-control">@AuthorizationService.AuthorizedUser.Name</span>
</div>
<div>
<a class="btn btn-outline-primary" href="@AuthorizationService.ApiUriSignOut">Sign Out</a>
</div>
</Authorized>
<NotAuthorized>
<div>
<a class="btn btn-outline-primary" href="@AuthorizationService.ApiUriSignIn">Sign In</a>
</div>
</NotAuthorized>
</AuthorizeView> <div class="top-row px-4 auth">
<SignInDisplay />
</div>Refer to this link for more information.


Share with