From Prompt to Enterprise UI in Minutes with the
Syncfusion Agentic UI Builder
Install Syncfusion’s Agentic UI Builder directly into your favorite IDE and generate stunning enterprise-grade UIs, dashboards, and pages using real Syncfusion components — powered by AI.
- 10× faster UI development
- Real Syncfusion components (not generic code)
- Edit, iterate, and ship in minutes
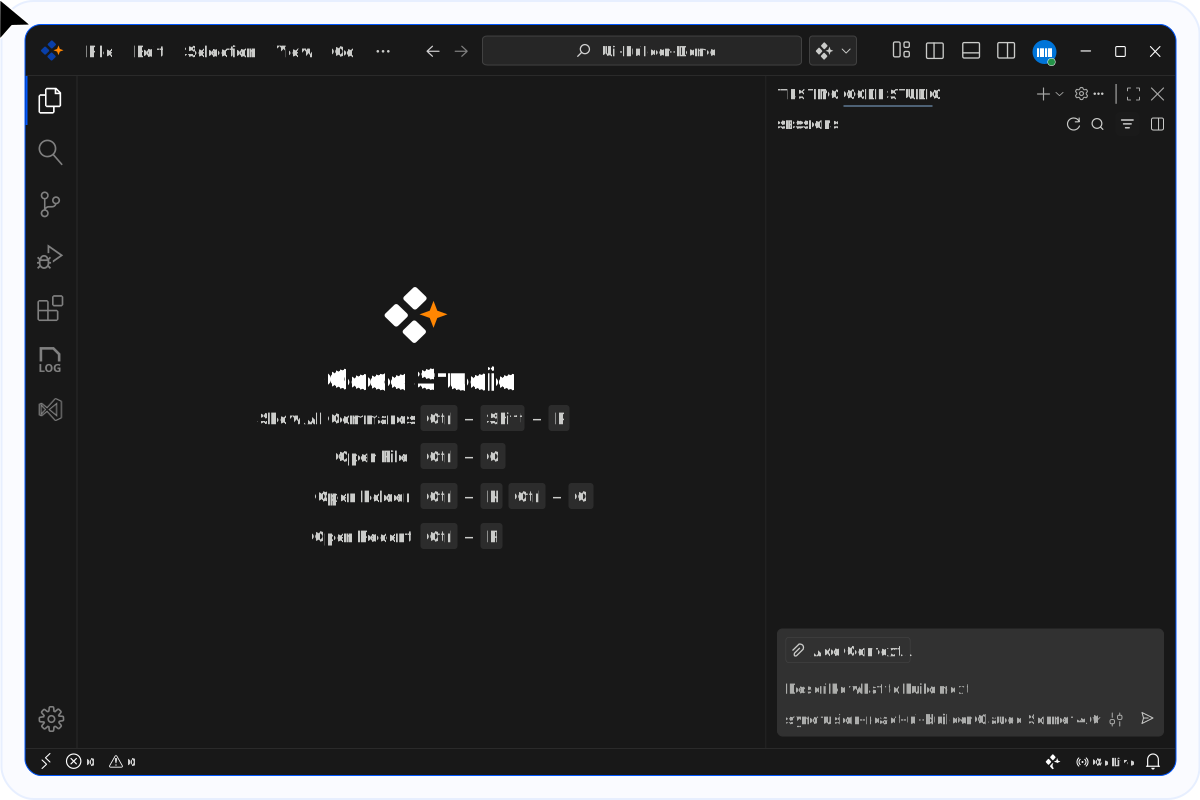
Why Use Agentic UI Builder
Agentic UI Builder is an AI-powered UI generation engine that converts natural language prompts into production-ready applications using Syncfusion enterprise UI components.

Rapid Interface Generation
Generate complex layouts, dashboards, and full UI structures within seconds using natural‑language prompts. This dramatically speeds up early development and eliminates time‑consuming manual setup.

Reduced Manual Configuration
The builder automatically configures Syncfusion components, layouts, and settings to streamline UI setup. This eliminates repetitive configuration work and ensures consistent structure across the project.

Faster Prototyping
Quickly turn ideas into functional UI prototypes that teams can review and iterate on. This accelerates decision‑making and helps refine concepts much earlier in the development cycle.

Enterprise‑Ready Components
Generated layouts use Syncfusion’s reliable, production‑grade components designed for enterprise applications. This ensures performance, scalability, and faster transition from prototype to production.
Generic AI Coding Tools vs Agentic UI Builder
Generic AI models often generate unreliable UI snippets from outdated training data and struggle to produce production-ready interfaces. The Agentic UI Builder uses Syncfusion component skills along with verified component APIs and snippets, resulting in accurate UI code and reliable interface generation.
Generic AI Workflow
- Hallucinated components
- Inconsistent layouts
- Broken responsiveness
- Unstable generated code
- Weak accessibility handling
Syncfusion Agentic UI Builder
- Real Syncfusion components
- Structured enterprise UI
- Responsive by default
- Maintainable architecture
- Enterprise-grade UI standards
How It Works
Get started in minutes with our simple, 4-step process.
Start with a prompt
Prompt your UI idea in plain language.
AI generates structured UI
AI creates structured layouts with Syncfusion components.
Copy production-ready code
Use production-ready UI code instantly.
Extend and refine
Modify and extend as needed.
Quick Setup for Instant AI Code Generation
Add the Syncfusion Agentic UI Builder to your development workflow in minutes. You can use Visual Studio Code, Cursor, or Code Studio IDEs with React, Angular, Blazor, or other platforms. Our guided setup ensures your AI agent is ready to generate component code immediately.
Configure the Syncfusion Agentic UI Builder
1. Install the APM (Agent Package Manager)
2. Use the APM CLI to install the React UI Builder skill for your preferred environment:
apm install syncfusion/react-ui-builder -t copilot
apm install syncfusion/react-ui-builder -t cursor
apm install syncfusion/react-ui-builder -t codex
apm install syncfusion/react-ui-builder -t claude
3. Once installed, select the syncfusion-react-ui-builder agent from the Agent dropdown in the chat panel
Create a login page with the Tailwind 3 theme using a centered card layout containing email and password input fields with validation. Include a "Remember Me" checkbox, a forgot password link, and a primary login button. Add a secondary "Create Account" button below. Ensure the layout is responsive and works on mobile, tablet, and desktop.
Configure the Syncfusion Agentic UI Builder
1. Install the APM (Agent Package Manager)
2. Use the APM CLI to install the Angular UI Builder skill for your preferred environment:
apm install syncfusion/angular-ui-builder -t copilot
apm install syncfusion/angular-ui-builder -t cursor
apm install syncfusion/angular-ui-builder -t codex
apm install syncfusion/angular-ui-builder -t claude
3. Once installed, select the syncfusion-angular-ui-builder agent from the Agent dropdown in the chat panel
Create a login page with the Tailwind 3 theme using a centered card layout containing email and password input fields with validation. Include a "Remember Me" checkbox, a forgot password link, and a primary login button. Add a secondary "Create Account" button below. Ensure the layout is responsive and works on mobile, tablet, and desktop.
Configure the Syncfusion Agentic UI Builder
1. Install the APM (Agent Package Manager)
2. Use the APM CLI to install the Blazor UI Builder skill for your preferred environment:
apm install syncfusion/blazor-ui-builder -t copilot
apm install syncfusion/blazor-ui-builder -t cursor
apm install syncfusion/blazor-ui-builder -t codex
apm install syncfusion/blazor-ui-builder -t claude
3. Once installed, select the syncfusion-blazor-ui-builder agent from the Agent dropdown in the chat panel
Create a login page with the Tailwind 3 theme using a centered card layout containing email and password input fields with validation. Include a "Remember Me" checkbox, a forgot password link, and a primary login button. Add a secondary "Create Account" button below. Ensure the layout is responsive and works on mobile, tablet, and desktop.
Configure the Syncfusion Agentic UI Builder
1. Install the APM (Agent Package Manager)
2. Use the APM CLI to install the MAUI UI Builder skill for your preferred environment:
apm install syncfusion/maui-ui-builder -t copilot
apm install syncfusion/maui-ui-builder -t cursor
apm install syncfusion/maui-ui-builder -t codex
apm install syncfusion/maui-ui-builder -t claude
3. Once installed, select the syncfusion-maui-ui-builder agent from the Agent dropdown in the chat panel
Create a login screen for a cross-platform MAUI application using Material Design 3 theme with a centered card containing email and password entry fields with input validation. Include a “Remember Me” checkbox, a forgot password link, and a primary login button. Add a secondary “Sign Up” button below. Ensure the layout is responsive andworks on iOS, Android, macOS, and Windows devices.
Configure the Syncfusion Agentic UI Builder
1. Install the APM (Agent Package Manager)
2. Use the APM CLI to install the WPF UI Builder skill for your preferred environment:
apm install syncfusion/wpf-ui-builder -t copilot
apm install syncfusion/wpf-ui-builder -t cursor
apm install syncfusion/wpf-ui-builder -t codex
apm install syncfusion/wpf-ui-builder -t claude
3. Once installed, select the syncfusion-wpf-ui-builder agent from the Agent dropdown in the chat panel
Create a login window with the Windows 11 Light theme using a centered StackPanel containing TextBox controls for email and password with validation. Include a CheckBox for “Remember Me”, a Hyperlink for “Forgot Password?”, and a primary Button for login. Add a secondary Button for “Create Account” below. Use proper XAML binding and command patterns.
Configure the Syncfusion Agentic UI Builder
1. Install the APM (Agent Package Manager)
2. Use the APM CLI to install the WinForms UI Builder skill for your preferred environment:
apm install syncfusion/winforms-ui-builder -t copilot
apm install syncfusion/winforms-ui-builder -t cursor
apm install syncfusion/winforms-ui-builder -t codex
apm install syncfusion/winforms-ui-builder -t claude
3. Once installed, select the syncfusion-winforms-ui-builder agent from the Agent dropdown in the chat panel
Create a login form using the Office2019Colorful theme with a centered TableLayoutPanel containing email and password TextBox controls with validation. Include a “Remember Me” CheckBox, a forgot password LinkLabel, and a primary login Button. Add a secondary “Create Account” button below. Ensure the form is well-organized and follows Windows Forms best practices with proper SkinManager configuration.
Configure the Syncfusion Agentic UI Builder
1. Install the APM (Agent Package Manager)
2. Use the APM CLI to install the WinUI UI Builder skill for your preferred environment:
apm install syncfusion/winui-ui-builder -t copilot
apm install syncfusion/winui-ui-builder -t cursor
apm install syncfusion/winui-ui-builder -t codex
apm install syncfusion/winui-ui-builder -t claude
3. Once installed, select the syncfusion-winui-ui-builder agent from the Agent dropdown in the chat panel.
Create a login page using the Fluent Light theme with a centered StackPanel containing email and password TextBox controls with validation. Include a “Remember Me” CheckBox, a forgot password Hyperlink, and a primary login Button. Add a secondary “Create Account” button below. Ensure the layout is well-organized and follows Windows desktop UI standards.
Enterprise UIs Built with Agentic UI Builder
See how prompts are converted into structured enterprise applications using Syncfusion components.
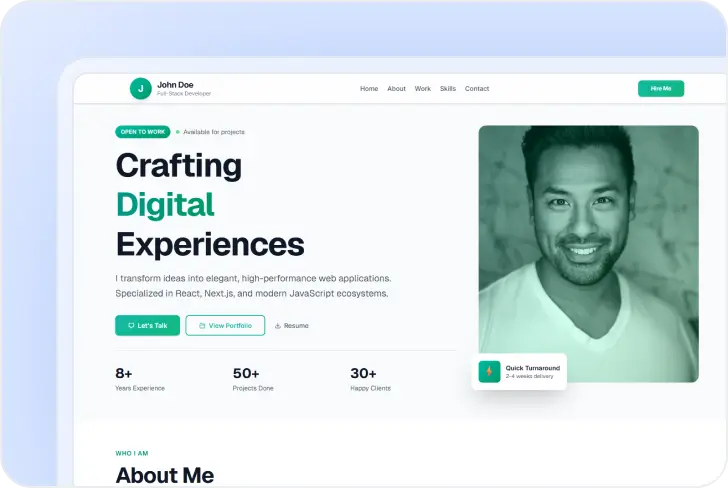
Showcase your projects and skills with a sleek, responsive React portfolio built for modern, professional presentation.
and subtle shadows Typography: Bold headings, clean sans-serif body text Sections to Build 1. Navigation Bar - Sticky top bar with circular avatar initial "J", name "John Doe" with subtitle "Full-Stack Developer", nav links (Home, About, Work, Skills, Contact), and a "Hire Me" call-to-action button 2. Hero Section - Eye-catching intro with "OPEN TO WORK" badge, animated availability indicator, large bold headline "Crafting Digital Experiences" with gradient text effect, professional profile photo, quick stats showing "8+ Years Experience", "50+ Projects Done", "30+ Happy Clients", and three action buttons (Let's Talk, View Portfolio, Resume) 3. About Me Section - Two-column layout with bio content on the left (detailed paragraphs about experience and expertise) and skills visualization on the right. Include tech stack badges (React, Next.js, TypeScript, Node.js, Python, PostgreSQL, MongoDB, AWS, Docker, Tailwind CSS, Syncfusion) and animated progress bars for core skills. Additional info cards for Education and Location. 4. Featured Work Section - Display 3 project cards (E-Commerce Platform with React/Node.js/MongoDB/Stripe, Task Management App with Next.js/TypeScript/PostgreSQL, Analytics Dashboard with React/Syncfusion/D3.js/Express) with alternating image-text layouts, tech stack pills, and View Live/Code buttons. 5. Testimonials Section - Grid of 3 testimonial cards with 5-star ratings, client quotes, avatar initials, and client names/roles. 6. Contact Section - Two-column layout with contact information (email with icon, location with icon) on the left and a contact form on the right. Form should have name, email, and message text areas with a Send Message button. 7. Footer - Dark themed footer with logo, bio text, social media icons (GitHub, LinkedIn, Twitter/X), quick links navigation, services list, and copyright.
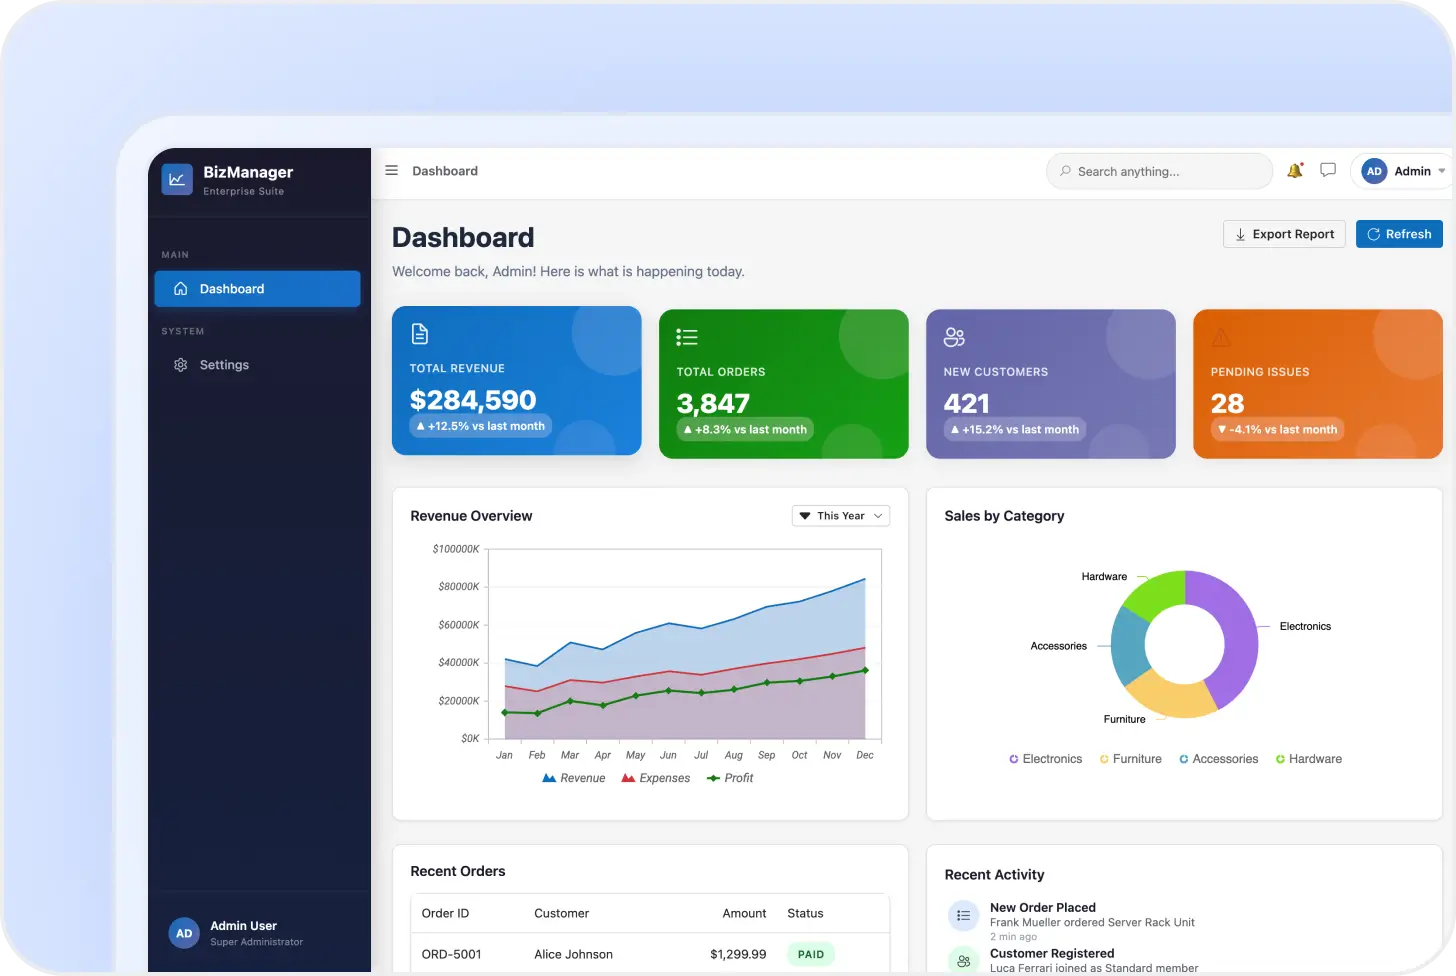
Check out these enterprise Blazor dashboards with sales metrics, customer statistics, revenue trend charts, and order management grids.
Your Intelligent UI Builder Assistant
Let the builder handle routine UI tasks so you can concentrate on core functionality. The assistant can:
-
Generate complete dashboards, pages, and enterprise UI layouts from natural language requests.
-
Automatically select and configure appropriate Syncfusion UI components.
-
Produce structured UI code aligned with Syncfusion component APIs.
-
Reduce manual layout design and repetitive UI scaffolding work.
-
Apply themes and design configurations consistently across your project.
-
Maintain clean structure and predictable patterns throughout your codebase
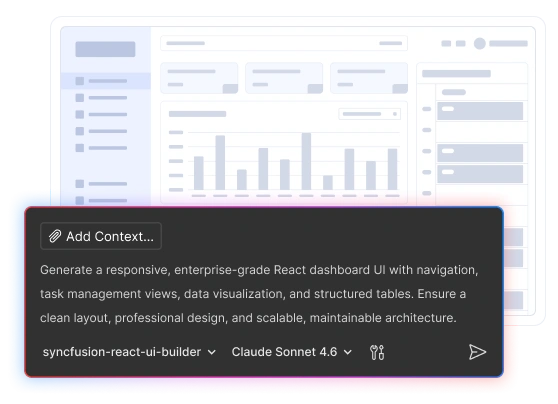
Powered by Syncfusion Agent Skills
The Agentic UI Builder, available as an add-on to Syncfusion Essential Studio®, connects to the Syncfusion Agent Skills, which provides AI models with structured knowledge about Syncfusion components, APIs, and usage patterns.
Build Enterprise Apps Faster with Syncfusion
Generate enterprise-ready UI layouts faster using the Agentic UI Builder powered by Syncfusion Agent Skills.
- Gain 30% to 50% extra productivity
- Works with your existing IDE
- No additional charges
Frequently Asked Questions
The Syncfusion Agentic UI Builder is an AI-powered tool that generates complete UI implementations with natural-language prompts. It creates layouts, components, and styles using Syncfusion component libraries.
For optimal accuracy and code quality, advanced models such as Claude Sonnet 4.6 or later are recommended.
Install APM, then run apm install syncfusion/react-ui-builder -t copilot in your terminal.
Yes. Installing and using the Syncfusion UI Builder is completely free. However, it connects your development environment to Syncfusion’s enterprise UI component libraries, which require a subscription purchase or community license.
Cursor, GitHub Copilot, Claude Code, VS Code (Copilot Chat), Codex, and others integrate with the Syncfusion Agentic UI Builder. If your AI agent supports agents and skills, the Syncfusion Agentic UI Builder will work with it.
The Agentic UI Builder significantly improves accuracy by grounding AI output in official API patterns. However, while hallucinations are greatly reduced, results still depend on the capabilities of the underlying AI model.
After installation, open your AI assistant in your IDE, select the Syncfusion UI Builder agent, and describe what you want to build.
The Agentic UI Builder scans only the parts of your project that are necessary, such as installed packages and your theme, to ensure UI updates match your setup. It limits access to only what’s required and updates only the files relevant to your request.
Yes. The Agentic UI Builder works with Syncfusion-supported platforms, including React, Angular, Blazor, .NET MAUI, WPF, WinForms, and WinUI. Install and enable the appropriate Syncfusion UI Builder agent in your IDE to generate, customize, and integrate Syncfusion components, layouts, and application interfaces in your existing projects.