
We are excited to announce that the Syncfusion WinForms Template Studio for Visual Studio is now available as part of our Essential Studio 2023 Volume 4 release.
The WinForms Template Studio is equipped with essential Syncfusion references and preconfigured rendering code for the seamless integration of Syncfusion WinForms components into WinForms apps. It streamlines the process of creating apps by providing a user-friendly project wizard customized for the integration of these Syncfusion components.
Let’s explore the installation process of Syncfusion’s WinForms extensions and how to use the Syncfusion WinForms Template Studio in Visual Studio.
Prerequisites
To use the WinForms Template Studio, it is necessary to install the Syncfusion WinForms extensions. This can be accomplished either directly from Visual Studio or through the Visual Studio Marketplace.
Installing the Syncfusion WinForms extensions from Visual Studio
Follow these steps to install the Syncfusion WinForms extensions from Visual Studio:
- Open Visual Studio.
- Navigate to Extensions -> Manage Extensions -> Online and search for Syncfusion WinForms.
- Locate the WinForms Extensions –> Syncfusion item.
- Click the Download or Install option next to the extension.
Note: Close all Visual Studio instances before clicking Modify in the VSIX installer to install the extension. For more details, refer to the Syncfusion VS Extensions Now on the Visual Studio Marketplace blog.
Installing the Syncfusion WinForms extensions from Visual Studio Marketplace
You can also install the Syncfusion WinForms extensions from the Visual Studio Marketplace:
- Download the Syncfusion WinForms Extensions from the Visual Studio Marketplace.
- Close all the running Visual Studio instances, if any.
- Double-click on the downloaded extension. The VSIX installer window will open. In it, click Install.
Utilizing Syncfusion WinForms Template Studio support for Visual Studio
- To create a Syncfusion WinForms project, follow either one of the following options:
-
- Option 1: Create WinForms projects using the Syncfusion menu in Visual Studio
Click Extensions ->Syncfusion and choose Essential Studio for WinForms -> Create New Syncfusion Project… in Visual Studio.
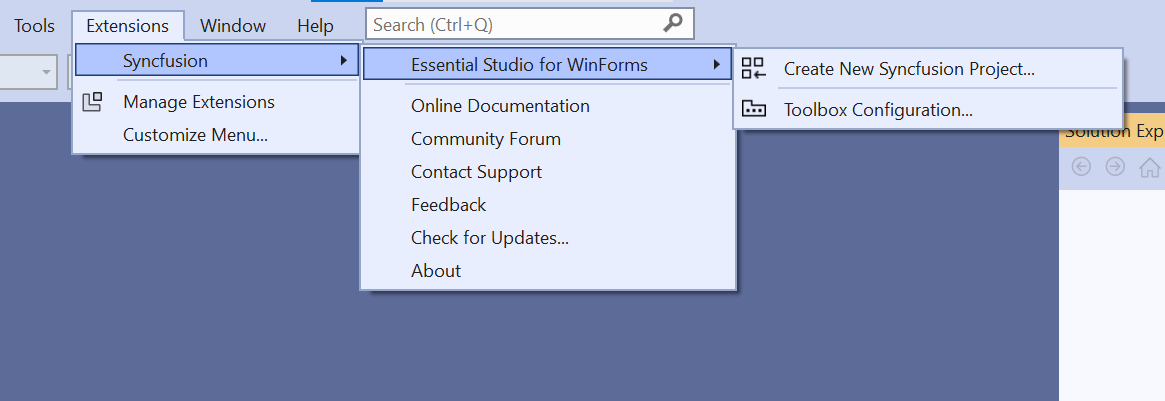
Note: In Visual Studio 2017, you can see the Syncfusion menu directly in the Visual Studio menu.
- Option 2: Create WinForms projects using the installed extension
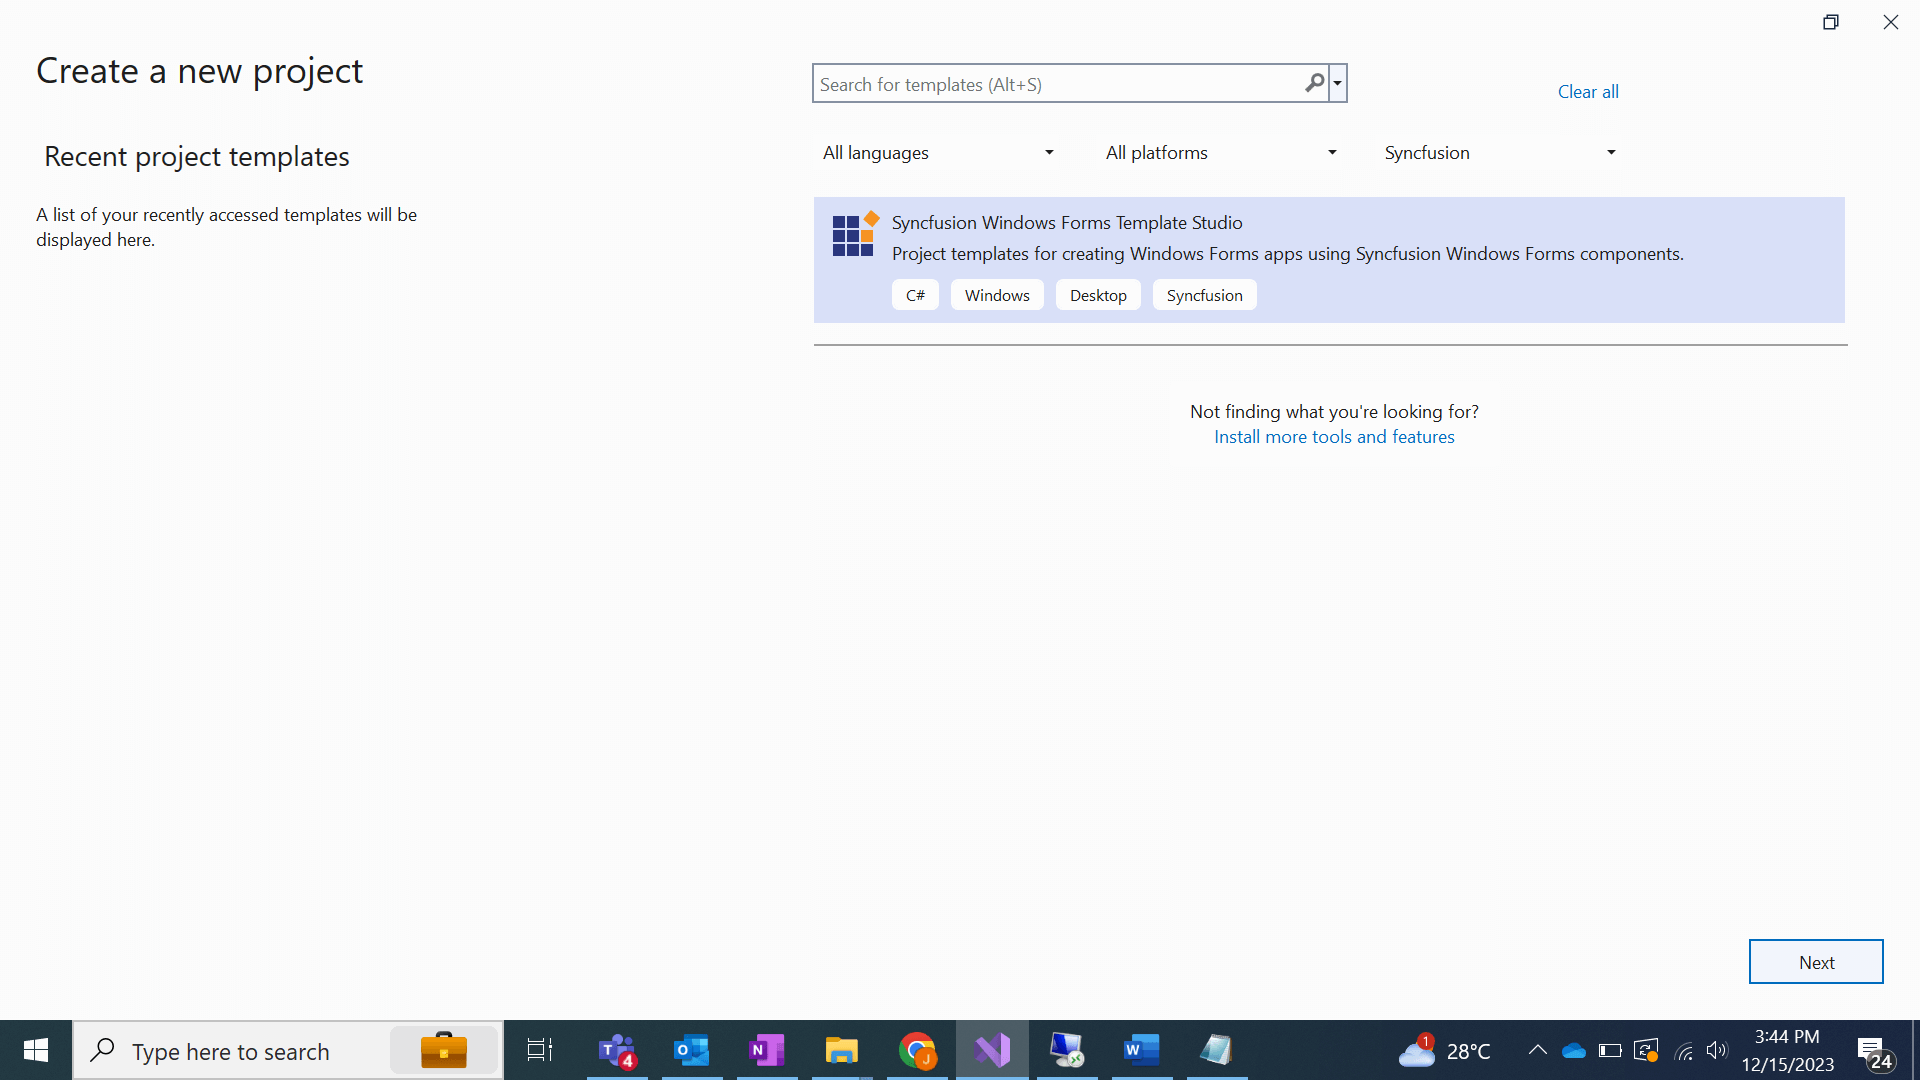
Choose File -> New -> Project. This will open a dialog to create a new project. By filtering the project type by Syncfusion or using the Syncfusion keyword in the search option, you can get the templates offered by Syncfusion for WinForms.
Refer to the following image.
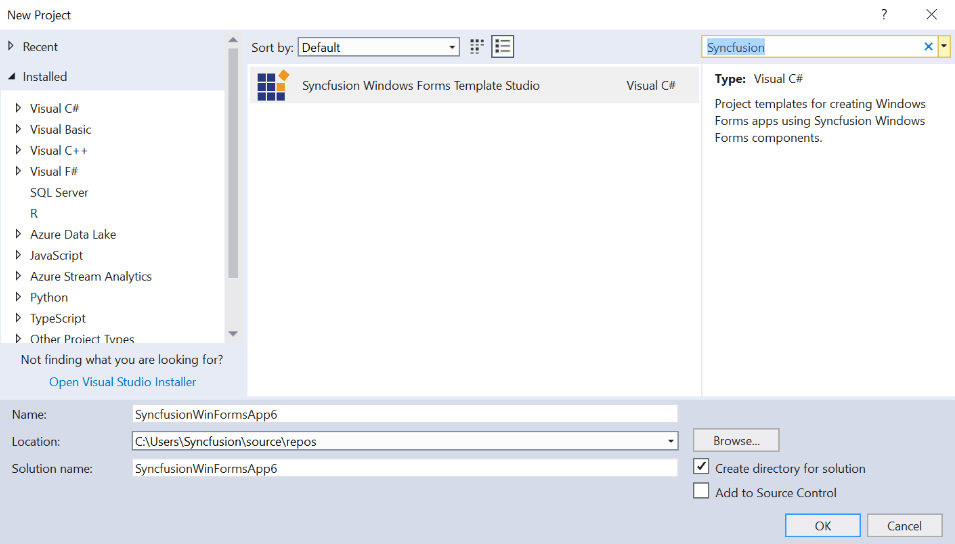
In Visual Studio 2017, Select File-> New -> Project and navigate to Syncfusion -> Windows -> Syncfusion WinForms Template Studio in Visual Studio.
- Option 1: Create WinForms projects using the Syncfusion menu in Visual Studio
- Name the project, specify the project location, and then click OK. The project wizard appears.
- Choose from the options to configure the Syncfusion WinForms app. In the Configuration tab, select a language (C# or Visual Basic) and a framework version (.NET 8.0, .NET 7.0, .NET 6.0, or .NET Framework). Then, select a reference type (NuGet, GAC Location, or Installed Location) for where the assembly needs to be added to the project. Then, click Next.
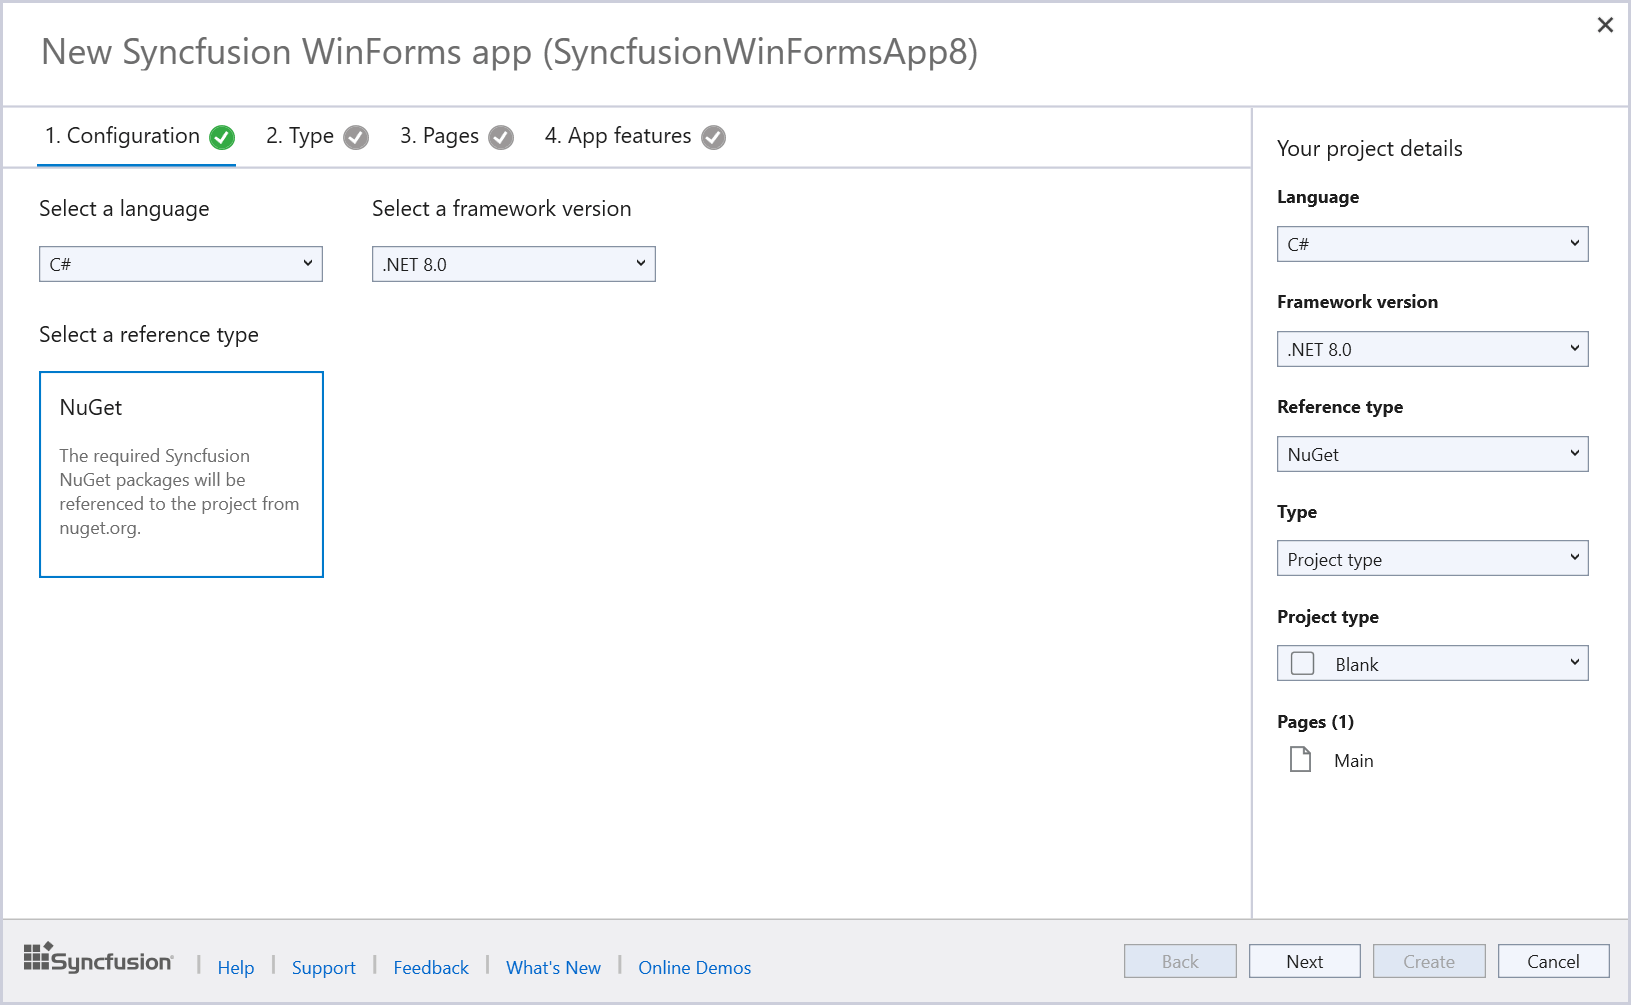
Note: The installed location and GAC options will be available only after the Syncfusion Essential WinForms setup has been installed. You can use NuGet instead of installing the Syncfusion Essential WinForms setup. Also, the GAC option will not be available when you choose .NET 6.0, .NET 7.0, and .NET 8.0 from the project type dropdown in Visual Studio.
- Choose any one of the following options from the Type tab:
- Project type
- Predefined template
Note: The Pages, Control, and App features tabs will only be enabled when a Project type is selected. If we choose a Predefined template, these tabs will be disabled.
Type 1: Creating the project-type app
When we select the Project type, a list of available project types will be displayed as shown in the following image.
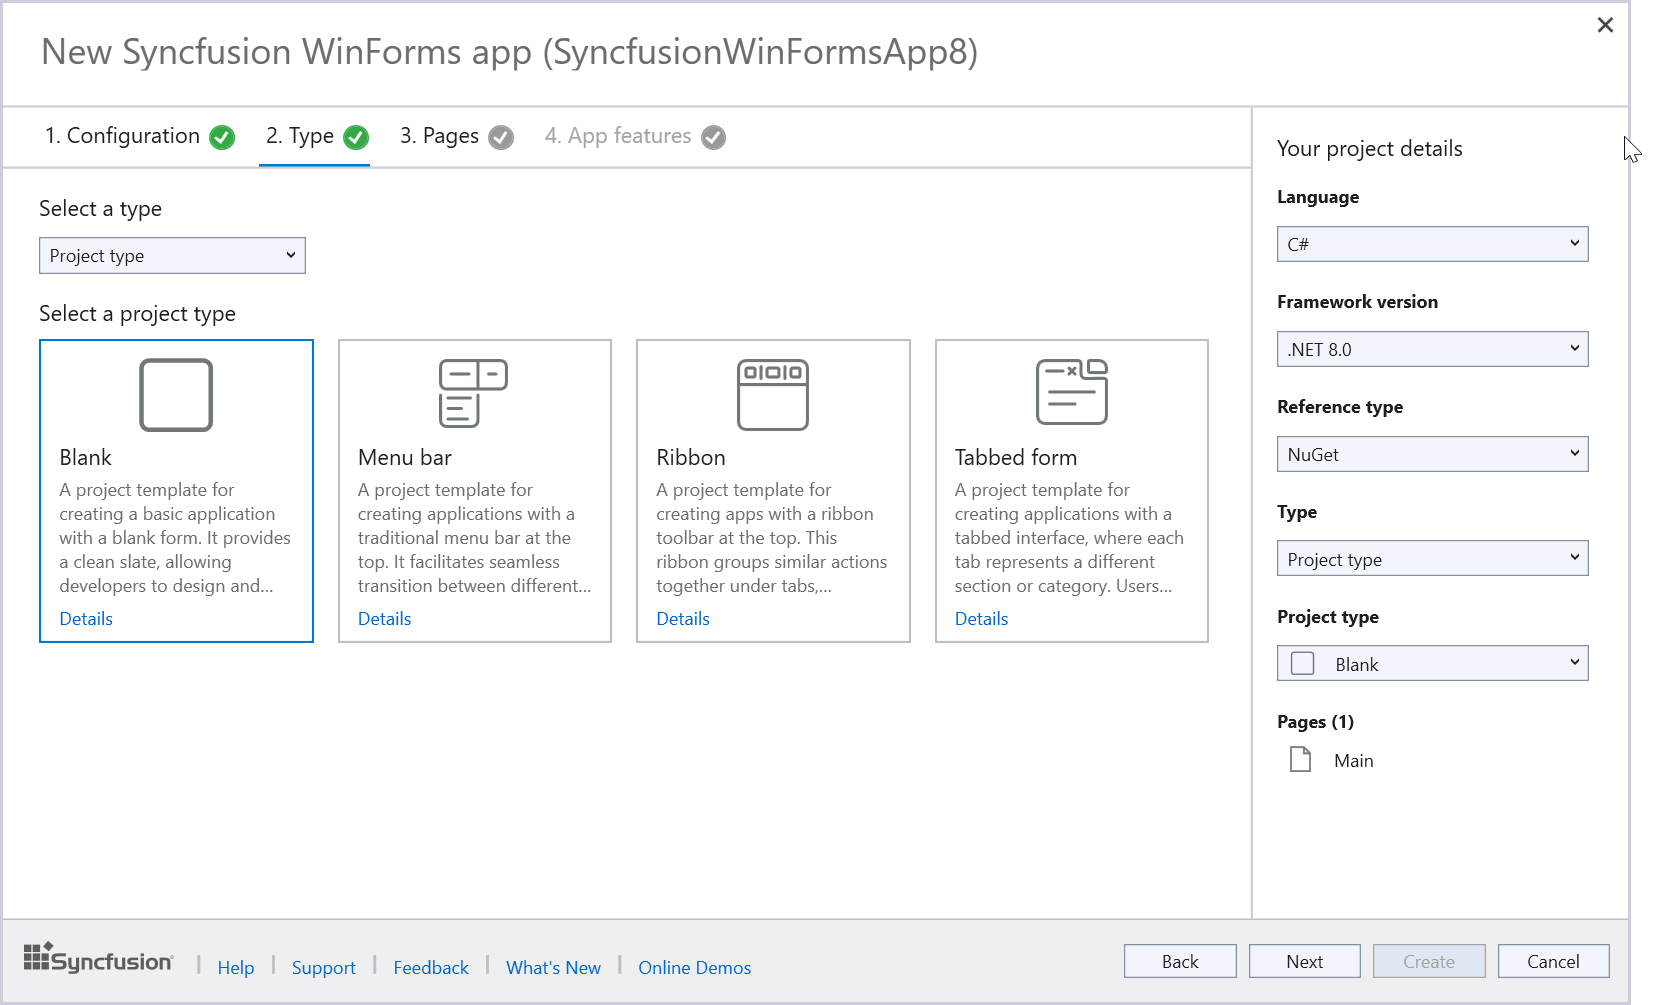
-
- Select the required project type.
- In the Pages tab, select the Syncfusion WinForms controls you want to include in your app by selecting them.
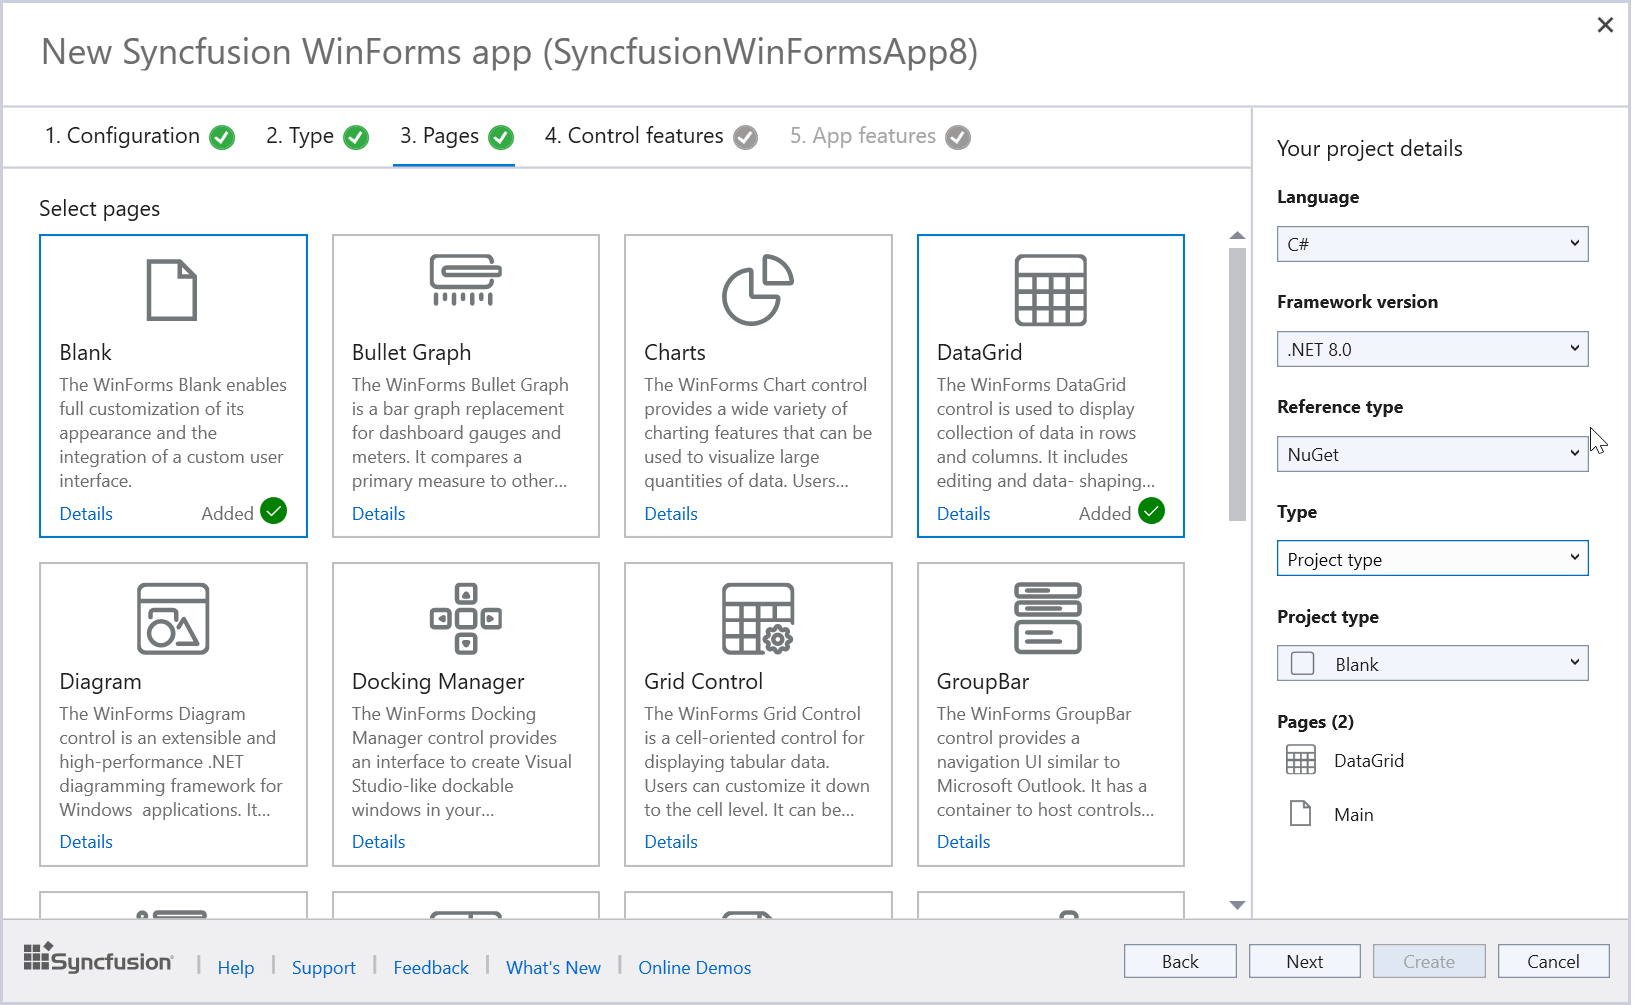
- Click Next or the Control Features tab to see the features of the selected controls. Then, choose the controls’ features you need.
- Then, select the required app features from the App Features tab.
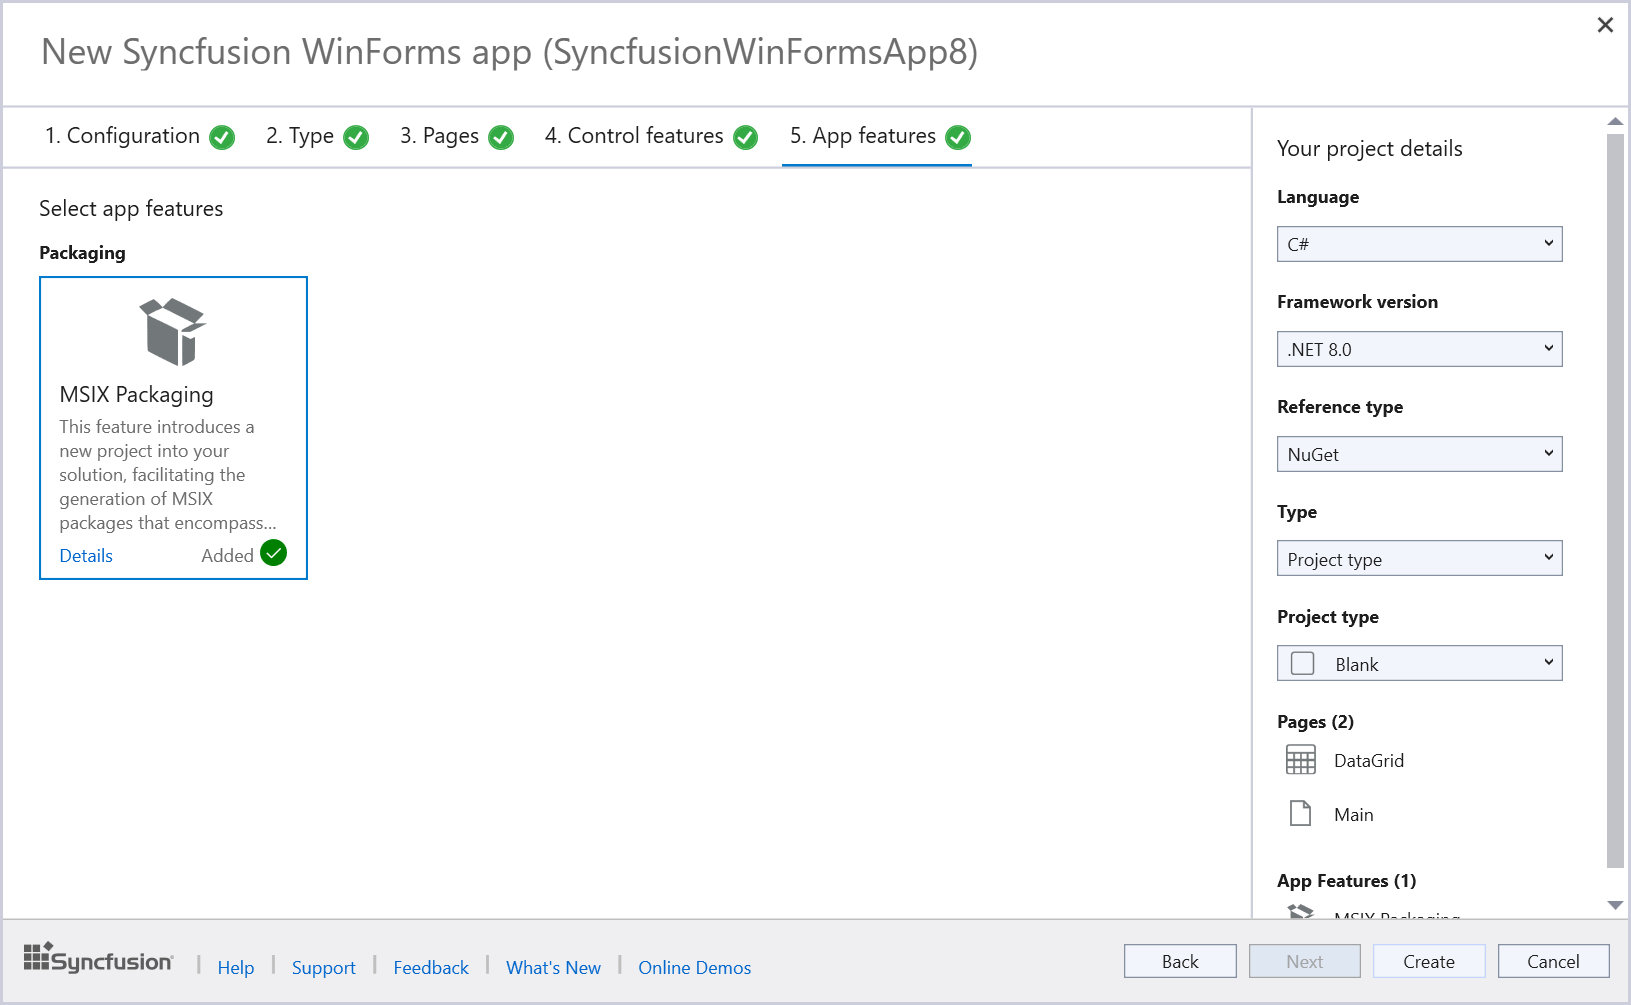
Note: The App Features tab will be available only when you choose .NET 6.0, .NET 7.0, or .NET 8.0 in the Configuration tab.
In the project details pane, you have the option to change the language, framework version, reference type, type, project type, remove selected controls, and remove selected app features. Refer to the following image.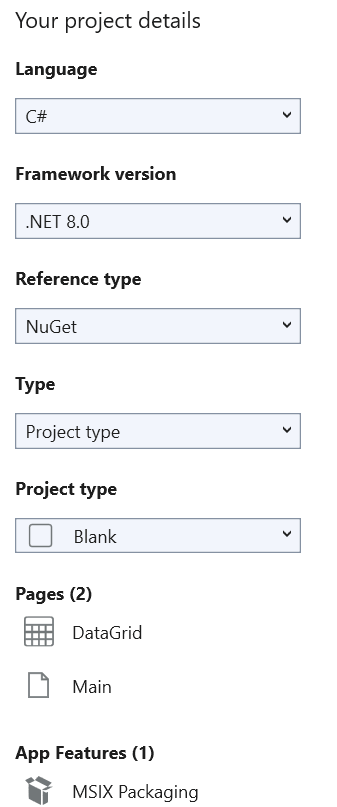
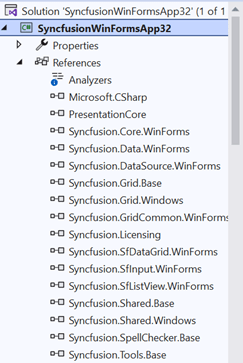
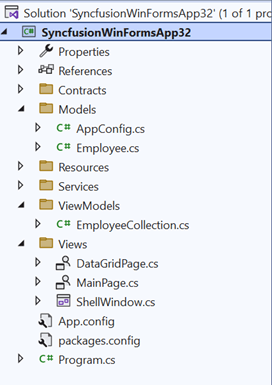
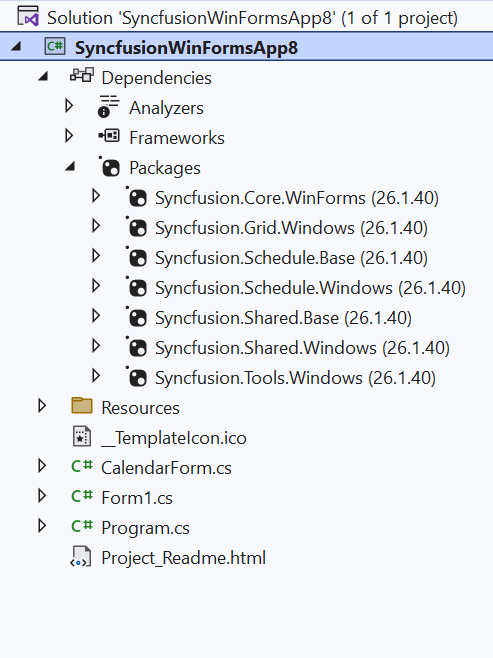
- After choosing the project configuration options in the project configuration wizard, click the Create button. Then, the Syncfusion WinForms project will be created with the necessary files, Syncfusion WinForms assemblies, and NuGet packages.
Type 2: Create the predefined template app
When we select the Predefined template, a list of available predefined templates will be displayed, as shown below.
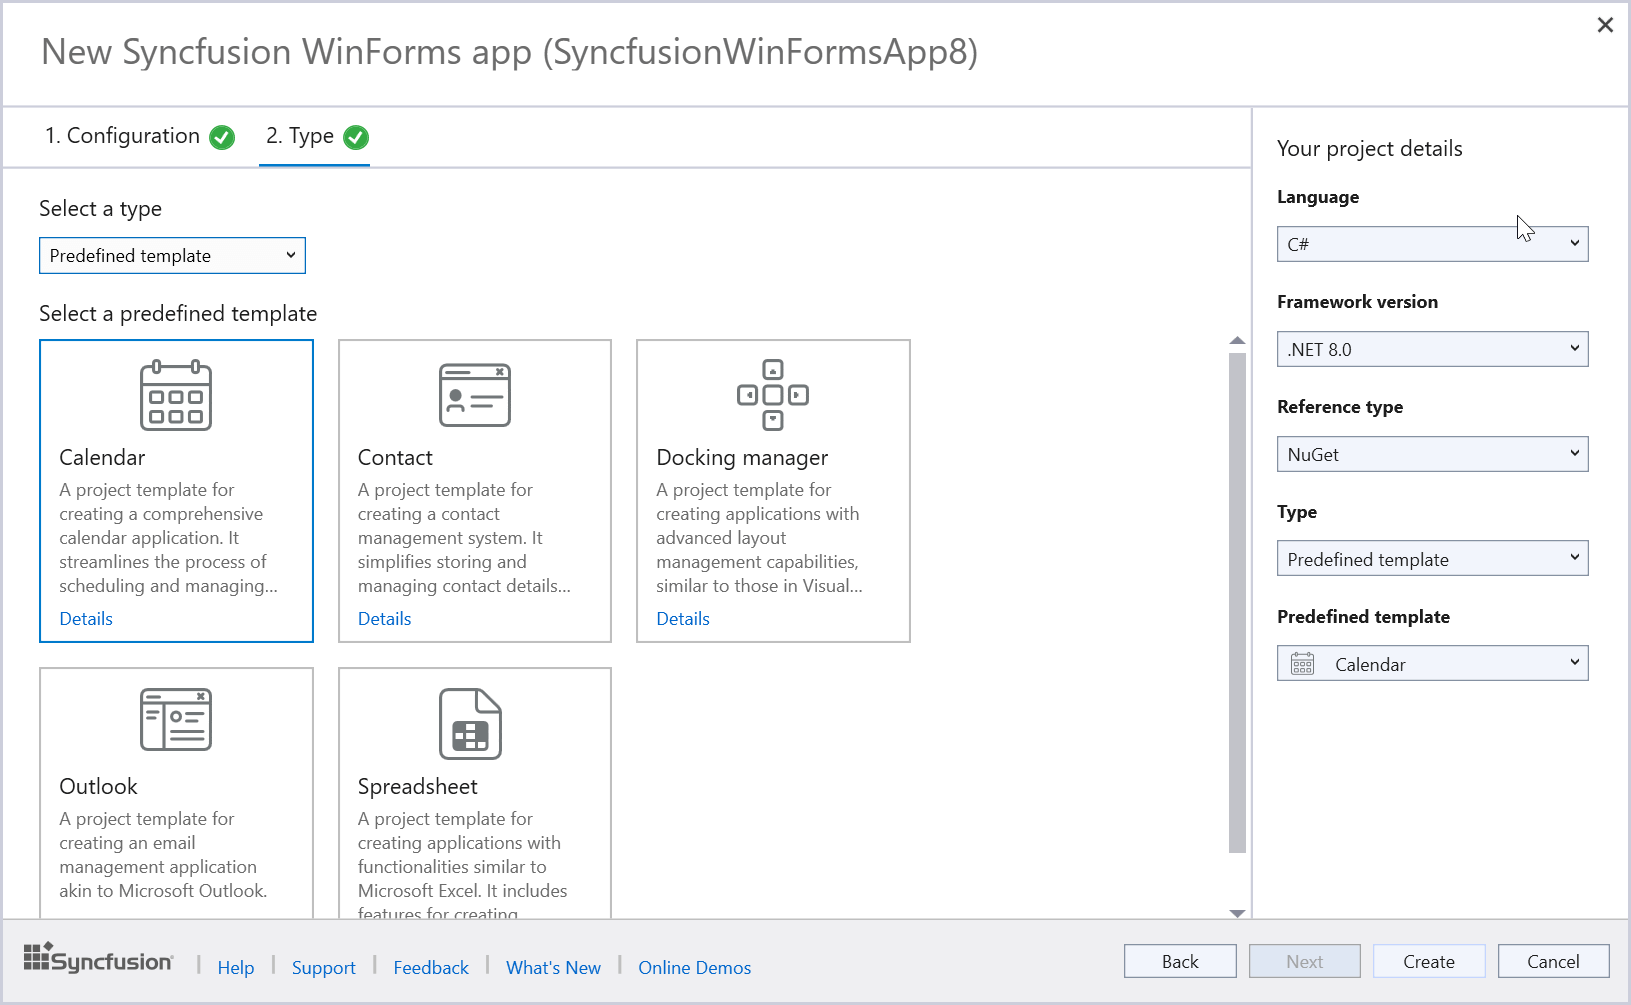
Note: The tabs for Page, Control features, and App features will be disabled if we choose the Predefined template option.
- Select the required predefined template.
In the project details pane, you have the option to change the selected language, framework version, reference type, type, and predefined template.
- After configuring the app, click the Create button. Then, the Syncfusion WinForms project will be created with the necessary files, Syncfusion WinForms assemblies, and NuGet packages.
Conclusion
Thanks for reading! In this blog, we’ve explored the new Syncfusion WinForms Template Studio for Visual Studio, available in the 2023 Volume 4 release. This user-friendly project wizard is designed to streamline the integration of Syncfusion components into your apps, automatically generating code and references, thereby eliminating the need for manual input. We encourage you to experience the wonders of this tool and share your thoughts in the blog’s comment section.
For our existing customers, we’re pleased to announce that the latest version of Essential Studio is now available for download on the License and Downloads page. If you’re new to Syncfusion, we offer a 30-day free trial for you to explore our extensive feature set. We also invite you to experiment with our samples available on GitHub.
Should you have any queries or feedback, our support forum, support portal, or feedback portal are at your disposal. We are always here to assist you, and look forward to hearing from you!
 No spam, just valuable updates.