
Syncfusio’s Blazor Visual Studio Code Extension includes Blazor project templates, code snippets, conversion, and migration tools. It allows you to create a Blazor project using prebuilt templates. Now, the Blazor Extension in Visual Studio Code is also available for the Mac operating system.
In this blog, we will see how to use the Blazor Extension in Visual Studio Code for Mac OS to:
- Create a Syncfusion Blazor application.
- Convert a Blazor application into a Syncfusion Blazor application.
- Migrate Syncfusion Blazor applications from one version to another.
Prerequisites
The prerequisites for creating a Blazor application are:
Installing the Syncfusion Blazor extension
The Syncfusion Blazor extension for Visual Studio Code is available in the Visual Studio Marketplace.
Installing from Visual Studio Marketplace
To install the Syncfusion Blazor extension from the Visual Studio Marketplace, follow these steps:
- First, open Visual Studio Code.
- Then, open the Command Palette by navigating to View> Command Palette.
- Search for Install Extensions in the Command Palette and expand it when it appears.
- Search for Syncfusion Blazor in the search box to locate Blazor VSCode Extensions – Syncfusion.
- Then, install the Blazor VSCode Extensions- Syncfusion extension.
Installing from a VSIX package
To install the Syncfusion Blazor extension from a VSIX package, follow these steps:
- Download the Syncfusion Blazor VSCode extension from the Visual Studio Marketplace.
- Then, open Visual Studio Code.
- Now, open the Command Palette by navigating to View > Command Palette.
- Search for Install, and then click Install from VSIX in the Command Palette.
- Finally, select the Syncfusion Blazor Extension from the Browse options. Then, the extension will be installed.
Creating the Syncfusion Blazor application
The Syncfusion Blazor extension in Visual Studio Code for Mac helps developers to create Blazor applications with Syncfusion Blazor UI components, saving them significant time. To create an app, follow these steps:
- Open Visual Studio Code.
- Now, open the Command Palette by navigating to View > Command Palette.
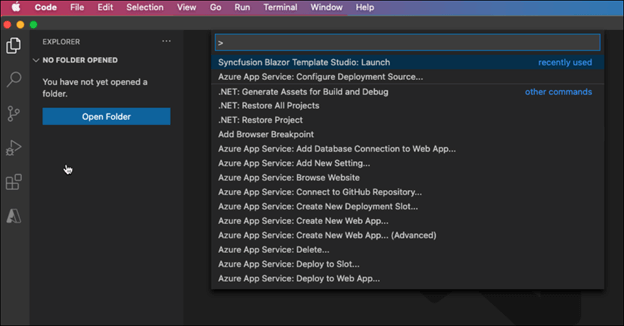
- Select Syncfusion Blazor Template Studio: Launch by searching for Syncfusion Blazor in the search text box.

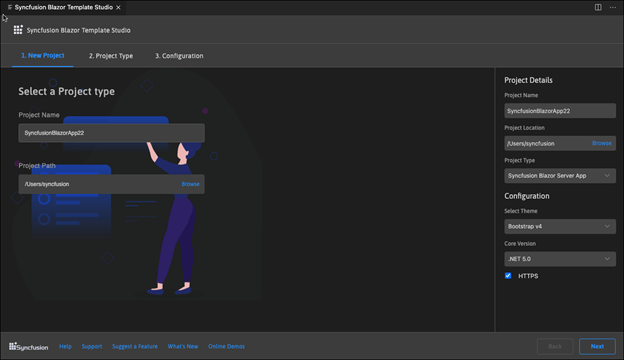
- Now, the Syncfusion Blazor Template Studio wizard will open. This UI design looks user-friendly and attractive. You can provide project-related details without any guidance or confusion via this UI design. It helps you easily select the application requirements. Provide the project name and location in which you want to store the application.
- Now, select the required Blazor application type:
- Syncfusion Blazor Server App.
- Syncfusion Blazor Web Assembly App.
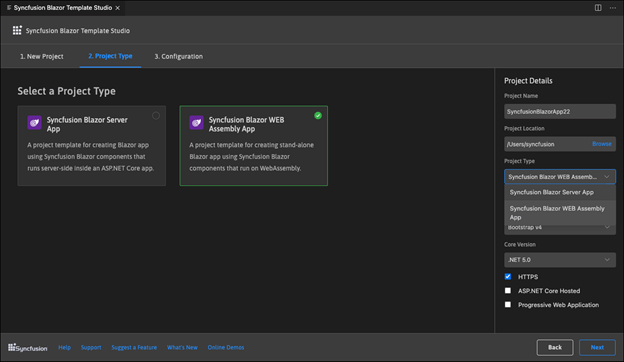
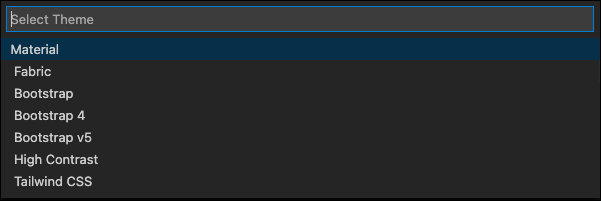
- In the Configuration tab, choose the .NET Core version, a theme, HTTPS configuration, and Blazor Web Assembly project types (ASP.NET Core-hosted and Progressive Web Application). Then, click Create.
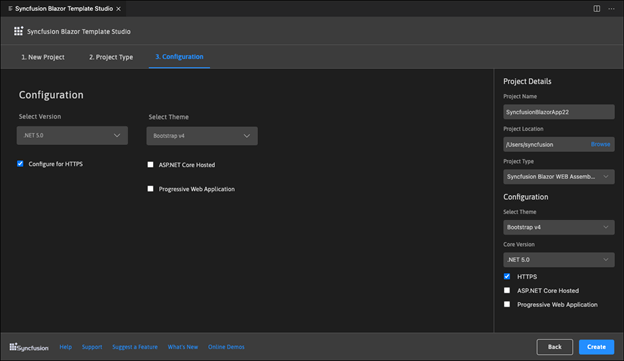
Note: In the Syncfusion Blazor Web Assembly App project type, we can choose ASP.NET Core-hosted, Progressive Web Application, or both.
- In the Configuration tab, choose the .NET Core version, a theme, HTTPS configuration, and Blazor Web Assembly project types (ASP.NET Core-hosted and Progressive Web Application). Then, click Create.
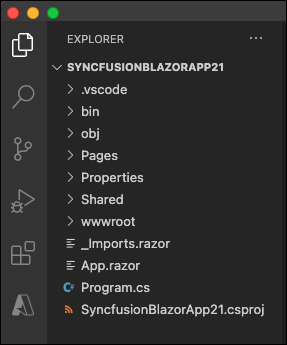
- Once the project is created, the Creating Your Project dialog will appear. Click Open Project. Refer to the following screenshot.

Now, the Blazor application has been created with the required Syncfusion NuGet packages and the CDN links of the Syncfusion Blazor components.
 Now, you can develop your application with Syncfusion Blazor components. While creating the Syncfusion Blazor application, the code snippets for the Calendar, DataGrid, and Button components will be added by default. You can run these components without any change in the source file.
Note: Refer to the Creating a Syncfusion Blazor application documentation to render the code and run the application.
Debugging the application
The Debug and Release modes are configured while creating the project. So, you don’t need to configure them manually. When debugging a Syncfusion Blazor app, the NuGet packages will be automatically restored. Then, the app will be compiled and start to run in the default browser.
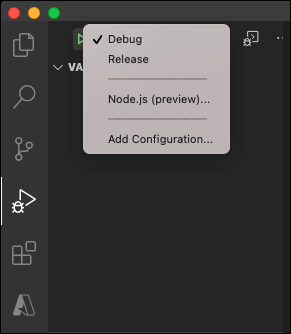
By default, the Blazor application runs in Debug mode. You can change it to Release mode by choosing the Debug option from the Debug tab or pressing the Ctrl+Shift+D shortcut key.
Converting a Blazor application to a Syncfusion Blazor application
The Syncfusion Blazor conversion is an add-in for the Extension in Visual Studio Code for Mac. It converts an existing Blazor app into a Syncfusion Blazor web app by adding the required NuGet packages and themes. With this, you can easily add Syncfusion Blazor components to the app. To do so, follow these steps:
- Open an existing Blazor web app or create a new Microsoft Blazor web app in Visual Studio Code.
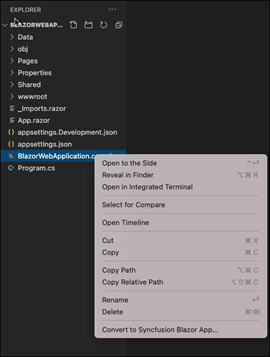
- Right-click on the Project file from Explorer (Workspace). Then, select Convert to Syncfusion Blazor App from the context menu. Refer to the following screenshot.
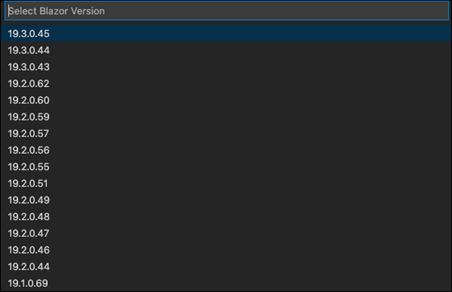
- Then, select the required Blazor version (which is published in the NuGet Gallery) from the dropdown that appears.
- Now, choose the required theme from the dropdown that appears.
Now, the application is configured with the required Syncfusion Blazor NuGet packages and themes.
Note: For more details, refer to the Converting Blazor application to Syncfusion Blazor application documentation.
Migrating a Syncfusion Blazor application from one version to another
The Syncfusion Blazor migration is an add-in for the Extension in Visual Studio Code for Mac. It migrates a Syncfusion Blazor app from one version to another by changing the Syncfusion NuGet package version in the app. Follow these steps to migrate a Syncfusion Blazor app:
- Open an existing Syncfusion Blazor app or create a new Syncfusion Blazor app in Visual Studio Code.
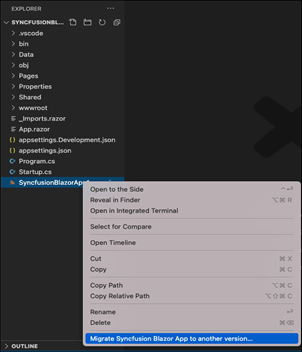
- Right-click on the project file from Explorer (Workspace). Then, select Migrate Syncfusion Blazor App to another version from the context menu. Refer to the following screenshot.
- Then, select the required Blazor version (which is published in the NuGet Gallery) from the dropdown that appears.
Finally, the Syncfusion NuGet packages references are updated to the selected version in the application.
Note: For more details, refer to the Upgrading Syncfusion Blazor application to the latest version documentation.
Special mention: Syncfusion® Document Viewer Extension
If you often find yourself switching between apps just to check a Word or Excel file, this handy tool is for you. The Syncfusion® Document Viewer Extension for Visual Studio Code lets you open and view documents like Word, Excel, and more; right inside your coding environment.
You can preview high-fidelity files and even make light edits such as text changes and formatting tweaks, all without leaving VS Code. It’s a simple way to stay focused and keep your project documentation within reach.
Available for free download on the Visual Studio Code Marketplace.
Conclusion
Thanks for reading! In this blog post, we have seen how to use our Syncfusion Blazor Extension in Visual Studio Code to create, convert and migrate a Blazor app in the MAC operating system. This will help you create attractive web applications with Syncfusion Blazor UI components in less time. Try out the procedures in this blog post and leave your feedback in the comments section below!
Syncfusion provides more than 65 high-performance, lightweight, modular, and responsive Blazor UI controls such as Data Grid, Charts, and Scheduler to ease the work of developers. Try them out for yourself.
You can also contact us through our support forum, Direct-Trac, or feedback portal. We are always happy to assist you!


 No spam, just valuable updates.