

Validating data is the process of ensuring the accuracy of the data. It ensures that the data meets certain requirements necessary for further data analysis. After validation, you can trust the data you use to be accurate, clean, and useful. Assuring the accuracy of the data you utilize is a proactive strategy to protect your most valuable data.
In this blog post, we will see how to enable the data validation feature in the Syncfusion JavaScript Spreadsheet. By doing so, you can require users to enter only a specific type of data or value and keep them from entering invalid data in the cells.
Where can you find data validation options?
On the Data tab of the ribbon, you’ll find the data validation dropdown button.
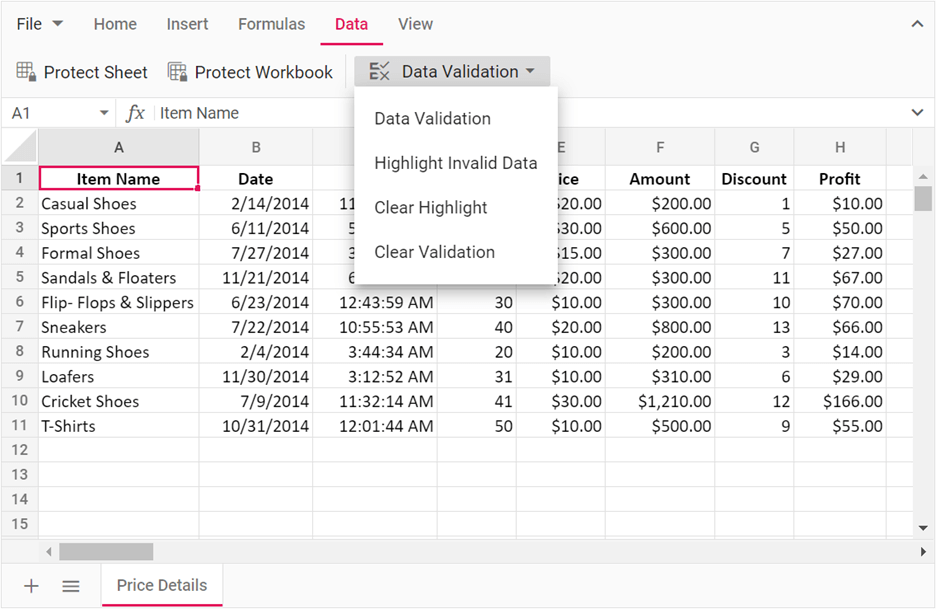
The Data Validation dropdown button lists the following options:
Data validation
The JavaScript Spreadsheet supports the following data validation options:
- Whole Number: Restricts the cell to accept only whole numbers.
- Decimal: Restricts the cell to accept only decimal numbers.
- List: Picks data from the dropdown list only.
- Date: Restricts the cell to accept only date values.
- Time: Restricts the cell to accept only time values.
- Text Length: Limits the text length.
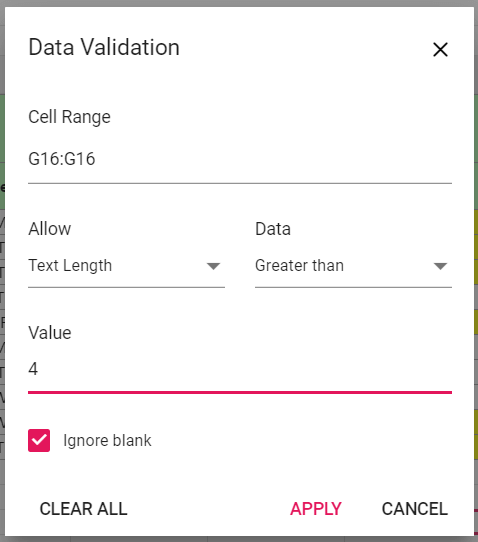
With this feature, you can set the validation rules in the Data Validation dialog like in the following screenshot.
Highlight invalid data
This feature highlights the cells that contain invalid data with a yellow background. The cells that failed to meet the data validation criteria are highlighted, including the typed and pasted values.
Clear highlight
This feature clears the highlight from the invalid cells. You can also highlight the cells once again if you wish.
Clear validation
This feature enables you to clear the applied validation from the specified range of cells or the whole worksheet.
Adding data validation in JavaScript Spreadsheet through code
Also, you can add data validation in the JavaScript Spreadsheet through code using the addDataValidation method and pass the required validation options with this method.
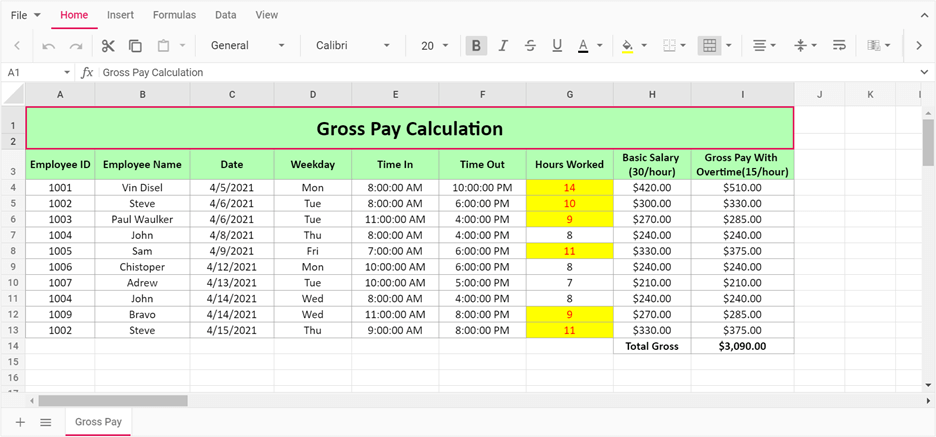
The following code example showcases the data validation feature with a gross pay calculation.
/**
  * Data validation
  */

    //Initialize the Spreadsheet component.
    let sheet: SheetModel[] = [
        {
            ranges: [{
                dataSource: (dataSource as any).grossPay,
                startCell: 'A3'
                },
            ],
            name: 'Gross Pay',
            rows: [{
                        cells: [{ value: 'Gross Pay Calculation',
                        style: { fontSize: '20pt', fontWeight : 'bold', textAlign: 'center', backgroundColor: '#B3FFB3',
                        verticalAlign: 'middle'} }]
                    },
                    {
                        index: 13,
                        cells: [{
                            index: 7, value: 'Total Gross',
                            style: { border: '1px solid #A6A6A6', textAlign: 'center', verticalAlign: 'middle', fontWeight: 'bold'} },
                        {
                            index: 8, formula: '=Sum(I4:I13)', format: '$#,##0.00',
                            style: { border: '1px solid #A6A6A6', textAlign: 'center', verticalAlign: 'middle', fontWeight: 'bold'}
                        }]
                    }
            ],
            columns: [
                { width: 88,  }, { width: 120 }, { width: 106 }, { width: 98 }, { width: 110 },
                { width: 110 }, { width: 110 }, { width: 98}, { width: 130}
            ]
        }  ];

    //Initialize the SpreadSheet control.
    let spreadsheet: Spreadsheet = new Spreadsheet({
        sheets: sheet,
        created: () => {
            spreadsheet.merge('A1:I2');
            spreadsheet.setBorder({ border: '1px solid #A6A6A6' }, 'A1:I13');
            spreadsheet.cellFormat({ textAlign: 'center', verticalAlign: 'middle'}, 'A3:I13');
            spreadsheet.cellFormat({ backgroundColor: '#B3FFB3', fontWeight : 'bold'}, 'A3:I3');
            spreadsheet.numberFormat('$#,##0.00', 'H4:I13');
            spreadsheet.wrap('H3:I3');
            //Add Data validation to range.
            spreadsheet.addDataValidation({ type: 'WholeNumber', operator: 'LessThan', value1: '9', ignoreBlank: false }, 'G4:G13');
            spreadsheet.addDataValidation({ type: 'TextLength', operator: 'GreaterThan', value1: '3', ignoreBlank: false }, 'B4:B13');
            spreadsheet.addDataValidation({ type: 'Date', operator: 'GreaterThan', value1: '4/5/2021’, ignoreBlank: false  }, 'C4:C13');
            spreadsheet.addDataValidation({ type: 'Time', operator: 'LessThan', value1: '6:00:00 PM', ignoreBlank: false  }, 'F4:F13');
            spreadsheet.addDataValidation({ type: 'List', value1: 'Mon, Tue, Wed, Thu, Fri', ignoreBlank: false  }, 'D4:D13');
            //Highlight Invalid Data.
            spreadsheet.addInvalidHighlight('G4:G13');
        }
    });

    spreadsheet.appendTo('#spreadsheet');
After executing the previous code example, we will get output like in the following screenshot.
Reference
For more information, refer to the Data Validation in JavaScript Spreadsheet demo.
Conclusion
Thanks for reading! I hope you now have a better understanding of the data validation feature in the Syncfusion JavaScript Spreadsheet control. With this feature, you can easily keep users from entering invalid data and ensure data accuracy. Also, refer to the Data Validation in JavaScript Spreadsheet documentation for more information.
In the upcoming blogs, we will discuss other features. What else do you expect from a spreadsheet? Please share your thoughts in the comments section of this blog post.
If you’re already a Syncfusion user, you can download Essential Studio® for JavaScript product setup to try out this control. Otherwise, you can download a free 30-day trial.
If you have any questions about these features, please contact us through our support forum, Direct-Trac, or feedback portal. We are happy to assist you!
 No spam, just valuable updates.