
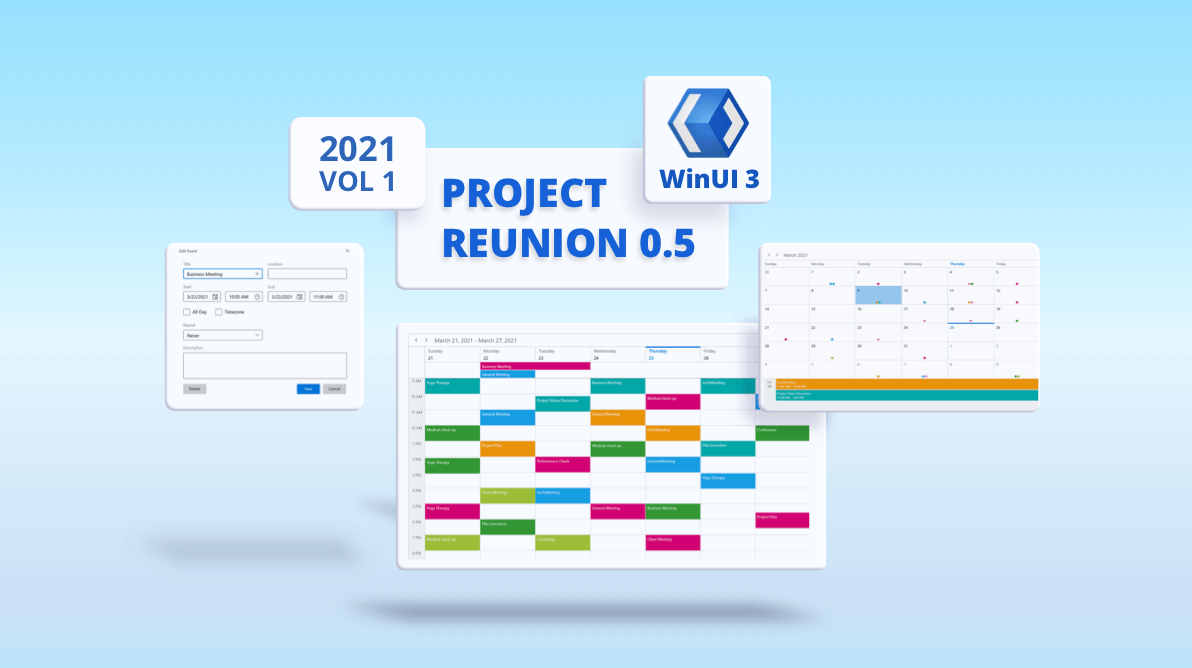
We at Syncfusion released the preview version of our WinUI 3 Project Reunion Scheduler in the 2021 Volume 1 release. The WinUI Scheduler control is used to schedule and manage appointments through an intuitive user interface, like the Windows calendar. It visualizes appointments in different views including day, week, workweek, month, timeline day, timeline week, timeline workweek, and timeline month. With it, users can easily schedule recurring events and appointments in different time zones. It also provides a built-in interface for adding, editing, deleting, and rescheduling appointments, and supports appearance customization and localization to meet the needs of different regions.
The Scheduler has the following essential features in its initial release:
- Views.
- Events.
- Resource grouping.
- Load on demand.
- Month agenda view.
- Built-in appointment editor.
- Context menu and commands.
- Time zones.
- Special time regions.
- Flexible working days.
- First day of the week customization.
- Date restriction.
- Appearance customization.
- Theming.
- Localization and globalization.
Let’s check out these features and learn how to integrate the WinUI 3 Project Reunion Scheduler into an application.
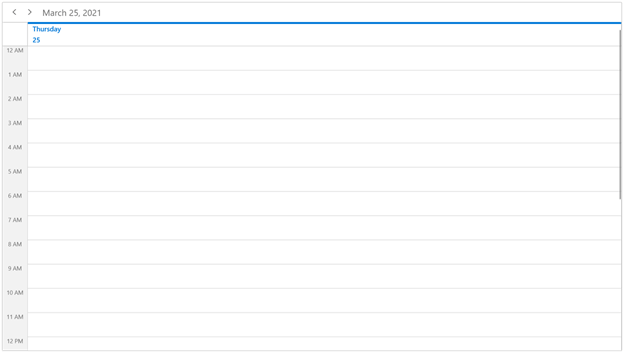
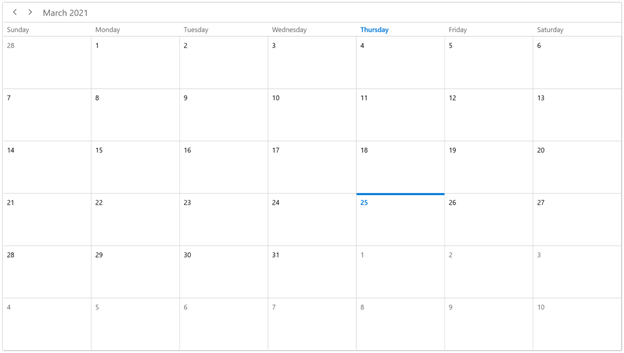
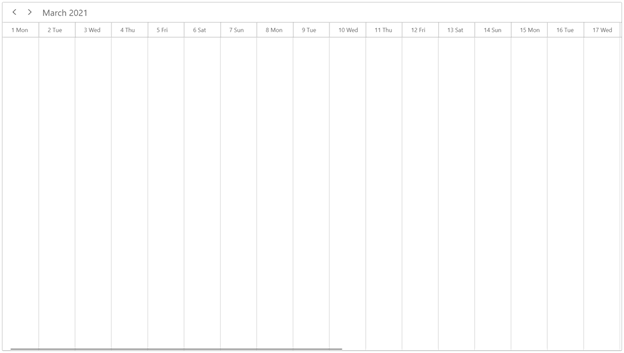
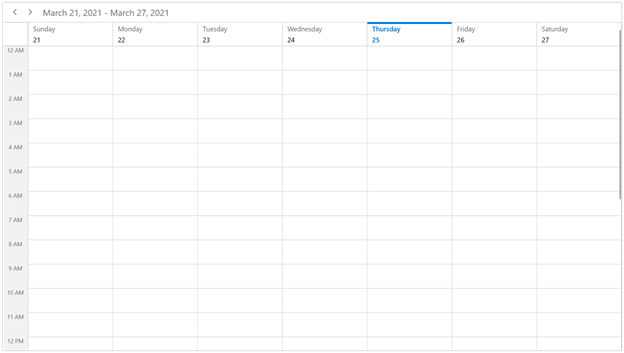
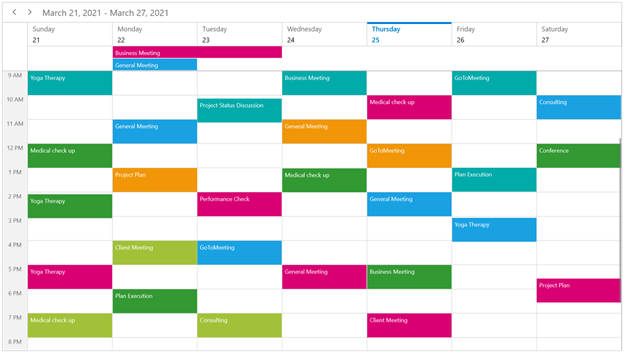
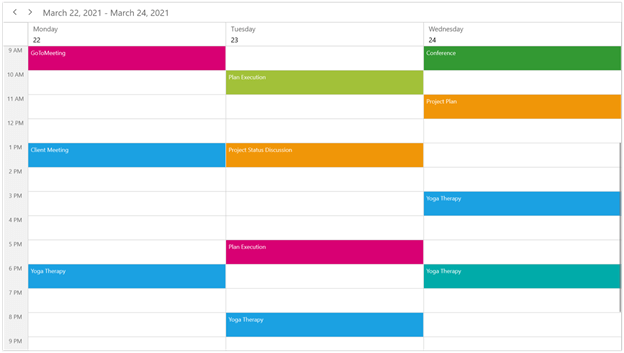
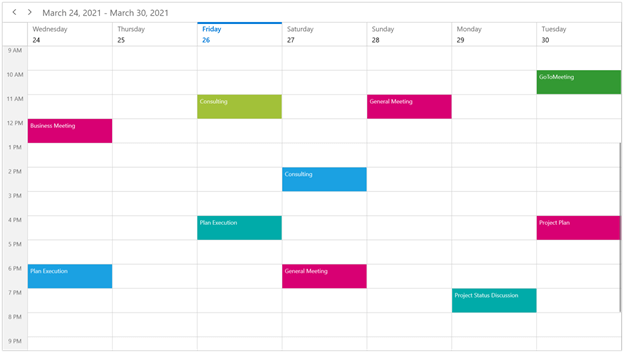
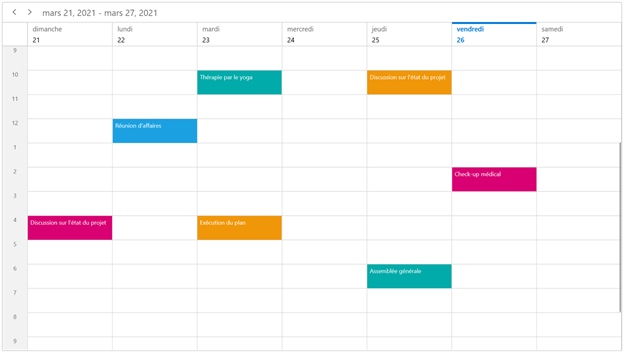
Views
A wide range of built-in view modes are available: day, week, workweek, timeline day, timeline week, timeline workweek, and timeline month.
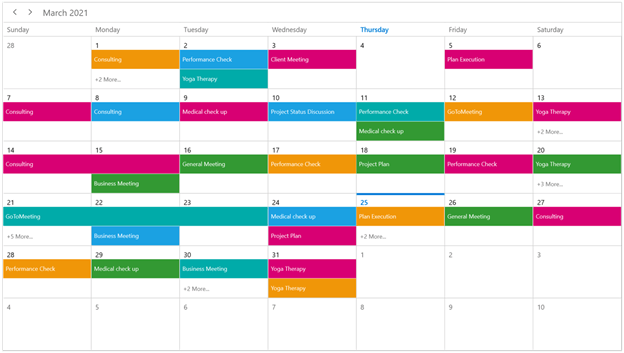
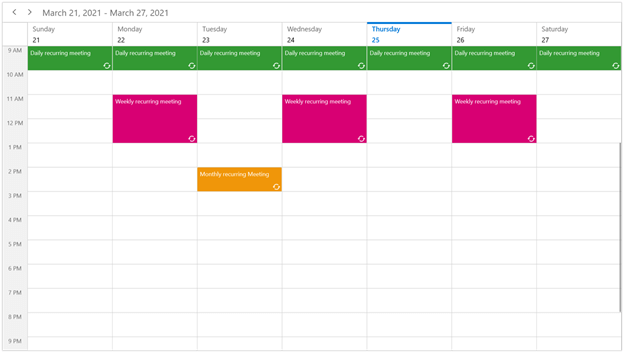
Events
Render recurring, all-day, and spanned appointments to visualize your schedules and events easily. Appointments contain information on events scheduled at specific times. In addition to default appointments, users can also use their own collections to connect a business entity to an appointment by mapping their fields, such as start time, end time, subject, notes, and recurrence.
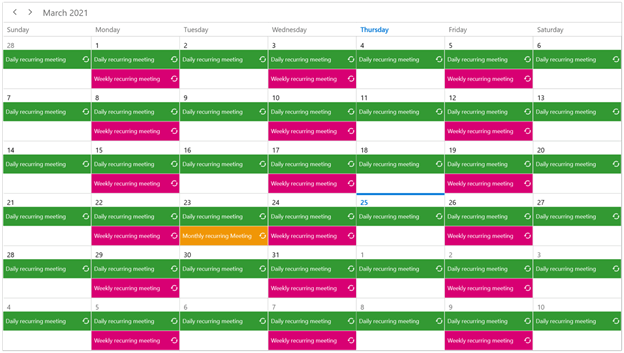
You can easily configure recurring events on a daily, weekly, monthly, or yearly basis. You can also skip or change the occurrence of a recurring appointment.
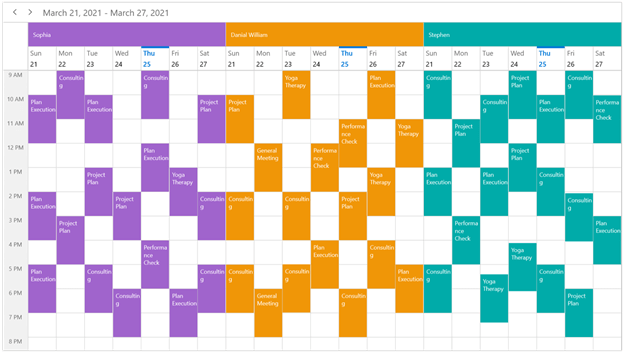
Resource grouping
Group appointments based on the resources associated with them in day, week, workweek, timeline day, timeline week, timeline workweek, and timeline month views.
Load on demand
Load appointments on demand for the visible date range with the loading indicator to users. Loading on demand improves the loading performance of appointments ranging multiple months or years.
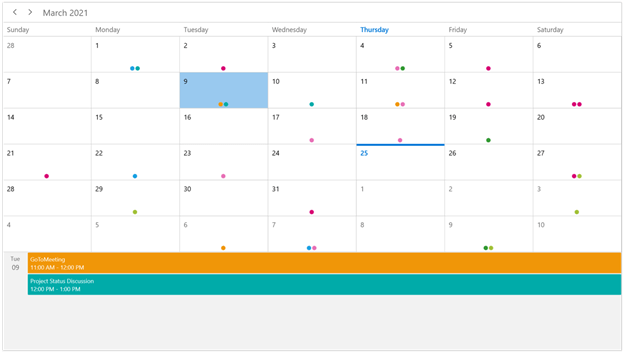
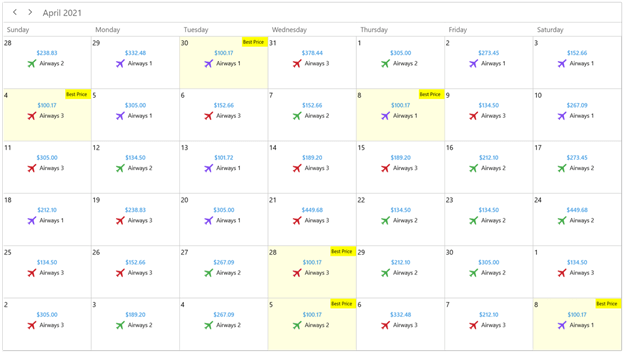
Month agenda view
Display appointments in a list below the month view by clicking a day.
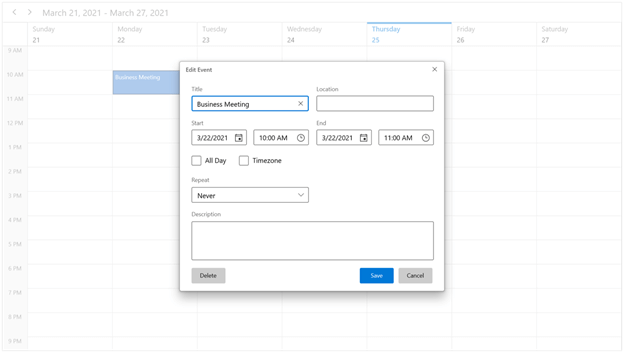
Built-in appointment editor
You can easily create, edit, or delete appointments using the built-in appointment editor.
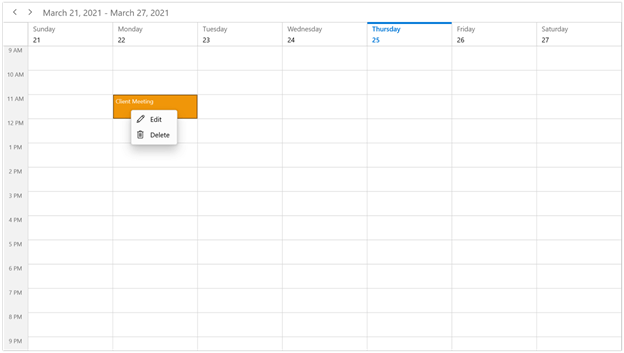
Context menu and commands
The scheduler context menu displays shortcut options to add, edit, and delete appointments during user interactions such as holding or right-clicking appointments, time slots, and month cells. Use built-in RoutedUICommands to handle the context menu options.
Time zones
Display appointments created in various time zones in a system. Appointment start and end times are also automatically adjusted and displayed based on daylight savings time.
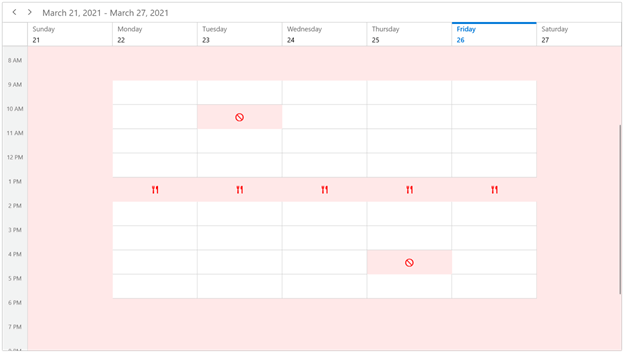
Special time regions
You can create special time regions to highlight time slots in day, week, workweek, timeline day, timeline week, and timeline workweek views. Adjacent special time regions can be merged and shown as a single region instead of separate regions for each day in week and workweek views.
Flexible working days
Customize the workdays in a workweek so that the remaining days will be hidden from the view.
First day of the week
You can also customize the first day of the week as needed. The default first day is Sunday.
Date restriction
Prevent navigation beyond the minimum date and maximum date. This restricts users from selecting dates outside the time range.
Appearance customization
You can provide a unique and consistent look to your Scheduler by customizing its appearance using styles, data templates, and themes.

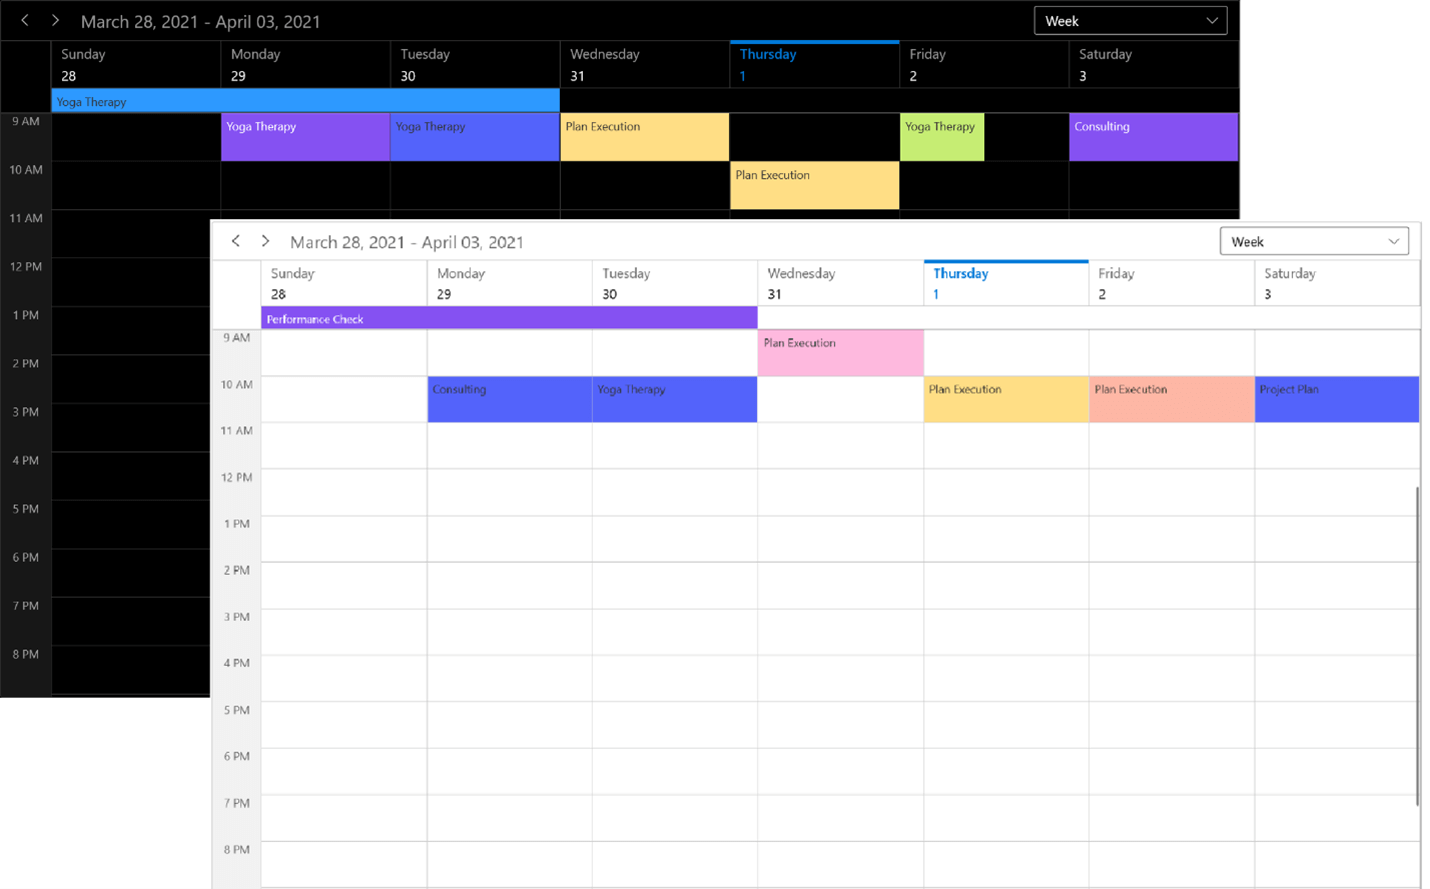
Theming
The Scheduler control is available in both light and dark themes.
Localization and globalization
Display the current date and time in globalized formats. All static text in the Scheduler can be localized.
Getting started with the WinUI Scheduler
Now that we’ve seen the features of the WinUI 3 Scheduler control, let’s cover how to add it in your application and use its basic features. You can implement the Scheduler in both WinUI 3 desktop and WinUI 3 UWP applications.
For this example, I am going to use the Scheduler in a WinUI 3 desktop project.
Step 1: Create a WinUI 3 application
First, create a simple WinUI 3 desktop project using the instructions provided in the following documentations: Get started with WinUI 3 for desktop apps and Build desktop Windows apps with Project Reunion 0.5.
Step 2: Add the necessary NuGet package
Then, add the Syncfusion.Scheduler.WinUI NuGet package to the application from nuget.org or from the installed location, C:\Program Files (x86)\Syncfusion\Essential Studio®\WinUI\xx.x.x.xx\NuGetPackages.
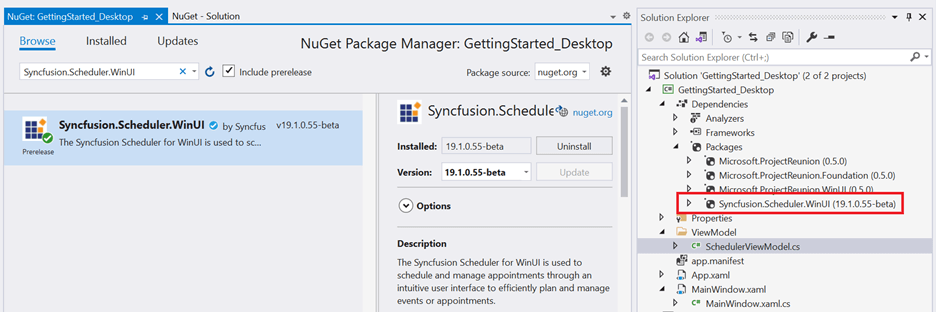
Note: xx.x.x.xx denotes the version [19.1.0.55-beta] of the Syncfusion WinUI 3 Project Reunion Scheduler package.
Step 3: Add the namespace
Include the scheduler namespace in your XAML file with the following code:
xmlns:scheduler="using:Syncfusion.UI.Xaml.Scheduler"
Step 4: Initialize the Scheduler
Initialize the Scheduler control as shown in the following code example.
Xaml
<scheduler:SfScheduler x:Name="Schedule" ViewType="Week"/>
C#
SfScheduler scheduler = new SfScheduler();
this.Content = scheduler;
Step 5: Add appointments
ScheduleAppointment is a class that defines appointments in the scheduler control. It has some basic properties such as StartTime, EndTime, Subject, and you can add some additional information about the appointment using the Notes, Location, and IsAllDay properties.
Xaml
<Grid>
  <Grid.DataContext>
    <local:SchedulerViewModel/>
  </Grid.DataContext>
  <scheduler:SfScheduler x:Name="Schedule" ItemsSource="{Binding Events}" ViewType="Week"/>
</Grid>
C#
public class SchedulerViewModel
{
public SchedulerViewModel()
{
Events = GenerateAppointments();
}
public ScheduleAppointmentCollection Events { get; set; }
private ScheduleAppointmentCollection GenerateAppointments()
{
// Creating an instance for the schedule appointment collection.
var scheduleAppointmentCollection = new ScheduleAppointmentCollection();
//Adding the schedule appointments in the schedule appointment collection.
scheduleAppointmentCollection.Add(new ScheduleAppointment
{
StartTime = DateTime.Now.Date.AddHours(10),
EndTime = DateTime.Now.Date.AddHours(11),
Subject = "Client Meeting",
AppointmentBackground = new SolidColorBrush(Color.FromArgb(255, 133, 81, 242)),
Foreground = new SolidColorBrush(Colors.White),
});
scheduleAppointmentCollection.Add(new ScheduleAppointment
{
StartTime = DateTime.Now.Date.AddDays(1).AddHours(13),
EndTime = DateTime.Now.Date.AddDays(1).AddHours(14),
Subject = "GoToMeeting",
AppointmentBackground = new SolidColorBrush(Color.FromArgb(255, 140, 245, 219)),
Foreground = new SolidColorBrush(Colors.Black),
});
scheduleAppointmentCollection.Add(new ScheduleAppointment
{
StartTime = DateTime.Now.Date.AddDays(-1).AddHours(9),
EndTime = DateTime.Now.Date.AddDays(-1).AddHours(10),
Subject = "Generate Report",
AppointmentBackground = new SolidColorBrush(Color.FromArgb(255, 83, 99, 250)),
Foreground = new SolidColorBrush(Colors.White),
});
scheduleAppointmentCollection.Add(new ScheduleAppointment
{
StartTime = DateTime.Now.Date.AddDays(2).AddHours(14),
EndTime = DateTime.Now.Date.AddDays(2).AddHours(15),
Subject = "Generate Report",
AppointmentBackground = new SolidColorBrush(Color.FromArgb(255, 255, 222, 133)),
Foreground = new SolidColorBrush(Colors.Black),
});
scheduleAppointmentCollection.Add(new ScheduleAppointment
{
StartTime = DateTime.Now.Date.AddDays(-2).AddHours(4),
EndTime = DateTime.Now.Date.AddDays(-2).AddHours(5),
Subject = "Plan Execution",
AppointmentBackground = new SolidColorBrush(Color.FromArgb(255, 45, 153, 255)),
Foreground = new SolidColorBrush(Colors.White),
});
scheduleAppointmentCollection.Add(new ScheduleAppointment
{
StartTime = DateTime.Now.Date.AddDays(0).AddHours(5),
EndTime = DateTime.Now.Date.AddDays(0).AddHours(6),
Subject = "Consulting",
AppointmentBackground = new SolidColorBrush(Color.FromArgb(255, 253, 183, 165)),
Foreground = new SolidColorBrush(Colors.Black),
});
scheduleAppointmentCollection.Add(new ScheduleAppointment
{
StartTime = DateTime.Now.Date.AddDays(1).AddHours(9),
EndTime = DateTime.Now.Date.AddDays(1).AddHours(10),
Subject = "Performance Check",
AppointmentBackground = new SolidColorBrush(Color.FromArgb(255, 198, 237, 115)),
Foreground = new SolidColorBrush(Colors.Black),
});
scheduleAppointmentCollection.Add(new ScheduleAppointment
{
StartTime = DateTime.Now.Date.AddDays(3).AddHours(17),
EndTime = DateTime.Now.Date.AddDays(3).AddHours(18),
Subject = "Project Plan",
AppointmentBackground = new SolidColorBrush(Color.FromArgb(255, 253, 185, 222)),
Foreground = new SolidColorBrush(Colors.Black),
});
scheduleAppointmentCollection.Add(new ScheduleAppointment
{
StartTime = DateTime.Now.Date.AddDays(0).AddHours(17),
EndTime = DateTime.Now.Date.AddDays(0).AddHours(18),
Subject = "Consulting",
AppointmentBackground = new SolidColorBrush(Color.FromArgb(255, 83, 99, 250)),
Foreground = new SolidColorBrush(Colors.White),
IsAllDay = true
});
return scheduleAppointmentCollection;
}
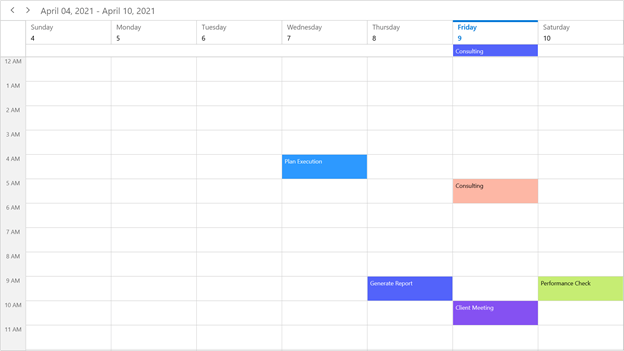
}Demo project
For more information, refer to our WinUI 3 Project Reunion Scheduler demo project. On executing this sample, you will get the output shown in the following screenshot.
Conclusion
I hope you enjoyed learning about the new Syncfusion WinUI 3 Project Reunion Scheduler control and its features. This control is available in the 2021 Volume 1 release. For more information, refer our WinUI Scheduler user guide and our demos in this GitHub repository. Additionally, you can download and check out our demo app in the App Center.
For current Syncfusion customers, the new version is available for download from the License and Downloads page. If you are not yet a Syncfusion customer, you can try our 30-day free trial to check out the newest features.
Also, if you need any specific feature in our WinUI 3 Scheduler, please let us know in the comments section below. You can also contact us through our support forums, Direct-Trac, or feedback portal. We are always happy to assist you!
 No spam, just valuable updates.