BoldSign is an enterprise-grade electronic signature application and API that enables users to sign documents digitally and allows you to send documents for eSignatures from its app or within your app. Its eSignature APIs give you complete control over documents and properties. You can send documents for signature, track document status with webhooks, download signed documents and audit trails, remind signers to complete the signing process, and much more.
This blog post will teach you how to integrate BoldSign using its eSignature APIs in ASP.NET Core web application!
Getting started
Note: Refer to the Getting Started with BoldSign documentation before proceeding.
- Sign up for a free sandbox.
- Create an ASP.NET Core web app using the following command:
dotnet new webapp --framework "netcoreapp3.1" -o ASPCoreEsignApp - Install the BoldSign API NuGet package with the following command:
dotnet add package BoldSign.Api - Acquire the necessary BoldSign app credentials.
Add BoldSign services through dependency injection
To communicate with the BoldSign API, you need to add authentication details such as headers and a base path to the HttpClient.
Include the following code in the ConfigureServices() method in your startup.cs file.
var apiClient = new ApiClient("https://api.boldsign.com/", "***API Key***");
services.AddSingleton(apiClient);
services.AddSingleton(new DocumentClient(apiClient));
services.AddSingleton(new TemplateClient(apiClient));
Now you can start using the BoldSign APIs in your app.
Send a document for signing
Using the following code in your ASP.NET Core app, you can initiate the signing process. Send a request to sign a document to one or more recipients with the signing workflow, auto-reminders, expiration date, and more.
Refer to the following code example.
private readonly IDocumentClient documentClient;
private readonly ITemplateClient templateClient;

public IndexModel(IDocumentClient documentClient, ITemplateClient templateClient, ILogger logger)
{
  this.documentClient = documentClient;
  this.templateClient = templateClient;
}

public void SignDocument()
{

  // Read the document from local path as stream.
  using var fileStream = System.IO.File.OpenRead("doc-2.pdf");
  var documentStream = new DocumentFileStream
  {
    ContentType = "application/pdf",
    FileData = fileStream,
    FileName = "doc-2.pdf",
  };


  // Creating collection with the loaded document.
  var filesToUpload = new List<IDocumentFile>
  {
    documentStream,
  };

  // Creating signature field.
  var signatureField = new FormField(
  id: "Sign",
  type: FieldType.Signature,
  pageNumber: 1,
  isRequired: true,
  bounds: new Rectangle(x: 50, y: 50, width: 200, height: 30));

  // Adding the field to the collection.
  List<FormField> formFeilds = new List<FormField>();
  formFeilds.Add(signatureField);

  // Creating signer field.
  var signer = new DocumentSigner(
    name: "Signer Name 1",
    emailAddress: "[email protected]",
    signerOrder: 1,
    authenticationCode: "851321",
    signerType: SignerType.Signer,
    privateMessage: "This is private message for signer",
    // Assign the created form fields to the signer.
    formFields: formFeilds);

  // Adding the signer to the collection.
  var documentSigners = new List<DocumentSigner>
  {
    signer
  };

  // Create send for sign request object.
  var sendForSign = new SendForSign
  {
    Title = "Sent from API SDK",
    Message = "This is document message sent from API SDK",
    EnableSigningOrder = false,

  // Assign the signers collection.
  Signers = documentSigners,

  // Assign the loaded files collection.
  Files = filesToUpload
  };

  // Send the document for signing.
  var createdDocumentResult = this.documentClient.SendDocument(sendForSign);
}
Note: For more details, refer to the send document for signing using BoldSign documentation.
Send a document using a template
Also, you can send documents for signing with predefined templates. Templates help users save time when they need to repeatedly send the same contracts for signing to different sets of people. Once we set up a template, sending documents takes less than a minute.
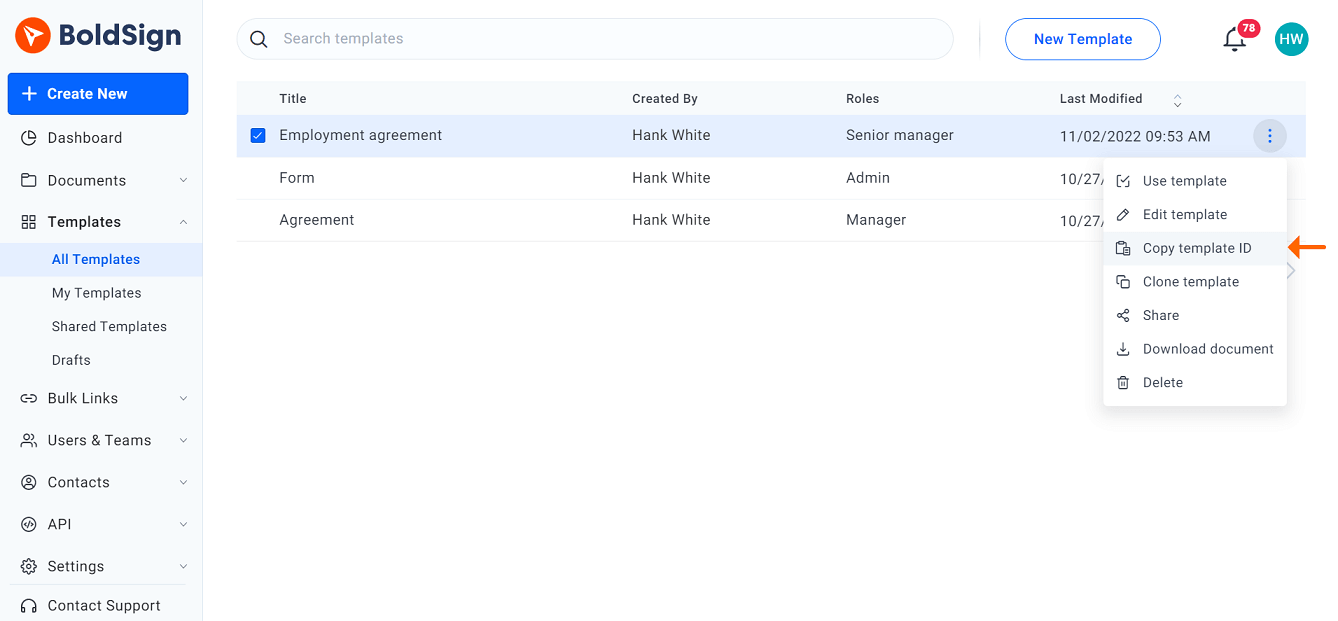
First, create a template in the BoldSign app and then get the template ID by following these steps:
- Navigate to the My Templates section in the BoldSign app. You can see the created templates in the list.
- Click the more options button at the right end of the template you want to send and choose the Copy template ID option to copy the template’s ID.

- Use the copied template ID to send your document for signing. You can directly use the template with a predefined set of recipients or add the recipients to the document before sending the signature request. Refer to the following code example.
public void SendDocumentUsingTemplate()
{

  var templateDetails = new SendForSignFromTemplate(
  templateId: "**templateId**",
  title: "Document from Template",
  message: "This document description");
  var createdDocumentResult = this.templateClient.SendUsingTemplate(templateDetails);
}
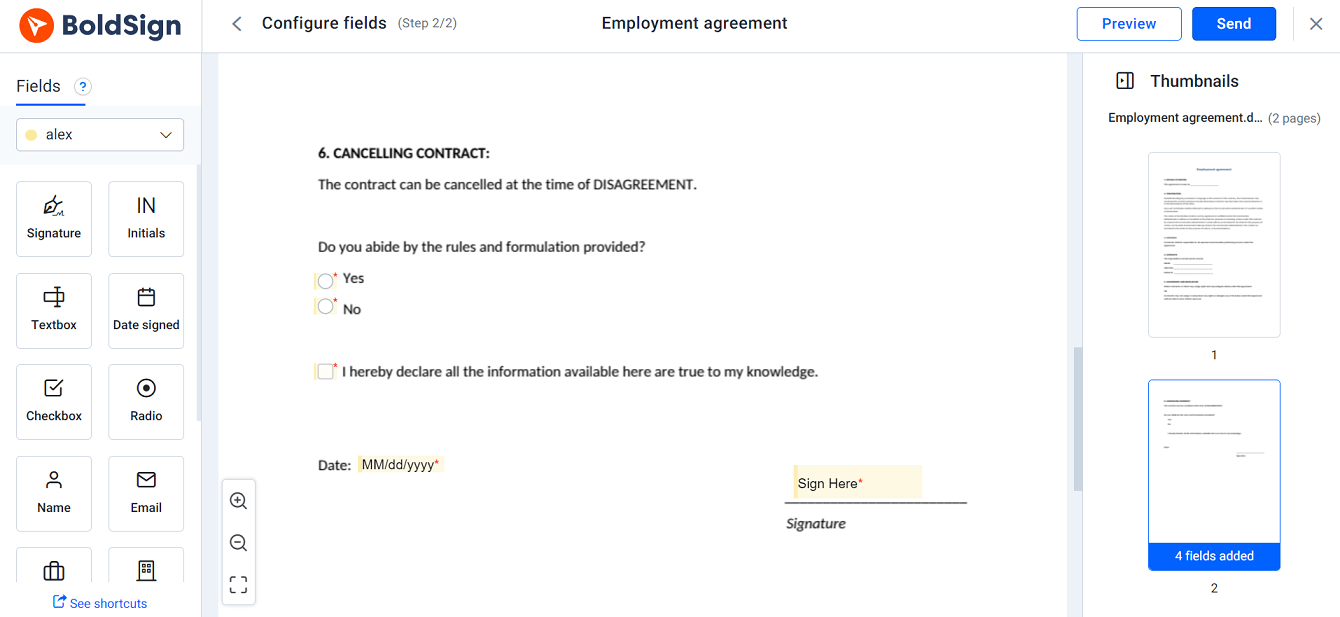
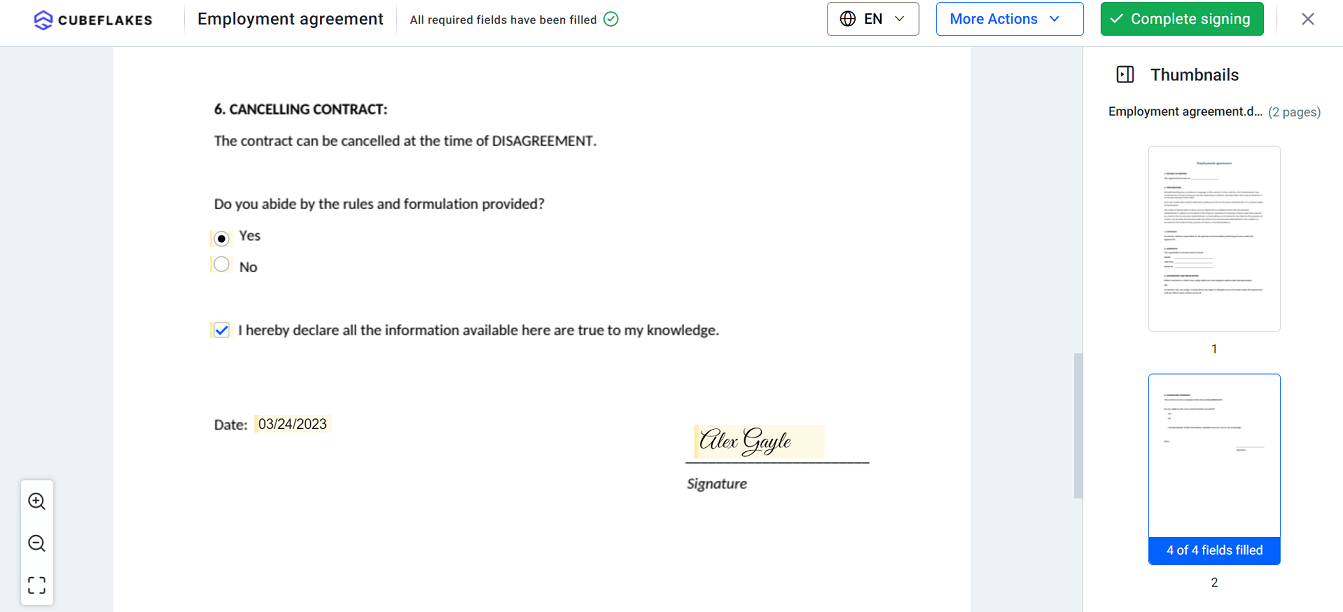
Refer to the following images.

Sending a PDF Document for Signing Using BoldSign 
Signing a PDF Document using BoldSign Web App
Note: For more details, refer to the send document to sign using templates in BoldSign documentation.
Conclusion
Thanks for reading about how to integrate BoldSign using its eSignature APIs into your ASP.NET Core web application! Check out our online demo and enjoy a hassle-free signing experience.
The Syncfusion ASP.NET Core UI controls library, powered by Essential JS 2, is the only control suite you will ever need to build an app. It contains over 70 high-performance, lightweight, modular, and responsive UI controls in a single package. Use them to increase your productivity in your development projects!
You can download the product setup if you’re a current customer. If you’re not a Syncfusion customer, you can download a free 30-day trial to evaluate our products.
You can contact us through our support forum, support portal, or feedback portal. As always, we are happy to assist you!
