
In this blog, we are going to learn the procedure to migrate a SQL Server database in an ASP.NET MVC application to MySQL and PostgreSQL.
All three, Microsoft SQL Server, MySQL, and PostgreSQL, are relational database management systems (RDBMS). MSSQL is developed and maintained by Microsoft, whereas MySQL and PostgreSQL are open-source software. MySQL is maintained by Oracle.
PostgreSQL is an advanced, enterprise-class, and open-source object-relational database management system (ORDBMS) that supports both SQL and JSON queries. It provides good performance along with low maintenance.
Reasons to choose MySQL
The following are reasons for someone to choose MySQL for their database needs:
- It needs less operational storage space.
- As it is open-source software, it is free to use.
- It allows the database files to be accessed and manipulated by different processes at runtime.
Reasons to choose PostgreSQL
- It is open-source software and free to use.
- It supports a concurrency management system. This allows you to access and manipulate multiple processes at the same time.
These are some of the reasons for developers to choose or migrate from MSSQL to MySQL or PostgreSQL. Let’s proceed with the steps involved in the migration process.
Note: Developers can also opt for data migration tools to ensure a seamless transition.
Prerequisites
In this blog, I am using Visual Studio to develop my application. Be sure that these necessary software packages are installed on your machine:
- Visual Studio 2019 (16.4.6 or higher)
- SQL Server 2017
- MySQL Workbench 8.0
- MySQL Community Server 8.0
- pgAdmin 4
Create an ASP.NET MVC application with SQL Server database
In this section, we are going to create an ASP.NET MVC application with an SQL Server database to demonstrate the conversion.
- Create an ASP.NET MVC application in Visual Studio 2019.
- Install the latest versions of the following NuGet packages:
- EntityFramework
- System.Data.SqlClient
- Mysql.Data.Entity
- Npgsql.EntityFramework
- Create a model class Student with the following code to record students’ ID, first name, last name, email ID, and other details.
using System; using System.ComponentModel.DataAnnotations; using System.ComponentModel.DataAnnotations.Schema; namespace StudentManagementSQLServer.Context { public class Student { [Key] [DatabaseGenerated(DatabaseGeneratedOption.Identity)] public int Id { get; set; } [Column(TypeName = "varchar(MAX)")] public string FirstName { get; set; } [Column(TypeName = "varchar")] [MaxLength(100)] public string LastName { get; set; } [Column(TypeName = "varchar")] [MaxLength(100)] public string Email { get; set; } [Column(TypeName = "nvarchar(MAX)")] public string ProfileImage { get; set; } [Column(TypeName = "nvarchar(MAX)")] public string Address { get; set; } [Column(TypeName = "decimal")] public decimal Age { get; set; } [Column(TypeName = "datetime")] public DateTime DOB { get; set; } [Column(TypeName = "datetime")] public DateTime? CreatedDate { get; set; } public int? CreatedBy { get; set; } public bool IsDeleted { get; set; } } } - Then, create a DBContext StudentContext.
using System.Data.Entity;

namespace StudentManagementSQLServer.Context
{
public class StudentContext : DbContext
{
public DbSet<Student> Student { get; set; }
public StudentContext() : base("StudentDBConnection") { }
}
}
Note: StudentDBConnection points out the database connection detail maintained in the Web.Config file.
- Add the database connection string details in the Web.Config file.
<connectionStrings>
<add name="StudentDBConnection" providerName="System.Data.SqlClient" connectionString="Server=*********;Database=StudentManagement_MVC;user id=*********;password=*********;MultipleActiveResultSets=true;" />
</connectionStrings>
Note: The database in MSSQL will be created with the same name as that of the Connection String Database.
This sample project is available in this GitHub location.
Migration from MSSQL to MySQL
In the previous section, we saw the steps to create an ASP.NET MVC application with an MSSQL database. Follow the next steps to migrate the MSSQL database to a MySQL database.
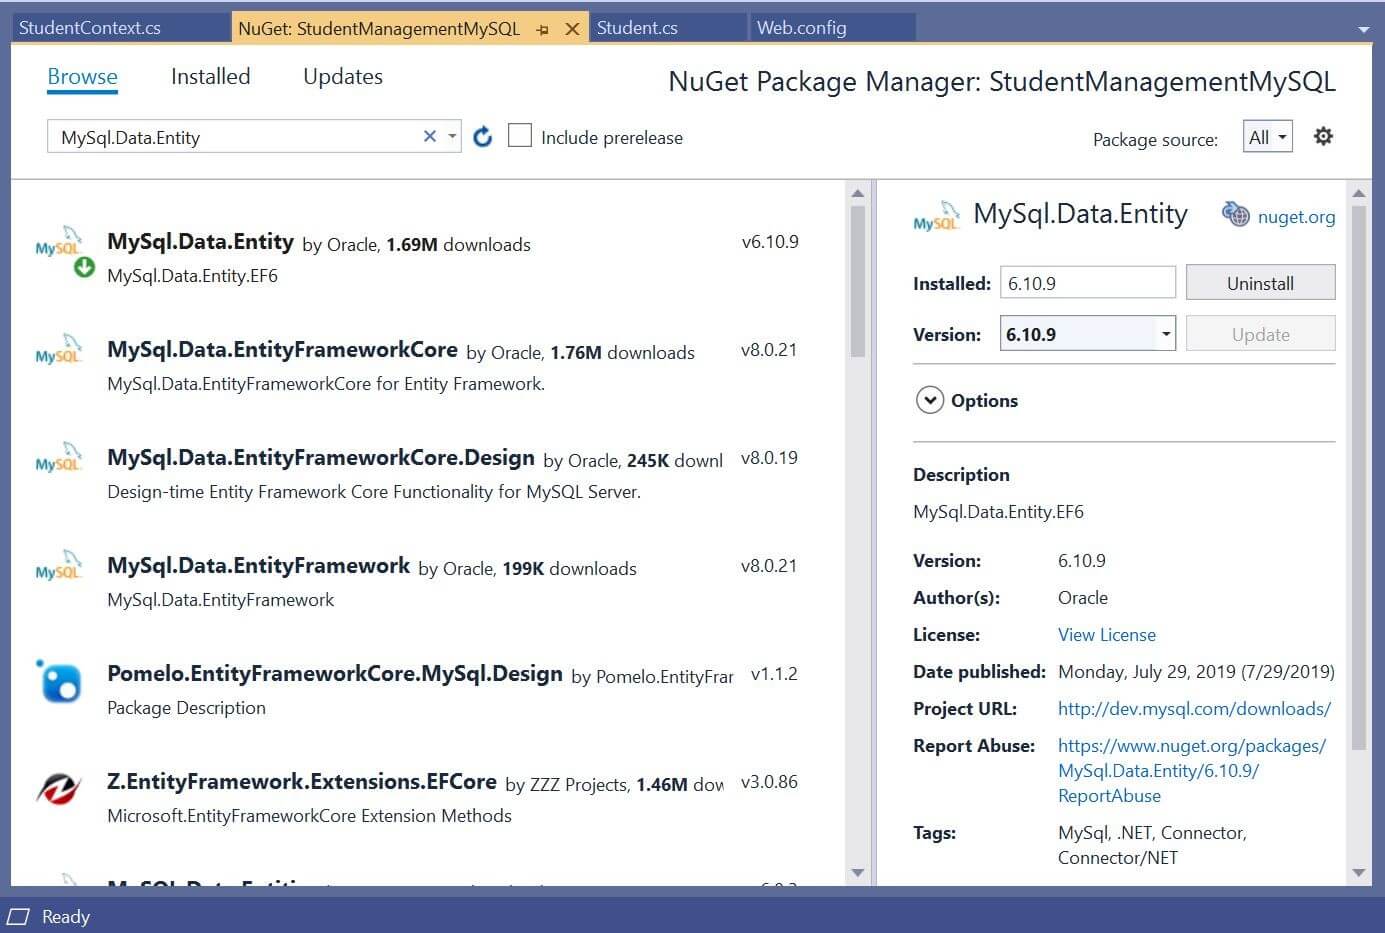
Step 1: Install the NuGet package MySql.Data.Entity by searching for it in the Browse tab in the NuGet Package Manager.
 Step 2: Update the DbConfigurationType in the DBContext file to migrate to the MySQL database configuration.
using MySql.Data.Entity;
using System;
using System.Collections.Generic;
using System.Data.Entity;
using System.Linq;
using System.Web;

namespace StudentManagementMySQL.Context
{
    [DbConfigurationType(typeof(MySqlEFConfiguration))]
    public class StudentContext : DbContext
    {
        public DbSet<Student> Student { get; set; }
        public StudentContext() : base("StudentDBConnection") { }
    }
}
Step 3: Change the connection string value in the Web.Config for MySQL database configuration.
<connectionStrings>
<add name="StudentDBConnection" providerName="MySql.Data.MySqlClient" connectionString="Server=localhost;Database=StudentManagement_MVC;user id=root;password=123456;"/>
</connectionStrings>
Step 4: Ensure the MySQL version of data types supported in SQL Server.
You can find the comparison of sample student models between the MSSQL and MySQL databases in the following table.
| MSSQL | MySQL | Conversion Remarks |
| Nvarchar(max) | Text | nvarchar allows 4,000 characters but max indicates maximum storage size of 2^31-1 bytes. |
| Varchar(max) | Text | varchar allows 4,000 characters but max indicates maximum storage size of 2^31-1 bytes. |
| Bool | Bool | No conversion |
| Decimal | Decimal | No conversion |
| Varchar | Varchar | No conversion |
| Nvarchar | Nvarchar | No conversion |
| Int | Int | No conversion |
| Datetime | Datetime | No conversion |
For more details, check out the following link here.
Restore database
In order to use code-based migration, you need to execute the following commands in the Package Manager Console in Visual Studio.
Step 1: Open the Package Manager Console with View -> Other Windows -> Package Manager Console.
Step 2: Execute the Enable-Migrations command.
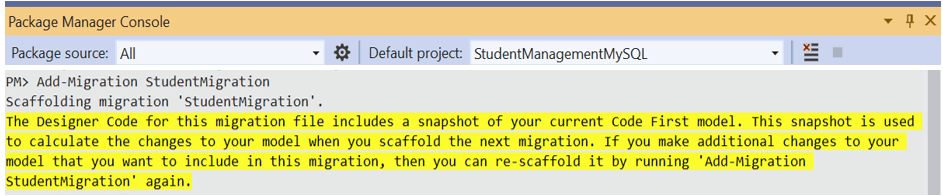
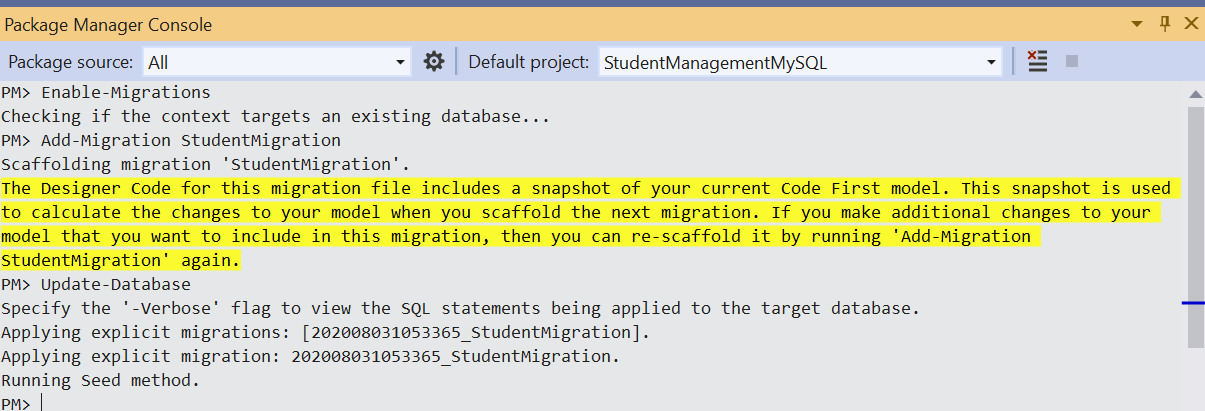 Step 3: Run the Add-Migration {{MigrationName}} command like in the following screenshot. In our case, the migration name is StudentMigration. So, the command with the parameter would be Add-Migration StudentMigration.
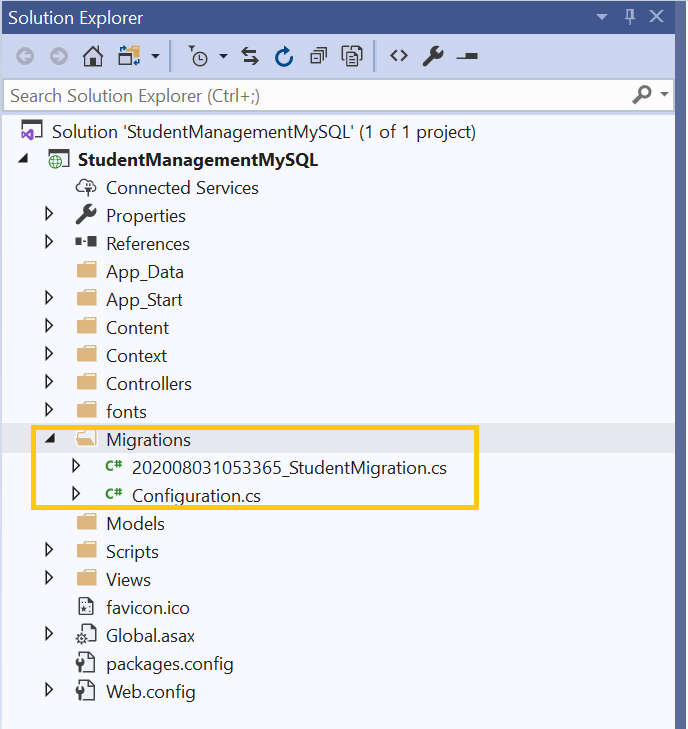
 Step 4: When migrations are done, it will create the <timestamp>_StudentMigration.cs file in the Migrations folder.
Please ensure that you get a file structure like the following image after successful migration.
Step 5: Run the Update-Database command.

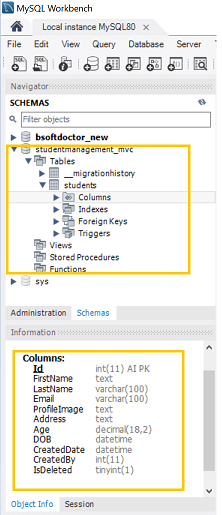
Step 6: After successful command execution, the database schema will be restored in the indicated database (see screenshot of restored database).
That’s it, the MSSQL to MySQL migration is complete. Let’s now proceed with the conversion of MSSQL to PostgreSQL.
Migration from MSSQL to PostgreSQL
For this conversion, we have to use the project with the MSSQL database and not the one acquired from the previous steps. You can get the project with MSSQL from this GitHub location. Follow these steps to perform migration from a MSSQL database to a PostgreSQL database.
Step 1: Install the package Npgsql.EntityFramework by searching for it in the Browse tab in the NuGet Package Manager.

Required changes in Web.Config
Step 2: Update the DBContext file to migrate to PostgreSQL database configuration.
<connectionStrings>
<add name="StudentDBConnection" providerName="Npgsql" connectionString="Server=localhost;Database=StudentManagement_MVC;user id=postgres;password=123456;Port=5432;Integrated Security=true;Pooling=true;" />
</connectionStrings>
Step 3: Add the defaultConnectionFactory tag inside the entityFramework tag in the Web.Config file.
<entityFramework>
<defaultConnectionFactory type="Npgsql.NpgsqlFactory, Npgsql" />
<providers>
<provider invariantName="System.Data.SqlClient" type="System.Data.Entity.SqlServer.SqlProviderServices, EntityFramework.SqlServer" />
<provider invariantName="Npgsql" type="Npgsql.NpgsqlServices, Npgsql.EntityFramework" />
</providers>
</entityFramework>
Step 4: Add the system.data details as follows in the Web.Config file.
<system.data>
<DbProviderFactories>
<remove invariant="Npgsql" />
<add name="Npgsql Data Provider" invariant="Npgsql" description=".Net Data Provider for PostgreSQL" type="Npgsql.NpgsqlFactory, Npgsql, Culture=neutral, PublicKeyToken=5d8b90d52f46fda7" support="FF" />
</DbProviderFactories>
</system.data>
Step 5: Ensure the conversion data types during the MSSQL-to-PostgreSQL conversion.
Find the comparison of sample student modals for the MSSQL and PostgreSQL databases in the following table.
| MSSQL | PostgreSQL | Conversion Remarks |
| Nvarchar(max) | Text | Variable length Unicode UCS-2 data, <= 2GB |
| Varchar(max) | Text | Variable length char string, <= 2GB |
| Bool | Bool | No conversion |
| Decimal | Decimal | No conversion |
| Varchar | Varchar | No conversion |
| Nvarchar | Nvarchar | No conversion |
| Int | Int | No conversion |
| Datetime | TIMESTAMP | Date and time with fractional seconds |
For a more in-depth analysis of the ease of use between PostgreSQL and SQL Server, I recommend examining this document. It offers a thorough comparison of PostgreSQL vs. MSSQL.
Restore database
In order to use code-based migration, execute the following commands in the Package Manager Console in Visual Studio.
Step 1: Open the Package Manager Console View -> Other windows -> Package Manager Console.
Step 2: Run the Enable-Migrations command in the Package Manager Console.

Step 3: Run the Add-Migration {{MigrationName}} command like in the following screenshot. In our case, the migration name is StudentMigration1. So, the command with the parameter would be Add-Migration StudentMigration1.

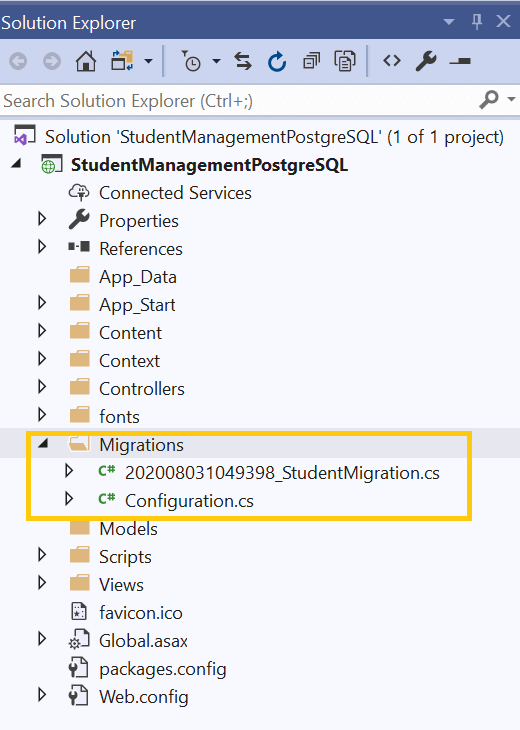
Step 4: When migrations are done, it will create the <timestamp>_StudentMigration.cs file in the Migrations folder. Ensure you got a file structure like in the following image after successful migration.
Step 5: Run the Update-Database command.

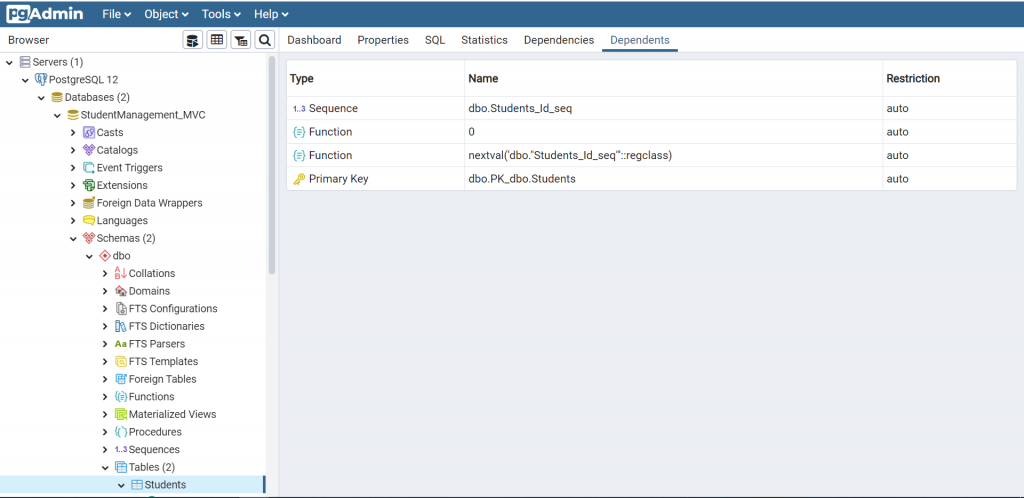
Step 6: After successful command execution, the database schema will be restored in the indicated database (see the screenshot of the restored database in the image).
References
For a deeper dive into these examples, feel free to explore the provided GitHub repository. Additional resources can be found in the links below for further insights.
Conclusion
I hope this blog provided a clear idea of how to migrate an MSSQL database used in an ASP.NET MVC application to MySQL and PostgreSQL databases. Please try these steps and share your comments in the comment box.
The Syncfusion ASP.NET MVC UI control library contains over 70 high-performance, lightweight, modular, and responsive UI controls in a single package. Use them to increase your productivity!
For existing customers, the newest version is available for download from the License and Downloads page. If you are not yet a Syncfusion customer, you can try our 30-day free trial to check out our available features. Also, try our samples from this GitHub location.
You can also contact us through our support forum, support portal, or feedback portal. We are always happy to assist you!
 No spam, just valuable updates.