
What is SignalR?
SignalR is an open-source software library used to send asynchronous notifications to client-side applications. The library includes both server-side and client-side components.
SignalR works great in any kind of web application, but the best use cases are generally applications that need dynamically changing real-time data to be presented in the UI.
For example, collaborative apps, dashboards, messaging apps, and games.
Why do we need SignalR?
In recent years, a lot of changes have happened in web applications. Users expect applications to show real-time changes faster. They also expect applications to deliver real-time information without the need to refresh the browser. For instance, dynamically changing stock share prices, election results, and so on.
Most web applications have server and client-side communications for data sharing, streaming, and security purposes. During these communications, we face congestion (traffic) while transferring data from the client to the server.
Fortunately, there are many technical solutions to overcome this issue. They are:
These three solutions are combined and available as SignalR. By default, the SignalR core works by trying the above methods in order to find the best transfer protocol. When it finds the best method, it establishes the connection through that transfer method. Most modern browsers support WebSocket, which is the best method in SignalR.
Where we can use SignalR?
The ultimate goal of SignalR is to provide fast and simultaneous data transfers wherever required. Here are some real-time examples:
- Games.
- Auctions.
- Chat applications (messages, notifications, comments).
- Live streaming.
- Financial transactions.

Setting up SignalR in a Blazor WASM project
Configuring SignalR communication in a web application is quite simple. This blog will cover using it to set up real-time updates in the Syncfusion Blazor Dashboard Layout component.
Let’s see how to configure and use SignalR in a Blazor WebAssembly (WASM) application in .NetCoreApp version 3.1.
- Create a new Blazor WASM application in hosted mode.
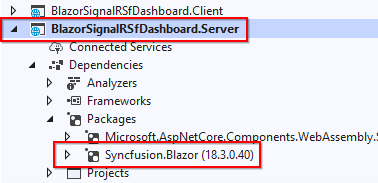
- Install the Syncfusion.Blazor NuGet package in the server project.
- Now, add a folder in the server project and name it Hubs. Create a class file with the name DashboardHub.cs inside the Hubs folder. Then, include the following code for dashboard real-time updates (drag-and-drop operation).
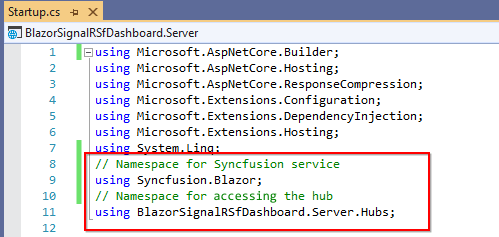
using System.Threading.Tasks; // Add the following namespace to use the Hub class inheritance. using Microsoft.AspNetCore.SignalR; namespace BlazorSignalRSfDashboard.Server.Hubs { public class DashboardHub : Hub { // Method call for updating dashboard panel into new dragged position. // id - Dashboard component ID. // row - New row for dragged panel. // column - New column for dragged panel. public async Task DashbordDragandDrop(string id, int row, int column) { await Clients.All.SendAsync("LayoutChange", id, row, column); } } } - Add the declared Hub namespace in the startup.cs file to register the service.
- Add SignalR and ResponseCompression middleware services to the Startup.ConfigureServices file. Also, register the Syncfusion service as mentioned below.
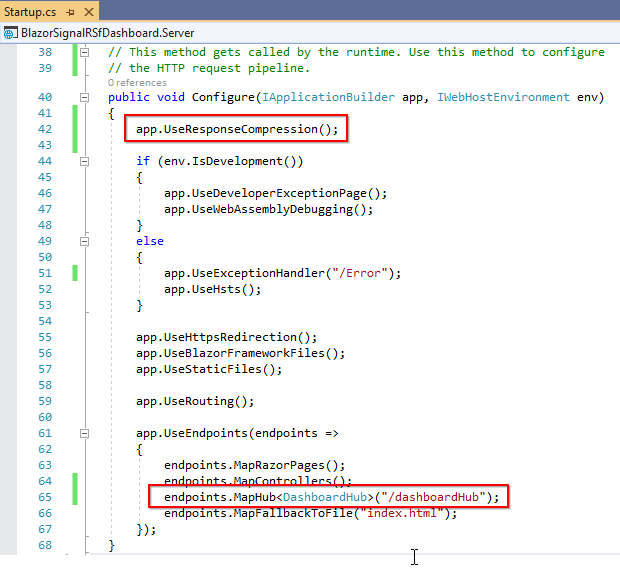
// This method gets called by the runtime. Use this method to add services to the container. // For more information on how to configure your application, visit https://go.microsoft.com/fwlink/?LinkID=398940 public void ConfigureServices(IServiceCollection services) { // Register the signalR service services.AddSignalR(); // Register the Syncfusion service services.AddSyncfusionBlazor(); services.AddResponseCompression(opts => { opts.MimeTypes = ResponseCompressionDefaults.MimeTypes.Concat( new[] { "application/octet-stream" }); }); services.AddControllersWithViews(); services.AddRazorPages(); } - In the Startup.Configure file, add the UseResponseCompression middleware at the top of the processing pipeline, and also add the hub endpoints at the bottom.Refer to the following screenshot.
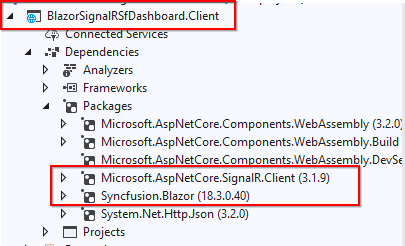
- The server project configuration is now completed. Let’s configure the client project. Install the NuGet packages Microsoft.AspNetCore.SignalR.Client and Syncfusion.Blazor in the client project.
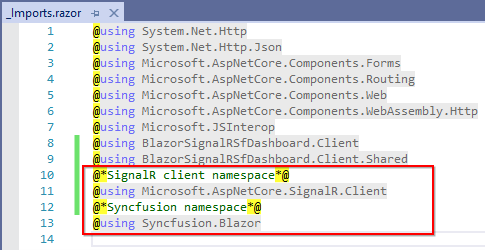
- Once the NuGet package installations are completed, add the application’s required namespaces into the imports.razor file.
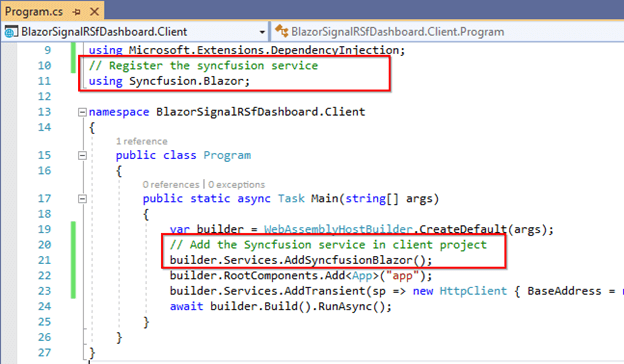
- Then, integrate the Syncfusion service in the program.cs file for Syncfusion component deployment.
- Add the Razor component in the client project Pages/index.razor file by replacing the existing markup with the following code.
@page "/" @using Syncfusion.Blazor.Layouts @inject NavigationManager NavigationManager @implements IDisposable <div class="container"> <SfDashboardLayout @ref="Dashboard" ID="dashboard" CellSpacing="@(new double[]{10 ,10 })" Columns="6"> <DashboardLayoutEvents OnDragStop="dragStop"></DashboardLayoutEvents> <DashboardLayoutPanels> <DashboardLayoutPanel SizeX="2" Row="0" Col="0" CssClass="e-orange"> <ContentTemplate> <div class="card"> <div class="card-content text"> Lorem ipsum dolor sit amet, consectetur adipisicing elit, sed do eiusmod tempor incididunt. </div> </div> <a class="footer" href="#"> More info </a> </ContentTemplate> </DashboardLayoutPanel> <DashboardLayoutPanel SizeX="2" Row="0" Col="2" CssClass="e-blue"> <ContentTemplate> <div class="card e-employee"> <div class="card-content text"> Lorem ipsum dolor sit amet, consectetur adipisicing elit, sed do eiusmod tempor incididunt. </div> </div> <a class="footer" href="#"> More info </a> </ContentTemplate> </DashboardLayoutPanel> <DashboardLayoutPanel SizeX="2" Row="0" Col="4" CssClass="e-green"> <ContentTemplate> <div class="card e-employee"> <div class="card-content text"> Lorem ipsum dolor sit amet, consectetur adipisicing elit, sed do eiusmod tempor incididunt. </div> </div> <a class="footer" href="#"> More info </a> </ContentTemplate> </DashboardLayoutPanel> <DashboardLayoutPanel SizeX="2" SizeY="2" Row="1" Col="0" CssClass="e-seablue"> <ContentTemplate> <div class="card e-employee"> <div class="card-content text"> Lorem ipsum dolor sit amet, consectetur adipisicing elit, sed do eiusmod tempor incididunt. Lorem ipsum dolor sit amet, consectetur adipisicing elit, sed do eiusmod tempor incididunt. </div> </div> <a class="footer" href="#"> More info </a> </ContentTemplate> </DashboardLayoutPanel> <DashboardLayoutPanel SizeX="2" Row="1" Col="2" CssClass="e-yellow"> <ContentTemplate> <div class="card e-employee"> <div class="card-content text"> Lorem ipsum dolor sit amet, consectetur adipisicing elit, sed do eiusmod tempor incididunt. </div> </div> <a class="footer" href="#"> More info </a> </ContentTemplate> </DashboardLayoutPanel> <DashboardLayoutPanel SizeX="2" Row="1" Col="4" CssClass="e-cyan"> <ContentTemplate> <div class="card e-employee"> <div class="card-content text"> Lorem ipsum dolor sit amet, consectetur adipisicing elit, sed do eiusmod tempor incididunt. </div> </div> <a class="footer" href="#"> More info </a> </ContentTemplate> </DashboardLayoutPanel> <DashboardLayoutPanel SizeX="2" Row="2" Col="2" CssClass="e-sandal"> <ContentTemplate> <div class="card e-employee"> <div class="card-content text"> Lorem ipsum dolor sit amet, consectetur adipisicing elit, sed do eiusmod tempor incididunt. </div> </div> <a class="footer" href="#"> More info </a> </ContentTemplate> </DashboardLayoutPanel> <DashboardLayoutPanel SizeX="2" Row="2" Col="4" CssClass="e-voilet"> <ContentTemplate> <div class="card e-employee"> <div class="card-content text"> Lorem ipsum dolor sit amet, consectetur adipisicing elit, sed do eiusmod tempor incididunt. </div> </div> <a class="footer" href="#"> More info </a> </ContentTemplate> </DashboardLayoutPanel> </DashboardLayoutPanels> </SfDashboardLayout> </div> @code{ SfDashboardLayout Dashboard; HubConnection Connection; private string id; private int row; private int col; protected override async Task OnInitializedAsync() { // Create a Hub connection. Connection = new HubConnectionBuilder().WithUrl(NavigationManager.ToAbsoluteUri("/DashboardHub")).Build(); // Detect the client event from server side. Connection.On<string, int, int>("LayoutChange", OnLayoutChange); await Connection.StartAsync(); } public async Task dragStop(DragStopArgs args) { // Fetch the corresponding drag element. var id = args.Element.ID; // Get the current dashboard layout panel position using Serialize() method var value = await this.Dashboard.Serialize(); for (int i = 0; i < value.Count; i++) { if (value[i].Id == args.Element.ID) { // Assign the corresponding row and column based on id after drag completion. row = value[i].Row; col = value[i].Col; } } // Call the dashboard method inside the Hub. await Connection.InvokeAsync("DashbordDragandDrop", id, row, col); } Task OnLayoutChange(string id, int row, int column) { // Call the movepanel method to assign the exact position to the panel after dragging. this.Dashboard.MovePanel(id, row, column); return Task.CompletedTask; } public void Dispose() { _ = Connection.DisposeAsync(); } } <style> .card-content.text { font-size: 14px; text-align: justify; color: #fff; padding: 8px 16px; } .card { border: none; background-color: inherit; position: relative; } #dashboard .e-panel.e-blue { background-color: #00c0ef; } #dashboard .e-panel.e-green { background-color: #00a65a; } #dashboard .e-panel.e-yellow { background-color: #af8646; } #dashboard .e-panel.e-orange { background-color: #f0910c; } #dashboard .e-panel.e-red { background-color: #dd4b39; } #dashboard .e-panel.e-voilet { background-color: #3c8dbc; } #dashboard .e-panel.e-seablue { background-color: #39CCCC; } #dashboard .e-panel.e-sandal { background-color: #e6bd50; } #dashboard .e-panel.e-cyan { background-color: #de4747; } .container .footer { position: absolute; font-size: 13px; bottom: 0px; text-align: center; padding: 3px 0; color: rgba(255,255,255,0.8); display: block; z-index: 10; background: rgba(0,0,0,0.1); text-decoration: none; width: 100%; } .container { width: 800px; margin: 0; } @@media(max-width:600px) { .container { flex: 1; width: auto; } } </style> - Add the Syncfusion style sheet in the index.html page’s head section.

- Now, the Blazor WASM application is ready to deploy and interact with the Syncfusion Dashboard Layout component.
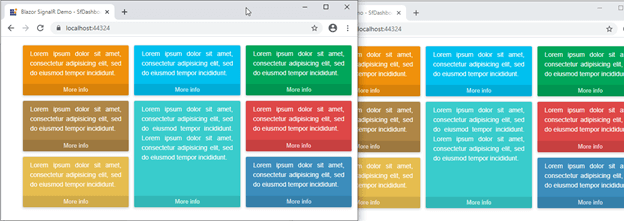
- Run the application from the server project. The application will be automatically launched into your default web browser window.
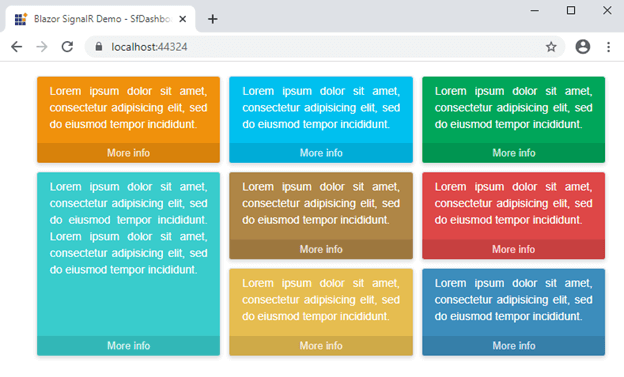
- Copy the URL from the address bar and paste it into another tab. Choose either window to drag and drop the dashboard panels and modify their position. Then, the changes will be automatically reflected in the another window.
Resources
The complete project used in this blog post is available for your reference at this GitHub repository.
Conclusion
In this blog, we’ve learned how to create a SignalR hub and add SignalR services in a Blazor WebAssembly hosted project to make real-time updates in a live dashboard by using the Syncfusion Dashboard Layout component.
You can also try out various scenarios to get more familiar with SignalR and its uses. Let us know what you think in the comments section below!
Syncfusion’s Blazor suite offers over 65 high-performance, lightweight, and responsive UI components for the web—including file-format libraries—in a single package. Please take a look at the live demos in our sample browser, too.
You can contact us through our support forums, Direct-Trac, or feedback portal. We are always happy to assist you!


 No spam, just valuable updates.
Comments (1)
Hi,
Thanks for the demo. There is a little error in the dragStop-method where we in the latest version needs to inspect the Id of the argument given and not the element itself. Please see the revised code below for the dragStop-method:
public async Task dragStop(DragStopArgs args)
{
// Fetch the corresponding drag element.
var id = args.Id; // CHANGED HERE AND…
// Get the current dashboard layout panel position using Serialize() method
var value = await this.Dashboard.Serialize();
for (int i = 0; i < value.Count; i++)
{
if (value[i].Id == args.Id) // … CHANGED HERE
{
// Assign the corresponding row and column based on id after drag completion.
row = value[i].Row;
col = value[i].Col;
}
}
// Call the dashboard method inside the Hub.
await Connection.InvokeAsync("DashbordDragandDrop", id, row, col);
}