
TL;DR: Dive into the Flutter Expense Tracker’s Transaction page — add, edit, delete, and filter your financial data in real-time using a responsive UI powered by Syncfusion’s Flutter DataGrid. Enjoy Excel export, state management, adaptive layouts, and seamless CRUD operations, tailored for desktop, tablet, and mobile screens.
Welcome back to the Expense Tracker sample blog series! So far, we have explored the setup process, import pages, and dashboard features that enhance user experience and financial tracking.
Now, let’s look closer at the transaction page, which allows users to view, add, edit, and delete transactions seamlessly. This section plays a crucial role in keeping financial records organized and accessible.
Transaction overview
The transaction page offers a range of features designed for efficiency and ease of use:
- Responsive layout: Adapts seamlessly across desktop, tablet, and mobile devices.
- Advanced filtering: Quickly sort transactions by type and date range for better insights.
- CRUD operations: Effortlessly add, update, or delete transactions as needed.
- Dynamic DataGrid: Features height-based row pagination for a structured display.
- Excel export: Enables easy data backup and financial analysis.
- Real-time updates: Uses custom notifiers to ensure transactions reflect instantly.
This section ensures users have complete control over their financial records while maintaining a smooth and intuitive experience.
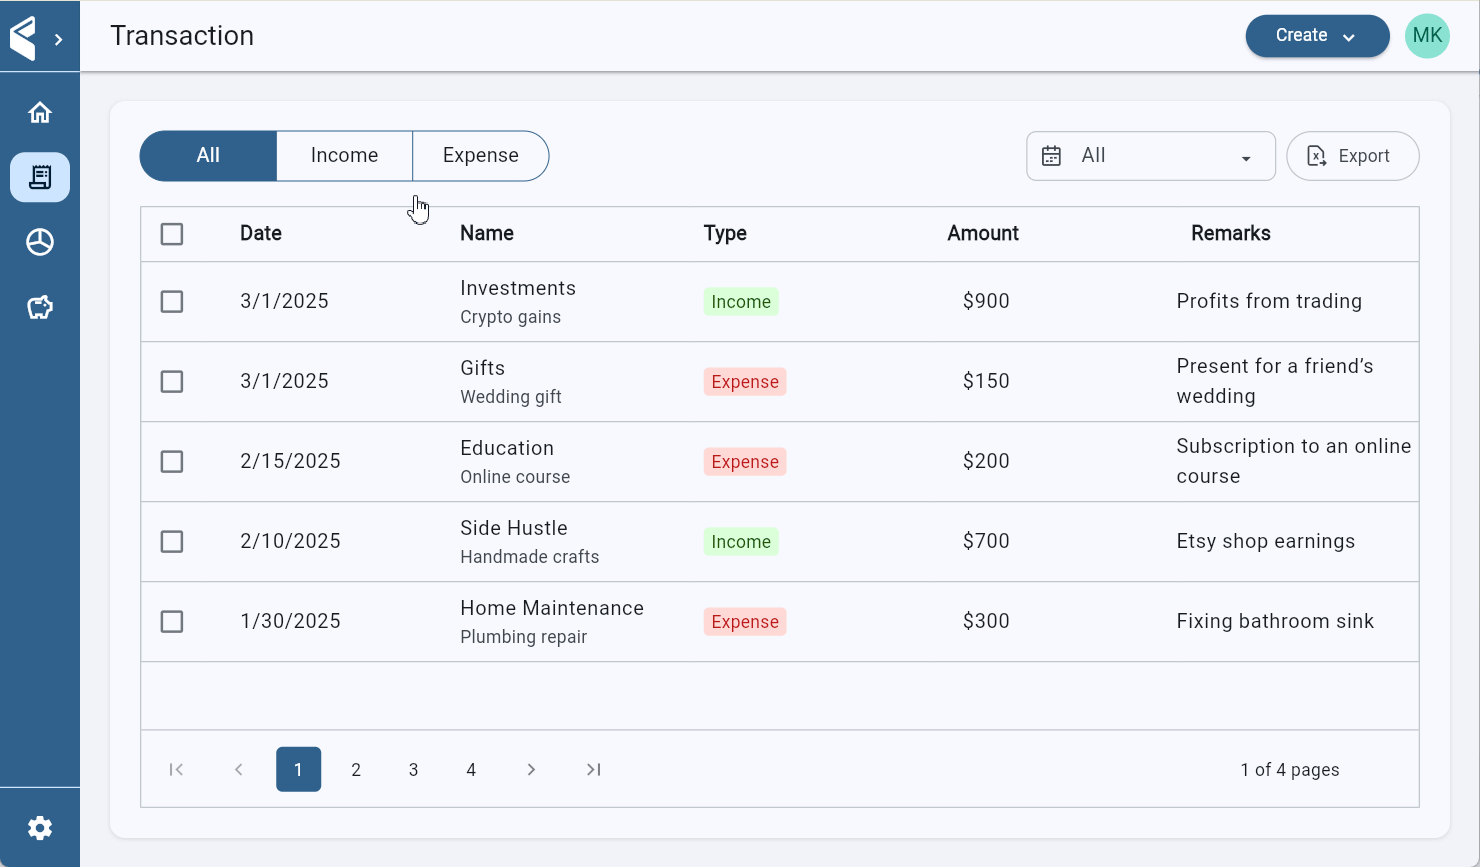
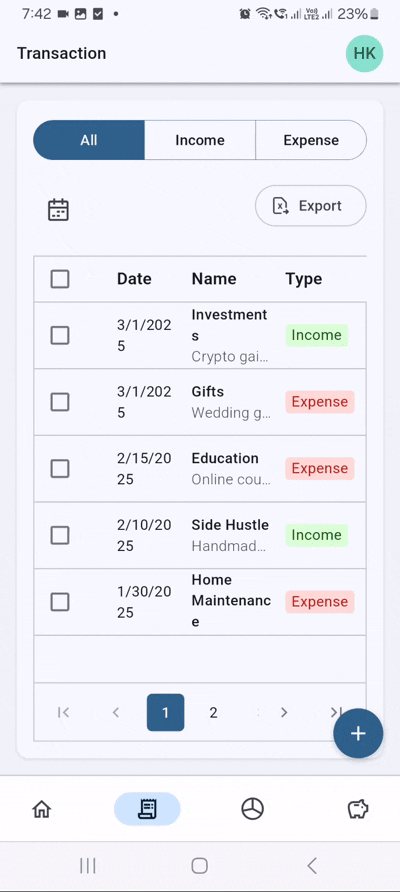
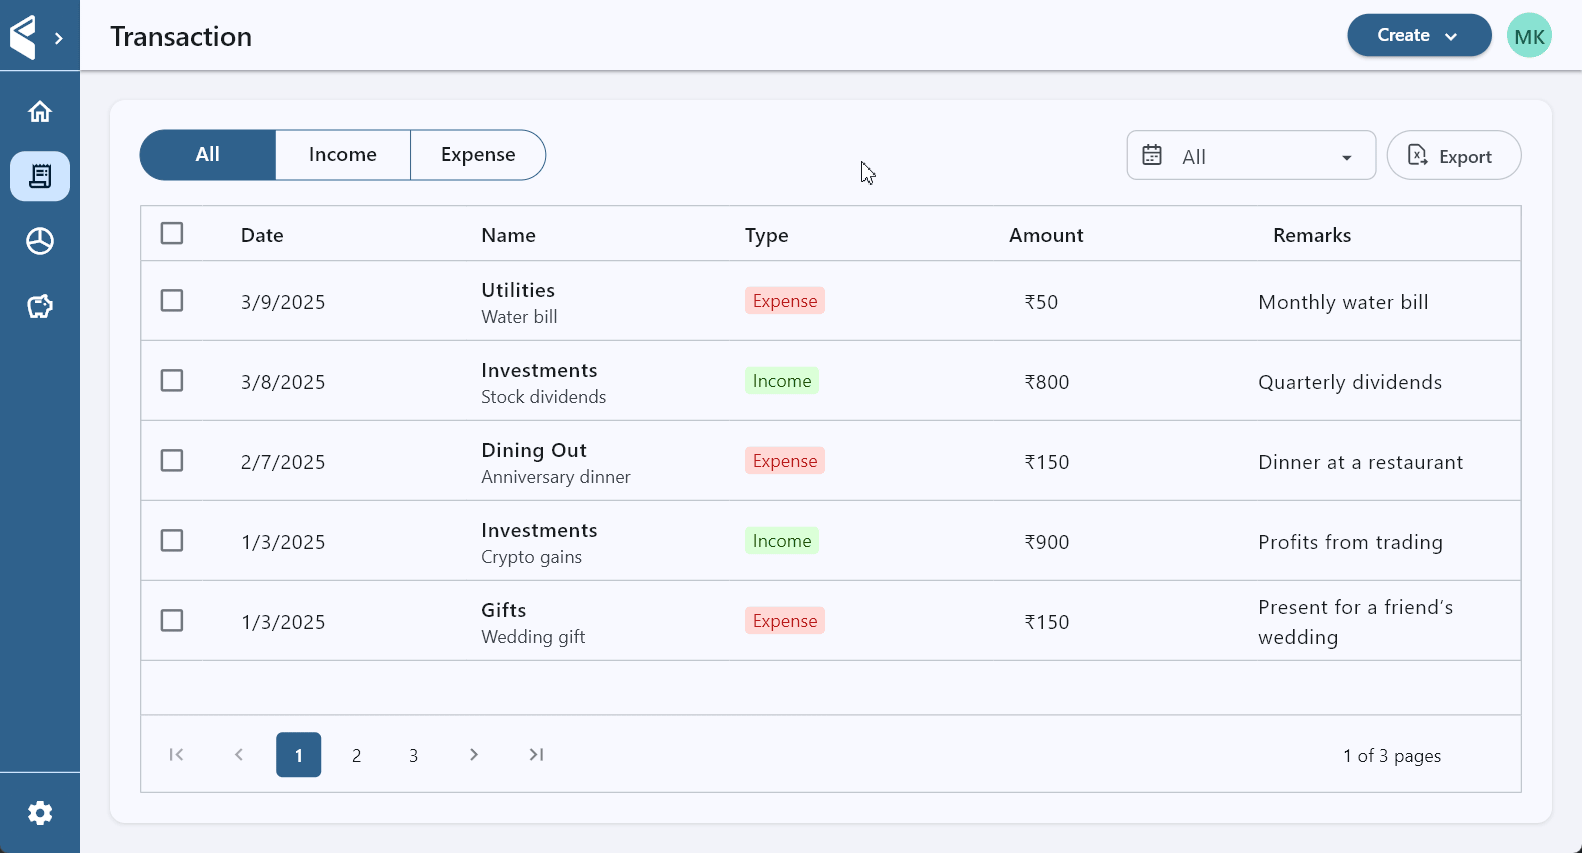
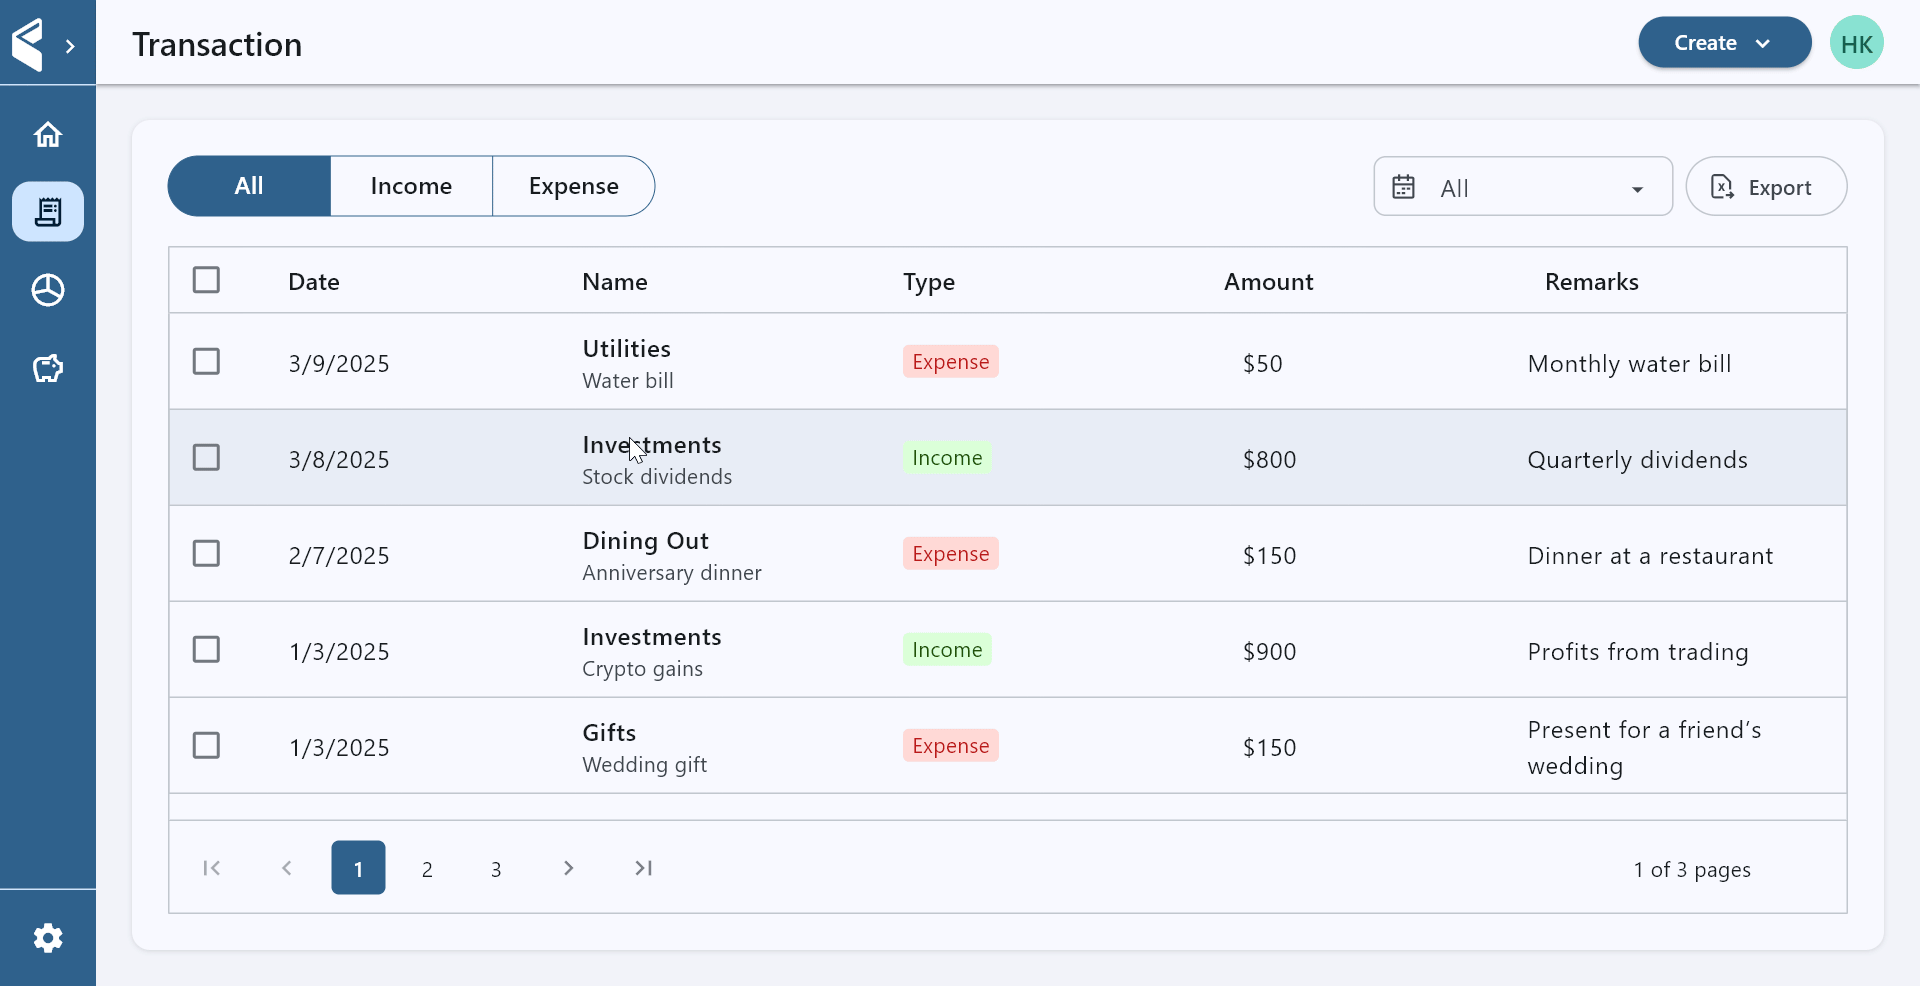
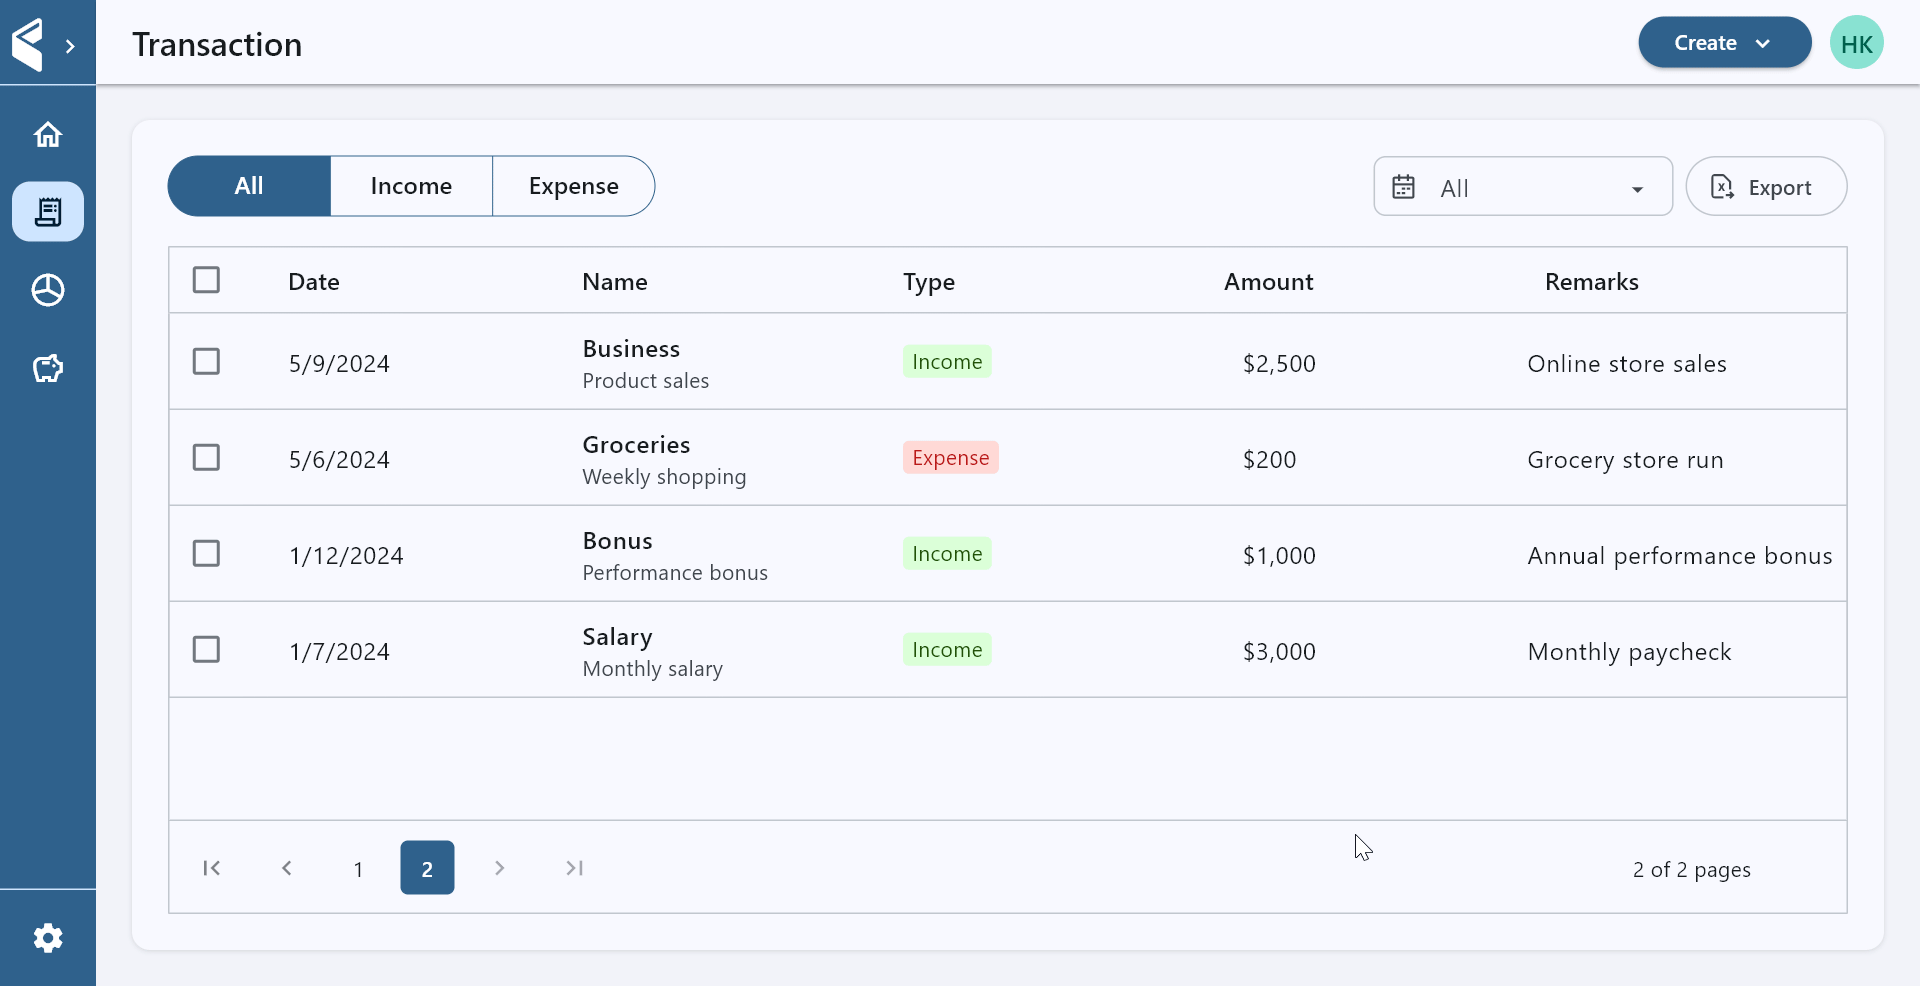
Desktop view

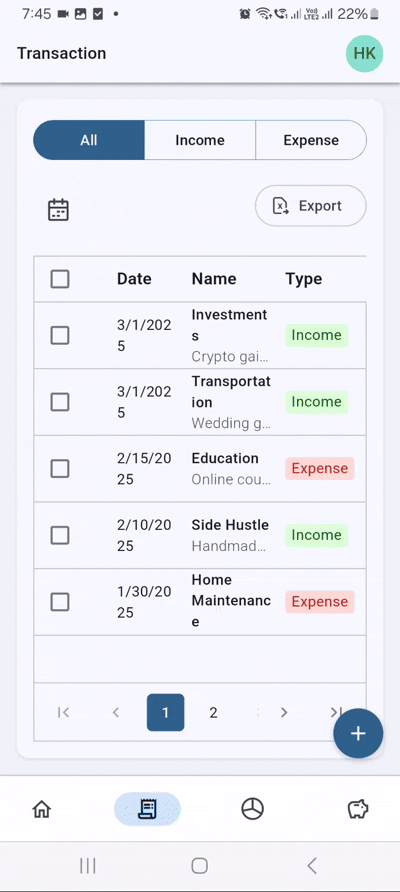
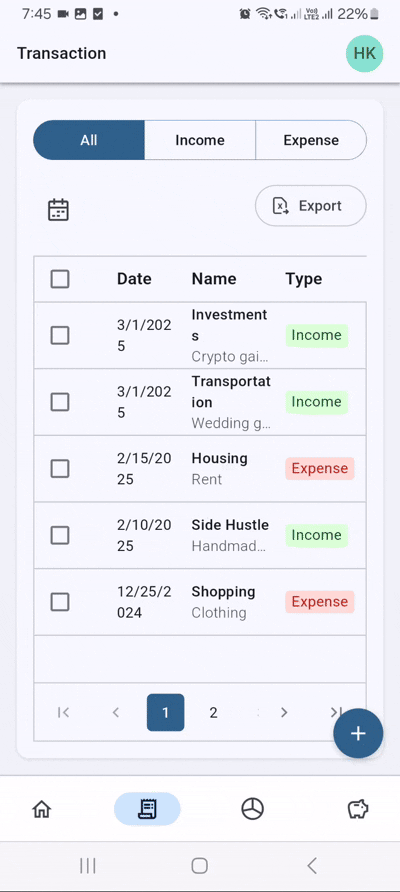
Mobile view
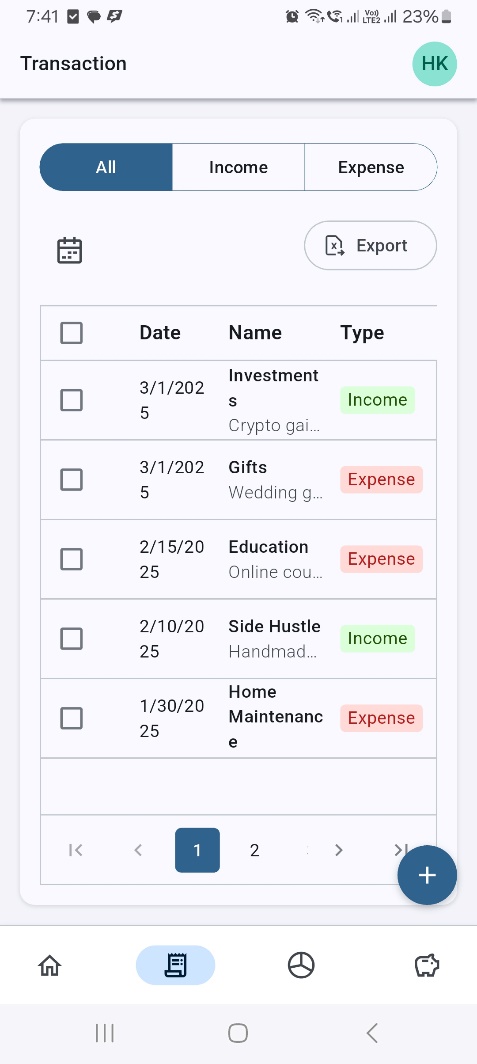
Transaction page layout
The Transaction Page is structured into three key sections to ensure a seamless user experience:
- Action bar: This bar provides buttons and dropdown menus for filtering transactions by type and date, enabling quick and efficient navigation.
- Filter options: This option offers additional filtering tools, particularly for mobile users, to enhance usability across different screen sizes.
- Transaction DataGrid: This tool displays transaction records in a structured table format using the Syncfusion® Flutter DataGrid, making it easy to view, analyze, and manage financial data.
This well-organized layout ensures smooth interaction and efficient transaction tracking across all devices.
Widget _buildTransactionPage(TransactionNotifier transactionNotifier) {
  return ExpenseCard(
    child: Column(
      children: [
        _buildActionBar(transactionNotifier),

        // Use < and > for conditionals if that's your requirement
        if (isMobile(context))
          _buildMobileFilterAndExportRow(),  // Only on smaller (mobile) screens

        Expanded(child: _buildTransactionDataGrid(context)),
      ],
    ),
  );
}
Transaction filtering system
The transaction page includes an intuitive filtering system that helps users refine transaction records based on type and date range, ensuring a seamless and efficient browsing experience.
Transaction type filter
Users can filter transactions by selecting specific types:
- All: Displays all transactions without any filters.
- Income: Shows only income-related transactions.
- Expense: Displays only expense-related transactions.
In the transaction page of the Expense Tracker sample, we have optimized the filtering UI for different screen sizes to ensure a seamless user experience:
- Desktop view: Use Flutter’s built-in SegmentedButton widget for quick and efficient filtering.
- Tablet view: Use Flutter’s DropdownMenu widget, replacing the SegmentedButton for better accessibility.
- Mobile view: Use Flutter’s PopupMenuButton widget, further improving usability on compact screens.
Widget _buildFilteringSegmentsOrDropDownButton(BuildContext context) {
  final TransactionNotifier transactionNotifier =
      context.watch<TransactionNotifier>();

  return isTablet(context)
      ? ChartsDropdownFilter(
          intervalFilters: const <String>['All', 'Income', 'Expense'],
          selectedDuration: transactionNotifier.selectedSegment,
          onTap: (String? value) =>
              _handleSegmentChange(value!, transactionNotifier),
        )
      : SegmentedFilterButtons(
          options: const <String>['All', 'Income', 'Expense'],
          onSelectionChanged: (Set<String> selections) =>
              _handleSegmentChange(selections.first, transactionNotifier),
          selectedSegment: transactionNotifier.selectedSegment,
        );
}
Date range filter
Users can also filter transactions based on predefined date ranges, allowing them to view records within a specific period. We have used Flutter’s built-in DropdownMenu widget to allow users to select a date interval, triggering real-time updates.
Widget _buildTransactionFilter(BuildContext context) {
  final TransactionNotifier transactionNotifier =
      context.watch<TransactionNotifier>();

  return ChartsDropdownFilter(
    intervalFilters: dateDuration,
    onTap: (String? newValue) {
      if (newValue != null) {
        transactionNotifier.updateSelectedDuration(newValue);
        transactionNotifier.updateTransactions(_transactions);
      }
    },
    selectedDuration: transactionNotifier.selectedDuration,
  );
}
Desktop view
Mobile view
State management in the transaction page
State management is essential for enabling dynamic filtering, real-time UI updates, and tracking user selections. The transaction page leverages two key notifiers to handle state efficiently:
- TransactionNotifier: It manages transaction data, handles filtering logic, and ensures seamless state updates.
- TransactionSelectedCountNotifier: It tracks the number of selected transactions to delete.
class TransactionNotifier extends ChangeNotifier {
  void updateTransactions(List<Transaction> transactions) {
    _transactions = transactions;
    _filteredTransactions = _applyFilters(transactions);
    notifyListeners();
  }

  void updateSelectedSegment(String segment) {
    _selectedSegment = segment;
    _filteredTransactions = _applyFilters(_transactions);
    notifyListeners();
  }
}
Excel export functionality
The transaction page includes an Excel export feature, allowing users to download their transaction data for backup, analysis, and easy sharing. This functionality offers several benefits:
- Backup & record-keeping: Users can maintain a local copy of their financial transactions.
- Advanced data analysis: Transactions can be analyzed using spreadsheet tools like Microsoft Excel or Google Sheets.
- Simplified sharing: Users can effortlessly share financial records with accountants or advisors.
_buildExportButton() {
  child: ExportButton(
    onTap: () async {
      handleOnTapExportLogic(context, 'Transactions', 'Transaction');
    },
  ),
}
The handleOnTapExportLogic() method facilitates the export process by converting the current transaction data into an Excel-compatible format, ensuring:
- Seamless data conversion without loss of transaction details.
- Accurate preservation of financial records.
- A user-friendly export process that requires minimal effort from the user.
Desktop view
Mobile view

Efficient data management with SfDataGrid
The Syncfusion Flutter DataGrid plays a central role in displaying and managing transaction data on the Transaction Page. This powerful Flutter widget provides a structured, interactive, and efficient way to handle large datasets with ease.
The SfDataGrid offers advanced capabilities, including:
- Dynamic column creation based on provided headers.
- Multiple row selection with checkbox support.
- Adaptive column width modes for optimal data visibility.
- Custom cell rendering to display different data types effectively.
- Page-based data loading using CustomDataGridSource.
- Responsive design that adjusts seamlessly across mobile, tablet, and desktop views.
The implementation combines SfDataGrid, DataGridController, and CustomDataGridSource, allowing for efficient data handling with minimal configuration. This ensures a smooth, user-friendly experience when navigating and interacting with transaction records.
SfDataGrid(
  source: dataSource,
  columns: _buildGridColumns(),
  selectionMode: SelectionMode.multiple,
  rowsPerPage: rowsPerPage,
  columnWidthMode: ColumnWidthMode.fill,
)
Data Paging mechanism
To ensure efficient data management and smooth navigation, the TransactionGridSource class implements an advanced data paging strategy. Key features include:
- Efficient data loading, which prevents performance degradation when handling large datasets.
- Smooth page navigation, allowing users to browse transactions seamlessly.
class TransactionGridSource extends CustomDataGridSource<Transaction> {
  final int rowsPerPage;

  TransactionGridSource({
    required BuildContext context,
    required List<Transaction> transactions,
    required int rowsPerPage,
  }) : super(
         rowsPerPage: rowsPerPage,
         data: transactions,
         columns: ['Date', 'Category', 'Type', 'Amount', 'Notes']
       );
}
CRUD operations in the transaction page
This Flutter application implements a comprehensive transaction management system with smooth CRUD (Create, Read, Update, Delete) operations. Let’s explore how these core features work:
Edit transaction
Editing functionality allows users to modify existing transaction records. The process is as follows:
- Users select a transaction from the data grid using checkboxes.
- The system detects the selection and displays action buttons.
- When the edit button is pressed, a dialog with pre-populated fields appears.
- Users can modify any field, including type, category, subcategory, amount, date, and notes.
- Upon submission, the transaction is updated in memory and saved to storage.
void handleEditTransaction() {
  // Get selected transaction index
  int selectedIndex = getSelectedTransactionIndex();

  // Show edit dialog
  if (isMobile) {
    showMobileEditDialog(selectedIndex);
  } else {
    showDesktopEditDialog(selectedIndex);
  }

  // On save:
  // 1. Create an "updated transaction object"
  // 2. Update transaction list
  // 3. Close dialog
}
Desktop view
Mobile view
Delete transaction
The delete operation removes one or more transactions with confirmation:
- Users select the transactions to delete.
- Clicking the delete button displays a confirmation dialog.
- Upon confirmation, the transactions are removed from the list and storage.
- The user interface updates to reflect the changes and clears the selection.
void handleDeleteTransaction() {
  // Show confirmation dialog
  showDeleteConfirmationDialog(
    title: "Delete Transaction?",
    content: "Do you want to delete this transaction?",
    onConfirm: () {
      // Get selected transaction indexes
      List<int> selectedIndexes = getSelectedTransactionIndexes();

      // Remove from transaction list
      transactionNotifier.deleteTransactions(selectedIndexes);

      // Update storage
      updateTransactions(
        context,
        userDetails,
        transaction,
        UserInteractions.delete,
        selectedIndexes
      );

      // Reset selection state
      clearSelection();

      // Close dialog
      Navigator.pop(context);
    }
  );
}
Desktop view
Mobile view

Add transaction
The add functionality creates new transaction records as follows:
- The user clicks an add button (which is not explicitly shown in the provided code).
- A dialog appears with empty fields.
- The user enters transaction details, including type, category, amount, date, etc.
- Upon submission, a new transaction is created and added to the list.
Refer to the following code example.
void handleAddTransaction() {
  // Set interaction type
  userInteraction = UserInteractions.add;

  // Show add dialog
  showDialog(
    context: context,
    builder: (context) => TransactionCenterDialog(
      userInteraction: userInteraction,
      userDetails: userDetails,
      categories: categories,
      subCategories: subCategories,
      // Other parameters
    )
  );

  // On dialog submission:
  // 1. Create a new transaction from form data
  // 2. Add to transaction list
  // 3. Persist to storage
  // 4. Close dialog
}
Desktop view

Mobile view
The application uses responsive design principles to adapt the UI for different screen sizes, showing appropriate dialogs for mobile and desktop views. The transaction management system is integrated with a data grid for visual representation and selection capabilities, with proper validation to ensure data integrity.

Conclusion
Thanks for reading! In this blog, we’ve explored how developing an effective transaction management page requires careful consideration of filtering, data presentation, and user interactions. By leveraging Flutter’s flexibility and Syncfusion’s DataGrid component, we have created a powerful and user-friendly interface adaptable to different devices.
This implementation showcases:
- Advanced filtering with multiple criteria.
- Responsive layouts for various screen sizes.
- Efficient data management with selection-based actions.
- Visually distinct representations of transaction types.
- Intuitive workflows for editing and deleting transactions.
By extending these functionalities, we can incorporate additional features such as analytics, reporting, and integration with external financial tools. What other features would you like to see in future updates? Please let us know in the comments below!
Existing Syncfusion® users can access the most recent Essential Studio® on the license and downloads page. If you’re new to Syncfusion®, we offer a 30-day free trial to test these exciting new features.
You can also contact us through our support forum, support portal, or feedback portal. We are always happy to help you!


 No spam, just valuable updates.