

In this blog, we are going to learn how to build an Ionic Angular app for implementing Firebase push notifications for both Android and iOS. We’ll create an ASP.NET project with SQL to send Firebase push notifications.
Prerequisites
To check whether Node.js is already installed in your machine, ask for its version using the following command. If it is already installed, it returns the version number.
node -v
v14.18.0
Otherwise, it returns the following error.
 To check whether the npm is already installed, execute the following command to ask for its version. This command returns the version if npm is already installed.
npm -v
6.14.15
Otherwise, it returns the following error.
 To check whether the Angular CLI is already installed, execute the following command to ask its version.
ng version Angular CLI : 13.2.3
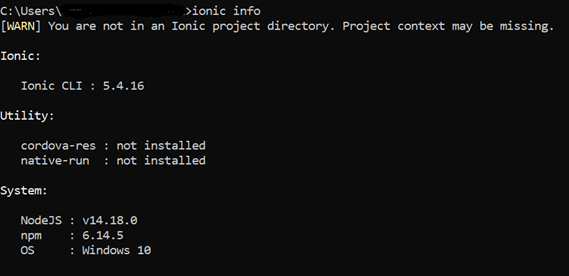
To check whether the Ionic CLI is already installed in your machine, execute the following command to ask for its version. If it is already installed, it returns the version details.
ionic info
 Otherwise, it returns the following error.
 Install the missing components using the respective commands in the following table.
| Package | Command |
| Node.js | Node.js |
| npm | Installing Node.js will install npm. |
| Angular CLI | npm i @angular/cli |
| Ionic | npm install -g ionic |
Create an Ionic Angular application
After ensuring that the Angular CLI and Ionic are installed, create a new Ionic-with-Angular app using the following command. I am naming my app PushNotificationApp.
ionic start PushNotificationApp
 Now, the terminal will request us to choose the framework. Make sure to choose Angular. Refer to the following image.
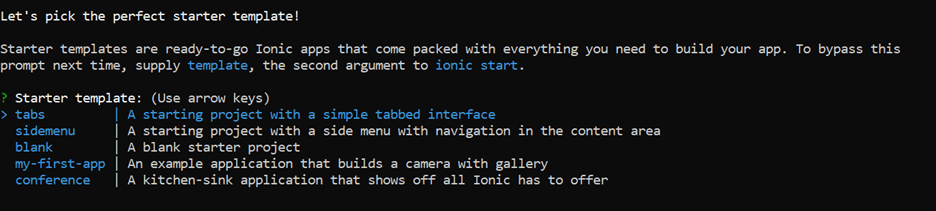
 Then, the terminal will request us to choose the starter template, like in the following image. Make sure to choose blank.
Install Capacitor
Let’s install Capacitor in our app using the following command.
> ionic integrations enable capacitor
![]() Once the app has been created successfully, switch to the newly created project directory using the following command.
Once the app has been created successfully, switch to the newly created project directory using the following command.
> cd .\PushNotificationApp
Run the npx cap init command. It will allow us to fill out our app’s information like the app name and Package ID to initialize Capacitor configuration.
npx cap init
> App name: PushNotificationApp
> App Package ID: com.pushnotification.app
Refer to the following screenshot.

Build app
Before adding any native platforms to this project, the app must be built at least once. A web build creates the web assets directory that Capacitor needs (www folder in Ionic Angular projects). Use the following command to build the project.
> Ionic build
Add platforms
Let’s add the iOS and Android platforms to this app in this section.
Before adding the Android platform, make sure to install the capacitor/android package using the following command.
> npm install @capacitor/android
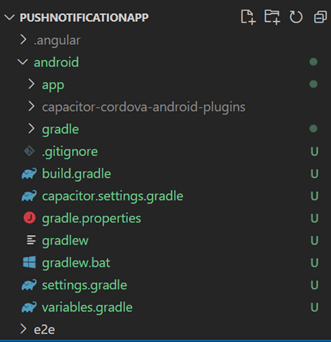
Now, add the Android platform using the next command.
> npx cap add android
By running these commands, Android folders are created at the root of the project.
 Before adding iOS platform, make sure to install the capacitor/ios package using the following command.
> npm install @capacitor/ios
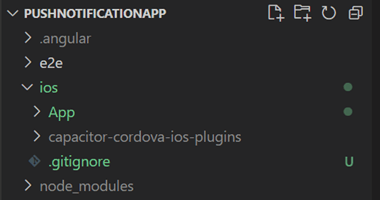
Now, add the iOS platform with the next command.
> npx cap add ios
Running these commands creates iOS folders at the root of the project.
Create service
Create common services to invoke Web API calls and the HTTPClient inside the Service folder using the following command.
Let’s point to the projects src/app folder and run the following commands.
PushNotificationApp /src/app> ionic generate service Service/WebApi

PushNotificationApp /src/app> ionic generate service Service/HttpProvider
Add the following code in the web-api.service.ts file in the following locations.
src/app/Service/web-api.service.ts
import { Injectable } from '@angular/core';
import { Observable, throwError } from 'rxjs';
import { map } from 'rxjs/operators';
import { catchError } from 'rxjs/internal/operators/catchError';
import { HttpHeaders, HttpClient } from '@angular/common/http';

@Injectable({
    providedIn: 'root'
})
export class WebApiService {
    constructor(private httpClient: HttpClient) { }

    // Post call method
    // Param 1 : url
    // Param 2 : model
    post(url: string, model: any): Observable<any> {
      const httpOptions = {
        headers: new HttpHeaders({
          'Content-Type': 'application/json'
        }),
       observe: "response" as 'body'
      };
      return this.httpClient.post(
        url,
        model,
        httpOptions)
        .pipe(
          map((response: any) => this.ReturnResponseData(response)),
          catchError(this.handleError)
        );
    }
    private ReturnResponseData(response: any) {
      return response;
    }
    private handleError(error: any) {
      return throwError(error);
    }
}
src/app/Service/http-provider.service.ts
import { Injectable } from '@angular/core';
import { Observable } from 'rxjs';
import { WebApiService } from './web-api.service';

var apiUrl = "https://localhost:44370/";

var httpLink = {
    addPushNotification: apiUrl + "api/pushNotification/addPushNotification",
    sendPushNotification: apiUrl + "api/pushNotification/sendPushNotification"
}
@Injectable({
    providedIn: 'root'
})
export class HttpProviderService {
    constructor(private webApiService: WebApiService) { }

    public addPushNotification(pushNotificationsDetail: any): Observable<any> {
      return this.webApiService.post(httpLink.addPushNotification , pushNotificationsDetail);
   }
    public sendPushNotification(pushNotificationsDetail: any): Observable<any> {
      return this.webApiService.post(httpLink.sendPushNotification,pushNotificationsDetail);
    }
}
Integration of Push Notification API
First, install the following push notification plugin to enable push notifications.
> npm install @capacitor/push-notifications
In the app.component.ts file, add the import section and const to make use of the push notification API.
const { PushNotifications } = Plugins;

import {
Plugins,
PushNotification,
PushNotificationToken,
PushNotificationActionPerformed
} from ‘@capacitor/core’;
Then, add the push notifications API for registration, registrationError, pushNotificationReceived, and pushNotificationActionPerformed inside the ngOnInit() function in app.component.ts to register and monitor push notifications.
Refer to the following code example.
PushNotifications.requestPermission().then(result => {
      if (result.granted) {
        PushNotifications.register();
      } else {
      }
    });

    PushNotifications.addListener('registration', (token: PushNotificationToken) => {
      let registrationToken = token.value;
    });

    PushNotifications.addListener('registrationError', (error: any) => {
    });

    PushNotifications.addListener('pushNotificationReceived', (notification: PushNotification) => {
    });

    PushNotifications.addListener('pushNotificationActionPerformed', (args: PushNotificationActionPerformed) => {
    }    );
registration: Used to register the push notification token of the app during installation.
registrationError: Used to handle any error occurring during the registration.
pushNotificationReceived: Used to handle notifications received when the app screen is active.
pushNotificationActionPerformed: Used to handle the action to be performed when interacting with a push notification.
I’ve shared the complete code of app.component.ts for your reference.
import { Component } from '@angular/core';
import {
  Plugins,
  PushNotification,
  PushNotificationToken,
  PushNotificationActionPerformed
} from '@capacitor/core';
import { AlertController, Platform } from '@ionic/angular';
import { HttpProviderService } from './Service/http-provider.service';
const { PushNotifications } = Plugins;

@Component({
  selector: 'app-root',
  templateUrl: 'app.component.html',
  styleUrls: ['app.component.scss'],
})
export class AppComponent {

  notificationDetail = {
    title: '',
    body: ''
  };

  constructor(private alertCtrl: AlertController, private httpProvider: HttpProviderService, private platform: Platform) { }

  ngOnInit() {
    PushNotifications.requestPermission().then(result => {
      if (result.granted) {
        PushNotifications.register();
      } else {
      }
    });
    PushNotifications.addListener('registration', (token: PushNotificationToken) => {
      let registrationToken = token.value;
      if (registrationToken != null && registrationToken != 'null') {
        localStorage.setItem("registrationToken", registrationToken);
        var DeviceType = 0;
        if (this.platform.is("android")) {
          DeviceType = 1;
        }
        else if (this.platform.is("ios")) {
          DeviceType = 2;
        }

        var pushNotificationsDetail = {
          DeviceId: registrationToken,
          DeviceType: DeviceType
        }

        this.httpProvider.addPushNotification(pushNotificationsDetail).subscribe(async data => {
          if (data != null && data.body != null && data.body.isSuccess == true) {
            localStorage.setItem("IsSuccessPushRegistration", "true");
            this.notificationDetail.title = "Success";
            this.notificationDetail.body = data.body.message;
            this.showPushNotificationAlert(this.notificationDetail);
          }
        },async error => {});
      }
    },
    );

    PushNotifications.addListener('registrationError', (error: any) => {
    });

    PushNotifications.addListener('pushNotificationReceived', (notification: PushNotification) => {
      this.showPushNotificationAlert(notification);
    });

    PushNotifications.addListener('pushNotificationActionPerformed', (args: PushNotificationActionPerformed) => {
    });
  }

  async showPushNotificationAlert(notificationDetail: any) {
    const alert = await this.alertCtrl.create({
      header: notificationDetail.title,
      message: notificationDetail.body,
      buttons: ['OK']
    });
    await alert.present();
  }
}
When token registration of the app is completed, store the registration token in the database for future use.
When a push notification is received when the app is open, the notification will show in a pop-up message.
Create page
In this section, we will send a message through a push notification using the Web API server.
Add all the basic validations like Title and Body in the HTML file. Refer to the following code.
src/app/home.component.ts
import { Component, ViewChild } from '@angular/core';
import { NgForm } from '@angular/forms';
import { ActivatedRoute, Router } from '@angular/router';
import { AlertController, Platform } from '@ionic/angular';
import { HttpProviderService } from '../Service/http-provider.service';
@Component({
selector: 'app-home',
templateUrl: 'home.page.html',
styleUrls: ['home.page.scss'],
})
export class HomePage {
notificationList = {
NotificationTitle: '',
NotificationBody:''
};
notificationDetail = {
title: '',
body: ''
};
@ViewChild('sendForm', { static: false }) sendForm: NgForm;
constructor(private router: Router, private route: ActivatedRoute, public alertController: AlertController,
private httpProvider: HttpProviderService, private platform : Platform) {
this.route.queryParams.subscribe(params => {
if (this.router.getCurrentNavigation() && this.router.getCurrentNavigation().extras &&
this.router.getCurrentNavigation().extras.state) {
let data = this.router.getCurrentNavigation().extras.state;
this.showPushNotificationAlert(data);
}
});
}
async showPushNotificationAlert(notificationDetail: any) {
const alert = await this.alertController.create({
header: notificationDetail.title,
message: notificationDetail.body,
buttons: ['OK']
});
await alert.present();
}
sendMessage(form: NgForm) {
if (form.valid) {
this.httpProvider.sendPushNotification(this.notificationList).subscribe(async data => {
if (data != null && data.body != null && data.body.isSuccess == true) {
this.notificationDetail.title = "Success";
this.notificationDetail.body = data.body.message;
this.showPushNotificationAlert(this.notificationDetail);
}
},async error => {});
}
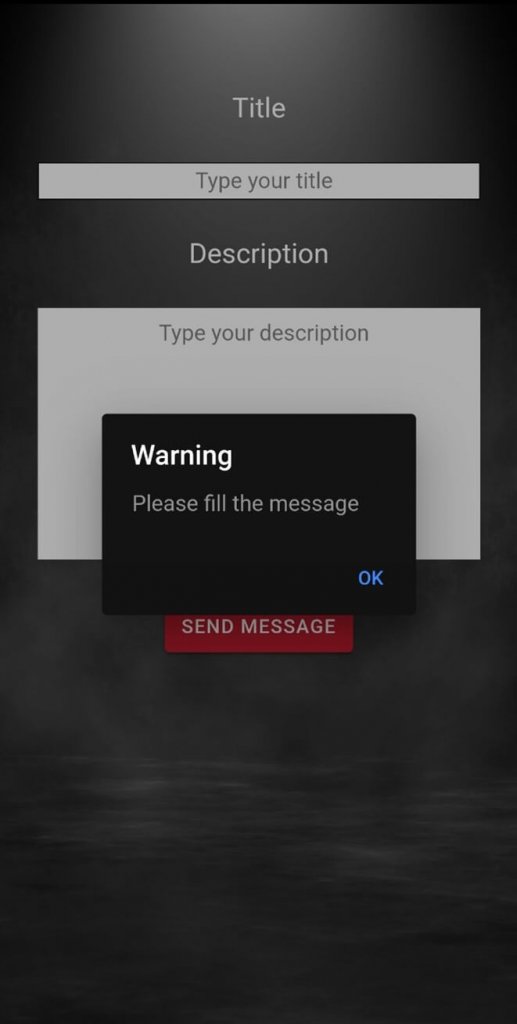
else {
this.notificationDetail.title = "Warning";
this.notificationDetail.body = "Please fill the message";
this.showPushNotificationAlert(this.notificationDetail);
}
}
}src/app/home.component.html
<ion-content>
    <form #sendForm="ngForm" novalidate>
        <ion-row class="row-style">
            <ion-col class="align-center p-30">
                <div class="label-message">
                    Title
                </div>
            </ion-col>
        </ion-row>
        <ion-row class="row-style">
            <ion-col class="align-center p-30">
                <ion-input type="text" id="message" name="message" #message="ngModel"
                    [(ngModel)]="notificationList.NotificationTitle" placeholder="Type your title" required></ion-input>
            </ion-col>
        </ion-row>
        <ion-row class="row-style">
            <ion-col class="align-center p-30">
                <div class="label-message">
                    Description
                </div>
            </ion-col>
        </ion-row>
        <ion-row class="row-style">
            <ion-col class="align-center p-30">
                <ion-textarea type="text" id="message" name="message" #message="ngModel"
                    [(ngModel)]="notificationList.NotificationBody" placeholder="Type your description" maxlength="120"
                    required></ion-textarea>
            </ion-col>
        </ion-row>
        <ion-row class="row-style">
            <ion-col class="align-center submit-btn p-30">
                <ion-button type="submit" (click)="sendMessage(sendForm)">Send Message</ion-button>
            </ion-col>
        </ion-row>
    </form>
</ion-content>
The following are screenshots of the Send Notification page.
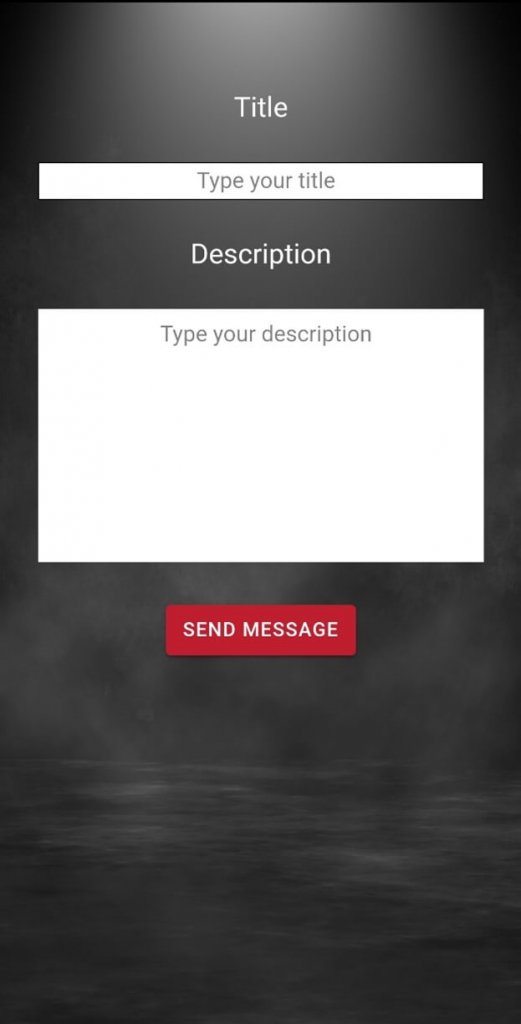 | 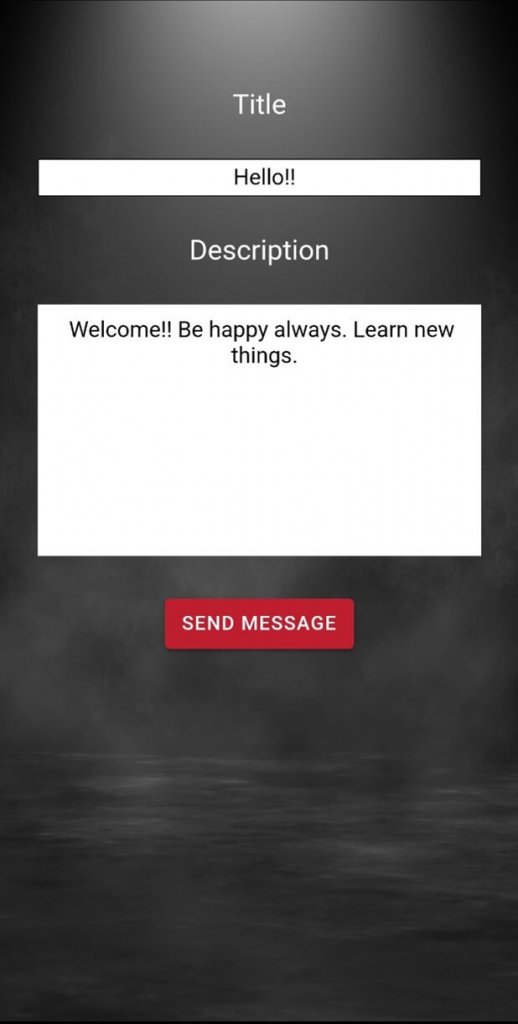 |
 |  |
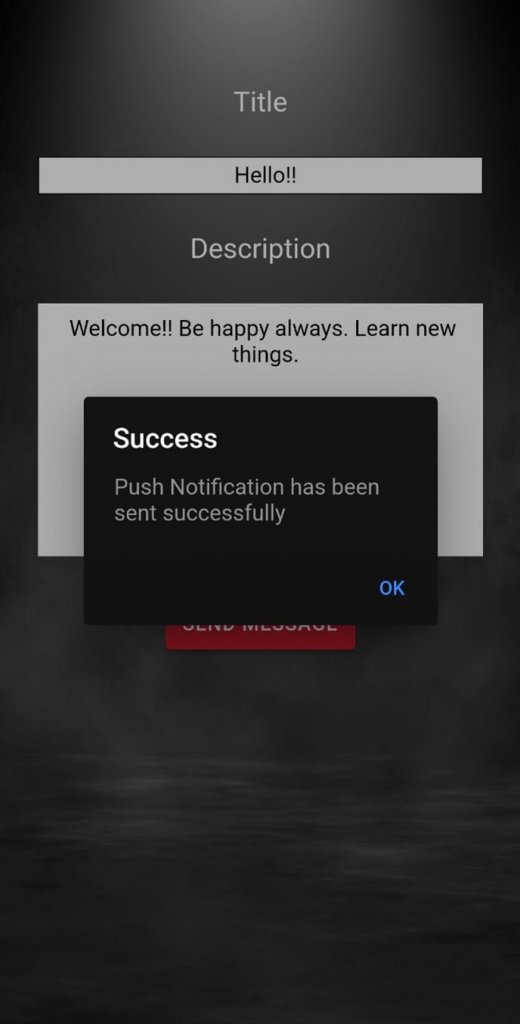 | 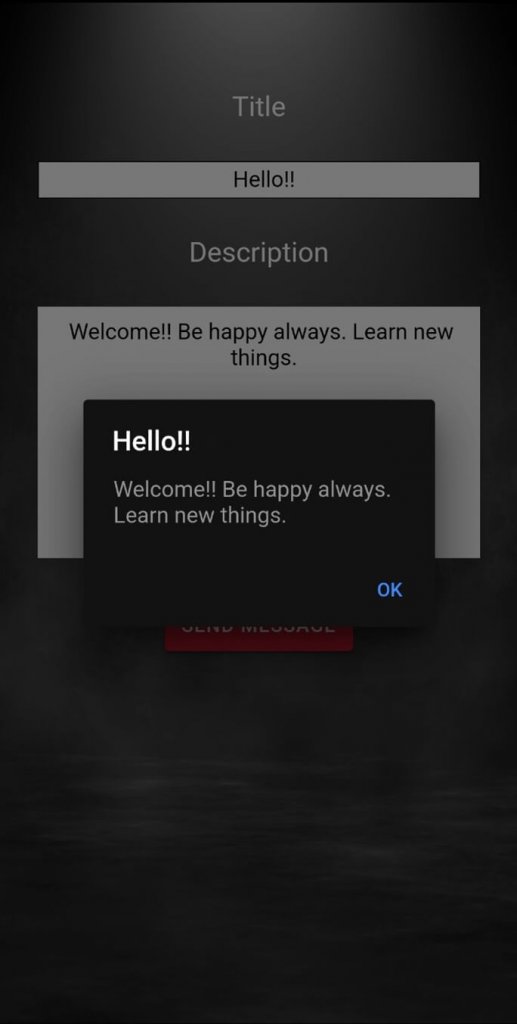 |
Now, run the following commands to update code changes in the Android and iOS app builds.
> ionic build
> npx cap copy
> npx cap sync
Creating a project for your app on Firebase
Go to the Firebase Console, sign in with your email ID, and click the Create a project button, as shown in the screenshot.
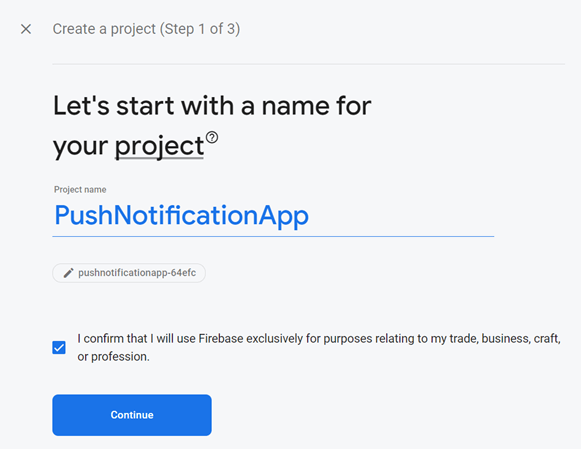
 Add a name for the project. I am naming mine PushNotificationApp. Accept the Firebase ToS and click Continue. A Project ID will be automatically generated.
 Then, click Continue.
Select the default account for Firebase and click Create Project.
Your project is ready to use. Now, click Continue.
Android
Integrating Firebase with the Android app
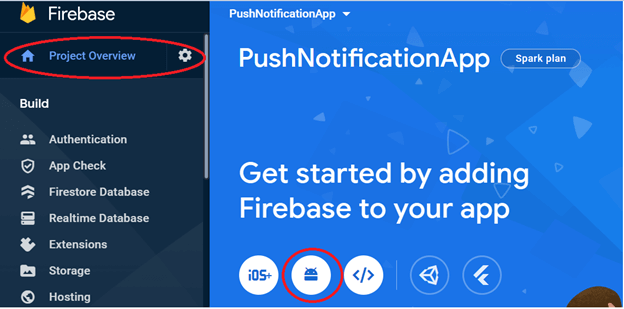
Go to the Project Overview page in the Firebase project and at the top, click the Android icon to add a new Android app.
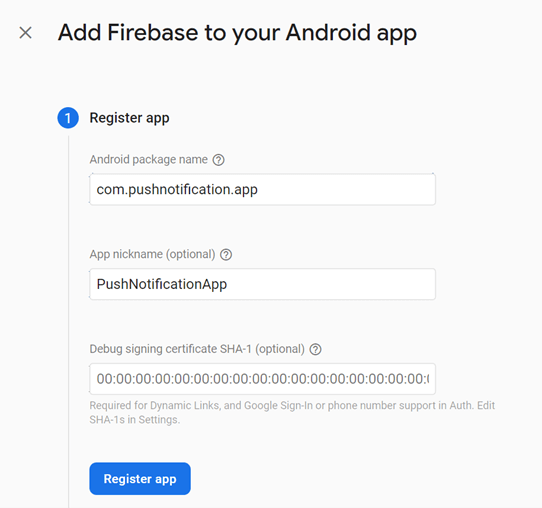
 The next screen will request some information about your application:
- The Android package name you provide here should match the app ID from your capacitor.config.json file. We used the name com.pushnotification.app for this Capacitor app ID, so that is what we will use for this entry.
- Nickname and Debug Signing Certificate are optional.
Then, click Register app.
Download and use the google-services.json file
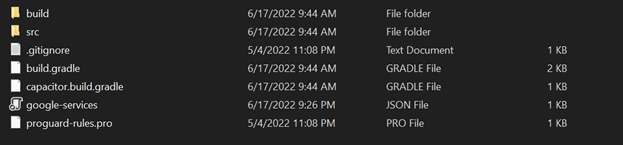
The next prompt will ask you to download a google-services.json file. This file contains the information your Capacitor app needs to connect to Firebase from Android.
Download the google-services.json file to your local machine. Then, move the file into your Capacitor Android project directory, under android/app/.
iOS
Prerequisites
iOS push notifications are more complicated than Android. Prior to being able to test push notifications with your iOS app, you must have a paid Apple Developer account to take care of the following items:
- Set up the proper development or production certificates and provisioning profiles for your iOS app in the Apple Developer Portal.
- Create an APNS certificate or key for either development or production in the Apple Developer Portal.
Integrating Firebase with our native iOS app
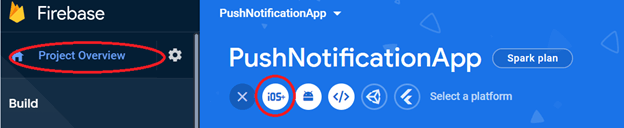
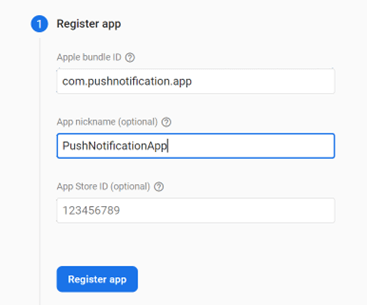
Go to the Project Overview page for the Firebase project and at the top, click the iOS icon to add a new iOS app.
The next screen will ask you for some information about your app:
- The iOS bundle ID should match the app ID from your capacitor.config.jsonfile. We used the name com.pushnotification.app for this Capacitor app ID, so that is what we will use for this entry.
- App Nickname and App Store ID are optional.
Then, click Register app.
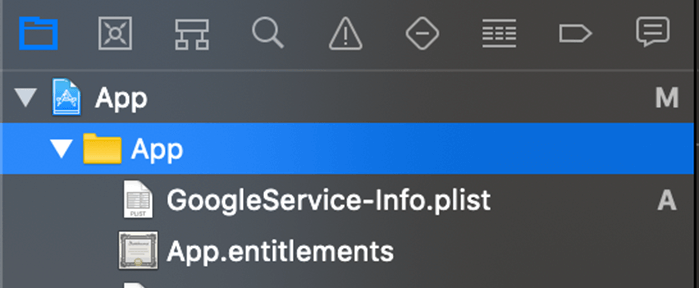
Add the GoogleService-Info.plist file to your iOS app
Download the GoogleService-Info.plist provided to your local machine.
Next, open the project in Xcode and run the following command.
npx cap open ios
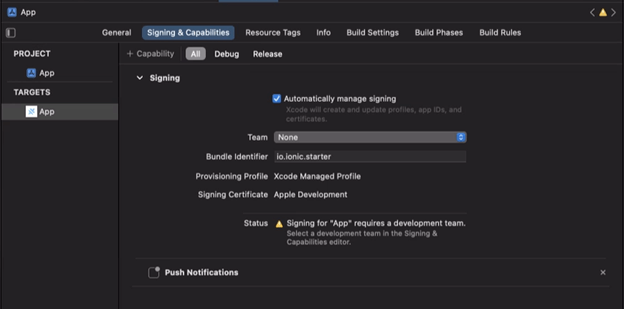
Enable push notifications in Xcode.
Check the listed items inside the App > Signing & Capabilities tab.
Under the Signing section, click + Capability. Then, search for push notifications in the current modal.

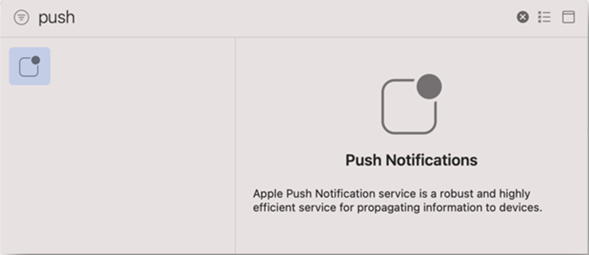 Add push notifications like in the following screenshot.
Add the GoogleService-Info.plist in Xcode.
Open Podfile in Xcode.
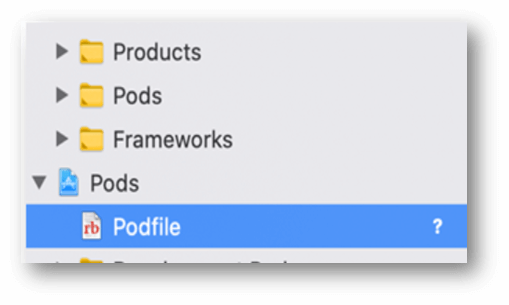 Add pod FirebaseCore and pod Firebase/Messaging to your target App section. Refer to the following code example.
target 'App' do
capacitor_pods
# Add your Pods here
pod 'FirebaseCore' # Add this line
pod 'Firebase/Messaging' # Add this line
end
Run npx cap update ios to update the Ionic project.
Add initialization code
To connect to Firebase when your iOS app starts up, follow these steps:
- Open AppDelegate.swift in Xcode and import Firebase at the top of the file.
import Firebase
- Then, add the configuration method of Firebase to the following initialization code in the application (didFinishLaunchingWithOptions) method.
FirebaseApp.configure()
Note: On iOS, you will see a pop-up asking you to allow notifications for your app—make sure you choose to allow notifications!
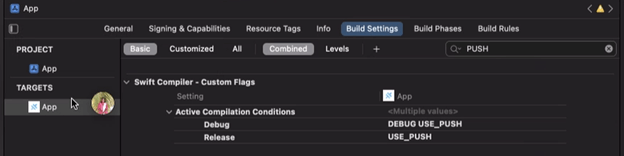
- Search for the keyword Push inside App > Build Setting Tab, as shown in the screenshot. Then ensure that the following items are added.
Generating .p8 key file
To achieve APNS, we are using the jose-jwt NuGet package for iOS devices from the server-side.
Jose JWT will work only for .NET Framework 4.6.1 and later versions.
Here, we are using the .p8 file to get a private key and send notifications.
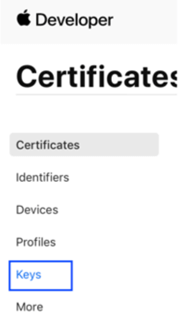
To generate a .p8 key file, go to your Apple developer account page and select Certificates, IDs & Profiles.
 Then, select Keys.
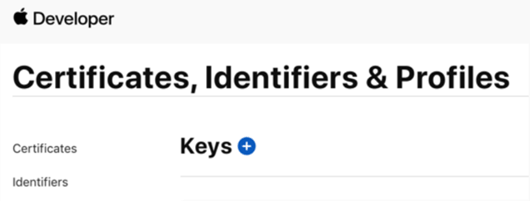
 Click the + button to add a new key.
 On the new key page, type in your key name and check the Apple Push Notification service (APNs) box. Then, click Continue and click Register.
 Click Download.
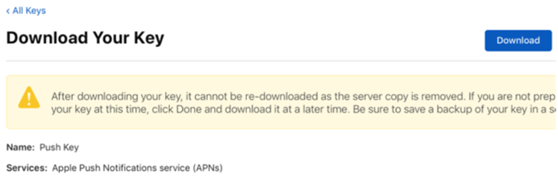 The authentication key filename will look like this: AuthKeyABCD1234.p8. The ABCD1234 is the Key ID.
Upload the APNS certificate or key to Firebase
You can now upload the .p8 file (APNS auth key) to your Firebase console.
To upload your auth key, go to the Project Overview page:
- Click on your iOS app and then the Settings gear icon.
- On the Settings page, click the Cloud Messaging tab.
- Under the iOS app configuration header, upload your authentication key or certificate(s) using the Upload button.

Sending a test notification
We can test the push notification configuration from the Firebase console. Go to the Cloud Messaging section under the Grow header in the project panel.
Next, click New Notification.
When creating the notification, you only need to specify the following information:
- The text of the notification.
- The title (Android only, optional for iOS).
- The target (either a user segment or topic; I recommend just targeting the iOS or Android app itself: see the following).
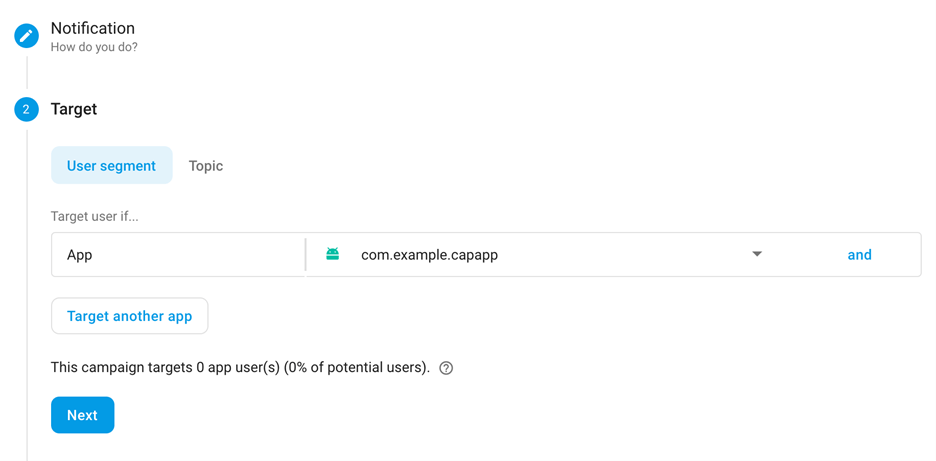 Select Publish to send the notification.
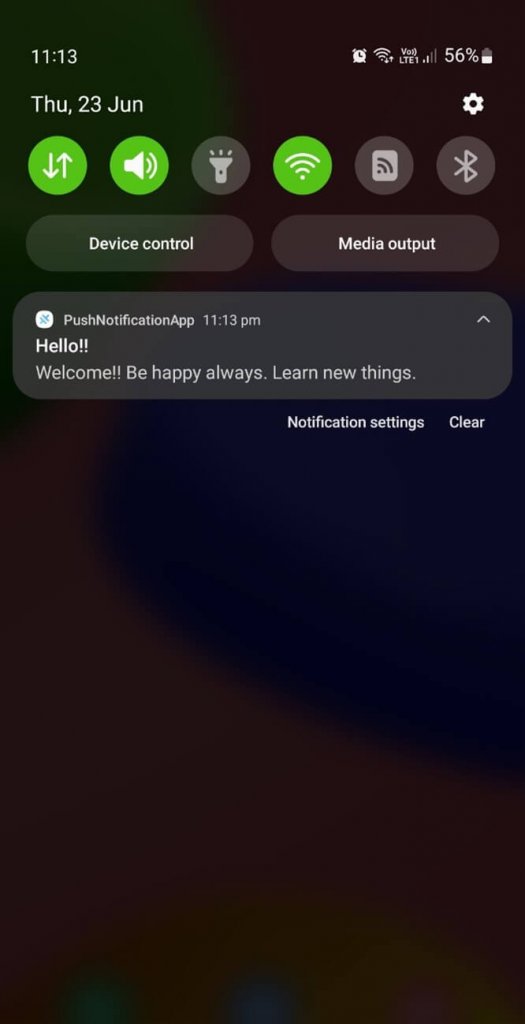
Now, you can see the push notification in the notification panel.
Creating a Web API for push notifications
In this section, we will discuss how to create a Web API in ASP.NET MVC for push notifications.
The purpose of this project is to send push notifications through Web API using a registration token stored in the database using the Push Notification plugin.
The Web API is a framework that makes it easy to build HTTP services for browsers and mobile devices. Using ASP.NET, Web API can communicate among different devices from the same database.
Create ASP.NET web application
Follow these steps to create an ASP.NET web app:
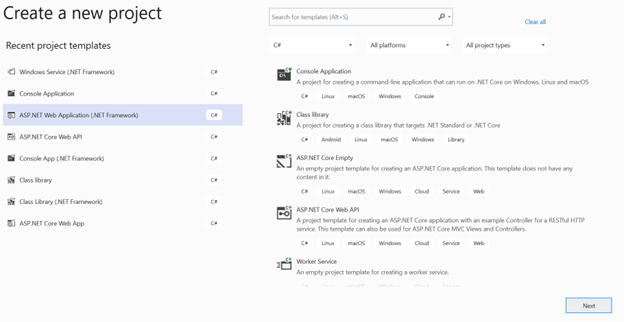
- First, open Visual Studio and select File >> New >> Project.
- Thne, select C# as the language and Windows as the platform.
- Select Web as the project type.
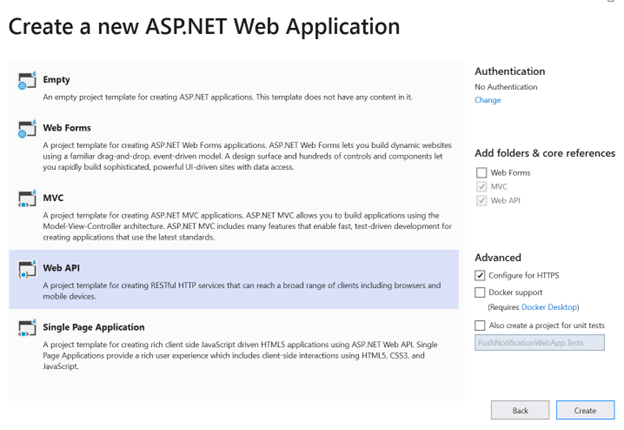
- Now, select ASP.NET Web Application (.NET Framework) and click Next.
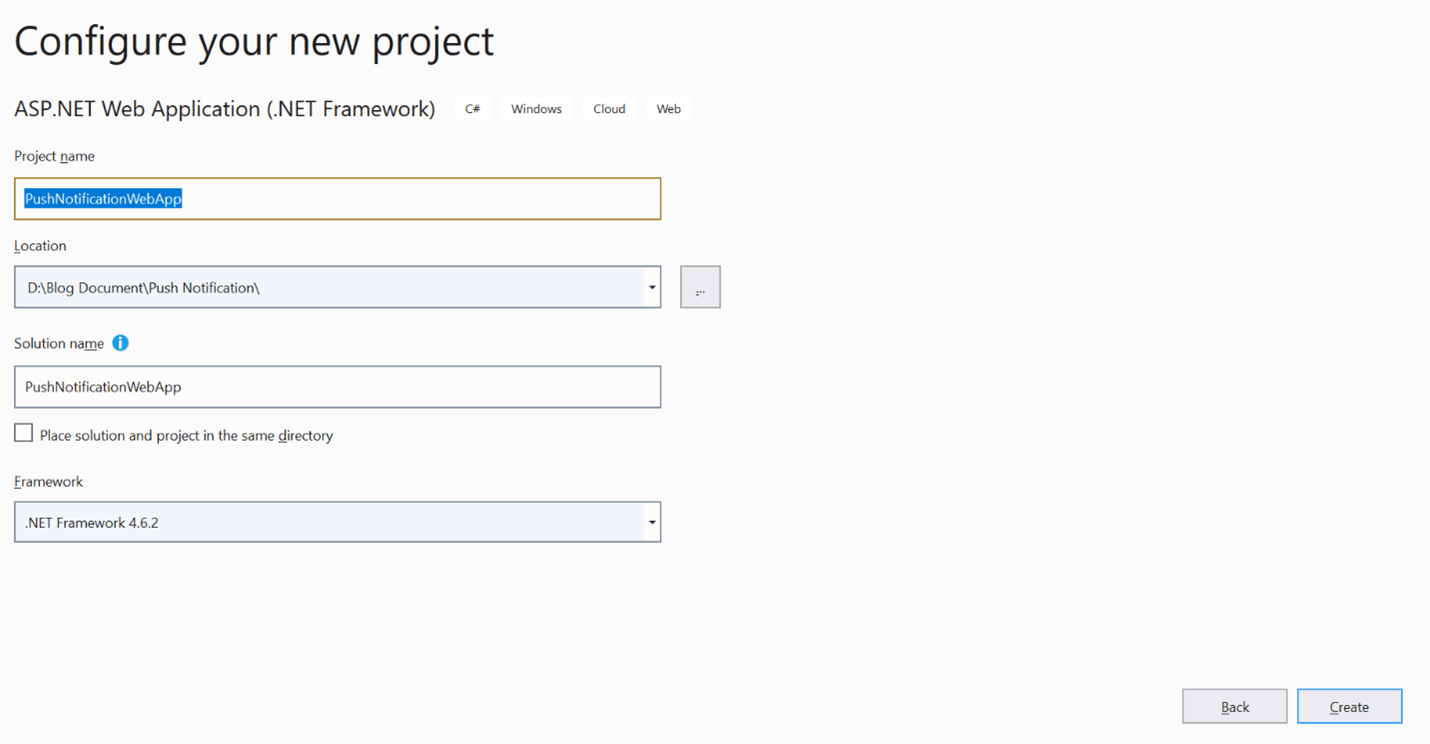
- Provide the project name and location. I name my project PushNotificationWebApp. Then, click Create.
- Finally, select the Web API template and click Create.
Install necessary NuGet packages
- In Visual Studio, choose Tools -> NuGet Package Manager -> Manage NuGet Packages for Solution or right-click your web app and click on Manage NuGet Packages.
- Browse for the following NuGet packages and install them:
- EntityFramework
- System.Data.SqlClient
- PushSharp
- Portable.BouncyCastle
Entity Framework

System.Data.SqlClient

PushSharp

Portable.BouncyCastle

After installing Entity Framework and SQL Server in our app, it will auto-generate the following section of providers inside the entityFramework section in the web.config file.
<entityFramework>
   <providers>
      <provider invariantName="System.Data.SqlClient" type="System.Data.Entity.SqlServer.SqlProviderServices, EntityFramework.SqlServer" />
   </providers>
</entityFramework>
Create a model class
Create a model class with the details of push notifications in the app. Refer to the following code example.
using System;
using System.Collections.Generic;
using System.ComponentModel.DataAnnotations;
using System.Linq;
using System.Net;
using System.Web;

namespace PushNotificationWebAPIApplication.Models
{
    public class PushNotification
    {
        [Key]
        public int Id { get; set; }
        public string DeviceId { get; set; }
        public string DeviceType { get; set; }
        public DateTime CreatedDate { get; set; }
        public bool IsDeleted { get; set; }
    }

    public class PushNotificationAddResponse
    {
        public bool IsSuccess { get; set; }
        public string Message { get; set; }
    }

    public class ResponseData
    {
        public bool IsSuccess { get; set; }
        public string Message { get; set; }
        public HttpStatusCode StatusCode { get; set; }
    }

    public class PushNotificationData
    {
        public int Id { get; set; }
        public string DeviceId { get; set; }
        public string DeviceType { get; set; }
    }

    public class PushNotificationResponseList : ResponseData
    {
        public List<PushNotificationData> PushNotification { get; set; }
    }

    public class Notification
    {
        public string NotificationTitle { get; set; }
        public string NotificationBody { get; set; }
    }
}
Creation of DBContext
Create a DBContext file in the app with the following code. This code will point to the connection from the web.config file.
using PushNotificationWebAPIApplication.Models;
using System;
using System.Collections.Generic;
using System.Data.Entity;
using System.Linq;
using System.Web;

namespace PushNotificationWebAPIApplication.Context
{
    public class PushNotificationDbContext : DbContext
    {
        public PushNotificationDbContext() : base("name=PushNotificationContext")
        {

        }
        public DbSet<PushNotification> PushNotifications { get; set; }
    }
}
Then, create a DatabaseInitializer file with the following code.
using System.Data.Entity;

namespace PushNotificationWebAPIApplication.Context
{
    public class DatabaseInitializer : DropCreateDatabaseIfModelChanges<PushNotificationDbContext>
    {
        protected override void Seed(PushNotificationDbContext context)
        {
            base.Seed(context);
        }
    }
}
Add connection string
Add the following connection string detail to the web.config file. This contains the server details, user ID, password, and database name.
Make sure to use the same connection name added in the DBContext.
<connectionStrings>
    <add connectionString="data source=SYNCLAPN18812;initial catalog=PushNotificationDB;persist security info=True;user id=sa;password=sa@1234" name="PushNotificationDBConnection" providerName="System.Data.SqlClient" />
</connectionStrings>
Add Controller
Now, go to Controller and expand it. By default, there will be some controllers in the Controller directory. To create a new controller:
- Select and right-click Controllers >> Add >> Controller.
- Then, select Web API, choose Web API 2 Controller – Empty, and click Add.
- Then, name the controller PushNotificationController and click Add.
Replace the code inside the controller with the following code.
using System;
using System.Net;
using System.Net.Http;
using System.Web.Http;
using System.Web.Http.Cors;
using PushNotificationWebAPIApplication.Context;
using PushNotificationWebAPIApplication.Models;
using System.Linq;
using System.Collections.Generic;
using Newtonsoft.Json.Linq;
using PushSharp.Core;
using PushSharp.Google;
using System.Configuration;

namespace PushNotificationWebAPIApplication.Controllers
{
    [EnableCors(origins: "*", headers: "*", methods: "*")]
    [RoutePrefix("api/pushNotification")]
    public class PushNotificationController : ApiController
    {
        public string TokenRegisterMessage = "Token was registered successfully";
        public string SendPushNotificationMessage = "Push notification was send successfully";

        private string serverKeyForApp = ConfigurationManager.AppSettings["FCMServerKeyForApp"];
        private string senderIdForApp = ConfigurationManager.AppSettings["FCMSenderIdForApp"];
        private string fcmNotificationSendURL = ConfigurationManager.AppSettings["FCMNotificationSendURL"];

        private string appleKeyId = ConfigurationManager.AppSettings["AppleKeyId"];
        private string appleTeamId = ConfigurationManager.AppSettings["AppleTeamId"];
        private string appId = ConfigurationManager.AppSettings["AppId"];
        private string appleAuthKeyFile = System.IO.Path.Combine(AppDomain.CurrentDomain.BaseDirectory, ConfigurationManager.AppSettings["AppleAuthKeyFile"]);

        private PushNotificationDbContext dbContext = new PushNotificationDbContext();
        public PushNotificationController()
        {
        }

        /// <summary>
        /// Add Push Notification
        /// </summary>
        /// <param name="pushNotification"></param>
        /// <returns></returns>
        [HttpPost]
        [Route("addPushNotification")]
        public HttpResponseMessage AddPushNotification(PushNotification pushNotification)
        {
            var pushNotificationAddResponse = new PushNotificationAddResponse();
            try
            {
                var PushNotification = new PushNotification
                {
                    DeviceId = pushNotification.DeviceId,
                    DeviceType = pushNotification.DeviceType,
                    CreatedDate = DateTime.Now,
                    IsDeleted = false
                };

                var pushnotification = (from push in dbContext.PushNotifications
                                                    where push.DeviceId == pushNotification.DeviceId &&
                                                    push.IsDeleted == false
                                            select push).FirstOrDefault();

                if (pushnotification != null)
                {
                    pushnotification.IsDeleted = true;
                    dbContext.SaveChanges();
                }

                dbContext.PushNotifications.Add(PushNotification);
                dbContext.SaveChanges();

                pushNotificationAddResponse.IsSuccess = true;
                pushNotificationAddResponse.Message = TokenRegisterMessage;

                return Request.CreateResponse(HttpStatusCode.OK, pushNotificationAddResponse);
            }
            catch (Exception ex)
            {
                return Request.CreateResponse(HttpStatusCode.Unauthorized, ex.Message);
            }
        }

        /// <summary>
        /// Send Push Notification
        /// </summary>
        /// <param name="pushMessage"></param>
        /// <returns></returns>
        [HttpPost]
        [Route("sendPushNotification")]
        public HttpResponseMessage SendPushNotification(Notification notificationList)
        {
            var pushNotificationAddResponse = new PushNotificationAddResponse();
            try
            {
                var responseStatus = new ResponseData();

                var androidDeviceIdList = new List<string>();
                var iosDeviceIdList = new List<string>();

                var pushNotificationList = GetPushNotification();

                if (pushNotificationList.Count > 0)
                {
                    foreach (var notification in pushNotificationList)
                    {
                        if (notification.DeviceType == "1")
                        {
                            androidDeviceIdList.Add(notification.DeviceId);
                        }
                        else if (notification.DeviceType == "2")
                        {
                            iosDeviceIdList.Add(notification.DeviceId);
                        }
                    }

                    if (androidDeviceIdList.Count > 0)
                    {
                        SendToAndroid(androidDeviceIdList, notificationList.NotificationBody, notificationList.NotificationTitle, serverKeyForApp, senderIdForApp);
                    }

                    if (iosDeviceIdList.Count > 0)
                    {
                        var apns = new IOSPushNotificationHandler(appleKeyId, appleTeamId, appId, appleAuthKeyFile, true);

                        foreach (var token in iosDeviceIdList)
                        {
                            apns.JwtAPNsPush(token, notificationList.NotificationTitle, notificationList.NotificationBody);
                        }
                    }
                }

                pushNotificationAddResponse.IsSuccess = true;
                pushNotificationAddResponse.Message = SendPushNotificationMessage;

                return Request.CreateResponse(HttpStatusCode.OK, pushNotificationAddResponse);
            }
            catch (Exception ex)
            {
                return Request.CreateResponse(HttpStatusCode.Unauthorized, ex.Message);
            }
        }

        private List<PushNotificationData> GetPushNotification()
        {
            var responseStatus = new PushNotificationResponseList();
            var pushNotificationList = new List<PushNotificationData>();
            var pushnotification = (from push in dbContext.PushNotifications
                                    where push.IsDeleted ==false
                                    select push).ToList();

            foreach (var notify in pushnotification)
            {
                var pushNotificationData = new PushNotificationData();
                pushNotificationData.Id = notify.Id;
                pushNotificationData.DeviceId = notify.DeviceId;
                pushNotificationData.DeviceType = notify.DeviceType;

                pushNotificationList.Add(pushNotificationData);
            }
            return pushNotificationList;
        }

        public void SendToAndroid(List<string> deviceIdList, string NotificationBody, string NotificationTitle, string ServerKeyForApp, string SenderIdForApp)
        {
            var config = new GcmConfiguration(SenderIdForApp, ServerKeyForApp, null);
            config.GcmUrl = fcmNotificationSendURL;
            var broker = new GcmServiceBroker(config);
            broker.OnNotificationFailed += (notification, aggregateEx) => GcmNotificationFailed(aggregateEx);
            broker.OnNotificationSucceeded += (notification) => GcmNotificationSucceeded();
            broker.Start();

            broker.QueueNotification(new GcmNotification
            {
                RegistrationIds = deviceIdList,
                Notification = JObject.FromObject(new
                {
                    body = NotificationBody,
                    title = NotificationTitle,
                    badge = 1
                }),
                Priority = GcmNotificationPriority.High,
                ContentAvailable = true
            });

            broker.Stop();
        }

        private void GcmNotificationSucceeded()
        {
            GetDevicePushStatus("Notification has been sent");
        }

        private void GcmNotificationFailed(AggregateException aggregateEx)
        {
            string errorMessage = "";
            aggregateEx.Handle(ex =>
            {
                if (ex is GcmNotificationException)
                {
                    var notificationException = (GcmNotificationException)ex;
                    var gcmNotification = notificationException.Notification;
                    var description = notificationException.Description;
                    if (description != null)
                        errorMessage = "Notification Failed: Desc={" + description + "}";
                    else
                        errorMessage = "Notification Failed: Desc={" + notificationException.Message + "}";
                }
                else if (ex is GcmMulticastResultException)
                {
                    var multicastException = (GcmMulticastResultException)ex;

                    foreach (var succeededNotification in multicastException.Succeeded)
                    {
                    }

                    foreach (var failedKvp in multicastException.Failed)
                    {
                        var n = failedKvp.Key;
                        var e = failedKvp.Value;
                        errorMessage += "Notification Failed: Desc={" + e.Message + "}";
                    }

                }
                else if (ex is DeviceSubscriptionExpiredException)
                {
                    var expiredException = (DeviceSubscriptionExpiredException)ex;

                    var oldId = expiredException.OldSubscriptionId;
                    var newId = expiredException.NewSubscriptionId;

                    errorMessage = "Device RegistrationId Expired: {" + oldId + "}";

                    if (!string.IsNullOrWhiteSpace(newId))
                    {
                        errorMessage = "Device RegistrationId Changed To: {" + newId + "}";
                    }
                }
                else if (ex is RetryAfterException)
                {
                    var retryException = (RetryAfterException)ex;
                    errorMessage = "FCM Rate Limited, don't send more until after {" + retryException.RetryAfterUtc + "}";
                }
                else if (ex is UnauthorizedAccessException)
                {
                    var unauthorizedexception = (UnauthorizedAccessException)ex;
                    errorMessage = "FCM Authorization Failed.";
                }
                else
                {
                    errorMessage = "Notification Failed for some unknown reason";
                }

                return true;
            });
            GetDevicePushStatus(errorMessage);
        }

        private string GetDevicePushStatus(string statusText)
        {
            return statusText;
        }
    }
}
Create IOSPushNotificationHandler and Http2CustomHandler class files. Refer to the following code examples.
IOSPushNotificationHandler.cs
using Jose;
using Jose.keys;
using Newtonsoft.Json.Linq;
using Org.BouncyCastle.Crypto.Parameters;
using Org.BouncyCastle.OpenSsl;
using System;
using System.Collections.Generic;
using System.IO;
using System.Linq;
using System.Net.Http;
using System.Security.Cryptography;
using System.Threading.Tasks;

namespace PushNotificationWebAPIApplication.Models
{
    public class IOSPushNotificationHandler
    {
        public string Algorithm { get; set; }
        public string HostServerUrl { get; set; }
        public int HostPort { get; set; }
        public string APNsKeyId { get; set; }
        public string TeamId { get; set; }
        public string BundleAppId { get; set; }
        public string AppleAuthKeyFile { get; set; }
        public CngKey PrivateKey { get; set; }
        public string AccessToken { get; set; }

        public IOSPushNotificationHandler(string appleKeyId, string appleTeamId, string appId, string appleAuthKeyFile, bool production)
        {
            Algorithm = "ES256";

            if (production == false)
                HostServerUrl = "api.development.push.apple.com";
            else
                HostServerUrl = "api.push.apple.com";

            HostPort = 443;

            APNsKeyId = appleKeyId;
            TeamId = appleTeamId;
            BundleAppId = appId;
            AppleAuthKeyFile = appleAuthKeyFile;
        }

        private long ToUnixEpochDate(DateTime date)
        {
            return (long)Math.Round((date.ToUniversalTime() - new DateTimeOffset(1970, 1, 1, 0, 0, 0, TimeSpan.Zero)).TotalSeconds);
        }

        private async Task JwtAPNsPush(Uri host_uri, string access_token, byte[] payload_bytes)
        {
            var result = new ResponseData();

            try
            {
                using (var handler = new Http2CustomHandler())
                {
                    using (var http_client = new HttpClient(handler))
                    {
                        var request_message = new HttpRequestMessage();
                        {
                            request_message.RequestUri = host_uri;
                            request_message.Headers.Add("authorization", String.Format("bearer {0}", access_token));
                            request_message.Headers.Add("apns-id", Guid.NewGuid().ToString());
                            request_message.Headers.Add("apns-expiration", "0");
                            request_message.Headers.Add("apns-priority", "10");
                            request_message.Headers.Add("apns-topic", BundleAppId);
                            request_message.Method = HttpMethod.Post;
                            request_message.Content = new ByteArrayContent(payload_bytes);
                        }

                        var response_message = await http_client.SendAsync(request_message);
                        if (response_message.StatusCode == System.Net.HttpStatusCode.OK)
                        {
                            var response_uuid = "";

                            IEnumerable<string> values;
                            if (response_message.Headers.TryGetValues("apns-id", out values))
                            {
                                response_uuid = values.First();

                                result.Message = $"success: '{response_uuid}'";
                                result.IsSuccess = true;
                            }
                            else
                            {
                                result.Message = "failure";
                            }
                        }
                        else
                        {
                            var response_body = await response_message.Content.ReadAsStringAsync();
                            var response_json = JObject.Parse(response_body);

                            var reason_str = response_json.Value<string>("reason");
                            result.Message = $"failure: '{reason_str}'";
                        }
                    }
                }
            }
            catch (Exception ex)
            {
                result.Message = $"exception: '{ex.Message}'";
            }
        }

        private CngKey GetPrivateKey()
        {
            using (var reader = File.OpenText(AppleAuthKeyFile))
            {
                var ecPrivateKeyParameters = (ECPrivateKeyParameters)new PemReader(reader).ReadObject();
                var x = ecPrivateKeyParameters.Parameters.G.AffineXCoord.GetEncoded();
                var y = ecPrivateKeyParameters.Parameters.G.AffineYCoord.GetEncoded();
                var d = ecPrivateKeyParameters.D.ToByteArrayUnsigned();
                return EccKey.New(x, y, d);
            }
        }

        private void JwtAPNsPushExtend(string device_token, string title, string body)
        {
            var host_uri = new Uri($"https://{HostServerUrl}:{HostPort}/3/device/{device_token}");

            var _payload = new Dictionary<string, object>()
                    {
                        { "iss", TeamId },
                        { "iat", ToUnixEpochDate(DateTime.Now) }
                    };

            var header = new Dictionary<string, object>()
                    {
                        { "alg", Algorithm },
                        { "kid", APNsKeyId }
                    };

            var privateKey = GetPrivateKey();

            AccessToken = JWT.Encode(_payload, privateKey, JwsAlgorithm.ES256, header);

            var payload = new byte[0];
            {
                var data = JObject.FromObject(new
                {
                    aps = new
                    {
                        alert = new
                        {
                            title = title,
                            body = body
                        },
                        badge = 1
                    }
                });

                payload = System.Text.Encoding.UTF8.GetBytes(data.ToString());
            }

            Task.Run(async () => await JwtAPNsPush(host_uri, AccessToken, payload));
        }

        public void JwtAPNsPush(string device_token, string title, string body)
        {
            JwtAPNsPushExtend(device_token, title, body);
        }
    }

}
Http2CustomHandler.cs
using System;
using System.Collections.Generic;
using System.Linq;
using System.Net.Http;
using System.Text;
using System.Threading.Tasks;

namespace PushNotificationWebAPIApplication.Models
{
    public class Http2CustomHandler : WinHttpHandler
    {
        protected override Task<HttpResponseMessage> SendAsync(HttpRequestMessage request, System.Threading.CancellationToken cancellationToken)
        {
            request.Version = new Version("2.0");
            return base.SendAsync(request, cancellationToken);
        }
    }
}
Web config
Maintain the following app ID, FCM server key and sender ID, Apple key ID, team ID, and auth key file details in the web.config file.
<add key="AppId" value="com.pushnotification.app" />

<!-- Android Config Push Notification - FCM -->
<add key="FCMServerKeyForApp" value="*************************" />
<add key="FCMSenderIdForApp" value="***************" />
<add key="FCMNotificationSendURL" value="https://fcm.googleapis.com/fcm/send" />

<!-- IOS Config Push Notification -->
<add key="AppleKeyId" value="ABC1DEF11G" />
<add key="AppleTeamId" value="ER342D23FD9" />
<add key="AppleAuthKeyFile" value="AuthKey_ABC1DEF11G.p8" />
Android config
Click the gear icon at the top left and select the Project settings of the Firebase Console. Select the Cloud Messaging tab.
Under Cloud Messaging API (Legacy), click the options (three dots on the right) and then click Manage API in Google Cloud Console. This will open a new page. Under Cloud Messaging, press Enable.
Refresh the page on your Firebase Console and copy your Server key and Sender ID.
IOS config
Include the AuthKey_ ABC1DEF11G.p8 file in the app we created in the previous section.
The Apple key ID can also be derived from the name of the file for the key. Your file with the key will probably be named something like AuthKey_ABC1DEF11G.p8, so ABC1DEF11G is the key ID.
The team ID can be found in the upper-right corner of the Apple account webpage.
Resources
For more details, refer to the complete project in the Firebase Push Notification for Android and IOS repository.
Conclusion
I hope this blog provided a clear idea about how to build Ionic with Angular apps for implementing Firebase push notifications for both Android and iOS and creating ASP.NET projects with SQL to send Firebase push notifications.
 No spam, just valuable updates.