
TL;DR: Modern editors make image uploads both convenient but also risky. In Blazor apps, a public upload endpoint can expose your server to oversized files, spoofed MIME types, or unauthorized users. In this guide, you will wire up a token-aware image upload for the Blazor Rich Text Editor: the client sends a JWT, and your ASP.NET Core API validates it before saving anything.
In modern Blazor web applications, the Rich Text Editor component is a powerful tool for creating dynamic, content-rich interfaces. However, when handling image uploads, security is paramount, especially when sensitive data or user-specific resources are involved. In this blog post, we will explore how to enhance the image upload functionality in the Syncfusion® Blazor Rich Text Editor by integrating authentication tokens.
By following this approach, you ensure that only authenticated users can upload images, preventing unauthorized access and potential data breaches. In the sections that follow, we will walk through the configuration step by step, provide runnable code snippets for both client and server sides, and highlight best practices for implementation.
Why use authentication tokens for image uploads?
Image uploads look simple on the surface, but any unprotected file endpoint quickly becomes a target:
- Anonymous users can submit files you don’t expect.
- Attackers may attempt replay attacks or forge tokens.
- Attackers can spoof file types.
- Large files can eat up storage or memory.
By embedding an authentication token (e.g., JWT) in the upload request:
- Validation happens server-side: The server verifies tokens before it processes a file.
- Custom data flexibility: Pass user IDs, session info, or permissions alongside the image.
- Seamless integration: Works with Blazor’s event-driven model and ASP.NET Core’s form handling.
Because this method uses POST requests under the hood, it remains compatible with most authentication middleware, including JWT Bearer or cookie-based authentication.
Prerequisites
Before you begin, ensure you have:
- Visual Studio 2022.
- .NET Core 8.0+.
- Syncfusion Blazor Component installed and configured.
Steps to secure image uploads in Blazor Rich Text Editor with JWT authentication
Step 1: Create a Blazor server application
Start by creating a new Blazor Server application in Visual Studio. Install the Syncfusion Blazor packages, and add the required style and script references as outlined in the Getting started documentation.
Step 2: Add the Rich Text Editor
Next, add the following code to the Index.razor page to include the Blazor Rich Text Editor component, as shown in the code example below.
@using Syncfusion.Blazor.RichTextEditor

<SfRichTextEditor>
</SfRichTextEditor>
With the editor in place, you’re now ready to integrate secure image uploads.
Step 3: Inject a JWT into the image upload request
The Rich Text Editor fires the OnImageSelected event as soon as the user chooses an image. This makes it the ideal moment to attach your authentication token and any additional metadata, such as the current user ID, to the upload request. You can do this by using the CustomFormData property, which lets you inject the token (and any other parameters) directly into the form data sent to the server.
Here’s how you can do it in code:
<SfRichTextEditor>
    <RichTextEditorImageSettings SaveUrl="api/ImageUpload/Save" Path="./Images/" />
    <RichTextEditorEvents OnImageSelected="OnImageSelected" />
</SfRichTextEditor>


@code {
    private string authToken = "testAdmin";  // Fetch from auth service in real apps

    private void OnImageSelected(Syncfusion.Blazor.Inputs.SelectedEventArgs args)
    {
        // Add custom form data, including auth token
        args.CurrentRequest = new List<object> {
            new { authToken =  authToken},
            new { userId = "123" } // Optional: Add more params like user ID
        };
        // Optional: Log or validate client-side before upload
        Console.WriteLine($"Uploading image with token: {authToken}");
    }

}
Step 4: Validate the token and save the file (Server‑Side)
In your ASP.NET Core backend, create an API controller to receive the POST request. It retrieves the custom form data via Request.Form and validates the token, and processes the files.
For brevity, we’re using a simple Save method; extend it to support file storage (e.g., Azure Blob Storage or local disk). Use IList to handle multiple uploads if needed.
Code snippet to achieve this:
using Microsoft.AspNetCore.Mvc;

namespace BlazorApp1
{
    [Route("api/[controller]")]
    public class ImageUploadController : Controller
    {
        private readonly IWebHostEnvironment hostingEnv;

        public ImageUploadController(IWebHostEnvironment env)
        {
            this.hostingEnv = env;
        }

        [HttpPost("[action]")]
        [Route("api/Home/SaveRte")]
        [HttpPost]
        public async Task Save(IList UploadFiles)
        {
            string targetPath = hostingEnv.ContentRootPath + "\\wwwroot\\Images";

            // Step 1: Retrieve custom form data from the request
            if (!Request.Headers.TryGetValue("authToken", out var tokenString) || string.IsNullOrEmpty(tokenString))
            {
                return BadRequest("Authentication token is required.");
            }

            string authToken = tokenString.ToString();

            // Step 2: Validate the token
            if (!ValidateToken(authToken))
            {
                return Unauthorized("Invalid or expired authentication token.");
            }

            // Optional: Retrieve other custom data
            if (Request.Headers.TryGetValue("userId", out var userIdString))
            {
                string userId = userIdString.ToString();
                Console.WriteLine($"Upload from user: {userId}");
            }

            // Step 3: Process uploaded files
            if (UploadFiles == null || UploadFiles.Count == 0)
            {
                return BadRequest("No files uploaded.");
            }

            foreach (var file in UploadFiles)
            {
                if (file.Length > 0)
                {
                    // Validate file type/size
                    if (!IsValidImageFile(file))
                    {
                        return BadRequest("Invalid file type.");
                    }

                    var fileName = Path.GetFileName(file.FileName);
                    var filePath = Path.Combine(targetPath, fileName);
                    Directory.CreateDirectory(Path.GetDirectoryName(filePath));

                    using (var stream = new FileStream(filePath, FileMode.Create))
                    {
                        await file.CopyToAsync(stream);
                    }
                }
            }

            // Step 4: Return success response
            return Ok(new { success = true, message = "Files uploaded successfully." });
        }

        // Helper: Basic token validation
        private bool ValidateToken(string token)
        {
            return token.StartsWith("testAdmin") && token.Length > 5;
        }

        // Helper: Validate image files
        private bool IsValidImageFile(IFormFile file)
        {
            var allowedTypes = new[] { ".jpg", ".jpeg", ".png", ".gif" };
            var extension = Path.GetExtension(file.FileName).ToLowerInvariant();
            return allowedTypes.Contains(extension) && file.Length < 5 * 1024 * 1024;
        }
    }
}
This endpoint:
- Rejects unauthenticated requests.
- Validates the JWT.
- Checks file type and size.
- Saves the file only when everything checks out.
Step 5: Configure the endpoint for your Blazor Rich Text Editor
In your Blazor page (e.g., Index.razor), add the SfRichTextEditor component. Then configure the ImageSettings to your upload endpoint (e.g., /api/ImageUpload/Save).
<SfRichTextEditor>
<RichTextEditorImageSettings SaveUrl="api/ImageUpload/Save" Path="./Images/" />
<RichTextEditorEvents OnImageSelected="OnImageSelected" />
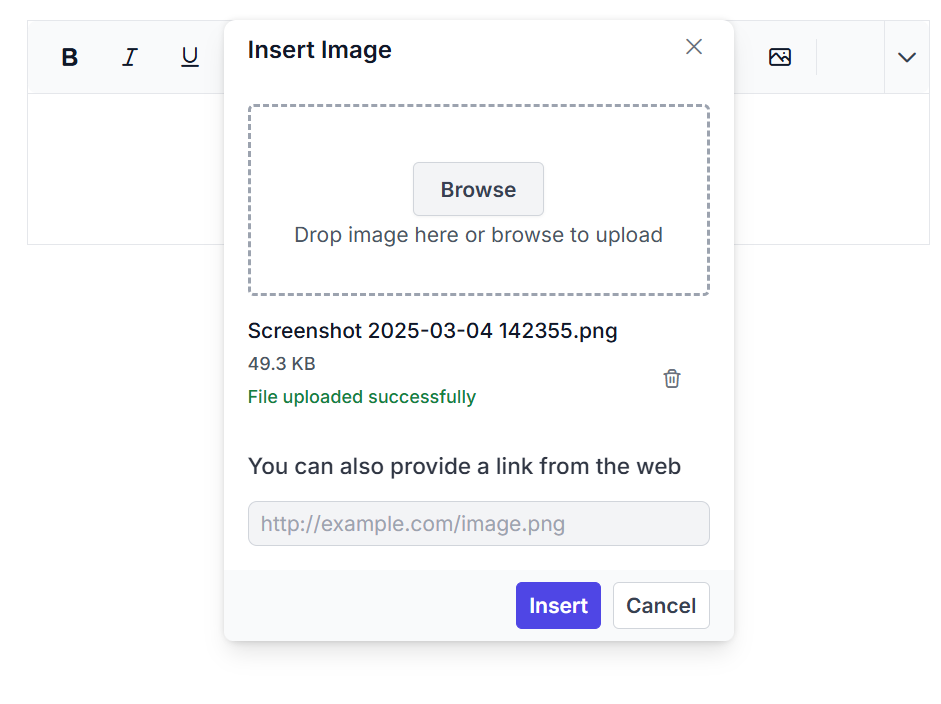
</SfRichTextEditor>After implementing the above steps, here’s what you can expect when using the Rich Text Editor:
GitHub references
You can download the complete source code of this example from the repository.
Frequently Asked Questions
Without proper protection, a public upload endpoint becomes vulnerable to issues such as anonymous uploads, oversized file attacks, spoofed MIME types, and other malicious requests. To mitigate these risks, adding JWT authentication ensures that only authorized users can upload images. With this in place, the server can validate each token before saving a file, while also allowing requests to include useful contextual metadata such as user IDs or permissions. As a result, your Blazor Rich Text Editor image upload workflow becomes significantly more secure, stable, and reliable.Why do I need JWT authentication for secure image uploads in the Blazor Rich Text Editor?
You can inject a JWT token using the This ensures that every upload request includes your token before it reaches the API.How do I send a JWT token along with image uploads from the Blazor Rich Text Editor?
OnImageSelected event. The event exposes CurrentRequest where you append custom form data, such as authToken and user-specific fields.
Your backend then validates the token before processing the file.
JWT validation occurs inside your image upload API endpoint, which is the first place the server receives the request from the Blazor Rich Text Editor. When an image is uploaded, the backend can read your token from either To ensure secure processing, the upload endpoint should follow a simple, structured flow. First, the API needs to extract the token from the incoming request to inspect. Next, the server should validate the token using your configured JWT signature, issuer, audience, and expiration rules. This verification step ensures the request is coming from an authorized user. Finally, once the token is confirmed to be valid, the server can safely process the upload and store the file.Where do I validate the JWT token in the backend?
Request.Headers or Request.Form, depending on how it was sent.

Conclusion
Thank you for reading! Integrating authentication tokens into Syncfusion Blazor Rich Text Editor uploads is a simple yet powerful way to lock down your app’s data flow. With just a few lines of code, you’ve added a robust security layer that scales with your needs.
To dive deeper into configuration options, event APIs, and advanced customization, refer to our comprehensive documentation and demos for the Blazor Rich Text Editor. They offer detailed guidance and real examples to help you extend this pattern across your application.
If you’re a Syncfusion user, you can download the setup from the license and downloads page. Otherwise, you can download a free 30-day trial.
You can also contact us through our support forum, support portal, or feedback portal for queries. We are always happy to assist you!


 No spam, just valuable updates.